Note
Access to this page requires authorization. You can try signing in or changing directories.
Access to this page requires authorization. You can try changing directories.
You can use the Find All References command to determine where particular code elements are referenced throughout your codebase. In the code editor, the Find All References command is available on the context (right-click) menu of the element you want to find references to. You can also select the element and then select Shift+F12.
The results appear in a tool window named <element> references, where element is the name of the item you're searching for. A toolbar in the references window enables you to:
- Use a drop-down list to change the scope of the search. You can choose to search only in open or changed documents. You can increase or decrease the scope of the search, as far as the entire solution.
- Copy the selected referenced items by selecting the Copy button. All the values in all the columns for all selected rows are copied to the clipboard, preceded by the column headings. This format can be easily pasted into a spreadsheet.
- Select buttons to go to the next or previous location in the list, or select the F8 and Shift+F8 keys to do so.
- Remove any filters on the returned results by selecting the Clear All Filters button.
- Change how returned items are grouped by selecting a setting in the Group by drop-down list.
- Keep the current search results window by selecting the Keep Results button. When you select this button, the current search results stay in the window. New search results appear in a new tool window.
- Use List View to toggle between a tree view and a plain text list. Some functionality is disabled in the plain text list.
- Search for strings within the search results by entering text in the Search Find All References box.
You can also hover the mouse pointer over any search result to see the reference in the context of the surrounding code:

Navigate to references
You can use the following methods to navigate to references in the references window:
- Select a reference and then select the Enter key, or double-click the reference, to go to it in code.
- On the right-click menu of a reference, select the Go To Previous Location or Go To Next Location commands.
- Use the Up Arrow and Down Arrow keys.
Change reference groupings
By default, references are grouped by project and then by definition. However, you can change this grouping order by changing the setting in the Group by drop-down list on the toolbar. For example, you can change it from the default setting of Project then definition to Definition then project. Other grouping order settings are also available.
Definition and Project are the two default groupings used, but you can add others by choosing the Grouping command on the selected item's right-click menu. It can be helpful to add more groupings if your solution has numerous files and paths.
Grouping isn't available in a plain text list.
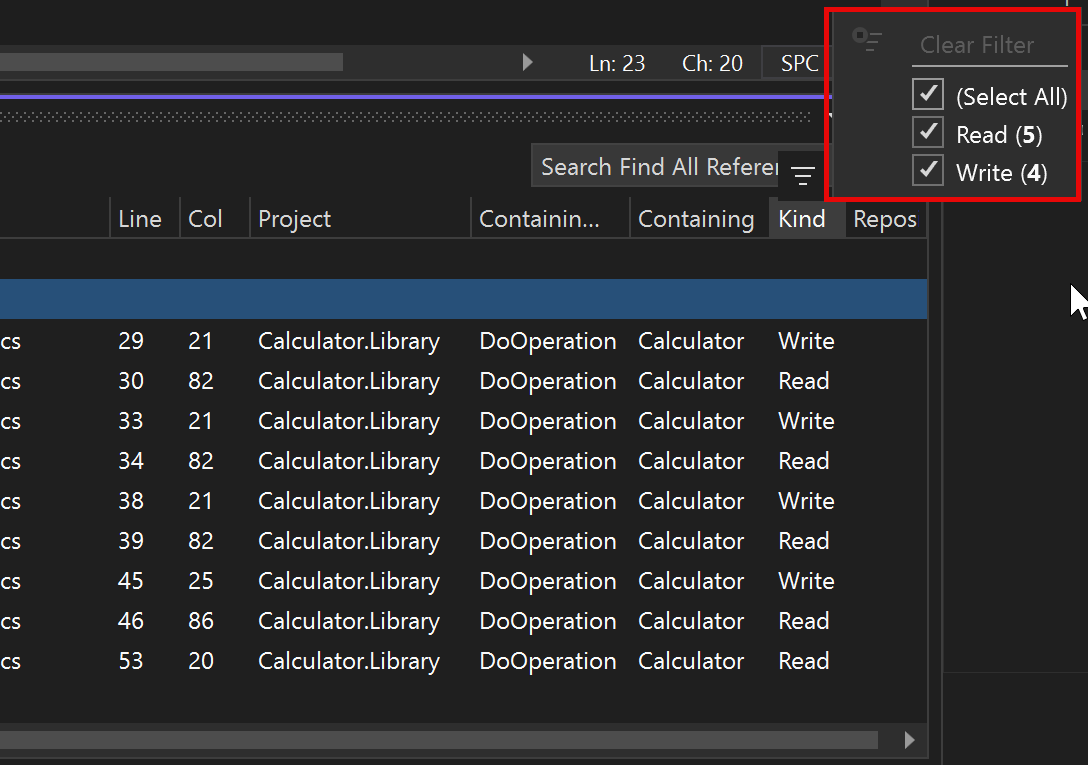
Filter by reference type in .NET
In C# or Visual Basic, the Find References window has a Kind column that lists the type of reference that was found. You can use this column to filter by reference type. Select the filter icon that appears when you hover over the column header. You can filter references by Read, Write, Reference, Name, Namespace, and Type, but only the filters that are relevant in the current set of results are shown.
After you apply a filter or a filter set, you can easily remove it by using the Clear All Filters button.
Customize preview behavior
You can set whether a file is opened in the editor at the location where the reference occurs.
Open the Tools > Options pane, and expand the All Settings > Environment > Tabs > Preview Tab section. If you select the Allow new files to be opened in the preview tab checkbox, select or clear the Preview selected files in Find Results checkbox.
Open the Tools > Options dialog, and expand the Environment > Tabs and Windows section. In the Preview Tab group, if you select the Allow new files to be opened in the preview tab checkbox, select or clear the Preview selected files in Find Results checkbox. Select OK.
When you select this option, the file is opened in the editor at the place where the reference occurs. When the option isn't selected, the file is opened only if you explicitly select Enter or double-click the row.