Use Task List with code comments and shortcuts
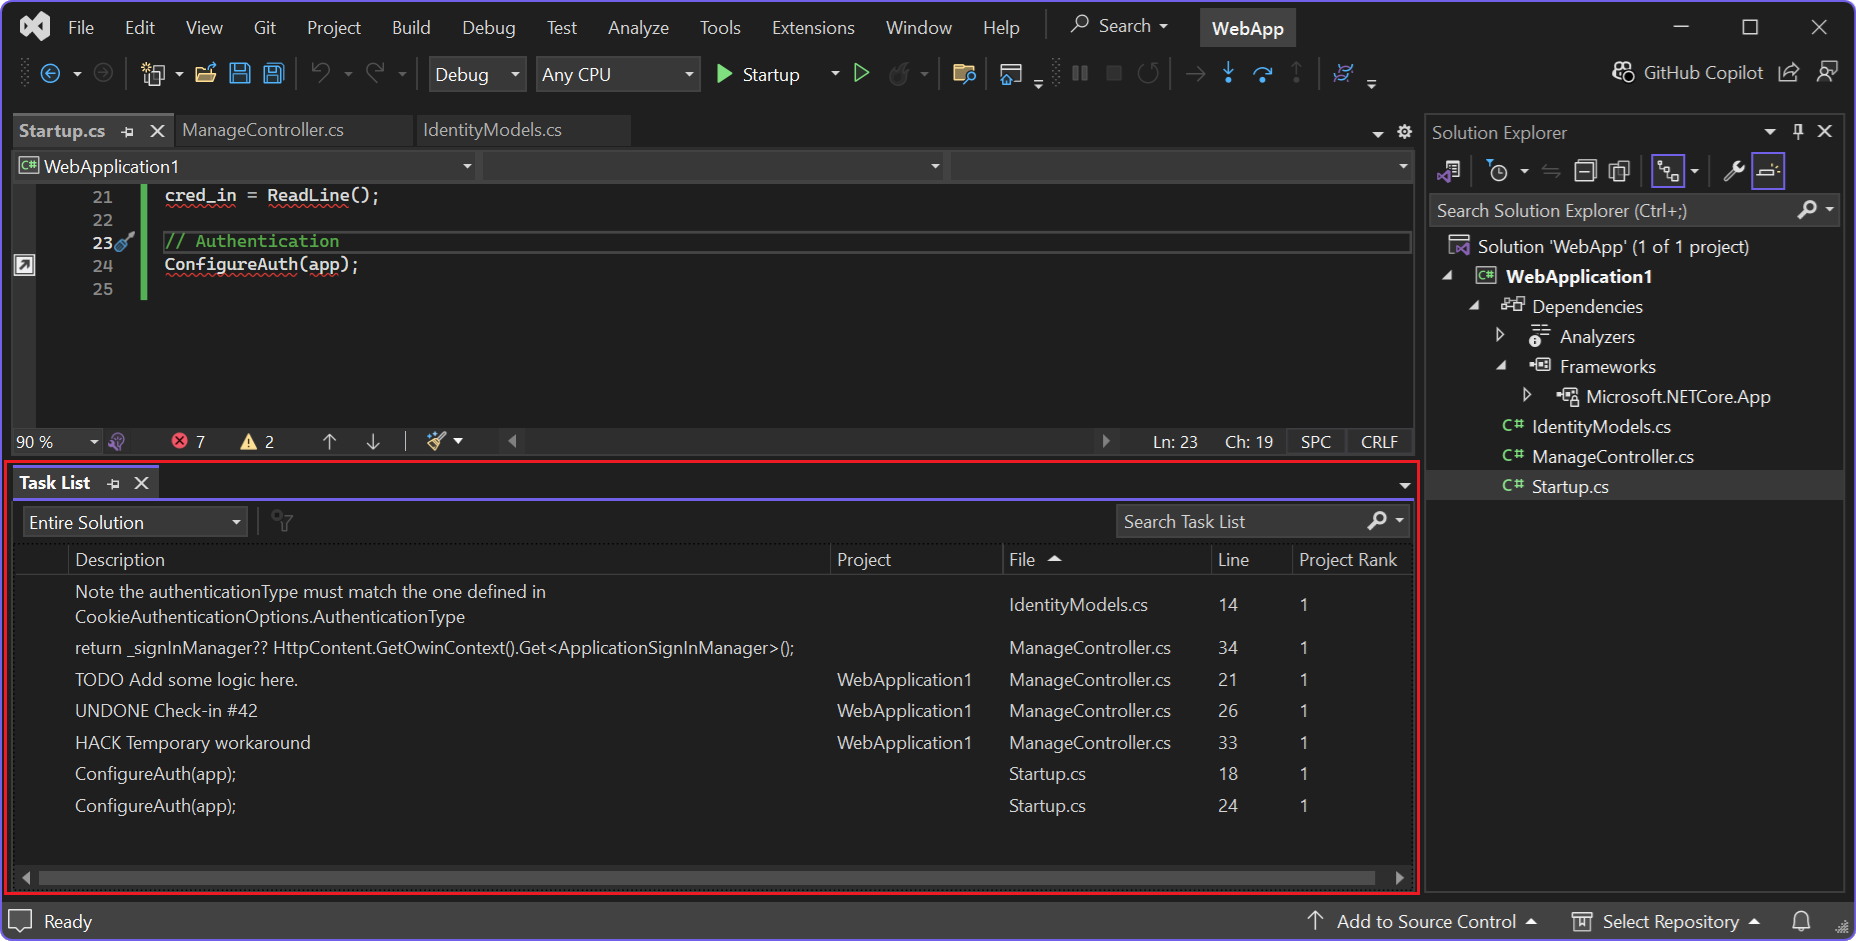
The Task List tool in Visual Studio lets you track code comments that use tokens like TODO and HACK or custom tokens. You can also use this feature to manage task shortcuts that take you directly to a predefined location in code. By default, Task List opens at the bottom of the application window in the Visual Studio Interactive Development Environment (IDE):
If you don't see the Task List window, select View > Task List, or use the keyboard shortcut Ctrl+\,T. Like other feature windows in the Visual Studio IDE, you can move the Task List window to any location on the IDE surface.
Use predefined tokens
Visual Studio prepares Task List content by scanning your code for comment markers and tokens. Several predefined tokens are available for C/C++, C#, and Visual Basic programs: HACK, TODO, UNDONE, and UnresolvedMergeConflict. These token labels are case insensitive.
Visual Studio recognizes a comment when it consists of three components:
The comment marker, such as
//,#,<!--The comment token prefix, such as
TODO,hack,MoveToHeaderThe comment text that follows the token
Here's an example of a code comment in C#:
// TODO: Load state from previously suspended application
When Visual Studio recognizes a predefined token, it displays the comment text as a task in Task List.
Create custom tokens
You can create custom tokens for any programming language by following these steps:
On the Visual Studio Tools menu, select Options.
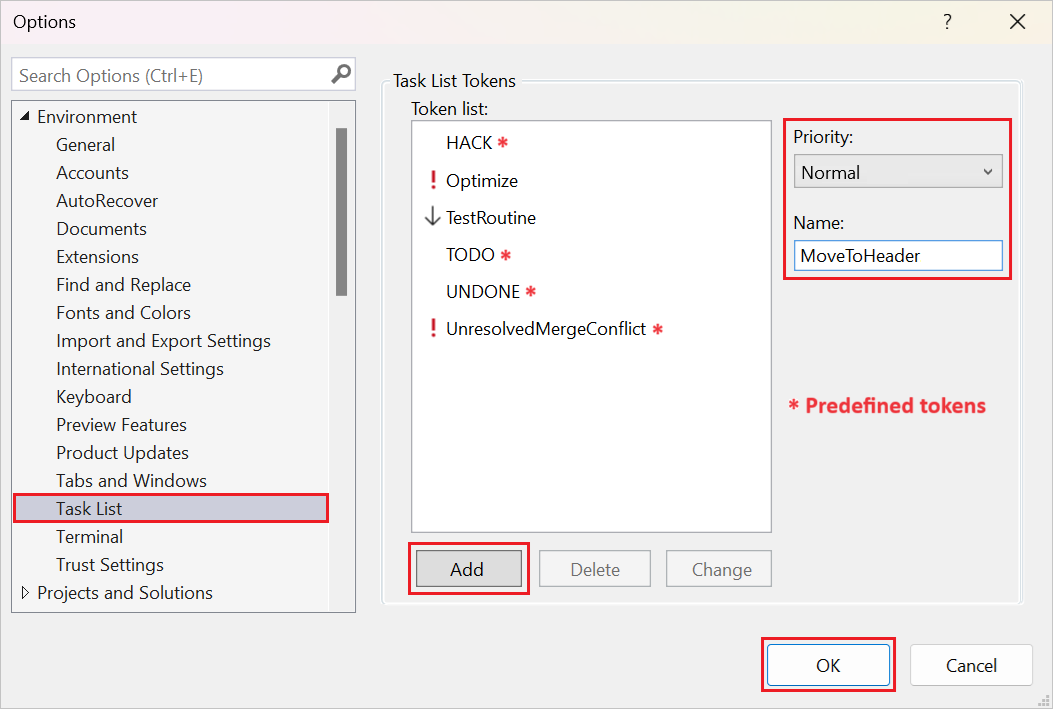
Expand the Environment section, and select the Task List tab. The Task List options page opens:

In the Name text box, enter the name for the custom token, such as Optimize.
Expand the Priority dropdown list and select a default priority for the custom token.
To add the custom token to the list of tokens, select Add.
To apply your changes, select OK.
When Visual Studio recognizes a custom token, it displays the comment text as a task in Task List.
Add code task shortcuts
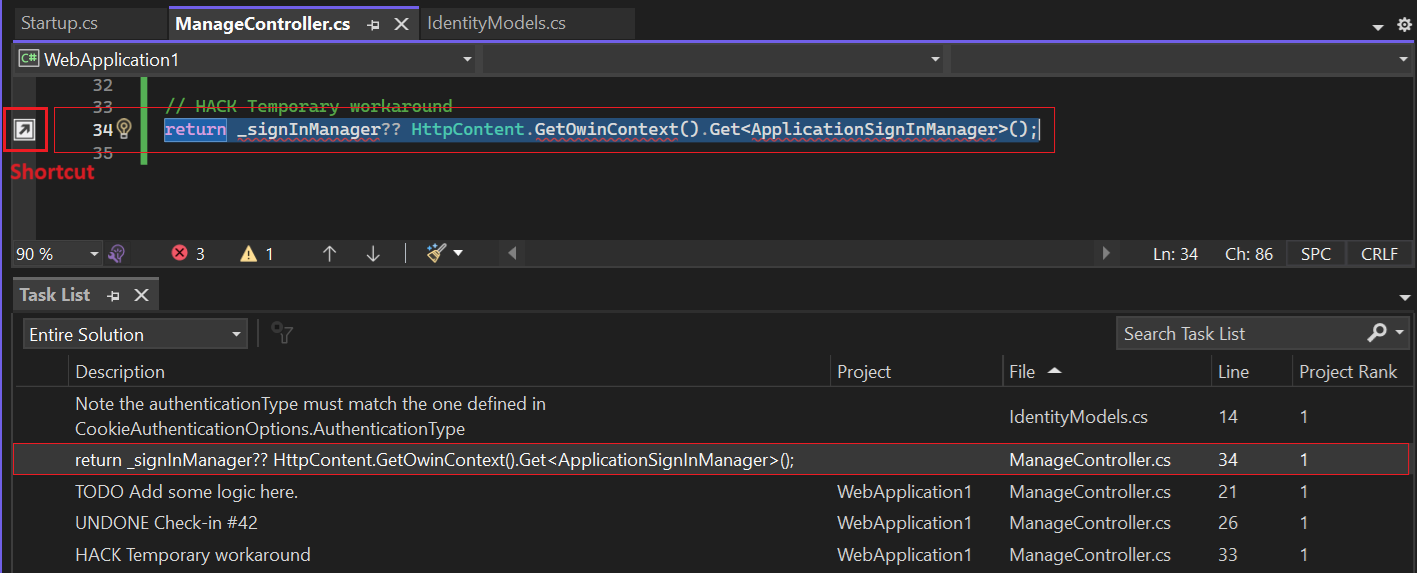
A code task shortcut is a bookmark you add in your code that Visual Studio tracks in Task List. This type of shortcut has a different icon than a regular bookmark.
To create a code task shortcut, insert the pointer into the code where you want to place a shortcut.
Select Edit > Bookmarks > Add Task List Shortcut, or use the keyboard shortcut Ctrl+K, Ctrl+H.
Use tasks and shortcuts to access code
After Visual Studio updates Task List with your code comment token instances and code task shortcuts, you can use these items to quickly go to the linked locations in your code:
To go to the location in your code for any task, double-click the task item in Task List.
To jump to the code location for the previous or next task in the list, right-click the current task in the list, and select Next Task or Previous Task. These actions are also available on the Visual Studio View menu.
Sort list items
You can change the sort order for the list items:
To change the primary sort order for the list, select a column header. Visual Studio sorts the list contents according to the items in the selected column.
To apply a secondary sort order, select Shift and a different column header. Visual Studio sorts the list contents by the first selected column followed by the second selected column.
You can continue this approach and apply more refined sorting by selecting Shift and another column header.
Show, hide, and order columns
You can also work with specific columns in the list:
To show a column, right-click anywhere on the list and select Show Columns. On the flyout menu, select the columns to show. The following columns are available: Priority, Description, Project, Project Rank, Path, File, Line, and Column.
On the flyout menu, Visual Studio displays a checkmark next to a visible column.
To hide a column, unselect the column name on the flyout menu. Visual Studio removes the checkmark.
To change the order of the columns in the list, drag the column headers into the desired position.
Tip
The Project Rank column represents project dependencies. Projects with a rank of 1 don't depend on any other projects. Projects with a rank of 2 depend on one or more projects with a rank of 1, and so on. For more information, see Standard Table Column Definitions: Project Rank field.
Related content
- Review the reference for the Task List, Environment, and Options dialog

