Introduction to Azure Functions in Visual Studio for Mac
Important
Visual Studio for Mac is scheduled for retirement on August 31, 2024 in accordance with Microsoft’s Modern Lifecycle Policy. While you can continue to work with Visual Studio for Mac, there are several other options for developers on Mac such as the preview version of the new C# Dev Kit extension for VS Code.
Azure Functions is a way to create and run event-driven snippets of code –– functions –– in the cloud, without having to explicitly provision or manage infrastructure. For more information about Azure Functions, see the Azure Functions documentation.
Requirements
Azure function tools are included in Visual Studio for Mac 7.5 and newer.
To create and deploy functions you also need an Azure subscription. If you don't have an Azure account, you can sign up today for free and receive 12 months of free popular services, $200 free credit and 25+ always free services -> https://azure.com/free.
Creating your first Azure Functions project
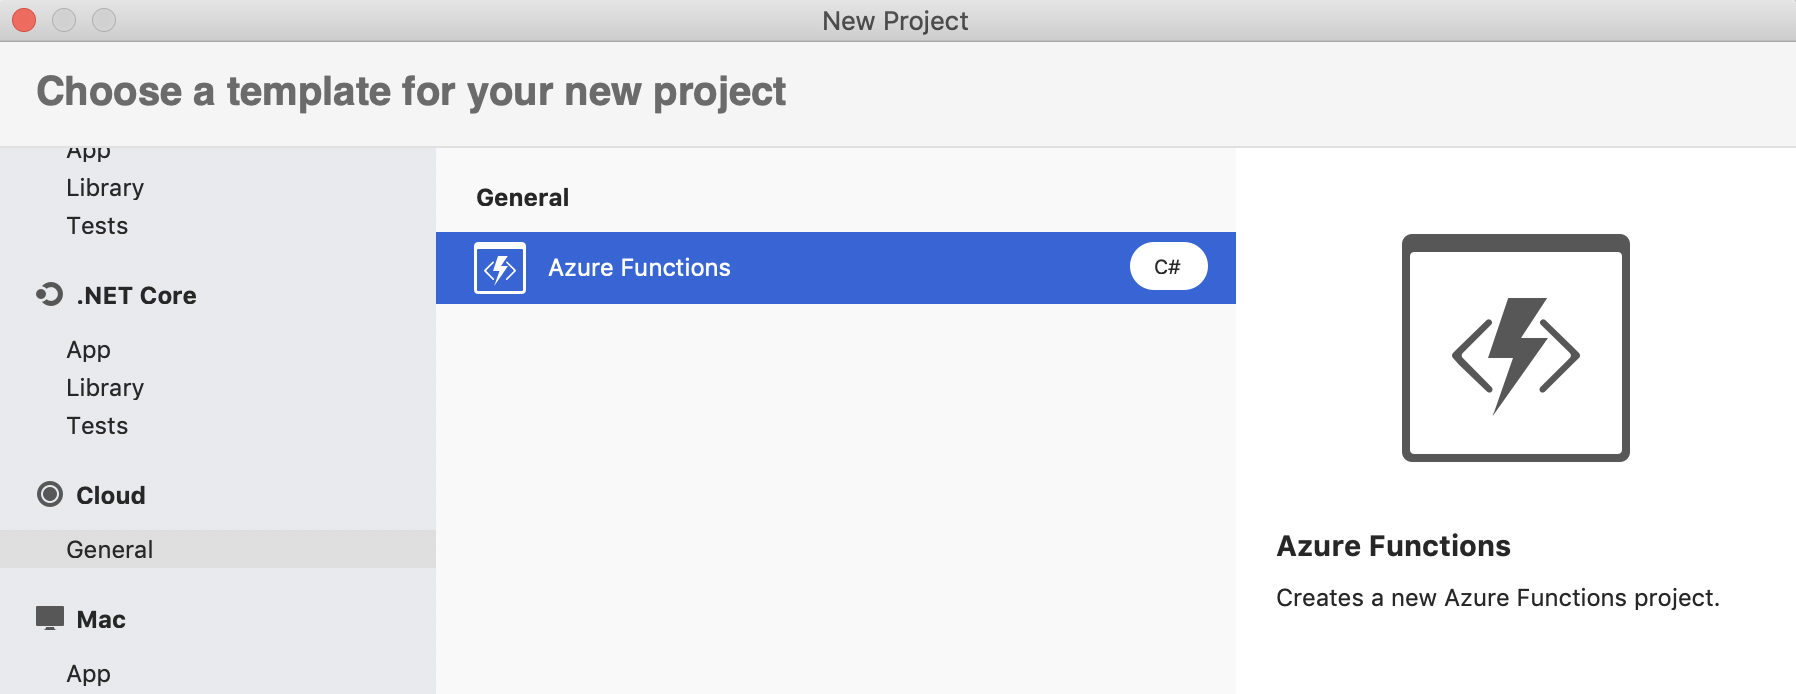
In Visual Studio for Mac, select File > New Solution.
From the New Project dialog, select the Azure Functions template under Cloud > General and click Next:
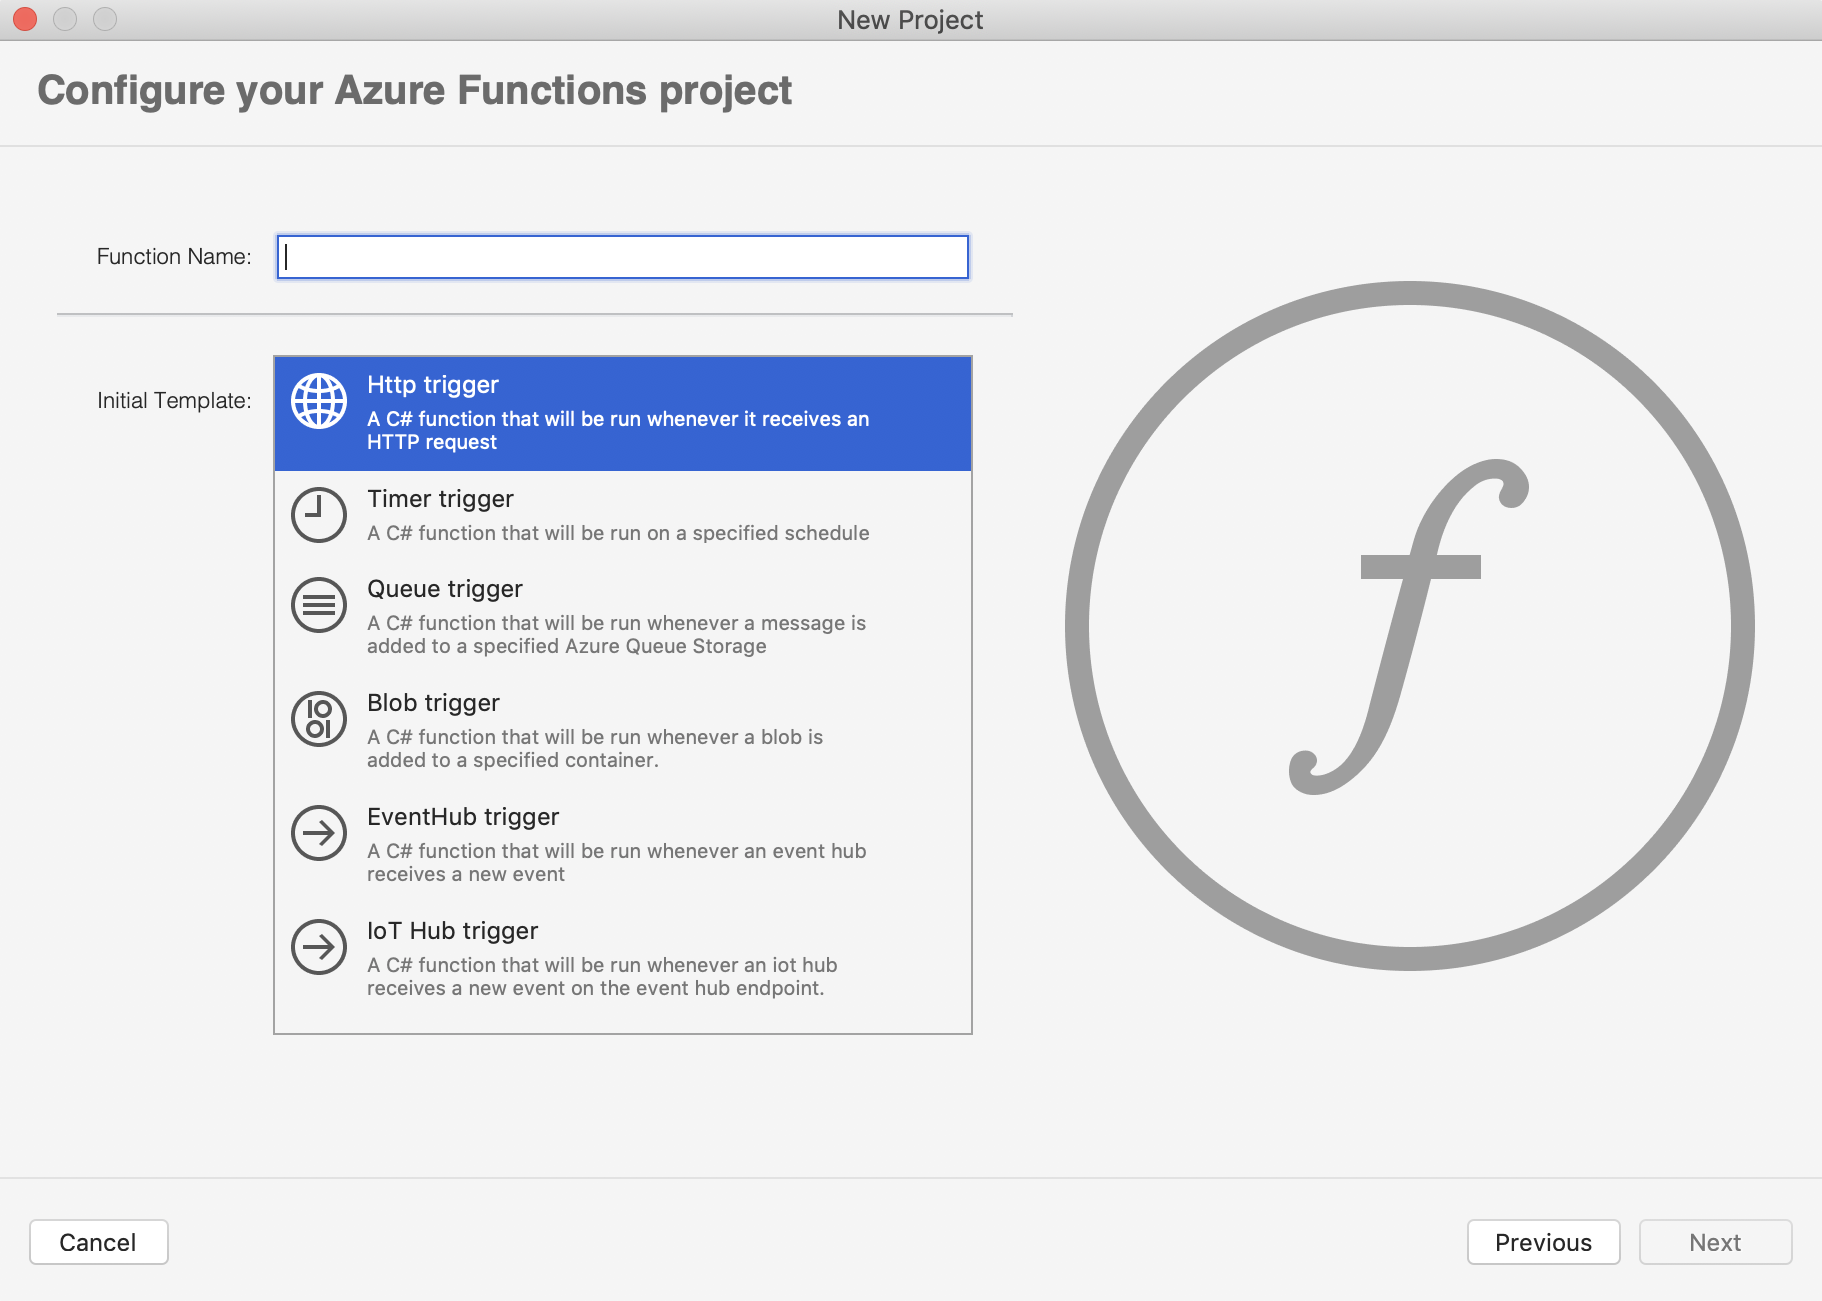
Select the initial Azure Functions template that you wish to use, enter your function name and click Next.
Tip
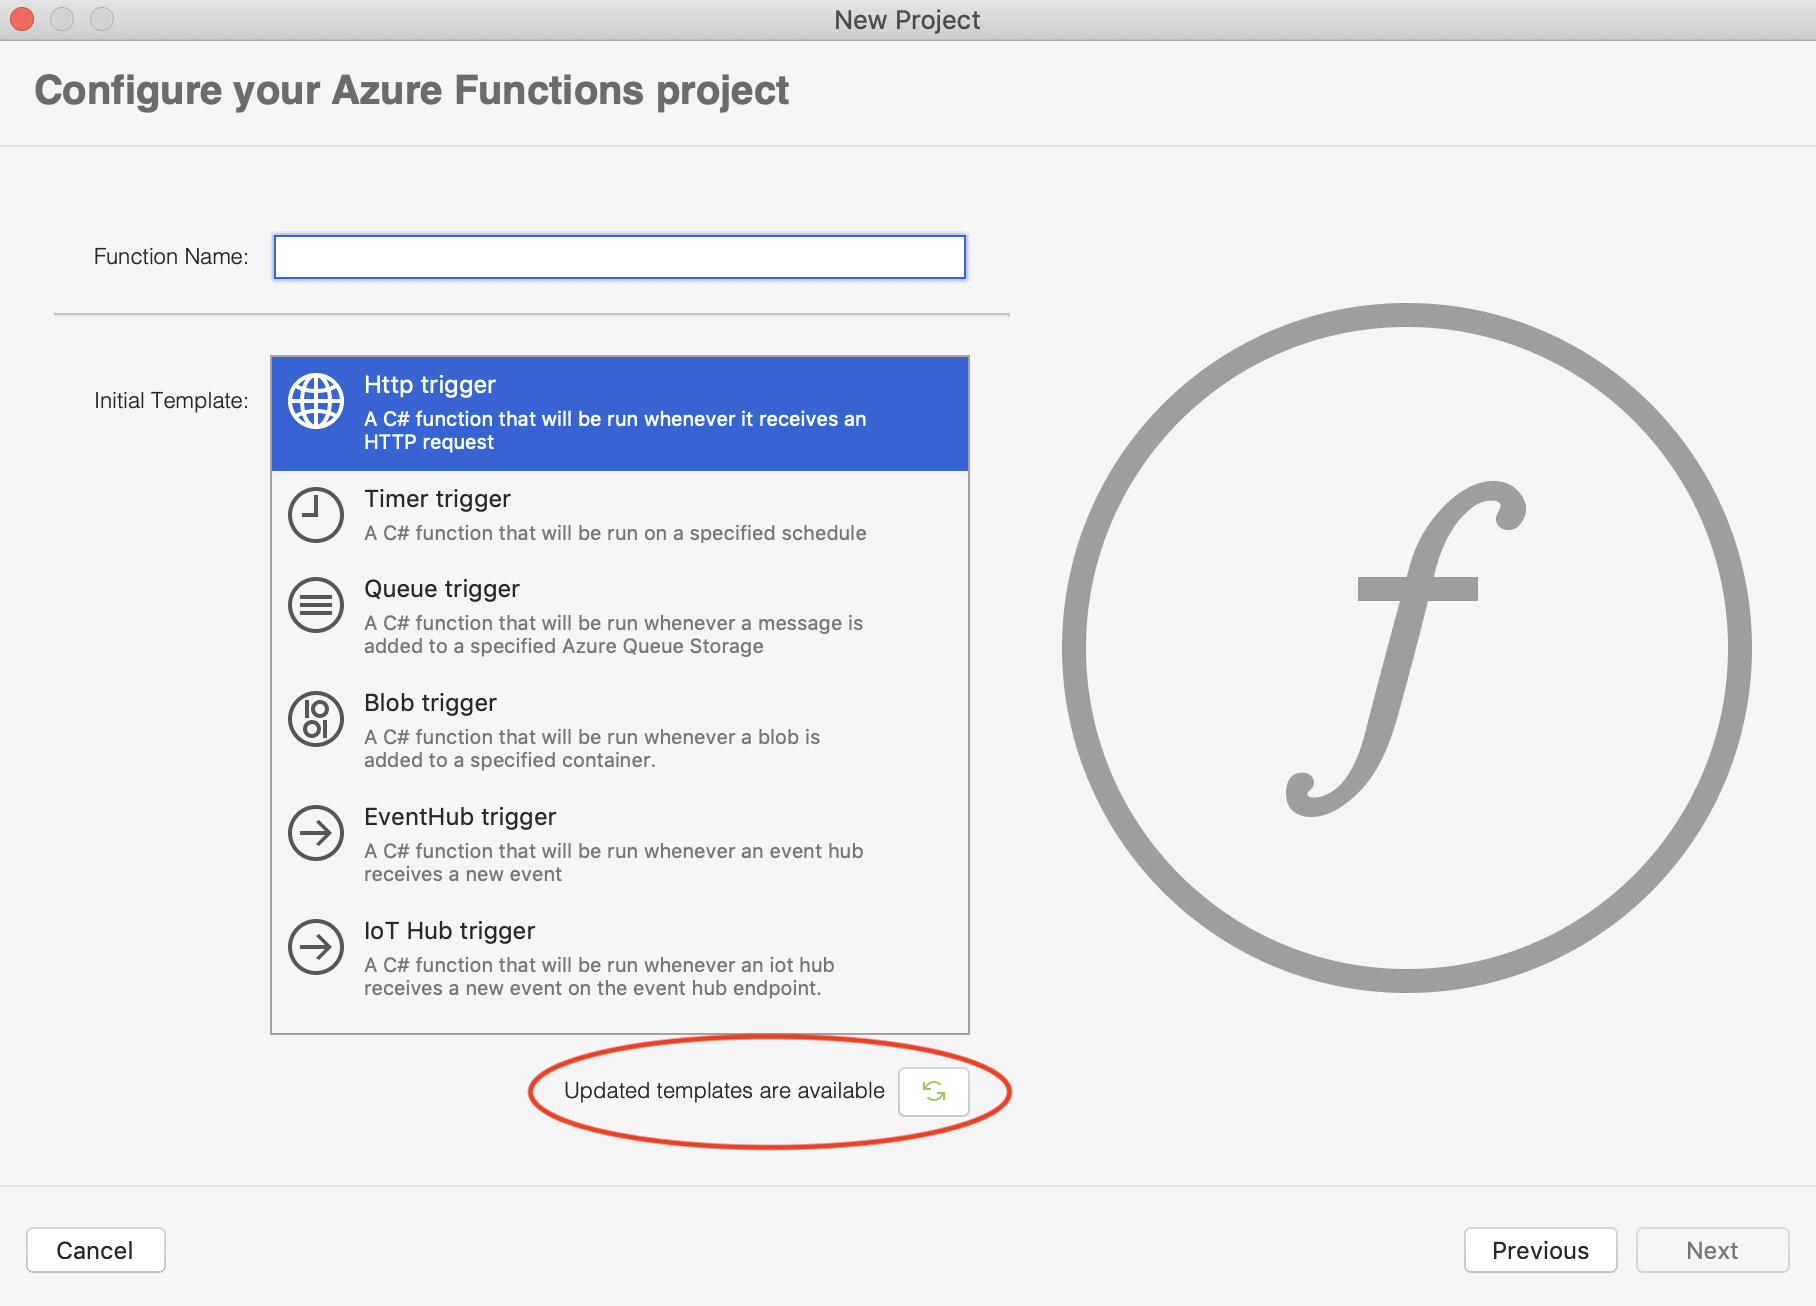
While the bundled Azure Functions runtime and templates (CLI) are kept as to date as possible, they inevitably get outdated. When creating a new Functions project, Visual Studio for Mac will check for updates to the CLI and will notify you as shown in the following image. Simply click on the button to download the updated templates.
Depending on the type of function you select, the next page will prompt you to enter details, such as access rights, as illustrated in the following image:
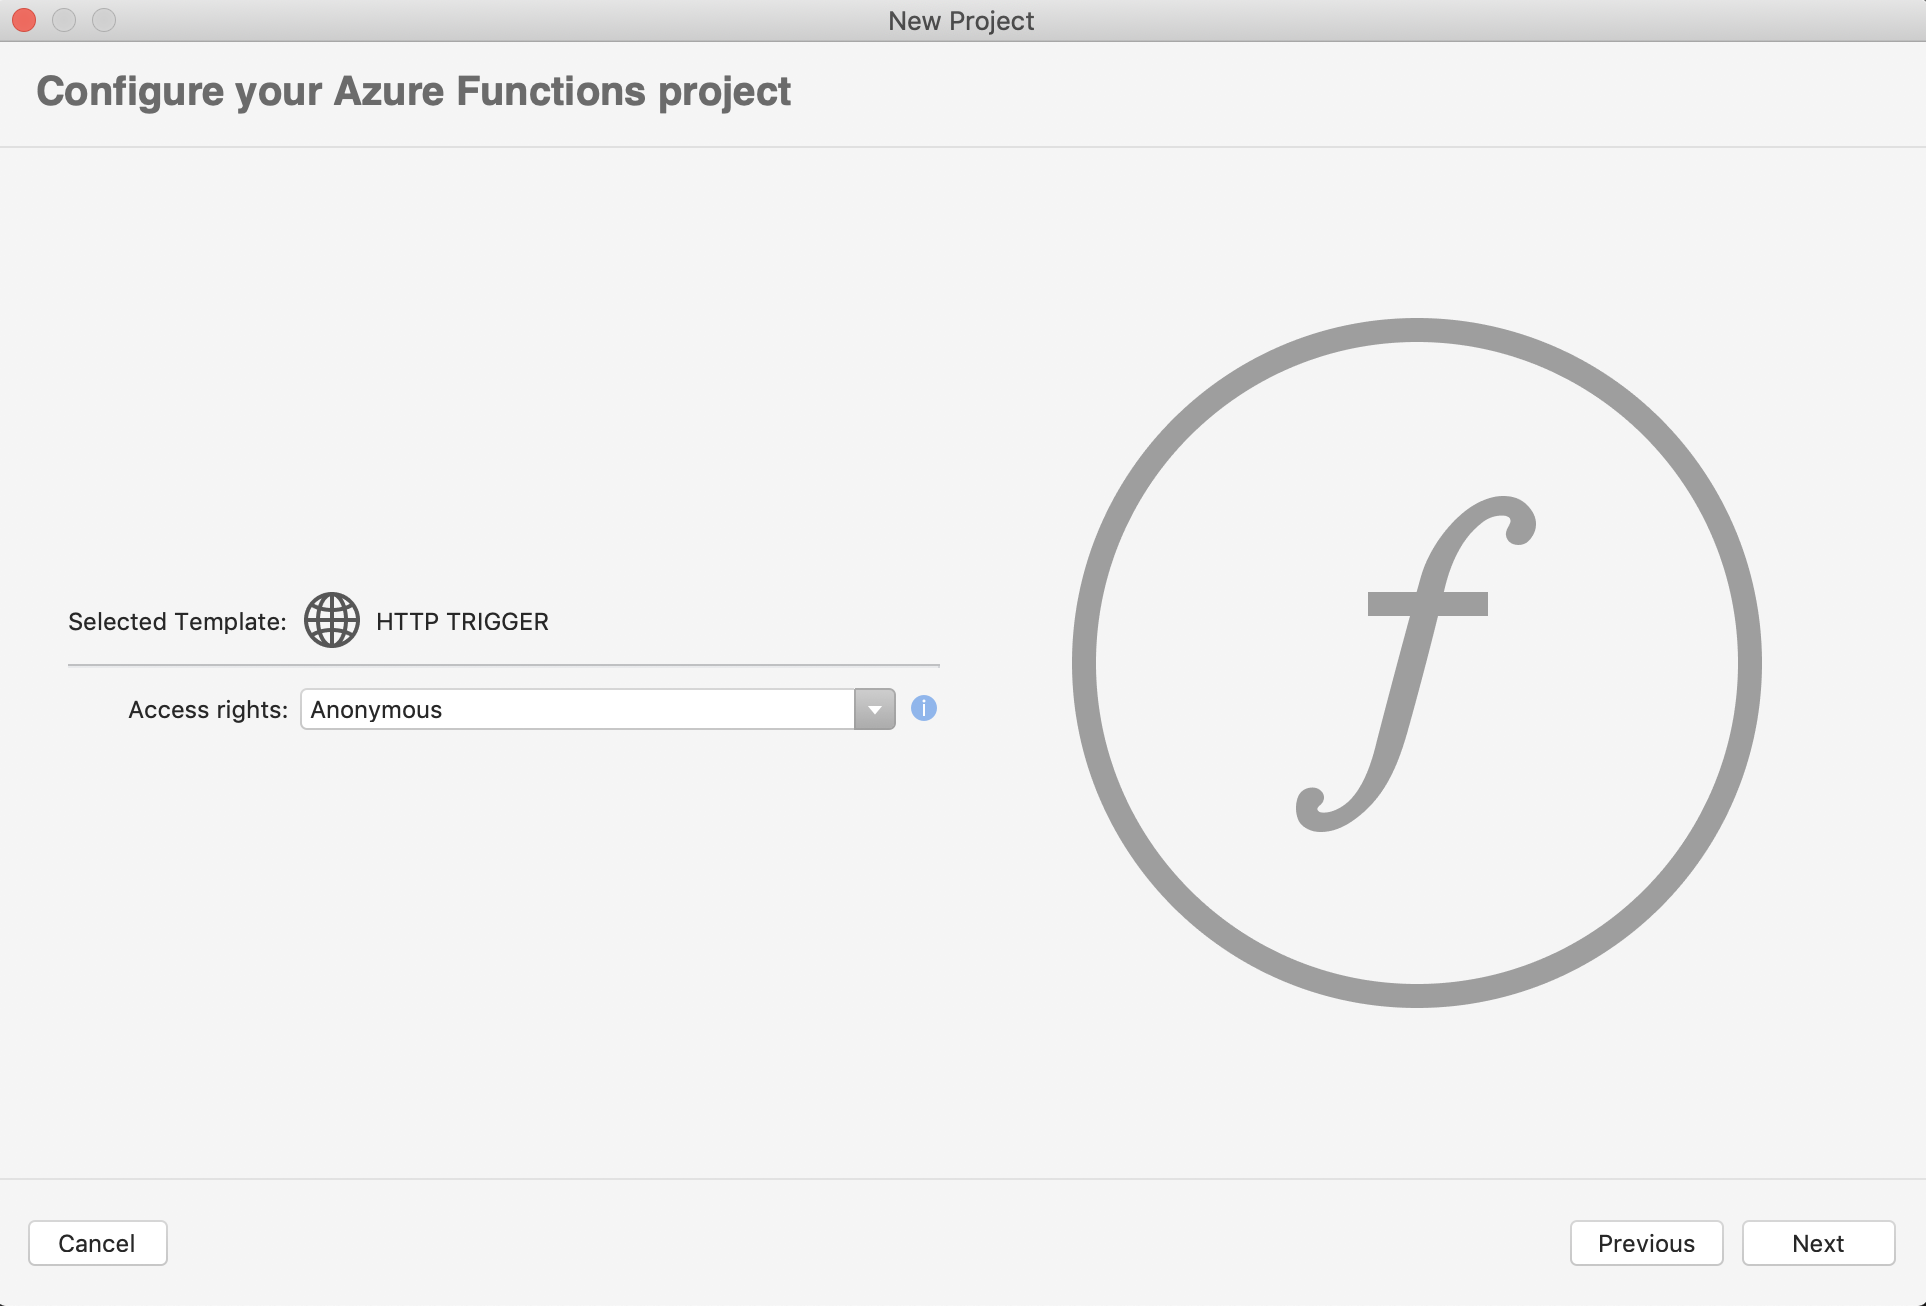
For more information on the different types of Azure Functions templates and the binding properties required to configure each template, see the Available function templates section. For this example, we're using an HTTP trigger with access rights set to anonymous.
Once you've set the parameters, choose the location for the project and click Create.
Visual Studio for Mac creates a .NET Standard project with a default function included. It also includes NuGet references to a variety of AzureWebJobs packages, as well as the Newtonsoft.Json package.
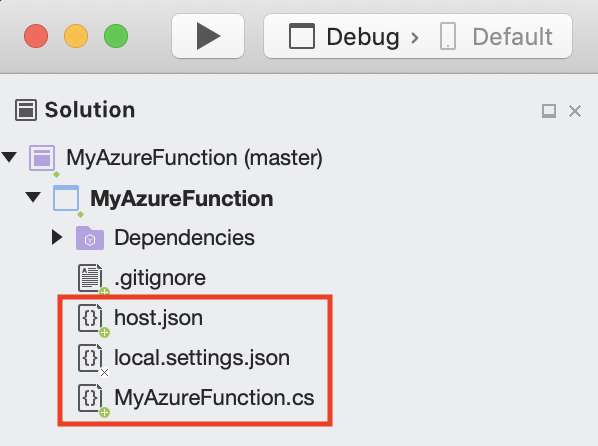
The new project contains the following files:
- your-function-name.cs – This class contains boilerplate code for the function that you selected. It contains a FunctionName attribute with the function name, and a trigger attribute that specifies what triggers the function (eg. an HTTP request). For more information on the function method, refer to the Azure Functions C# developer reference article.
- host.json – This file describes the global configuration options for Functions host. For an example file and information on the available settings for this file, see the host.json reference for Azure Functions.
- local.settings.json – This file contains all the settings for running functions locally. These settings are used by the Azure Functions Core Tools. For more information, see Local settings file in the Azure Functions Core Tools article.
Now that you've created a new Azure Functions project in Visual Studio for Mac, you can test out the default HTTP-triggered function from your local machine.
Testing the function locally
With Azure Functions support in Visual Studio for Mac you can test and debug your function on your local development computer.
To test your function locally, press the Run button in Visual Studio for Mac:

Running the project starts local debugging on the Azure function and opens a new Terminal window, as illustrated in the following image:
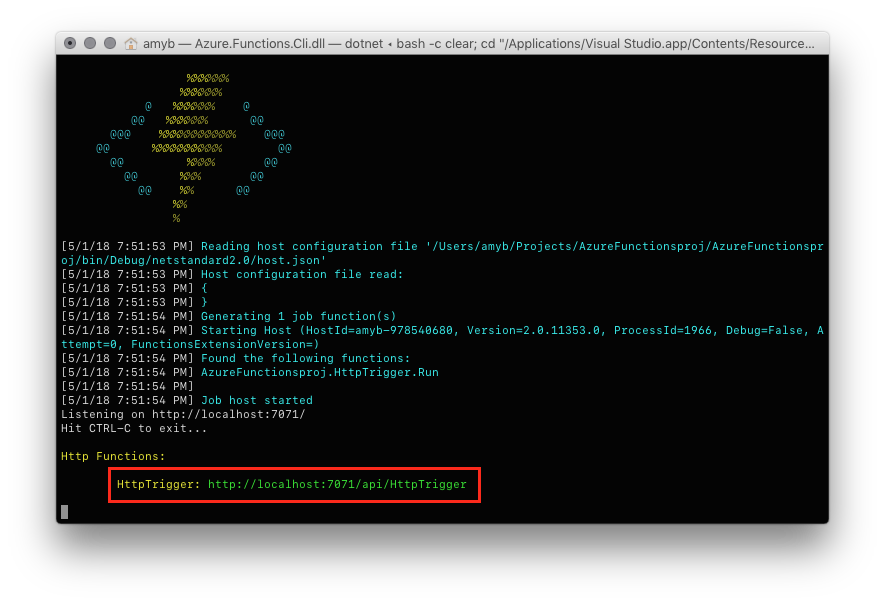
Copy the URL from the output.
Paste the URL for the HTTP request into your browser's address bar. Add the query string
?name=<yourname>to the end of the URL and execute the request. The following image shows the response in the browser to the local GET request returned by the function:
Adding another function to your project
Function Templates enable you to quickly create new functions using the most common triggers and templates. To create another type of function, do the following:
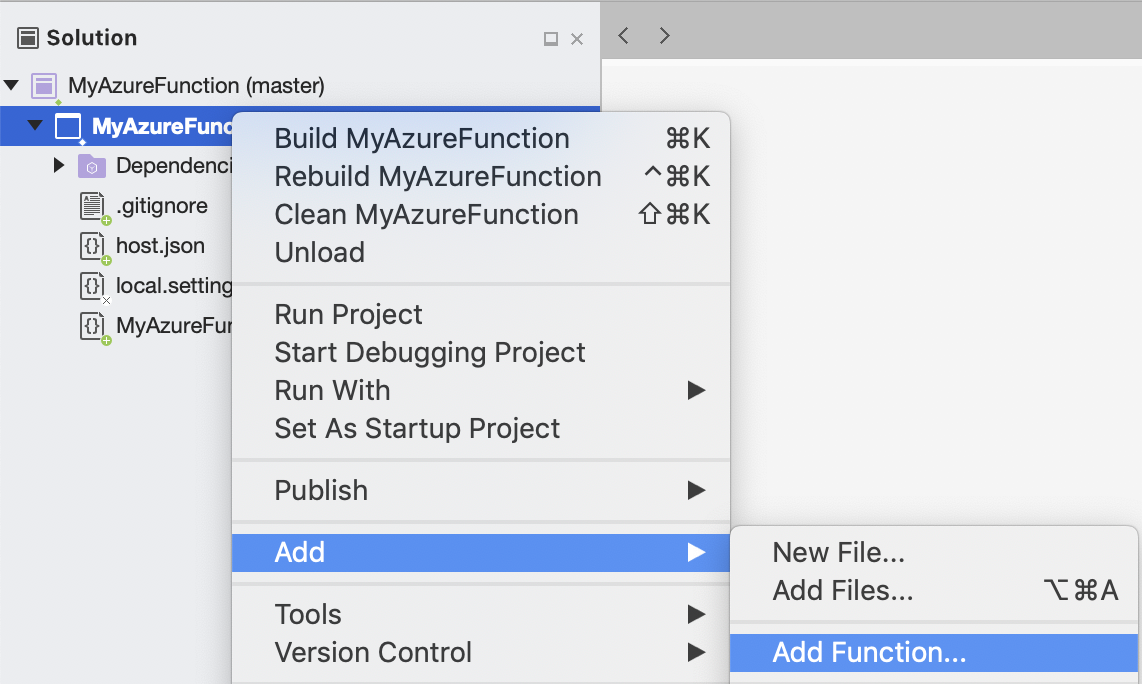
To add a new function, right-click on the project name and select Add > Add Function...:
From the New Azure Function dialog, select the function you require:
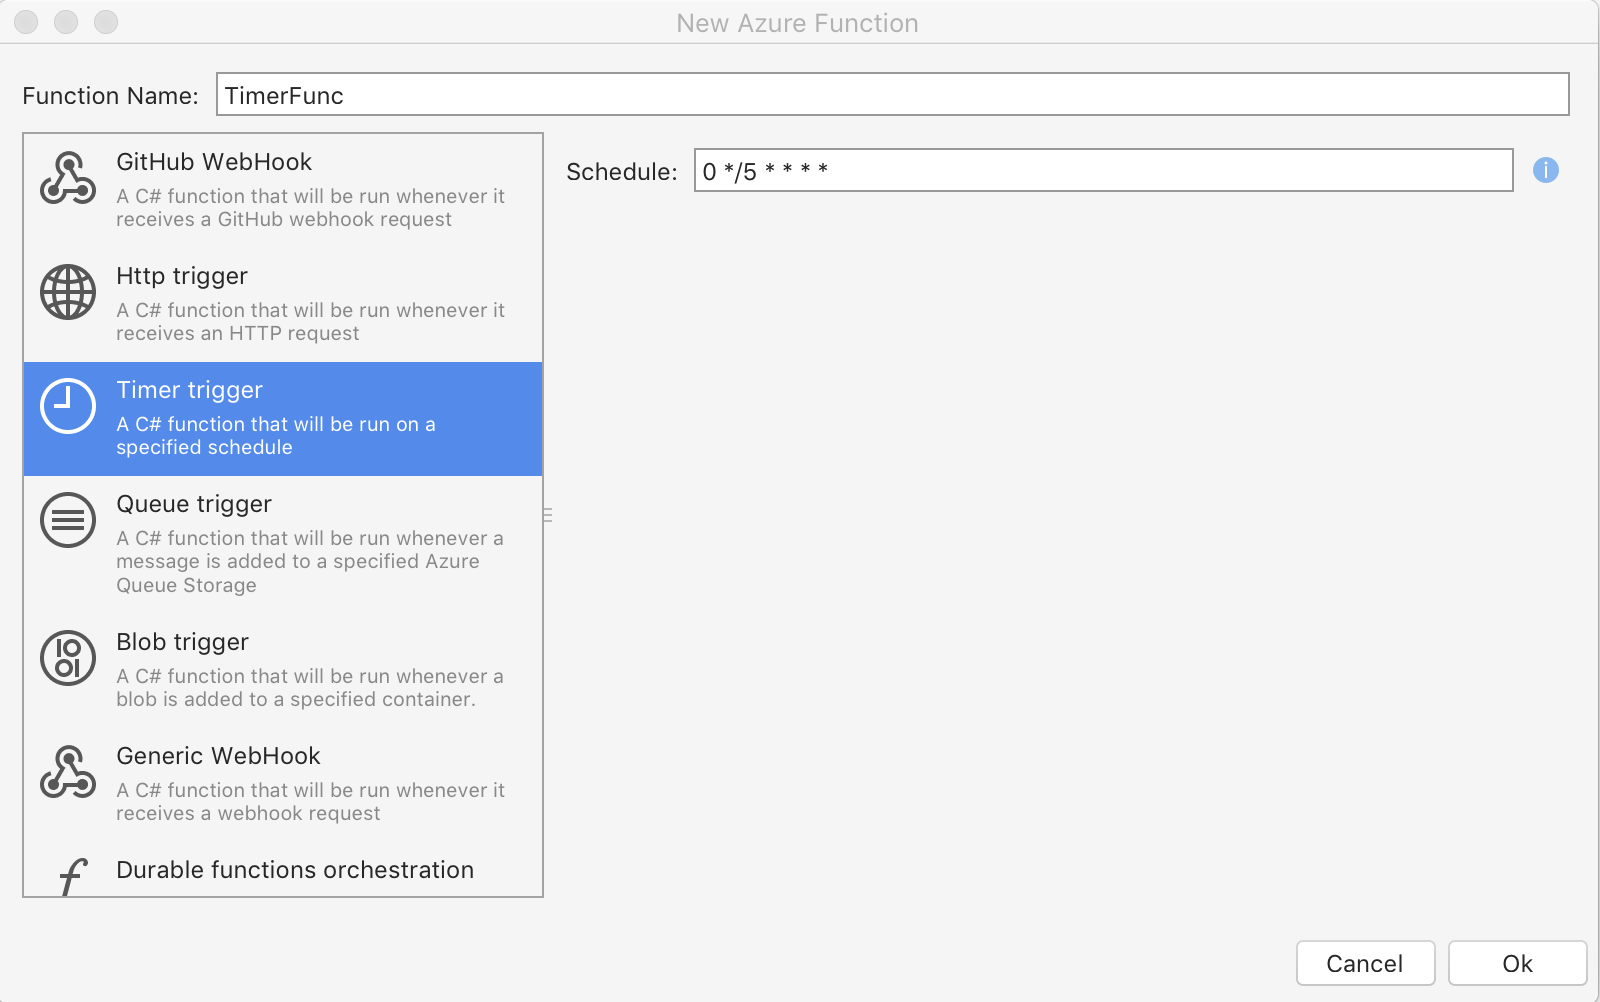
A list of the Azure function templates are provided in the Available function templates section.
You can use the above procedure to add more functions to your function app project. Each function in the project can have a different trigger, but a function must have exactly one trigger. For more information, see Azure Functions triggers and bindings concepts.
Publish to Azure
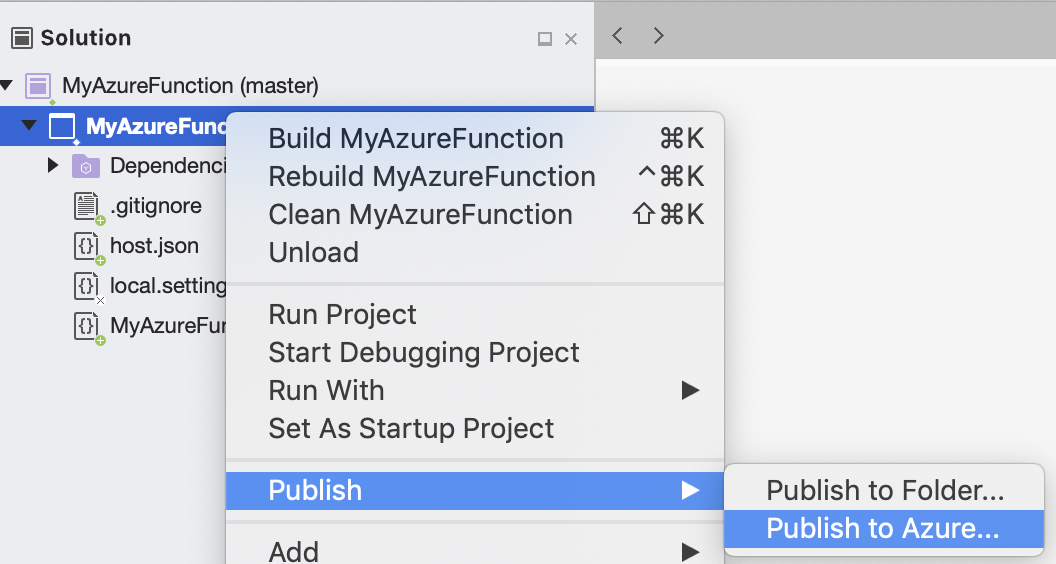
Right-click on the project name and select Publish > Publish to Azure:
If you've already connected your Azure account to Visual Studio for Mac a list of available app services are displayed. If you haven't logged in, you'll be prompted to do so.
From the Publish to Azure App Service dialog, you can either select an existing app service or create a new one by clicking New.
In the Create new App Service dialog, enter your settings:
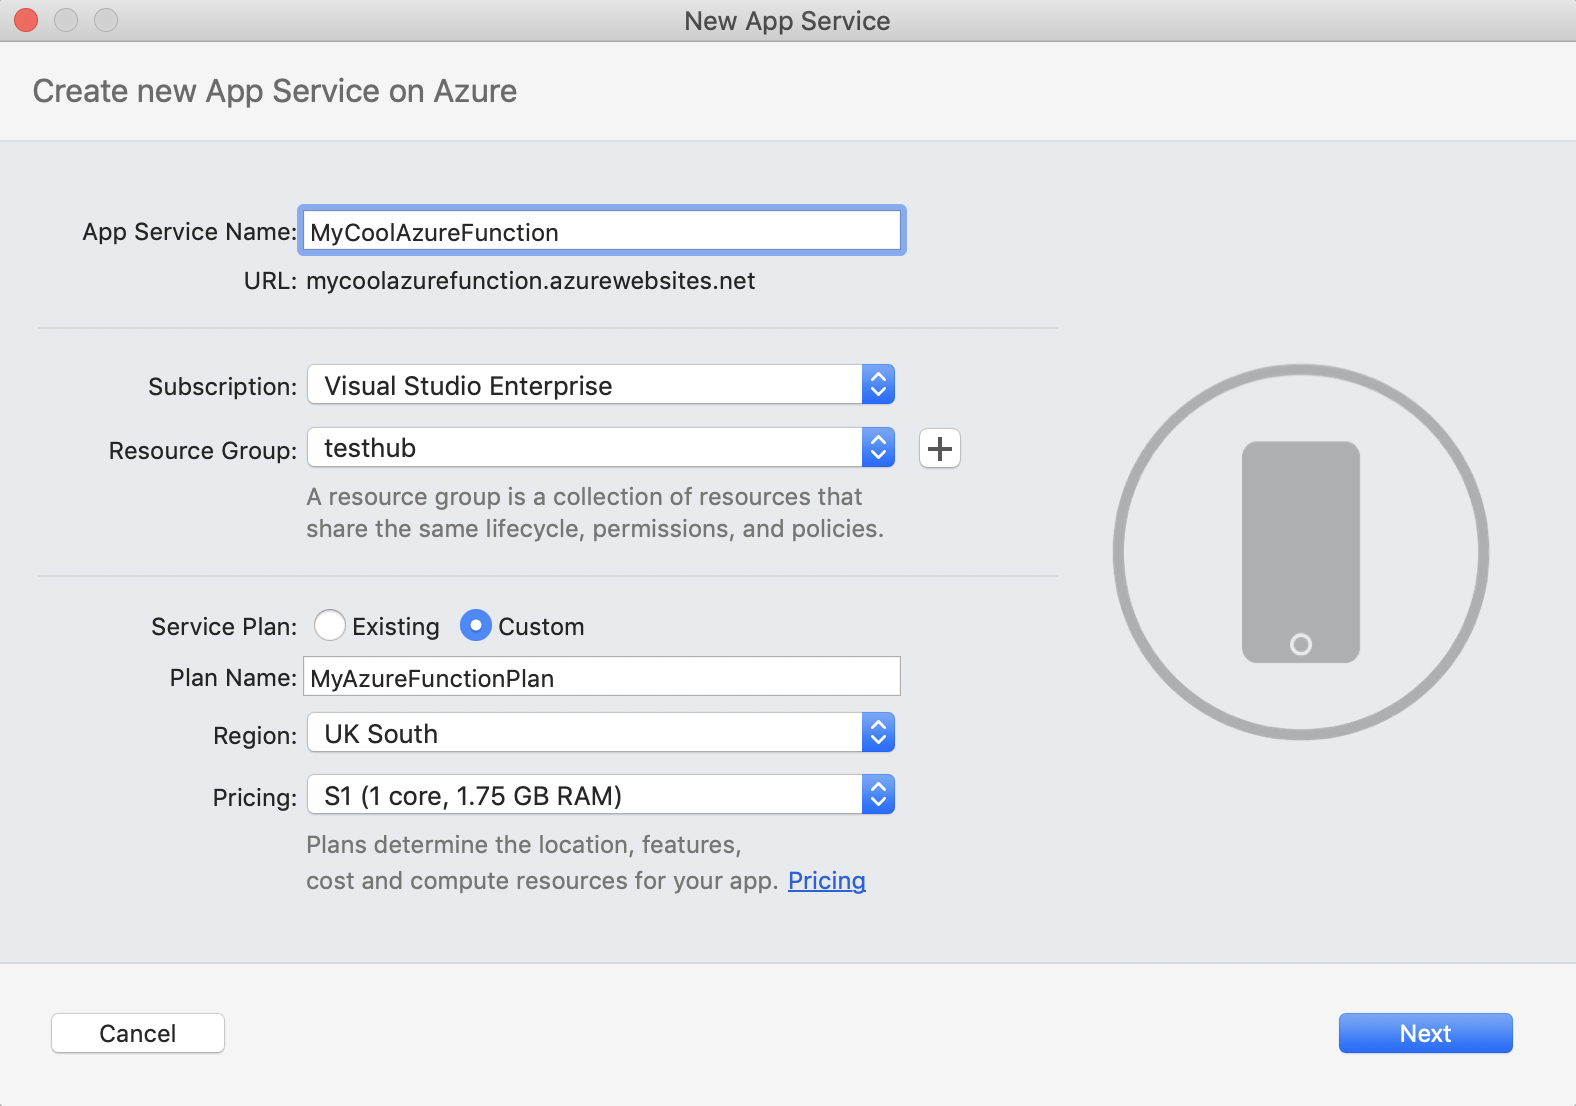
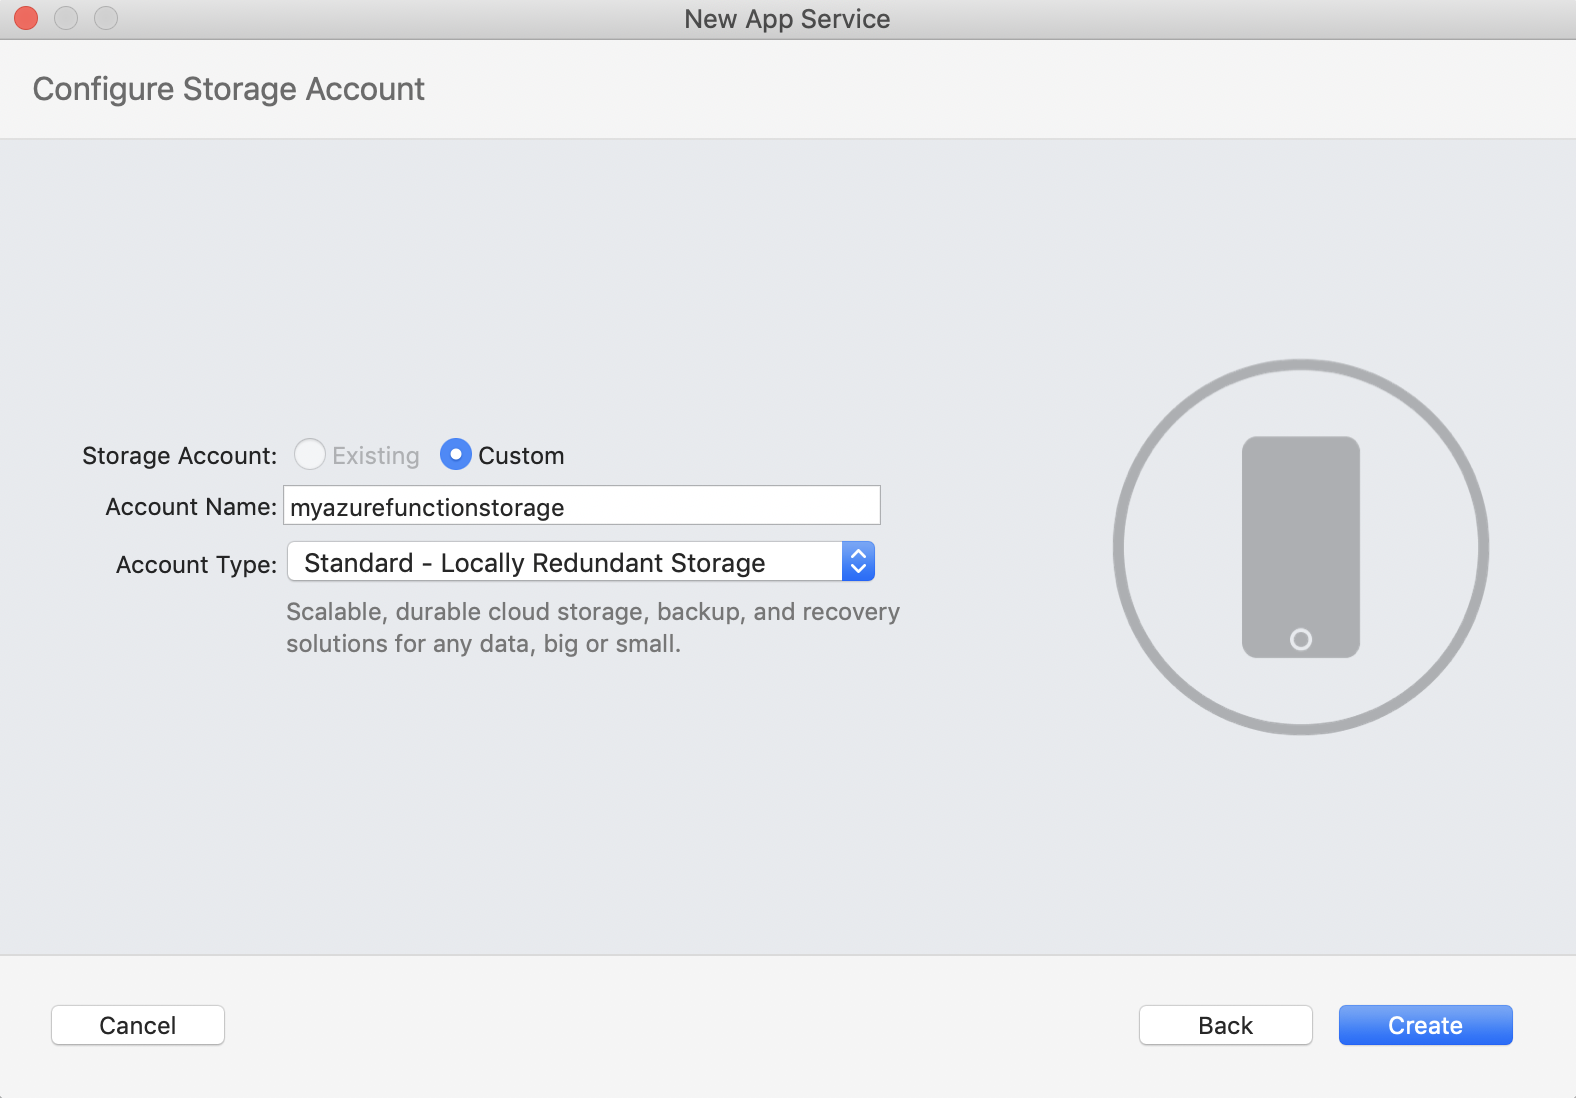
Setting Description App Service Name A globally unique name that identifies your new function app. Subscription The Azure subscription to use. Resource Group Name of the resource group in which to create your function app. Choose + to create a new resource group. Service Plan Choose an existing plan or create a custom plan. Choose a Location in a region near you or near other services your functions access. Click Next to create a storage account. An Azure Storage account is required by the Functions runtime. Click Custom to create a general purpose storage account, or use an existing one:
Click Create to create a function app and related resources in Azure with these settings and deploy your function project code.
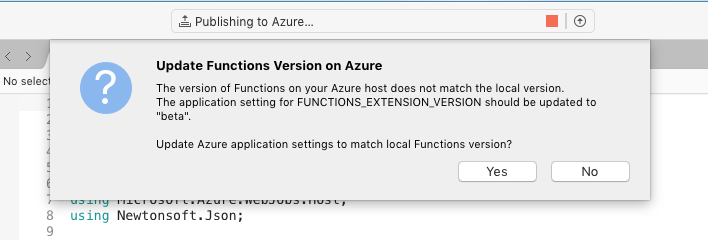
You might be prompted with a dialog during publishing informing you to "Update Functions Version on Azure". Click Yes:
Function app settings
Any settings you added in the local.settings.json must be also added to the function app in Azure. These settings are not uploaded automatically when you publish the project.
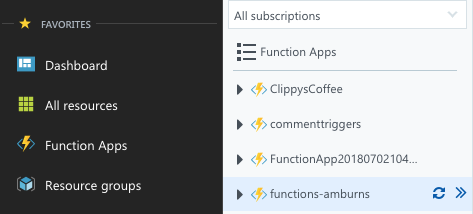
To access your app settings, go to the Azure portal at https://ms.portal.azure.com/. Under Functions Apps, select Function Apps and highlight your function name:
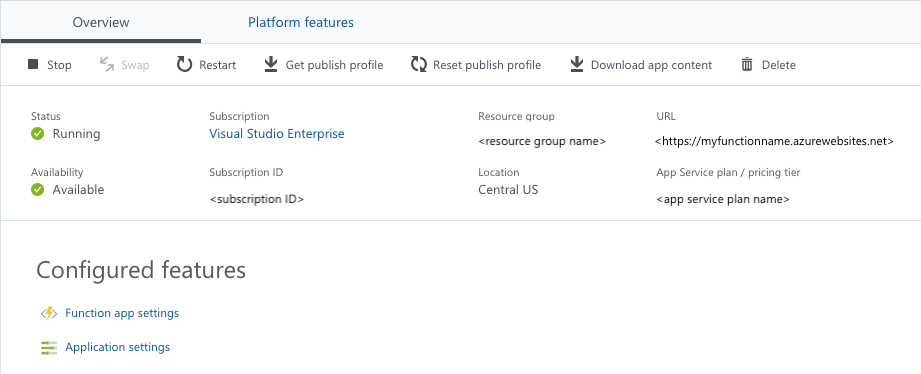
From the Overview tab select Application settings under Configured features:
From here you can set Application Settings for the function app, where you can add new application settings or modify existing ones:
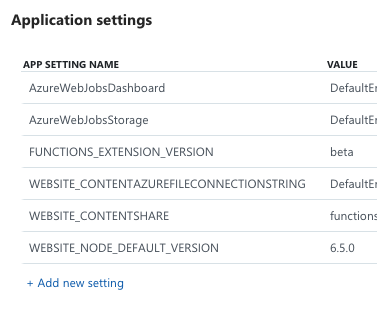
One important setting you might need to set is FUNCTIONS_EXTENSION_VERSION. When publishing from Visual Studio for Mac, this value should be set to beta.
Available function templates
GitHub Trigger – Respond to events that occur in your GitHub repositories. For more information, see the Azure Functions article on GitHub
- GitHub commenter – This function will be run when it receives a GitHub webhook for an issue or pull request and adds a comment.
- GitHub WebHook – This function will be run when it receives a GitHub webhook.
HTTP – Trigger the execution of your code by using an HTTP request. There are explicit templates for the following HTTP triggers:
- HTTP Trigger
- HTTP GET create, update, read, and delete (CRUD)
- HTTP POST CRUD
- HTTP Trigger with parameters
Timer – Execute cleanup or other batch tasks on a predefined schedule. This template takes two fields: a Name and a schedule, which is a six field CRON expression. For more information, see the Azure Functions article on Time
Queue Trigger – This is a function that will respond to messages as they arrive in the Azure Queue Storage queue. In addition to the function name, this template takes a Path (the name of the queue from which the message will be read) and storage account Connection (the name of the app setting containing your storage account connection string). For more information, see the Azure Functions article on Queue Storage.
Blob Trigger – Process Azure Storage blobs when they are added to a container. In addition to the function name, this template also takes a path and connection property. The path property is the path within your storage account that the trigger will monitor. The connection account is the name of the app setting containing your storage account connection string. For more information, see the Azure Functions Blob Storage article.
Generic WebHook – This is a simple function that will run whenever it receives a request from any service that supports webhooks. For more information, see the Azure Functions article on generic webhooks.
Durable functions orchestration – Durable functions let you write stateful functions in a serverless environment. The extension manages state, checkpoints, and restarts for you. For more information, see the guides on Durable functions.
Image Resizer – This function creates resized images whenever a blob is added to a container. The template takes path and connection string for the trigger, a small image output, and a medium image output.
SAS token – This function generates a SAS token for a given Azure Storage container and blob name. In addition to the function name, this template also takes a path and connection property. The path property is the path within your storage account that the trigger will monitor. The connection account is the name of the app setting containing your storage account connection string. The Access rights also need to be set. Authorization level controls whether the function requires an API key and which key to use; Function uses a function key; Admin uses your account access key. For more information, see the C# Azure function for generating SAS tokens sample.