Note
Access to this page requires authorization. You can try signing in or changing directories.
Access to this page requires authorization. You can try changing directories.
You can save code maps as part of a Visual Studio project, as an image, or as an XPS file.
Share a code map with other Visual Studio users
Use the File menu to save the map.
-or-
To save the map as part of specific project, on the map toolbar, choose Share > Move <CodeMapName>.dgml into, and then choose the project where you want to save the map.
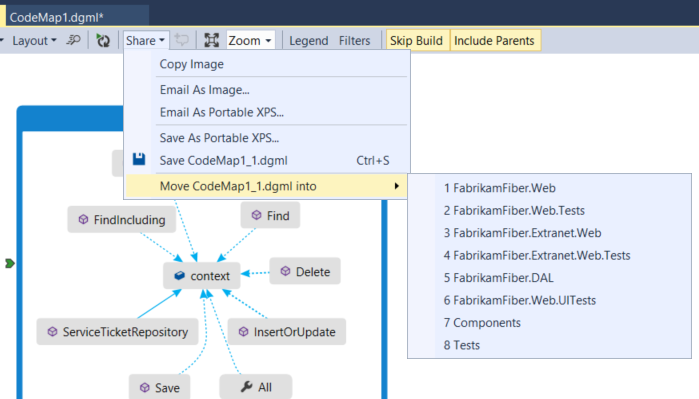
Visual Studio saves the map as a .dgml file that you can share with other users of Visual Studio Enterprise and Visual Studio Professional.
Note
Before you share a map with those who use Visual Studio Professional, make sure to expand any groups, show hidden nodes and cross-group links, and retrieve any deleted nodes that you want others to see on your map. Otherwise, other users won't be able to see these items.
The following error might occur when you save a map that is in a modeling project or was copied from a modeling project to another location:
"Cannot save fileName outside the project directory. Linked items are not supported."
Visual Studio shows the error, but creates the saved version anyway. To avoid the error, create the map outside the modeling project. You can then save it to the location that you want. Just copying the file to another location in the solution, and then trying to save it will not work.
Export a code map as an image
When you export a code map as an image, you can copy it into other applications, such as Microsoft Word or PowerPoint.
On the code map toolbar, choose Share > Email as Image or Copy Image.
Paste the image into another application.
Export the map as an XPS file
When you export a code map as an XPS file, you can see it in XML or XAML viewers.
On the code map toolbar, choose Share > Email As Portable XPS or Save As Portable XPS.
Browse to where you want to save the file.
Name the code map. Make sure that the Save as type box is set to XPS files (*.xps). Choose Save.