Note
Access to this page requires authorization. You can try signing in or changing directories.
Access to this page requires authorization. You can try changing directories.
The Subscriptions Admin Portal lets you add users one-at-a-time, or in large groups. To add individual users, see Add single users.
To add large groups of users, you can use the bulk add feature, or if your organization is using Microsoft Entra and your organization has a trusted agreement, you can use Microsoft Entra groups. This article explains the process for both options. Watch this video or read on to learn more about the bulk add feature.
Use Bulk add to assign subscriptions
Follow these steps to use the Bulk add feature:
Sign into the Visual Studio Subscriptions Admin Portal at https://manage.visualstudio.com.
To add multiple subscribers at one time, navigate to the Manage Subscribers tab. Choose the Add tab, then choose Bulk add in the drop-down.
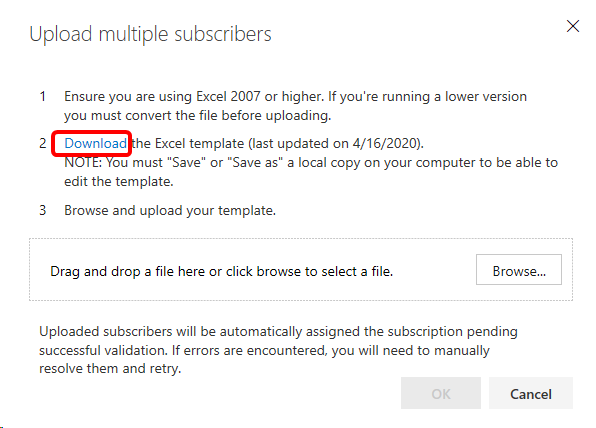
Bulk add uses a Microsoft Excel template to upload subscriber information. In the Upload Multiple Subscribers dialog box, select Download to download the template.
Note
Always download the latest version of this template. If you use an older version, your bulk upload can fail.
In the Excel spreadsheet, fill out the fields with the information for the individuals that you want to assign subscriptions to. (Reference is an optional field.) Save the file locally after you're done.
Note
One of the fields in the template allows admins to enable or disable subscribers' ability to download software. Disabling downloads also disables their access to product keys.
To help ensure a smooth upload, observe the following best practices:
- Ensure that none of the form fields contain commas.
- Remove spaces before and after values in form fields.
- Make sure user's names don't contain extra spaces between two-part first or family names. For example, if a person has a two-part first name such as "Maggie May," it should be typed as "MaggieMay" because the system doesn't trim the extra space.
- Make sure all required fields are completed.
- Check the Error message column. If any errors are listed, resolve them before attempting to upload the file.
Return to the Visual Studio Subscriptions Admin portal. In the Upload Multiple Subscribers dialog box, select Browse.
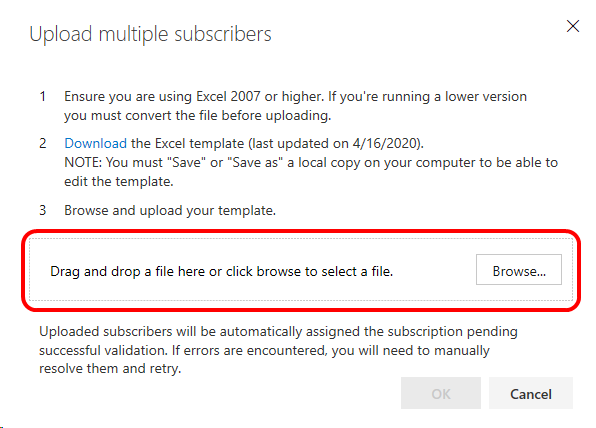
Navigate to the Excel file that you saved, and then select OK.
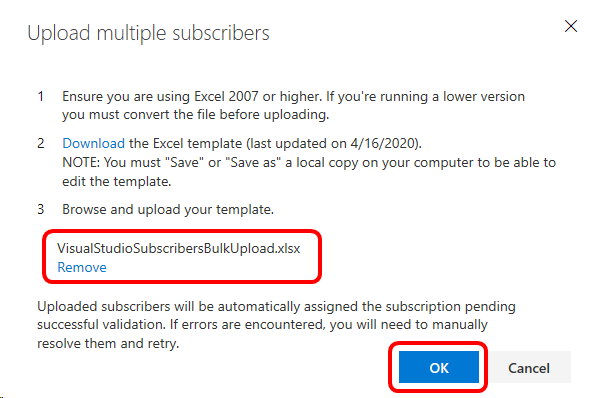
An upload progress dialog appears.
If the template contains errors, the upload fails. You're presented with the errors so that you can correct the template and attempt the bulk upload again.
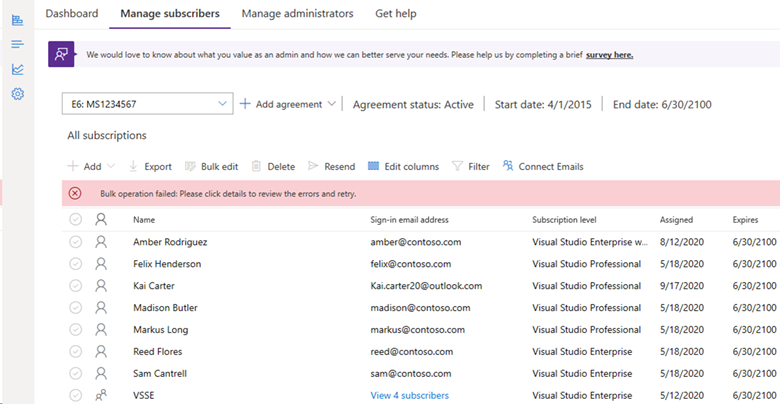
If you encounter a failure, follow these steps:
- Open the Excel file you created, correct the problems, and save the file.
- Return to the Admin Portal and dismiss the error message.
- Choose Add.
- Select Bulk add.
- Since you already have the Excel file saved, you don't need to download the template. Select Browse, locate the file you saved, and select Open.
- Select OK.
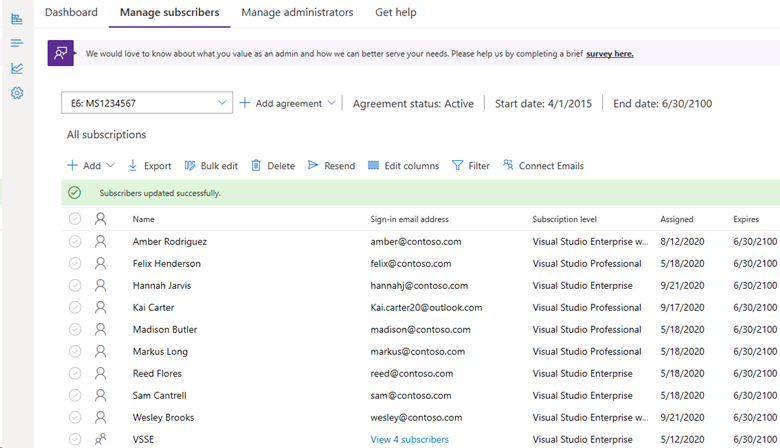
When the upload is successful, you see the list of subscribers and a confirmation message.
Use Microsoft Entra groups to assign subscriptions
Using this feature makes it easy to stay on top of your subscription assignments. Add Microsoft Entra groups in the Subscriptions Admin Portal to ensure that everyone in the group is assigned to a subscription. When members leave your organization and are removed from Microsoft Entra ID, their access to subscriptions is also removed automatically for you.
Important
The following limitations apply to the use of Microsoft Entra groups for adding subscribers:
- Only TRUSTED agreements can use Microsoft Entra groups.
- MPSA agreements can't use Entra groups.
- The admin must be a member of the Microsoft Entra tenant when initially adding a group to the admin portal. After the group is added, changes to the membership of the groups doesn't require admin involvement.
- Groups must contain at least one member. Empty groups aren't supported.
- All users must be in the top level of the group. Nested groups aren't supported.
- All members of the group must have an email address associated with their Microsoft Entra account.
- Separate email addresses for notifications aren't supported for subscriptions added using Microsoft Entra groups.
Watch this video or read on to learn more about adding subscribers using the Microsoft Entra group feature.
Sign in to the Visual Studio Subscriptions Admin Portal at https://manage.visualstudio.com.
To add multiple subscribers at one time, navigate to the Manage subscribers tab.
Choose the Add tab, then select Microsoft Entra group in the drop-down.
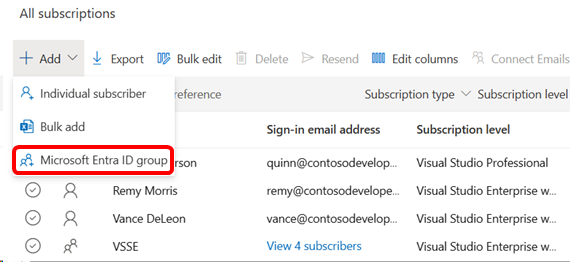
A fly-out window appears in the right pane. Begin to enter the name of the Microsoft Entra group that you'd like to add into the form field. The system searches the available Microsoft Entra groups within your organization for a match.
When you select the group, the field populates with the group name. You're able to view the users in that group before you add them. Next, you can choose the subscription level, download rights, and communication preferences for the group. You can add details into the reference field if you wish.
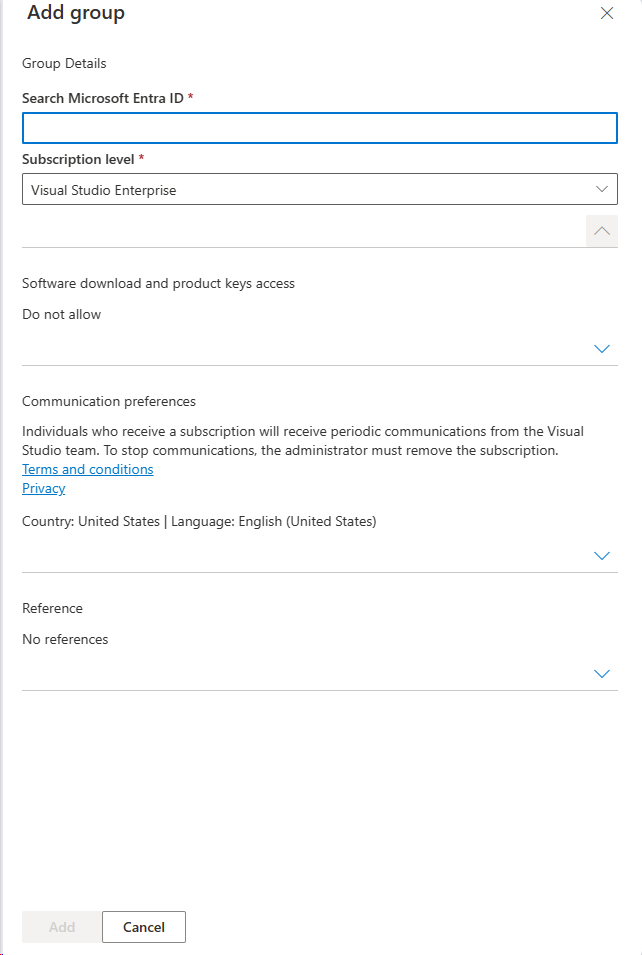
Select Add and then Confirm.
To see the added group, scroll to the bottom of your list of users.
Select View subscribers to display the members of the group. You can view details about the subscribers in the group. However, you can't make any edits to the subscribers or the subscriptions assigned to them.
Note
If you already assigned subscriptions individually to users who are later added as part of a Microsoft Entra group, they're added as part of the group and no longer be listed individually. If the individual subscription is for a different subscription level, however, they have two subscriptions. Example: If a user has an individual Visual Studio Professional subscription, and they're a member of a group to which you assign Visual Studio Enterprise subscriptions, they have both.
If you remove a subscriber from a Microsoft Entra group that has subscriptions assigned to it, it can take up to 24 hours for the update to be reflected in the admin portal.
Frequently asked questions
Q: Why can't I see the option to use Microsoft Entra groups to add subscribers?
A: The feature is currently only available to organizations with trusted agreements. Select the Details button to display your agreement information.

Q: I added users to my Microsoft Entra group, but they don’t have subscriptions yet. Why?
A: If the changes were made directly in Microsoft Entra ID the subscriptions should be assigned quickly. If the changes were made in an on-premises Active Directory, it first needs to be synced to Microsoft Entra ID. Depending how your on-premises Active Directory is configured, the changes could take up to 24 hours to be reflected. If it takes longer than 24 hours, our support team can help troubleshoot any issues.
Q: Can I choose multiple subscription levels to be assigned within a Microsoft Entra group?
A: No--Everyone in the group receives the same subscription level.
Q: Can I edit subscriber details of individuals added in a Microsoft Entra group?
A: No--To modify information for an individual subscriber, remove them from the Microsoft Entra group and assign them a subscription individually.
Q: Can I add separate notification email addresses for members of a Microsoft Entra group?
A: No – Separate email addresses for notifications are currently not supported for subscriptions added using Microsoft Entra groups. All emails are to the primary email (user principle name).
Resources
Visual Studio administration and subscriptions support.
See also
- Visual Studio documentation
- Azure DevOps documentation
- Azure documentation
- Microsoft 365 documentation
- Microsoft Entra documentation
Next steps
Have just one or two subscribers to add? Check out Add single users.