Note
Access to this page requires authorization. You can try signing in or changing directories.
Access to this page requires authorization. You can try changing directories.
Audience targeting can help you target content to specific Microsoft 365 Groups within your organization so your content is seen by the right people. Audience targeting can be applied to cards on the dashboard, SharePoint news posts that appear in the news reader, and links in the Resource section. For example, if a regional finance department has many specialized dashboard cards needed for their daily tasks, audience targeting ensures that only members of that group see the cards.
Note
The news reader experience is being rolled out to users that will replace the current Feed experience across desktop, web, and mobile devices. This update is planned to roll out to all customers across all devices by the end of April 2025.
You can also create separate Viva Connections experiences for different audiences. For more information, see the article on the difference between audience targeting and different experiences.
Note
- Audience targeting filters content and isn't a security measure. It isn't meant to manage permissions, access, or secure confidential content.
- Microsoft Entra Groups (including security groups, Microsoft 365 Groups, and Microsoft Entra Dynamic Groups) are supported.
- The author is able to view all content in Edit mode. In read-mode, the content is filtered based on the audiences selected.
- Publish (or republish) to save changes made to existing page content, page metadata, and audience targeting settings for audience targeting features to take effect.
Apply audience targeting to cards in the dashboard
Create a personalized experience by targeting dashboard cards to specific audiences to ensure only the most relevant cards are seen. Use audience targeting:
To create custom views for distinct roles and regions,
To generate as many different views as needed to create unique experiences, and
To ensure the most important content is seen by the intended audience.
Follow these instructions if you're setting up the Viva Connections dashboard for the first time.
Note
- Site owner permissions to the SharePoint home site are required to edit the Viva Connections dashboard.
- Site owners setting up the Connections dashboard for the first time should see the article on creating a Viva Connections dashboard and adding cards for more information.
To apply audience targeting to a dashboard card:
Note
See the article on how to edit the dashboard from SharePoint if you're accessing Viva Connections from your SharePoint home site.
From the dashboard, select Edit.
Select Edit on the card you want to apply audience targeting to.
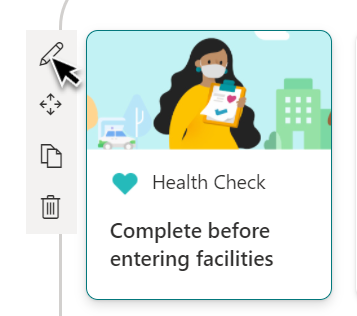
At the bottom of the edit pane, enter the Groups to the Audience to target field. Exit the edit pane when you're done.
Preview the viewing experience for different audiences and devices by selecting Preview from the command bar.
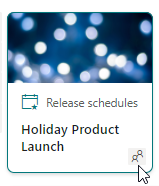
Publish the dashboard when you're done for the audience targeting to take effect. An icon appears on the card indicating audience targeting is applied.
Note
If an audience group that you recently created or changed was selected, it might take some time to see targeting applied for that group.
Preview your Connections dashboard to see how it displays for different audiences
After creating or editing cards on your Connections dashboard, make sure you preview the experience for each audience and on both desktop and mobile devices.
What you see in preview mode approximates how the dashboard displays for certain audiences and devices. When you apply audience targeting to cards, you can preview how different people view the dashboard depending on the audience or device.
While in preview-mode, make sure:
Physical gaps aren't present between cards that might appear while previewing different audiences and devices. If you see gaps, rearrange cards so that every audience and device has a high-quality viewing experience.
Icons, graphics, and images are easy to identify and understand.
Buttons and links are active and go to their intended destinations.
Labels and description text are helpful, easy to read, and make sense for the intended audience.
To preview different audiences:
While in edit mode, select Preview on the top right.
Open the Select audiences to preview as drop-down list. (if no cards are audience targeted, you’ll see a disabled Audience targeting label).
Search for and select a group. Once added, the group is selected by default. You can select the group again in the Select audiences to preview as drop-down list to deselect it. Cards targeted to a specific group display.
When one or more audiences are selected, cards that don’t have audience targeting applied also display.
If no audiences are targeted, only cards that aren’t audience targeted display. If there aren’t any cards with audience targeting applied, none display.
If you aren’t part of one of the selected audiences, you’ll only see cards that aren’t audience targeted. If none of the cards are audience targeted, you won’t see any cards.
In the following example, the preview is set for mobile devices and highlights the different views that can be created from a single dashboard using audience targeting.
| View 1 (General User) | View 2 (Users in Sales) |
|---|---|

|

|
Apply audience targeting to news posts that display in the news reader
Audience targeting is useful when you want to present information that is relevant only to a particular group of people. For example, you can target news stories about a specific project to only team members and stakeholders of the project.
To use audience targeting, you must first enable audience targeting for each pages library that contains the news stories you wish to target. For more information, see the article on enabling audience targeting for your pages library.
Apply audience targeting to news posts from SharePoint
To apply audience targeting to news posts (site pages) from your SharePoint site:
Access Settings from the SharePoint site where the news is published and select Site contents.
Navigate to the news post you want to apply audiences to and select Properties from the command bar.
Under Audience, enter the Groups you wish to target the news post to. Close the Properties panel when done.
Republish the news post for the audience targeting to take effect. News posts that are targeted to specific audiences list the groups in the Audience column.

Apply audience targeting to news posts from Connections
To apply audience targeting to news posts from Connections:
Navigate to the news post you want to apply audiences to and select Edit.
Select Page details from the command bar.
Under Audience, enter the Groups you wish to target the news post to. Close the Properties panel when done.
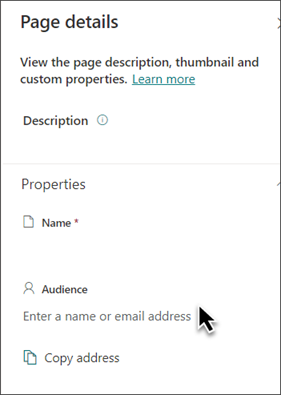
Select Update news for the audience targeting to take effect.
Apply audience targeting to links in resources
Resources are the navigation links that display beneath the dashboard. You can provide another level of customization to your Resource links by applying audience targeting. Resource links that have audience targeting applied only appear to users who are part of the selected audience.
For example, an organization could use audience targeting to provide a set of resource links for users working in Human Resources that would only be seen by those users.
Start by selecting Edit in the Resources section of your Connections experience.
Hover over the resource link and select the ellipsis.
Select Edit.
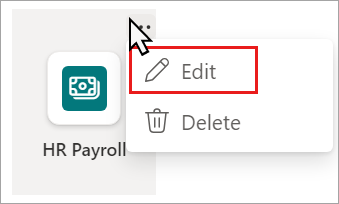
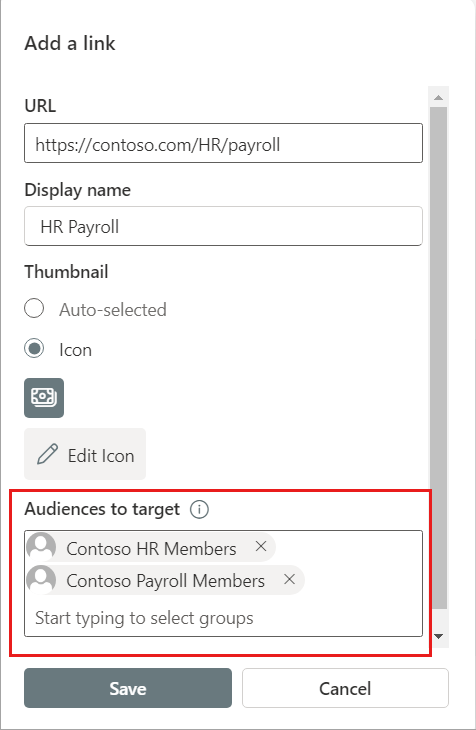
Under Audiences to target, enter the Groups that you want to see the resource link. Up to 10 audiences can be targeted.
Select Save.
Links targeted to specific audiences display an audience targeting icon in the upper left of the resource link.

For more information, see the article on customizing resources.
More resources
Create the Viva Connections dashboard


