Note
Access to this page requires authorization. You can try signing in or changing directories.
Access to this page requires authorization. You can try changing directories.
Use the Microsoft Viva Glint employee ID update feature to keep employee information current. Viva Glint admins can update users' IDs one-off or in bulk when there are:
- Duplicated IDs
- Missed leading zeros
- Acquisitions
- Rehires
- Changes in HR information system (HRIS) vendor
- Incorrect IDs
Caution
Update ID values with these processes before uploading user records with new employee IDs with the Edit Employee List and Details option. Uploading users with new IDs before updating ID values can result in DUPLICATED_EMAIL and DUPLICATED_EXTERNAL_USER_ID errors.
Update a user's employee ID
To update a user's ID:
From the admin dashboard, select the Configuration symbol and in the Employees section, choose People.
Search for and select a user to go to their Glint profile.
At the top of the page, select the pencil symbol next to Employee ID.

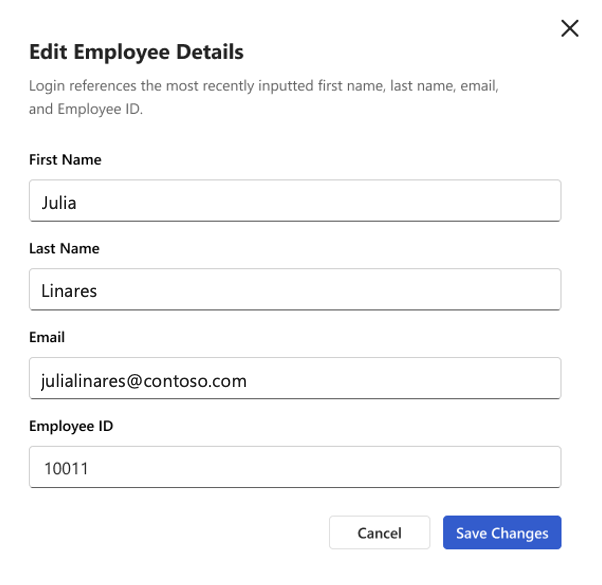
In the Edit Employee Details dialog that appears, enter a new value in the Employee ID field.
Select Save Changes to update the ID.

Important
Employee IDs must be unique for each user. If you update an ID to a value that's already in use by another user, you see this message: "Update didn't save. This Employee ID is already in use by user@contoso.com"
Update employee IDs in bulk
To update users' IDs in bulk:
From the admin dashboard, select the Configuration symbol and in the Employees section, choose People.
In the menu on left side of the People page, select All People and then choose Export.
In the Export All People dialog that appears, switch the Include all user attributes? toggle to Yes and select Export.
A .csv file of all Glint users downloads to your device. To retain leading zeros and special characters when opening the file, use the Text Import Wizard to import data into Excel.
Delete all columns except for:
First Name
Last Name
Email Address
Employee ID
Important
- To avoid upload errors, don't include Status or any other columns in the ID update file.
- The labels for required attributes in your Viva Glint tenant may differ from the columns listed in this article. For example, your organization may use Worker ID instead of Employee ID.
Delete users from the file that don't need an ID update and update values in the Employee ID column for remaining users.
Save the updated file in one of the following formats:
- .xlsx with a single sheet and no passwords or formulas
- .csv with a comma separator and UTF-8 encoding (Viva Glint accepts UTF-8 and UTF-8 with BOM encoding).
On the People page, select Import and choose the Employee ID Updates option.

Drag and drop or browse to choose your ID update file and select Upload File.
A progress bar at the top of the page shows the status of the ID update file and you receive an email when the file is ready to confirm.
When the upload is complete, select Review Upload on the People page.
In the Confirm your import dialog that appears, verify that:
The number of IDs updated is correct
There are 0 unchanged IDs
There are 0 errors found. Select Download Errors to review a file of warnings/errors if needed. To troubleshoot, see: Resolve upload errors related to employee ID updates.

Optionally, select Download Summary to download a file summarizing ID changes.
To finish the update, select Confirm Import.
Important
To prevent the ID update from canceling, confirm the import within 60 minutes of receiving the Confirm your Glint file email.
A progress bar at the top of the page shows the status of the update and you receive an email when the file is successfully imported.