Note
Access to this page requires authorization. You can try signing in or changing directories.
Access to this page requires authorization. You can try changing directories.
Metrics shape your query and help define what you want to know about your organization’s employees. In this article, we talk about how to customize metrics and add them to your queries.
Before we get started, here are a few things to know about custom metrics:
- In this release of the advanced insights app, you create custom metrics by duplicating existing metrics and changing their settings. In future releases, you’ll be able to create metrics from scratch and edit them directly.
- Some metrics aren’t customizable, including focus and hybrid metrics. Metrics available to customize have ellipses (...) to the right of their metric name. When you select the ellipses, you’ll see options to View and Clone.
How to customize a metric
Note
You’ll customize metrics while you’re creating a query. Make sure you’re in the Analysis page of the advanced insights app and have selected either a Power BI template query, person query, or meeting query.
Find your base metric
Because you'll create your customized metric from an existing metric, you'll need to first find that original metric.
While you’re building a query, select Add metrics, which brings you to the Select metrics pane.

To find the metric you want to customize, either:
- Expand each category.
- Use the category filters on the left side of the Select metrics pane.
- Use the search bar at the top of the Select metrics pane.
To learn more about a metric, including its definition, select the tooltip to the right of the metric name.
Use the Clone function
After you've found the metric you'll customize, select the ellipses (...) to the right of its metric name. In the resulting menu, select Clone.

You'll arrive at the metric editor.
Tip
If you just want to find out how a metric is set up and don’t want to create a new one, use the View option. Cloning creates an identical copy of the original metric that you can make changes to.
Customize your metric's settings
Depending on which kind of metric you want to edit—those in Power BI template or person queries, or those in meeting queries—you'll see different options in the metric editor pane for these two settings:
- Select which collaboration type(s) you want to measure
- Filter and define collaboration type(s)
Note
You're not able to edit Select what you want to measure for any metric.
For custom person and Power BI template queries
Select which collaboration type(s) you want to measure
Collaboration type is the kind of collaboration you want your metric to measure. Keep the existing type(s) or pick from these choices:
- Meetings attended
- Emails sent
- Emails read
- Chats sent
- Chats read
- Calls joined

You can set multiple types if you want. If you set multiple collaboration types, the query will return the combined time of all those collaboration types, for example, the collaboration time of emails and calls.
Filter and define collaboration type(s)
Filters narrow down your metric’s scope and tell it which data to look for.
After you selected collaboration types, you might have noticed blue containers appear. These containers match each selected collaboration type above. Within each container, you’ll need to set conditions and condition groups (collectively referred to as filters) that define the kind of data you want your metric to measure. For each category, you can set as many filters as you want.

We customize a sample metric below, where we give an example of how you might use filters.
Tip
For more information about filters, refer to our Filters article.
For meeting queries
Select which collaboration type(s) you want to measure
Each metric includes "Meetings attended" as the first collaboration type. This type is permanent and you can't remove it. However, for Number of emails sent during the meeting and Number of chats sent during the meeting metrics, you can change the second collaboration type to one of these:
- "Emails sent"
- "Emails read"
- "Chats sent"
- "Chats read"
For Number of emails sent during the meeting and Number of chats sent during the meeting, you can only have two selected collaboration types at a time.
Filter and define collaboration type(s)
Some metrics, like Number of attendees who joined the meeting on time, have existing filters. These existing filters appear in a white box and are grayed out. You can view these filters, but you're not able to edit them. If a metric has existing filters, you can still add your own custom filters to it.
Important
When you add filters for meeting query metrics, the meeting activity attribute you'll work with will always be "Attendee."
After you set "Attendee" as the Meeting activity attribute, you can pick from any attribute in your organizational data. For example, you could set this metric to include attendees whose HireDate is before April 10 2022, or attendees who are in the Asia/Seoul TimeZone.
For all query types
Select a time window
The time window is the range of hours during the day you want your metric to analyze. Pick from the following choices:
- During after hours, which are determined by Outlook working-hours settings
- During working hours, which are also determined by Outlook working-hours settings
- Throughout the day, which is a 24-hour time period
- Custom time period
If you pick a custom time period, you can set the custom value through a time picker, which appears below.

Name and publish
Name and publish contains the following sections:
- The Name field differentiates your customized metric from existing ones, so you’ll need to either add to the prepopulated name or give it a new one.
- The Description field contains the metric definition. You might also consider adding information to the description about what you changed, so other analysts in your organization understand what your customized metric does.
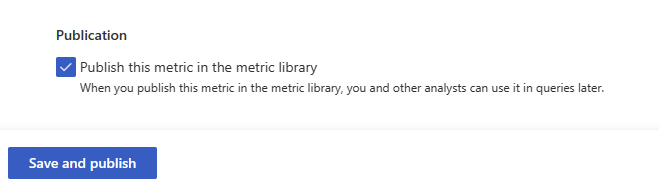
- The Publication section determines whether other analysts in your organization can find and use this metric in their queries. Select the checkbox if you want to make your metric available to others.
Save
When you're finished editing your metric, select the button at the bottom of the editor pane. If you chose to publish your metric, this button will say Save and publish. If you chose not to publish your metric, this button will say Save.
If you choose to just save your metric and not publish it, it only applies to this one query. You won't be able to use this metric in future queries you create.
How to add a customized metric to a query
You'll find customized metrics within the Select metrics pane. To get to the select metrics pane, select the Add metrics button while you're building a query.
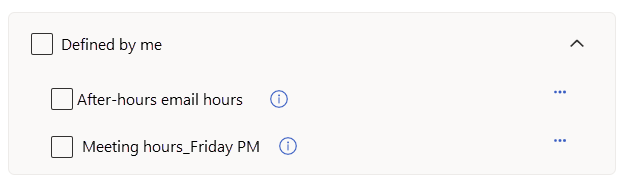
If you're looking for a metric you customized, expand the Defined by me category.
If you're looking for a metric that another analyst in your organization customized, expand the Defined by others category. If you saved your metric and didn't publish it, expand the Unpublished metrics category. Your new metric will be automatically selected. As we discussed earlier, this metric is only available for this query.
The rest of the process is the same as adding any metrics to a query. You'll select the checkmark next each metric you want to add. After you've selected all the metrics you want, select the Add to query button at the bottom of the pane.
Your metric appears in your query in progress, in the metrics box.
Sample scenario
Let's demonstrate how you might customize a metric. For this sample scenario, we'll say that you already have a query started. You want to add a metric that captures how many hours engineers are spending in after-hours meetings on Tuesdays, Wednesdays, and Thursdays.
Find a metric to customize:
Select Add metrics.
Look for a category that might contain a good starting metric. Maybe After hours collaboration will have something. Expand this category.
After-hours meeting hours sounds like a good place to start. Select the tooltip to view this metric's definition and related information.
You decide that After-hours meeting hours is the metric you want to customize. Select the ellipses (...) to the right of the metric name, and then select Clone.

Make changes to the metric settings:
The collaboration type, meetings attended, will stay the same, so leave the Select which collaboration type(s) you want to measure section as-is.
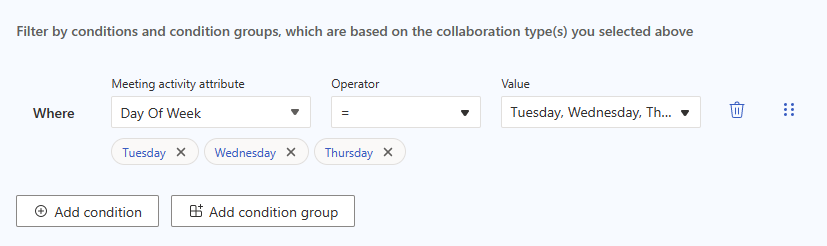
You notice there aren't any filters set up. You want this metric to apply to Tuesdays, Wednesdays, and Thursdays. Add a filter to capture these days by selecting Add condition.
Set "Day Of Week" as the Meeting activity attribute.
Set "=" as the Operator.
Select "Tuesday," "Wednesday," and "Thursday" as the Value.
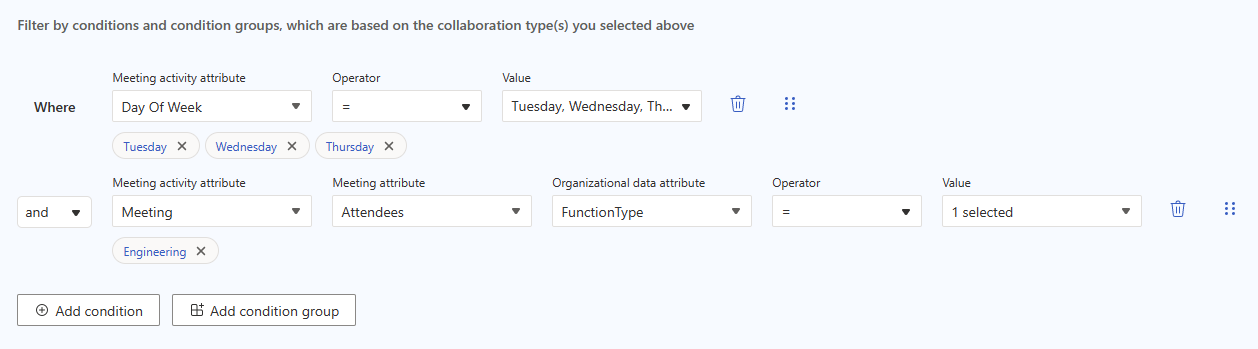
Because you wanted to know about engineers specifically, you'll need another condition. Select Add condition again.
Set "Meeting" as the Meeting activity attribute. By selecting "Meeting", you'll add another attribute box called Meeting attribute.
Set "Attendee" as the Meeting attribute. By selecting "Attendee", you'll add another attribute box called Organizational data attribute.
Set "Engineering" as the FunctionType
Set "=" as the Operator.
Set "Engineering" as the Value.
These are all the filters you'll need to set for this metric, so let's move on to the next section.
Select a time window is already set to "During after hours," so you can leave that selection as-is.
In Name and publish, choose a new name for your metric and add to its description.
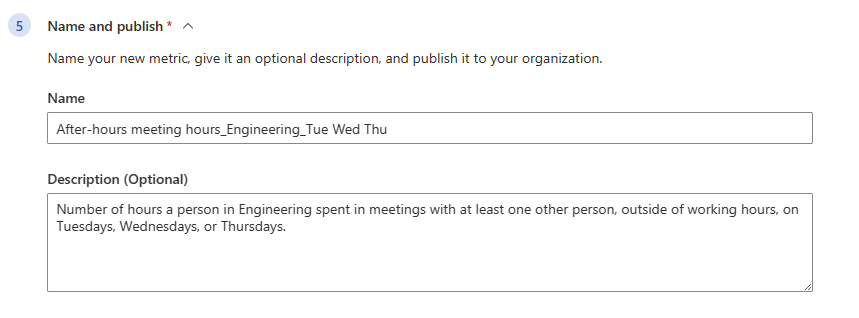
You think other analysts in your organization might use this metric at some point, so select the checkmark underneath Publication.
Select Save and publish.
In your query's Select metrics pane, expand the Defined by me category, select your new metric, and select Add to query.

