Note
Access to this page requires authorization. You can try signing in or changing directories.
Access to this page requires authorization. You can try changing directories.
The VL Central Orders workspace brings in new features and support to help you submit orders electronically with ease.
The Orders workspace is now feature complete combining feature-parity with Partner Order Entry Tool (POET) with numerous efficiency improvements and smart/automated validations and warnings. The release of the additional functionalities enable partners who currently transact in POET to seamlessly transact all of their EA business in Orders workspace in VL Central. The VLC orders workspace will further help to reduce the partner workload due to the new automation features.
This workspace was launched on February 12, 2024. We’re continuously improving this workspace to create the best experience for partners. The Simplifying the Volume Licensing (VL) experience journey map helps you to learn about improvements and the milestones along its journey.
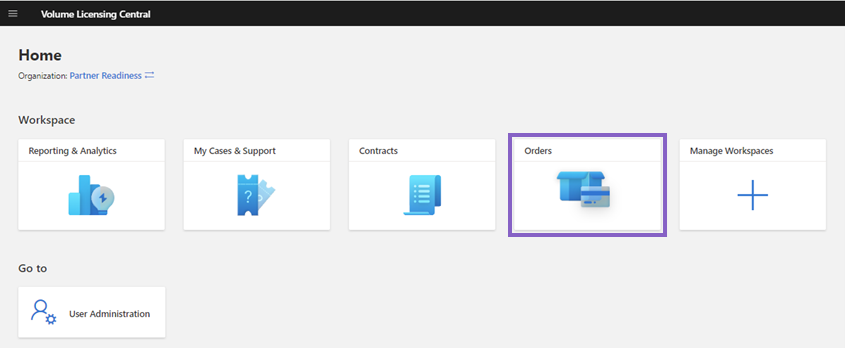
Workspace location
Orders workspace is on the Microsoft Volume Licensing Central home page under Workspace. To go to the Orders workspace, select the Orders tile.
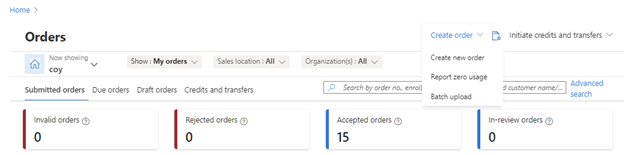
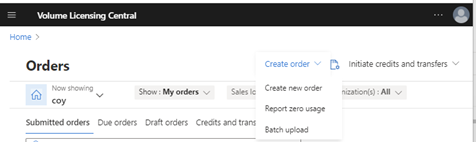
Under Order Entry, you can do the following:
- Create new orders.
- Submit batch uploads using templates.
- Submit zero usage orders.
On the Orders dashboard, you can do the following:
- Recover draft orders.
- Fix invalid orders stopped by the Regional Operations Center (ROC).
- Locate agreements with pending post-anniversary orders by using Orders Due.
- Locate orders submitted via VLC using the advanced functionality of Order Search.
Creating a new order
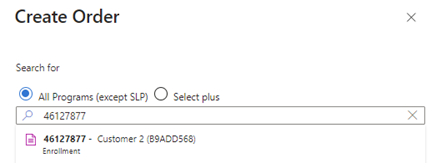
1. Search for an agreement
1.Under Create Order, search for either the Agreement Number or Customer Name.
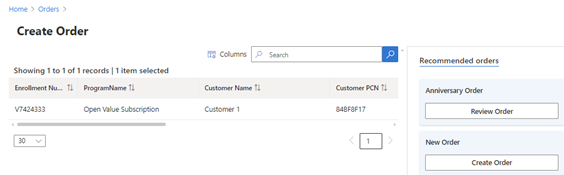
2.Review the search results and select the agreement that you want to use to create the order.
3.Select Create order for a new order or anniversary order.
2. Select and add products to the cart
An agreement number appears, and as headers with information about the customer.
A table shows available offerings established in the contract.
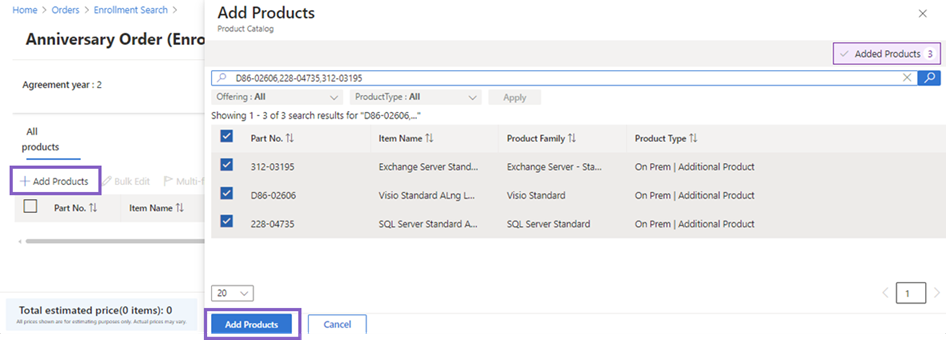
To look up the SKU, use the + Add Products function that displays a search functionality where you can search one or more SKUs.
Then select Add Products to include it in your grid order.
3. Set up product details
The SKU appears in the grid. Use the dropdown menu to select the program offering.
Specify the Quantity to purchase.
To choose the Billing Option, Usage Country, and Subscription Term, use the dropdown menus. For the Usage Date, the order might or might not be modified, depending on the program.
To apply for approved discounts, enter the Special Deal Number. You need to add this option from Columns to be visible on the grid.

4. Flag for ROC review
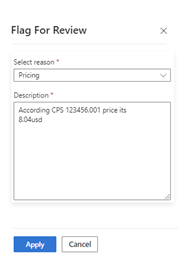
1.In the Actions section, select Flag for ROC review from the dropdown menu.

- A Flag item for ROC review message pops up. You can request the ROC to adjust the parameters of the SKU line to customize agreement conditions. This feature is available for Pricing, Billing, and Item/SKU.
5. Active warning display
When you’re entering order details, warning messages will automatically display to help correct programmatic errors. In some cases, the tool will automatically correct errors, such as in Program Offering and Usage Date. For example, if the billing option doesn’t qualify for an agreement, the billing option is automatically corrected.

6. Review cart
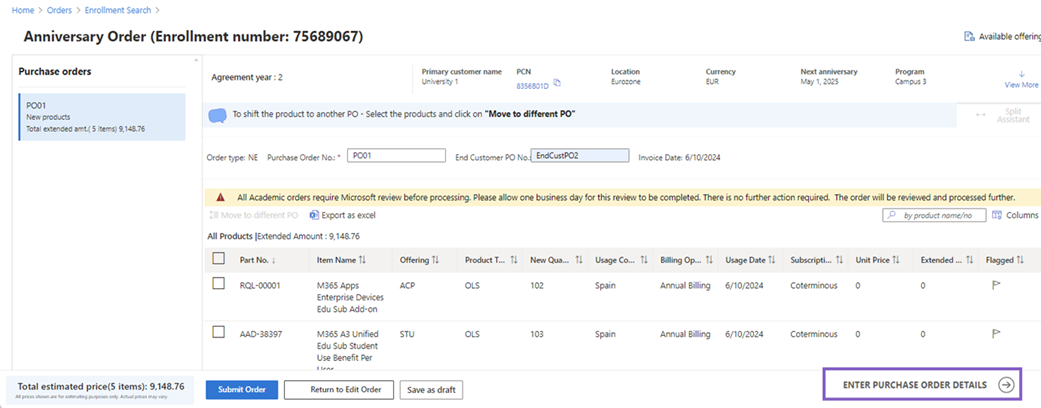
To view your selections, use the Review Cart page. Once you submit the order, you can no longer make changes. Expand additional products to review if the product, quantities, unit prices, and extended amounts match the expected customer order.
After reviewing your order, select Enter purchase order details.
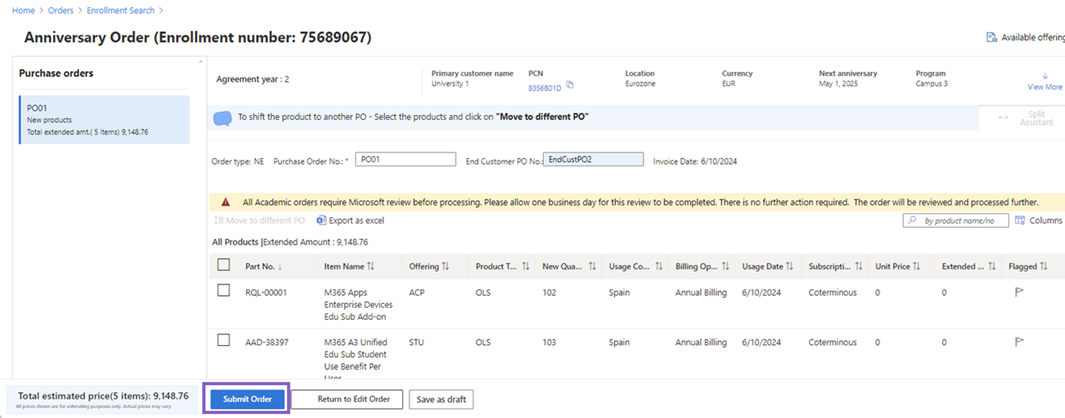
7. Enter Purchase Order details
Use the Enter purchase order details page to add information about the purchase order (PO). The PO detail segments displays fields for partner PO and end customer PO. The Send Order Confirmation Notification is turned on.
To continue, select Confirm Purchase Order Details. Select Submit Order to send to Microsoft for invoicing.
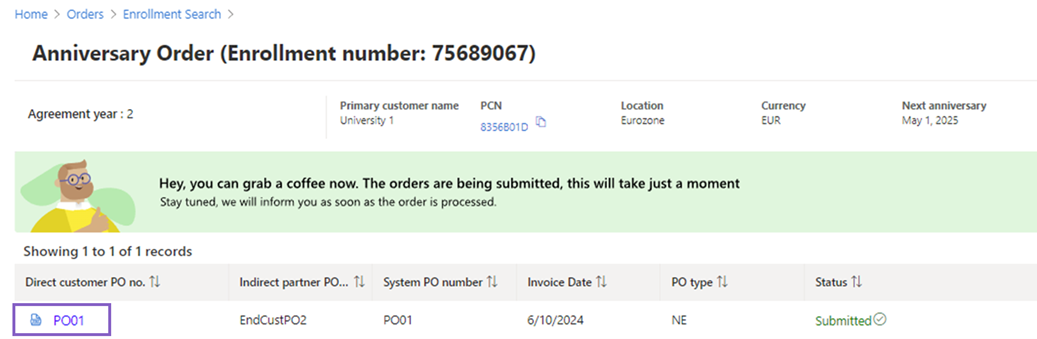
8. Order confirmation page
On this page, you can see the status of the submitted orders and download the confirmation PDF by selecting the PDF icon.
9. Duplicate SKU lines
To include the same SKU several times, use the Cloning functionality. You can do this by selecting the icon with two rectangles in the Actions column. This is specially used to report different country usage for the same order.
