Note
Access to this page requires authorization. You can try signing in or changing directories.
Access to this page requires authorization. You can try changing directories.
Active Directory Full Server Recovery
A full server recovery is necessary if you're restoring to different hardware or a different operating system instance. Bare-Metal recovery is a supported method of backup.
Keep in mind the following:
- The number drives on the target server needs to be equal to the number in the backup and they need to be the same size or greater.
- The target server needs to be started from the operating system DVD in order to access Windows PE Environment, and using the Repair your computer option.
- If you're using disk volume encryption solutions like BitLocker, make sure you test and apply the steps necessary to the server recovery plan for getting the server OS restored and started properly.
- If the target DC is running in a VM on Hyper-V and the backup is stored on a network location, you must install a legacy network adapter, with all isolation precautions needed depending on your recovery scenario.
- After you perform a full server recovery, you need to separately perform an authoritative restore of SYSVOL, as described in AD Forest Recovery - Performing an authoritative synchronization of DFSR-replicated SYSVOL.
Depending on your scenario, use one of the following procedures to perform a full restore.
Perform a full server restore with a healthy local backup using the latest image
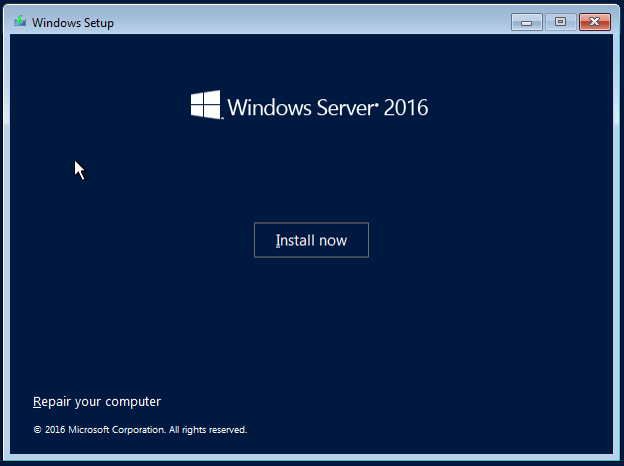
- Start Windows Setup, specify the Language, Time and currency format, and keyboard options and select Next.
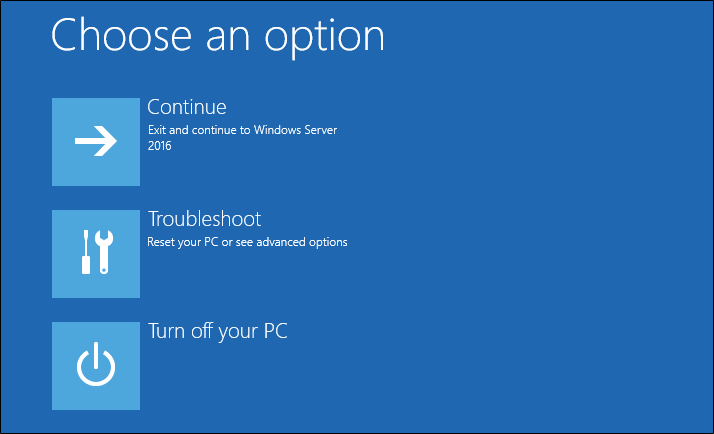
- Select Repair your computer.
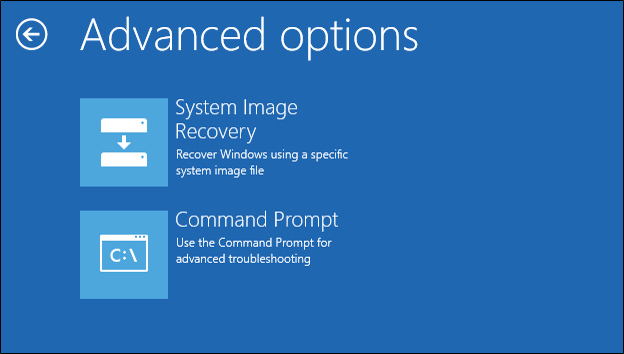
- Select Troubleshoot.
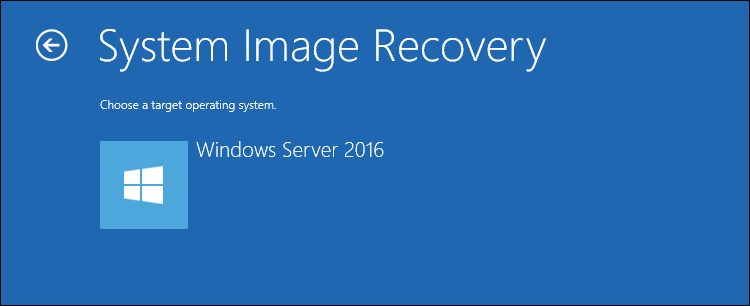
- Select System Image Recovery.
- Select Windows Server 2016.
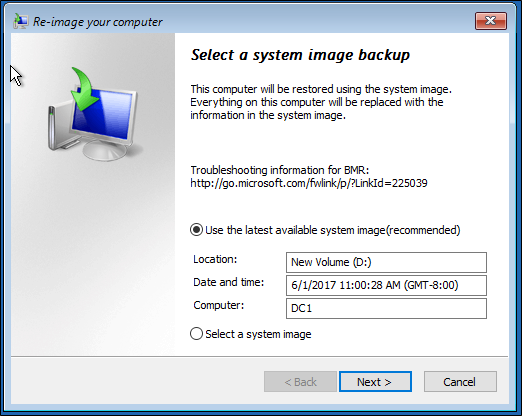
- If you're restoring the most recent local backup, select Use the latest
available system image (recommended) and select Next.
Note
If you need to select a backup from another time as the problem was introduced was introduced some time ago, select "Select a system image" and chose the known good backup.
- You'll now be given an option to:
- Format and repartition disks.
- Install drivers.
- Deselecting the Advanced features of automatically restarting and checking for disk errors. These are enabled by default.
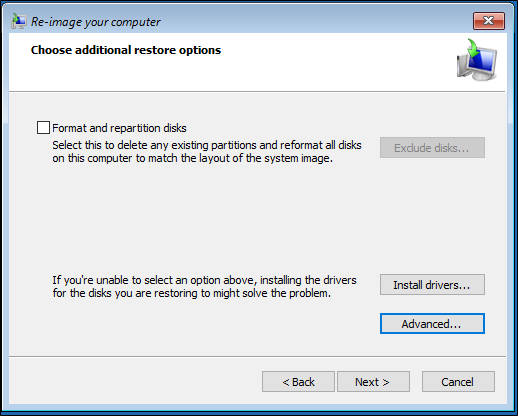
- Select Next.
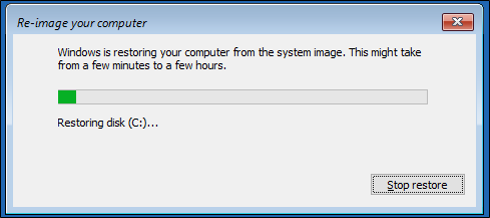
- Select Finish. You'll be prompted if you're sure you want to continue. Select Yes.
- Once this completes, perform an authoritative restore of SYSVOL, as described in AD Forest Recovery - Performing an authoritative synchronization of DFSR-replicated SYSVOL.
Perform a full server restore with any image local or remote
- Start Windows Setup, specify the Language, Time and currency format, and keyboard options and select Next.
- Select Repair your computer.
- Select Troubleshoot, select System Image Recovery, and select Windows Server 2016.
- If you're restoring the most recent local backup, select Select a system image and select Next.
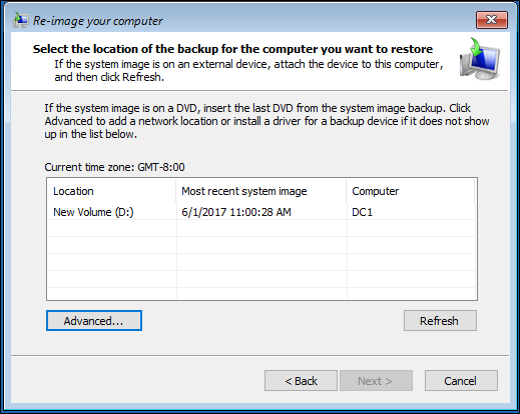
- Now you can select the location of the backup that you want to restore. If the image is local, you can select it from the list.
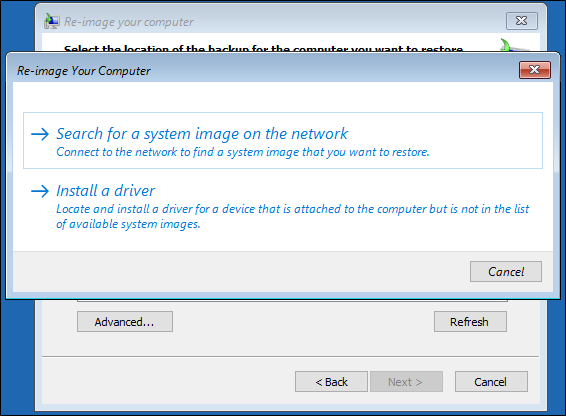
- If the image is on a network share, select Advanced. You can also select Advanced if you need to install a driver.
- If you're restoring from the network after clicking Advanced select Search for a system image on the network. You may be prompted to restore network connectivity. Select Ok.
- Type the UNC path to the backup share location (for example,
\\\\server1\\backups) and select OK. You can also type the IP address of the target server, such as\\\\192.168.1.3\\backups.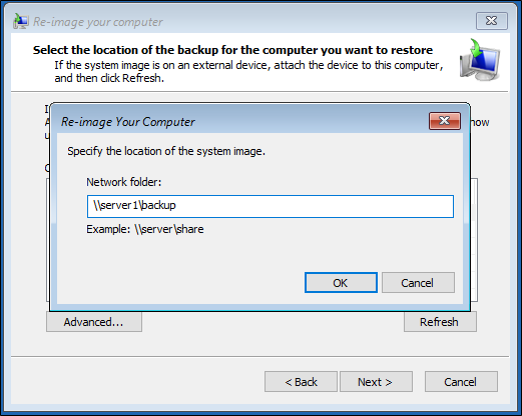
- Type credentials necessary to access the share and select OK.
- Now Select the date and time of system image to restore and select Next.
- You'll now be given an option to:
- Format and repartition disks.
- Install drivers.
- Deselecting the Advanced features of automatically restarting and checking for disk errors. These are enabled by default.
- Select Next.
- Select Finish. You'll be prompted asking if you're sure you want to continue. Select Yes.
- Once this completes, perform an authoritative restore of SYSVOL, as described in AD Forest Recovery - Performing an authoritative synchronization of DFSR-replicated SYSVOL.
Enable the network adapter for a network backup
If you need to enable a network adapter from the command prompt to restore from a network share, use the following steps.
Start Windows Setup, specify the Language, Time and currency format, and keyboard options and select Next.
Select Repair your computer. I
Select Troubleshoot, select Command Prompt.
Type the following command and press ENTER:
wpeinitTo confirm the name of the network adapter, type:
show interfacesType the following commands and press ENTER after each command:
netshinterfacetcpipv4set address "Name of Network Adapter" static IPv4 Address SubnetMask IPv4 Gateway Address 1For example:
set address "Local Area Connection" static 192.168.1.2 255.0.0.0 192.168.1.1 1Type
quitto return to a command prompt.Type
ipconfig /allto verify the network adapter has an IP address and try to ping the IP address of the server that hosts the backup share to confirm connectivity.Close the command prompt when you're done.
Now that the network adapter is working, repeat the steps above to complete the restore.
Next steps
- AD Forest Recovery - Prerequisites
- AD Forest Recovery - Devise a custom forest recovery plan
- AD Forest Recovery - Steps to restore the forest
- AD Forest Recovery - Identify the problem
- AD Forest Recovery - Determine how to recover
- AD Forest Recovery - Perform initial recovery
- AD Forest Recovery - Procedures
- AD Forest Recovery - Frequently Asked Questions (FAQ)
- AD Forest Recovery - Recover a single domain within a multidomain forest
- AD Forest Recovery - Redeploy remaining DCs
- AD Forest Recovery - Virtualization
- AD Forest Recovery - Cleanup