Note
Access to this page requires authorization. You can try signing in or changing directories.
Access to this page requires authorization. You can try changing directories.
Integrated Windows Authentication enables users to sign in with their Windows credentials and experience single sign-on (SSO) by using Kerberos or NTLM.
Why Integrated Windows Authentication fails
There are three main reasons why Integrated Windows Authentication fails:
- Service principal name (SPN) misconfiguration
- Channel binding token
- Internet Explorer configuration
SPN misconfiguration
An SPN is a unique identifier of a service instance. Kerberos authentication uses SPNs to associate a service instance with a service sign-on account. This configuration allows a client application to request the service to authenticate an account even if the client doesn't have the account name.
Here's an example of how an SPN is used with AD FS:
- A web browser queries Microsoft Entra to determine which service account is running
sts.contoso.com. - Microsoft Entra tells the browser that it's the AD FS service account.
- The browser gets a Kerberos ticket for the AD FS service account.
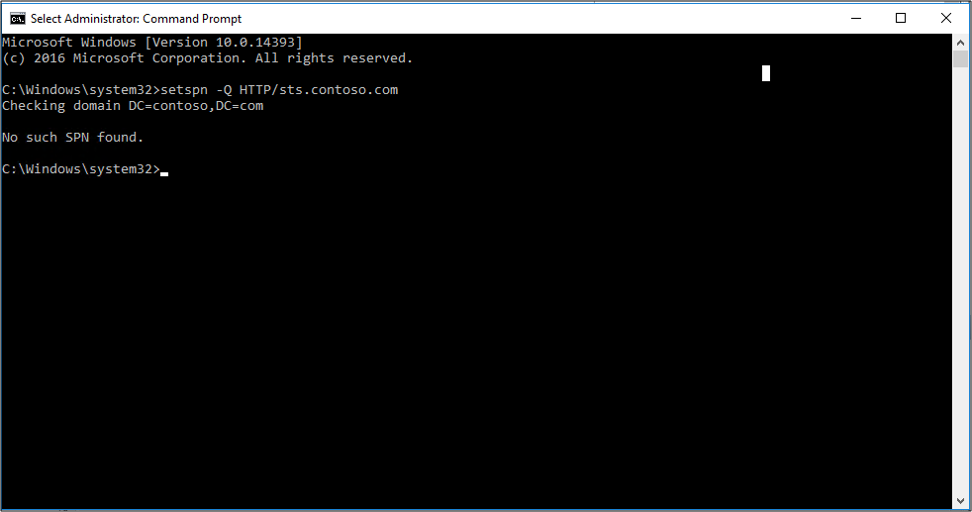
An AD FS service account with a misconfigured or wrong SPN can experience problems. When you look at network traces, you might see errors such as KRB Error: KRB5KDC_ERR_S_PRINCIPAL_UNKNOWN.
By using network traces (like Wireshark), you can determine what SPN the browser is trying to resolve. Then you can use the command-line tool, setspn - Q \<spn>, and do a lookup on that SPN. You might not find it or it might be assigned to another account other than the AD FS service account.
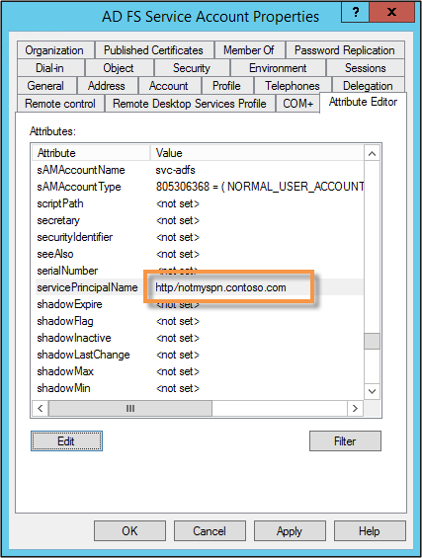
To verify the SPN, look at the properties of the AD FS service account.
Channel binding token
Currently, when a client application authenticates itself to the server by using Kerberos, Digest, or NTLM by using HTTPS, a Transport Layer Security (TLS) channel is first established. Authentication takes place by using this channel.
The channel binding token is a property of the TLS-secured outer channel. It's used to bind the outer channel to a conversation over the client-authenticated inner channel.
If a man-in-the-middle attack occurs and the SSL traffic decrypts and reencrypts, the key doesn't match. AD FS determines that something is sitting in the middle between the web browser and itself. The Kerberos authentication fails and the user is prompted with a 401 dialog instead of an SSO experience.
This problem might occur because of:
- Anything that sits in between the browser and AD FS
- Fiddler
- Reverse proxies that perform Secure Sockets Layer (SSL) bridging
By default, the AD FS setting is Allow. To change this setting, use the PowerShell cmdlet Set-ADFSProperties -ExtendedProtectionTokenCheck None.
For more information, see Best practices for secure planning and deployment of AD FS.
Internet Explorer configuration
Note
If you're using Chrome, add it to the list of user agents supported by Windows Integrated Authentication.
By default, Internet Explorer behaves in the following way:
- Internet Explorer receives a 401 response from AD FS with the word NEGOTIATE in the header. This word tells the web browser to get a Kerberos or NTLM ticket to send back to AD FS.
- By default, Internet Explorer tries to do this task (SPNEGO) without user interaction if the word NEGOTIATE is in the header. It works for intranet sites only.
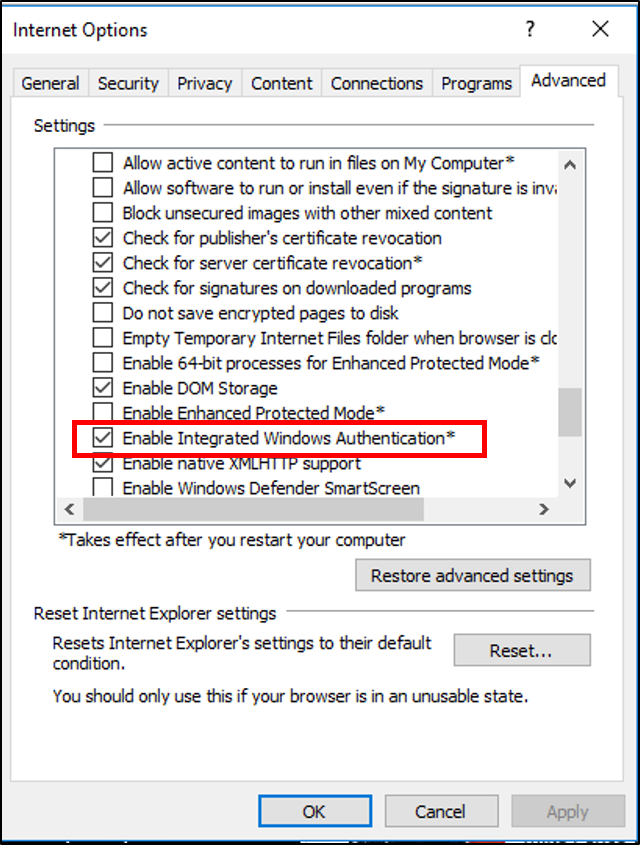
Two main things can prevent this situation from happening:
The Enable Integrated Windows Authentication checkbox isn't selected in the Internet Explorer properties. This option is located under Security > Advanced > Internet Options.
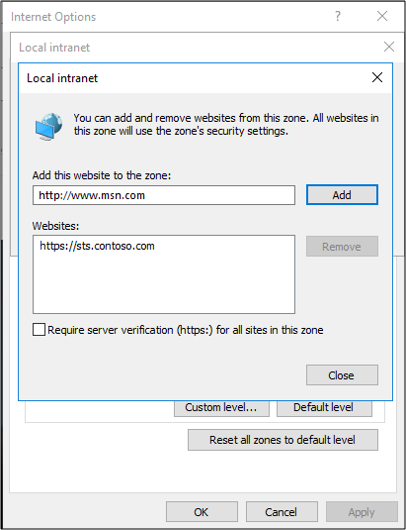
Security zones aren't configured properly:
Fully qualified domain names aren't in the intranet zone.
The AD FS URL isn't in the intranet zone.