Note
Access to this page requires authorization. You can try signing in or changing directories.
Access to this page requires authorization. You can try changing directories.
The Azure Site Recovery configuration tool is designed to manage and coordinate the replication, failover, and failback processes for on-premises and Azure virtual machines (VM) running on Arc-enabled Windows Server operating system (OS). During this public preview, the tool is only compatible with Hyper-V enabled machines, ensuring that your on-premises workloads remain operational during outages by replicating them to Azure as a secondary location.
With this feature, you don't need to manually install the Azure Site Recovery agent or link it to the Recovery Service Vault, Hyper-V site, or replication policy as this tool takes care of these tasks.
By default, an Azure storage account isn't included in this experience. To proceed, you must either create a new Azure storage account or use an existing one from your Azure subscription. Both options result in additional costs.
Note
The Azure Site Recovery configuration tool handles security by running all checks locally on your server. The results are only uploaded to your designated Azure storage account, ensuring that everything happens within the context of your account.
The Azure Site Recovery configuration tool has to be installed on every server you desire to run it on.
Prerequisites
Your device must be running an Arc-enabled on-premises Windows Server 2016 or later operating system with a minimum of 4 GB of memory.
Azure Arc must be installed and configured on your device.
You must use Windows Server Pay-as-you-go or Software Assurance license types.
The Windows Server Hyper-V role must be installed. To learn more, see Install or Uninstall Roles, Role Services, or Features.
Alternatively, users can run the following command in an elevated PowerShell window:
Enable-WindowsOptionalFeature -Online -FeatureName Microsoft-Hyper-V -All
Configure Azure Site Recovery
To configure Azure Site Recovery, the Azure Site Recovery agent needs to be installed on your device. To prepare the infrastructure, creating or using a vault, a Hyper-V site, and a replication policy is required. Once these items are in place, the Azure Site Recovery agent is installed and associates the replication policy with the cluster node. To set disaster recovery in your environment, perform the following steps:
Navigate to the Azure portal, then select your Windows server Arc-enabled device.
Note
During the public preview phase, be aware that this functionality can only be accessed in the public cloud.
Navigate to a Windows Server 2016 or later Arc-enabled Windows Server resource. This VM should be the Hyper-V host.
In the left pane, navigate to Windows management, then select Azure Site Recovery configuration (preview).
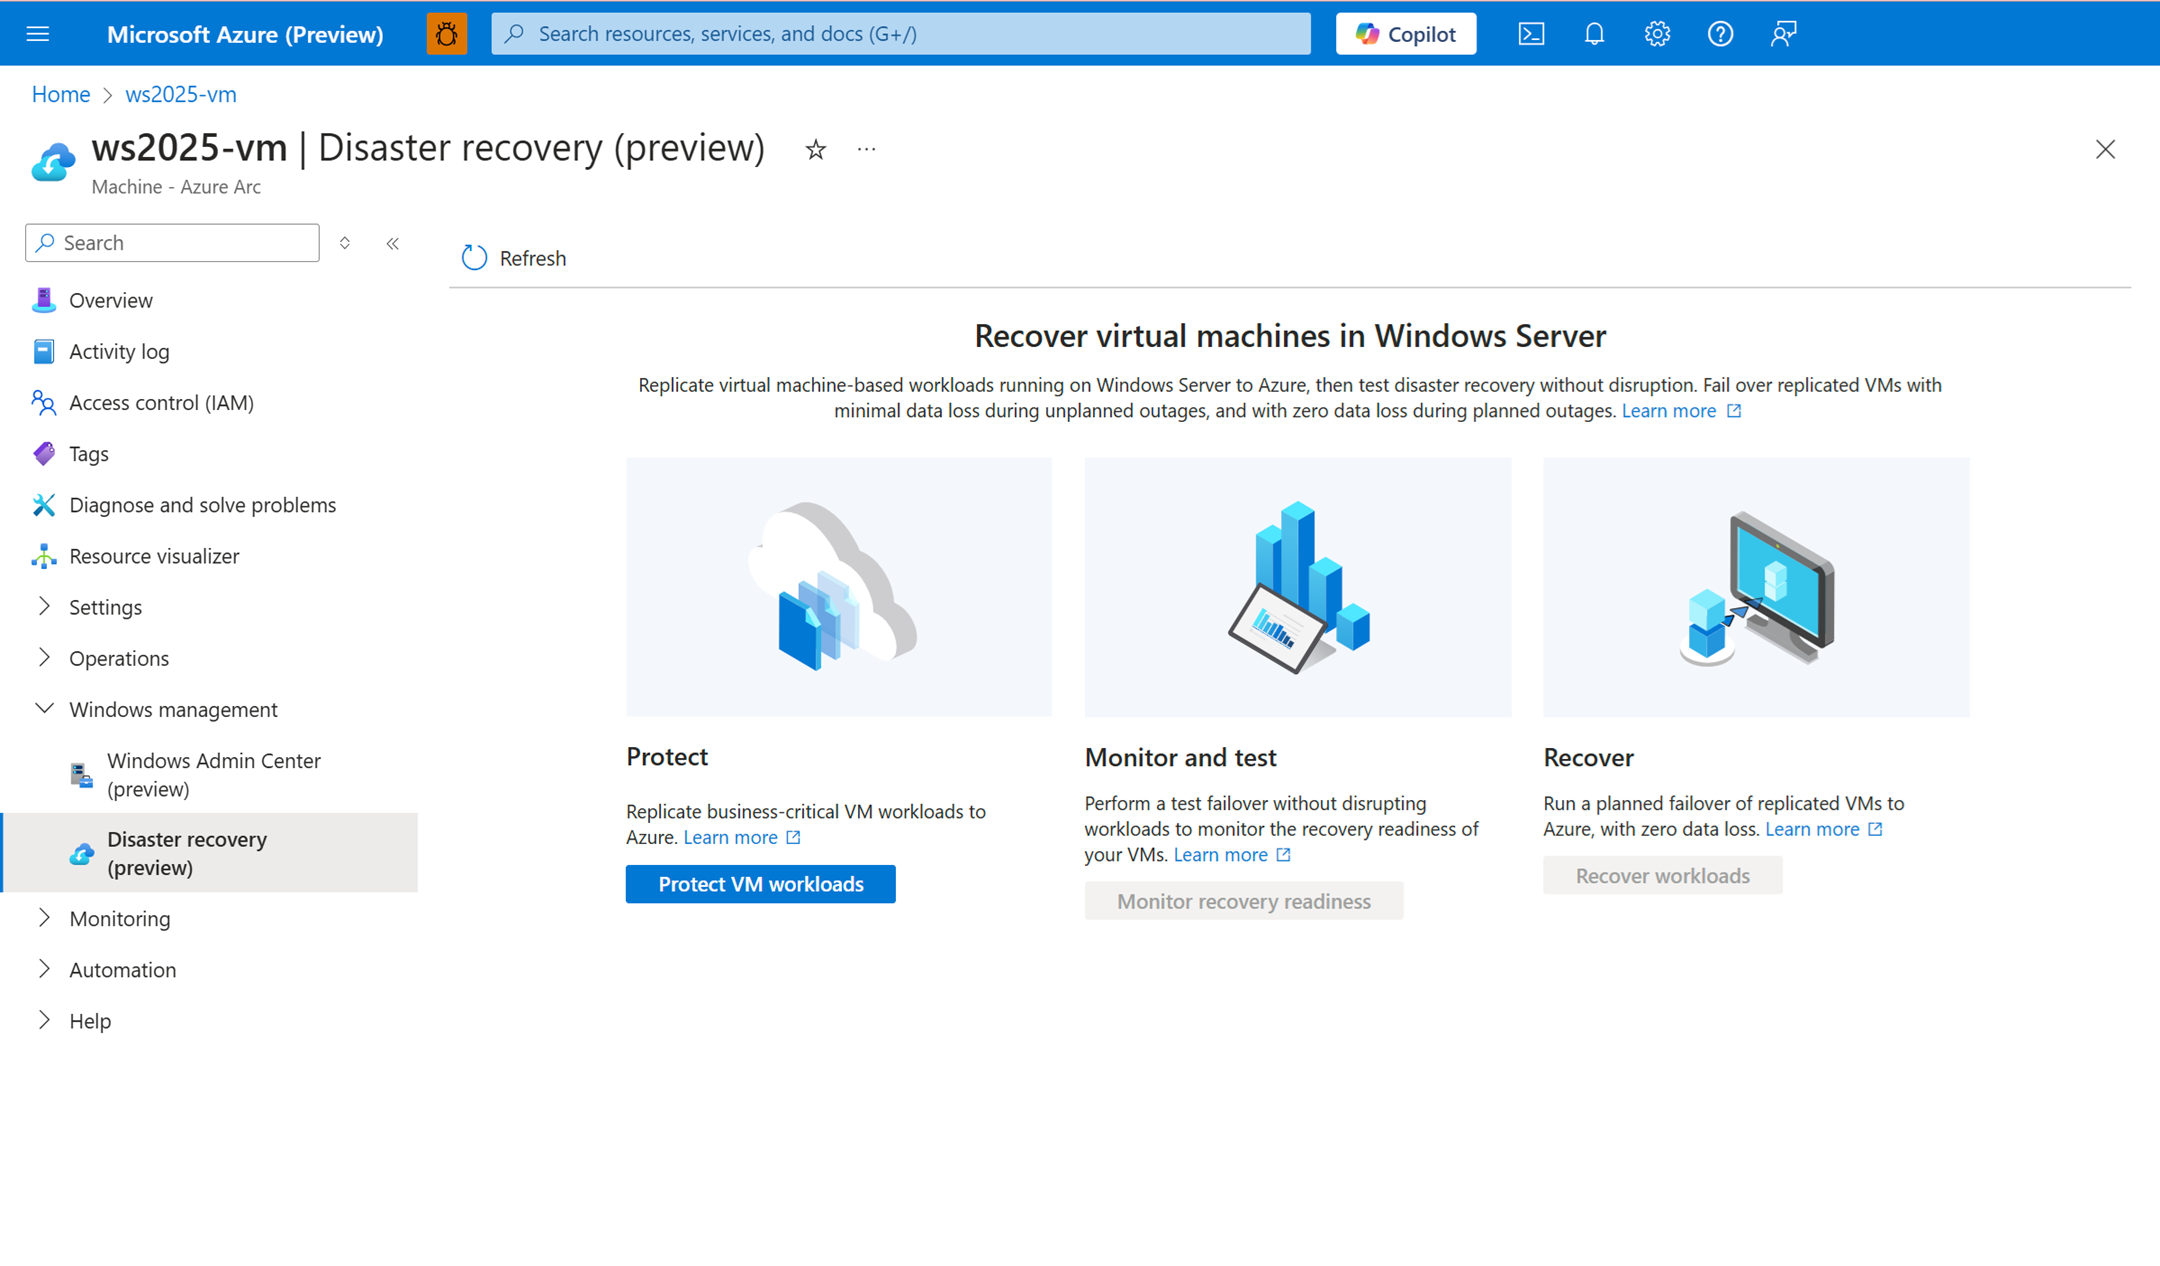
Select Protect VM workloads to access the Replicate VMs to Azure page.
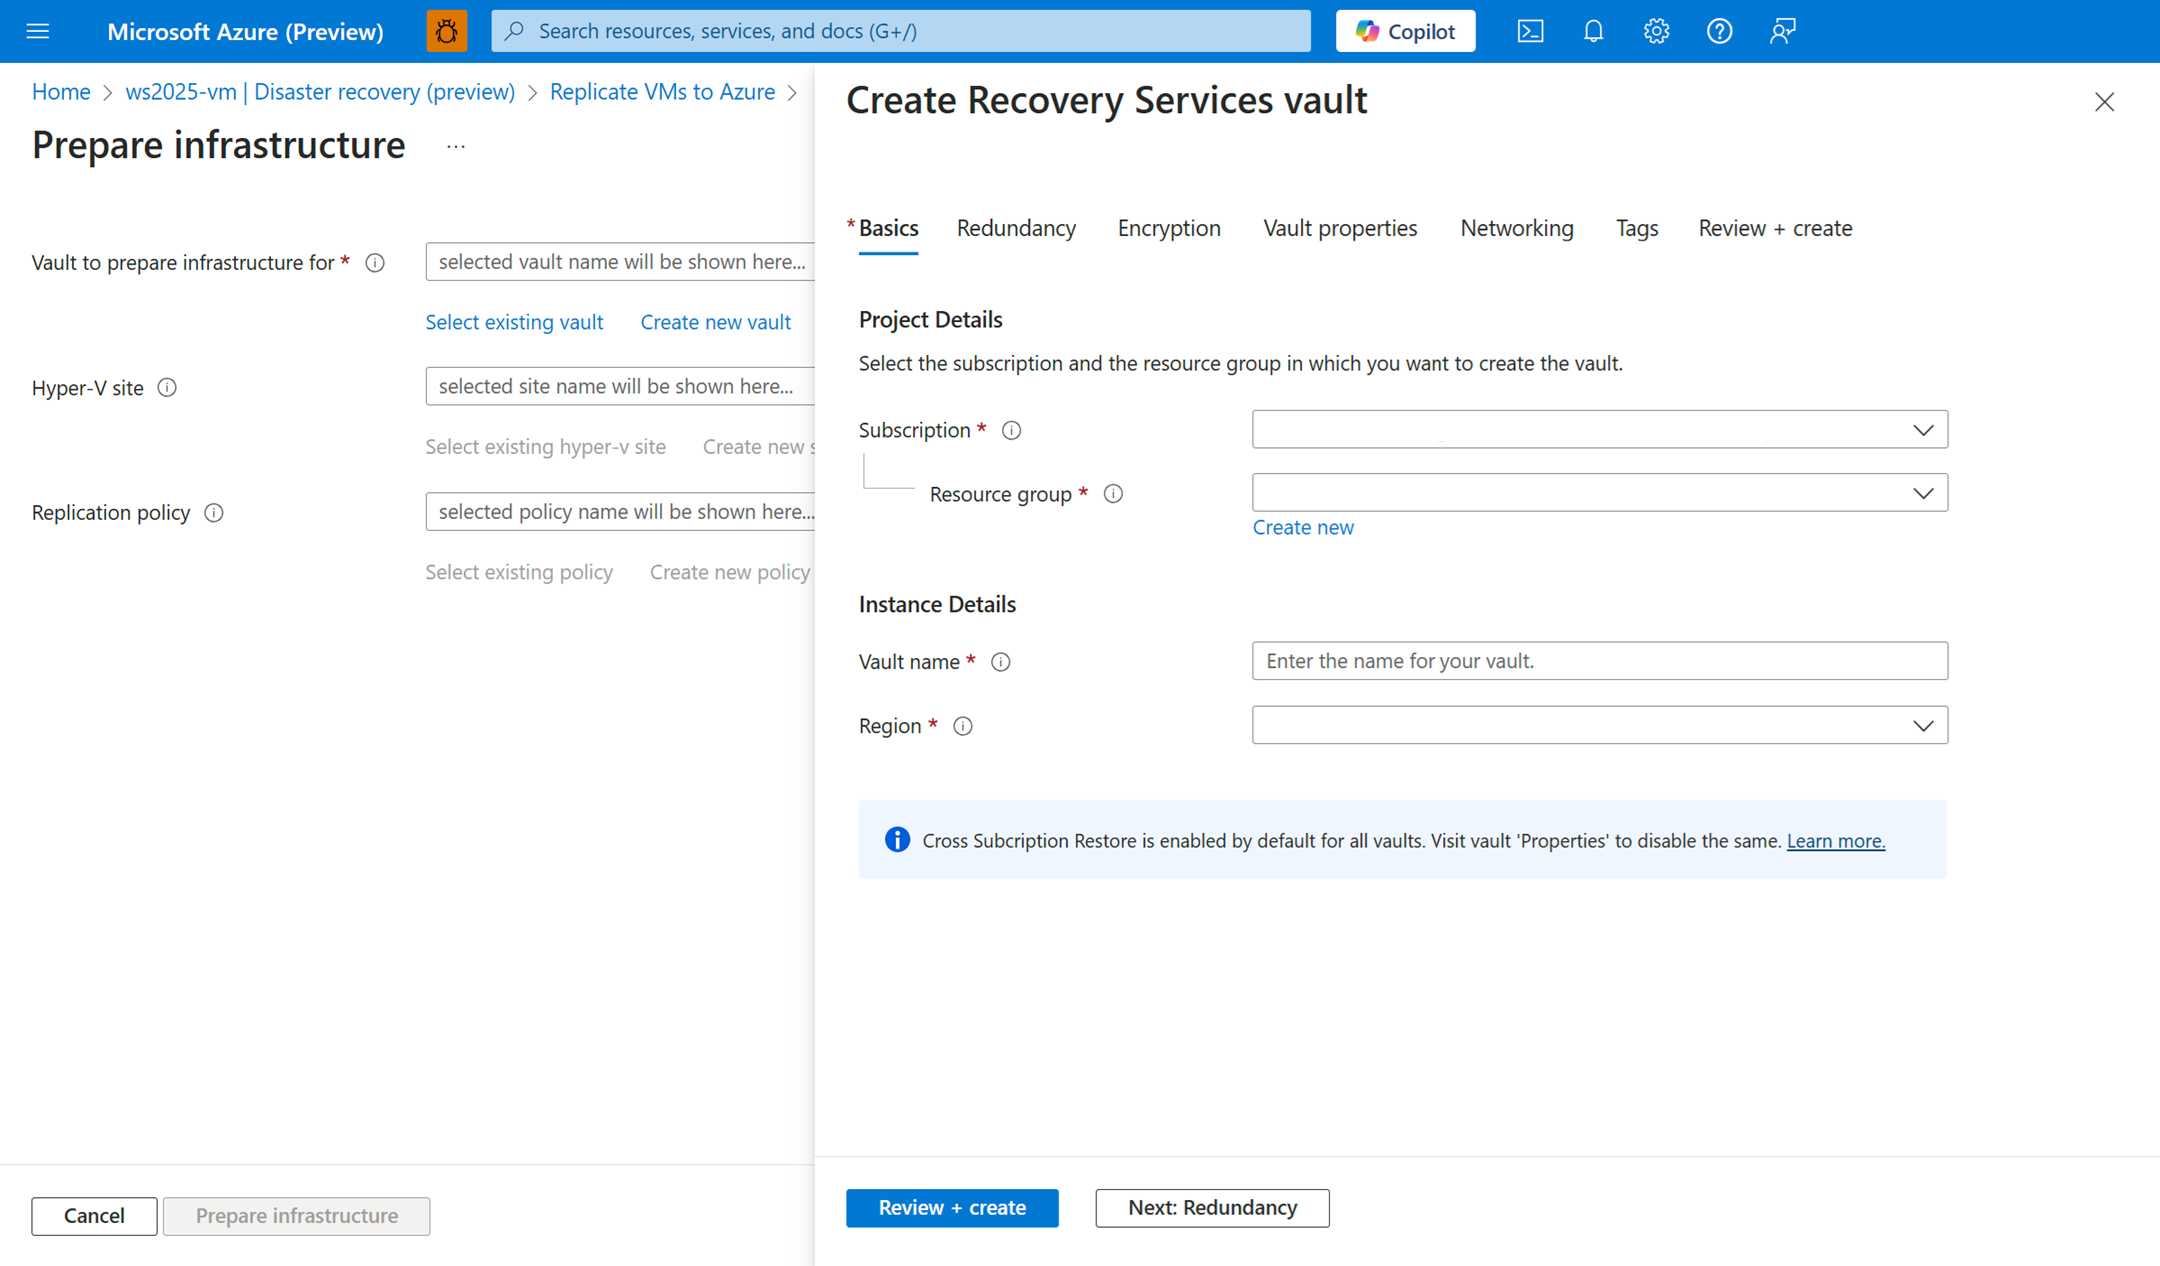
Under Step 1: Prepare infrastructure, select Prepare infrastructure.
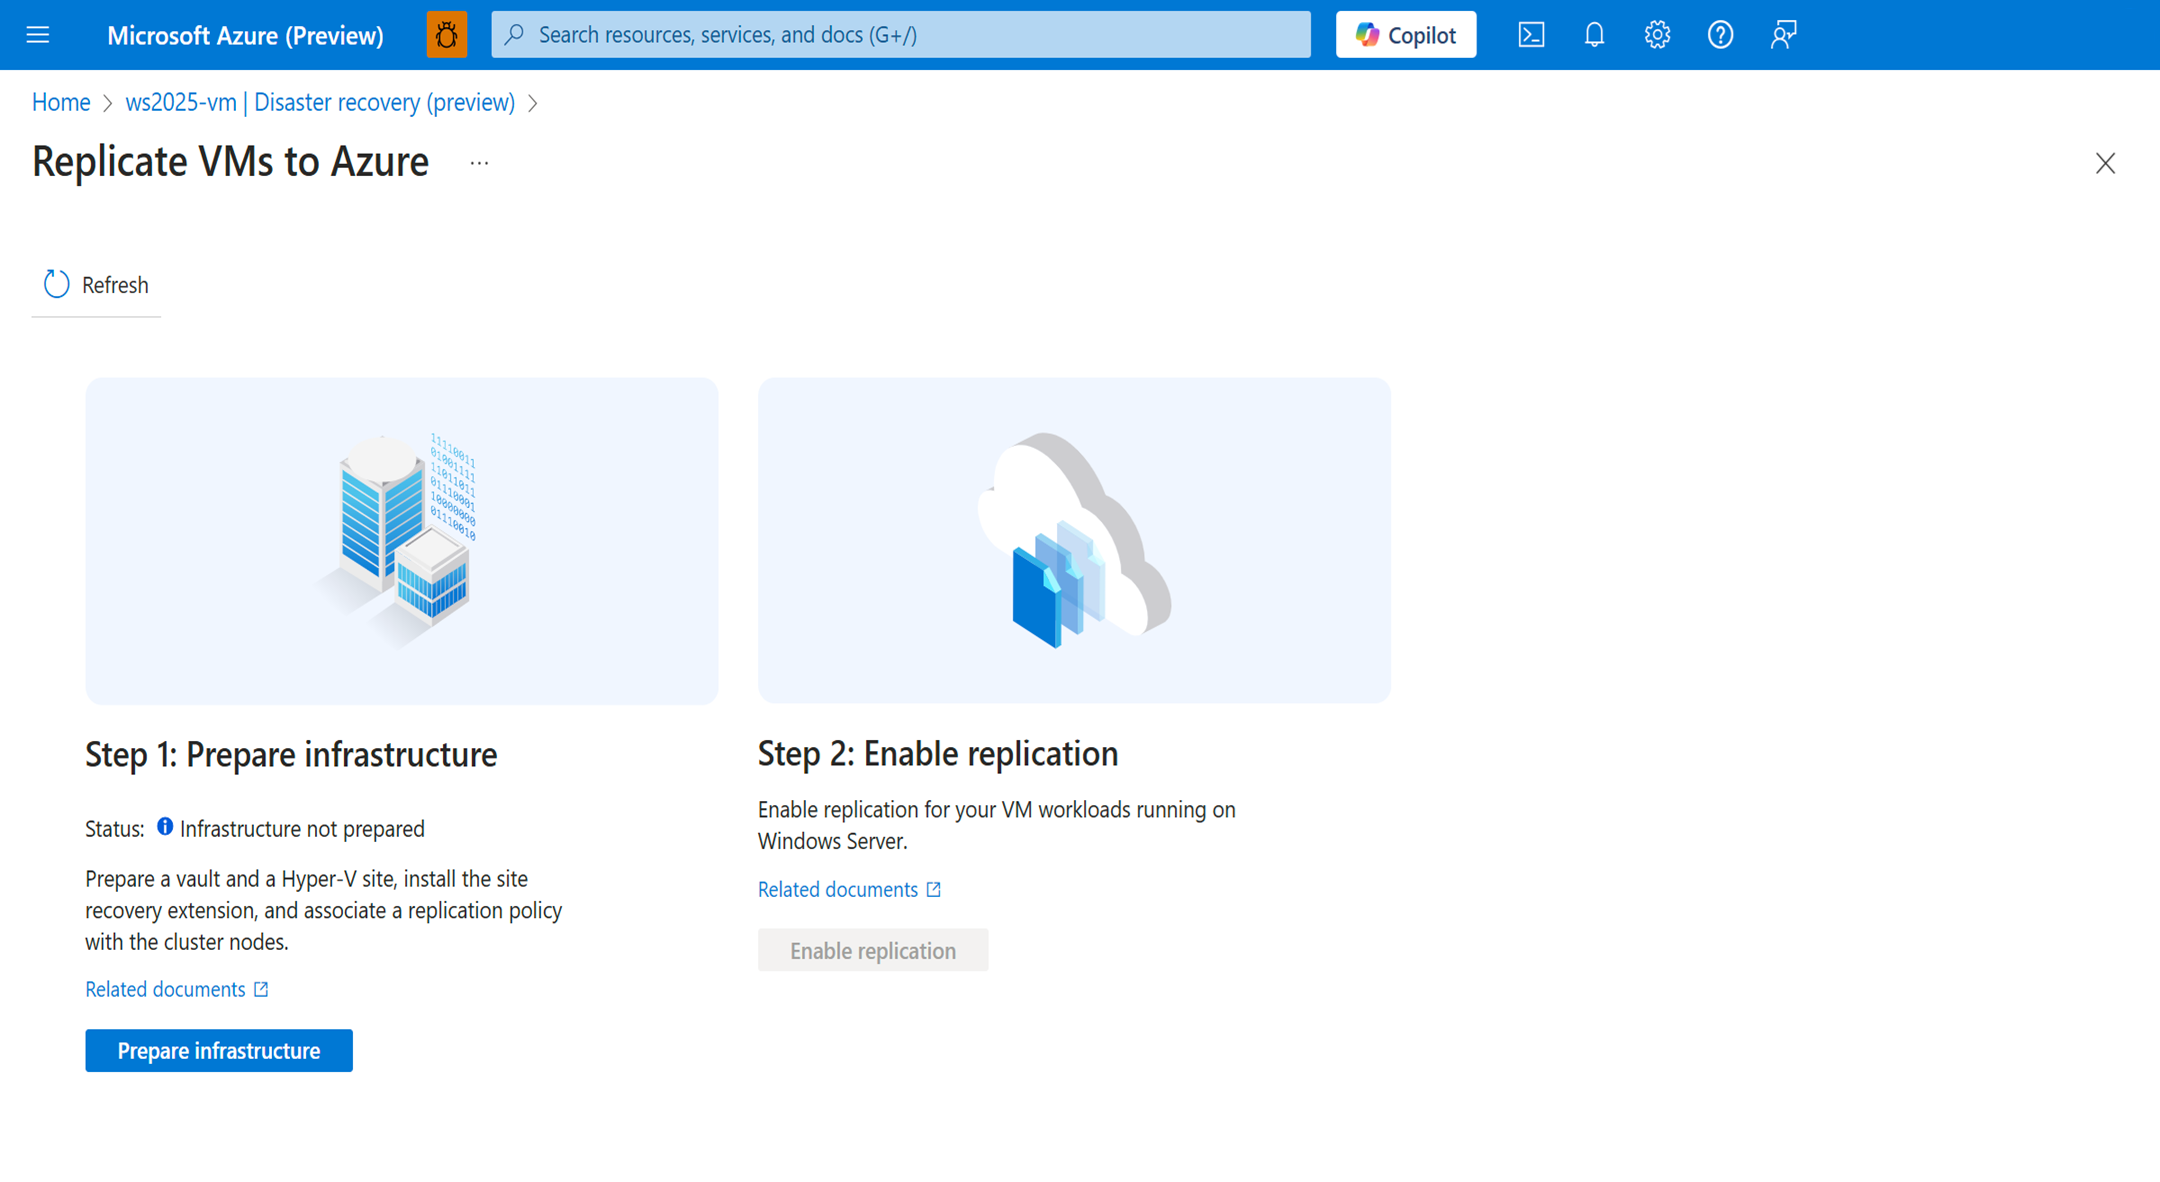
On the Prepare infrastructure page, the following needs to created unless they already exist:
- A vault for the infrastructure.
- A Hyper-V site.
- A replication policy.
If they already exist, select Prepare infrastructure. If they don't exist, create each one and select Review + create. Once all three are generated, select Prepare infrastructure.
Once infrastructure preparations are complete, and the Azure Site Recovery extension is successfully installed on the node, the Status: Infrastructure prepared successfully pop-up notification is displayed.
Lastly, select Enable replication.


Note
Preparing and installing the infrastructure agent can take up to 7 minutes. You can refresh the status by selecting the Refresh button on this page. Refreshing will navigate you back to the Replicate VMs to Azure page.
Known issues
As the Azure Site Recovery configuration tool is in preview, users might experience technical issues during the deployment process. To mitigate certain issue's, perform the following actions:
Issue: You encounter the error:
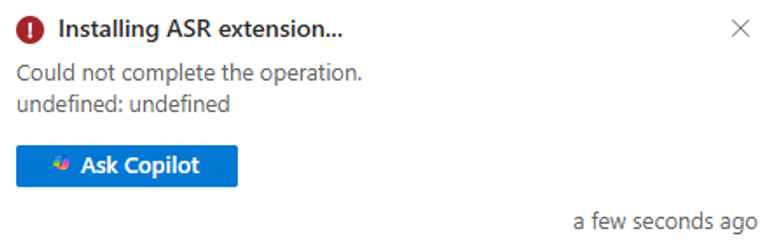
Solution: No action needed as this error is transient. Navigate to Windows management > Azure Site Recovery configuration (preview) > Protect VM workloads and check the status of your infrastructure under Step 1: Prepare infrastructure.
Issue: You encounter the following PowerShell error:
Extension failed to install. Extension returned non-zero exit code for Install: 1. Extension error output: std error: C:\Packages\Plugins\Microsoft.SiteRecovery.Dra.Windows\1.0.0.6\script\InstallAsr.ps1 : Hyper-V is not installed. + CategoryInfo : NotSpecified: (:) [Write-Error], WriteErrorException + FullyQualifiedErrorId : Microsoft.PowerShell.Commands.WriteErrorException,InstallAsr.ps1 Extension Error: C:\Packages\Plugins\Microsoft.SiteRecovery.Dra.Windows\1.0.0.6\script\InstallAsr.ps1 : Hyper-V is not installed. + CategoryInfo : NotSpecified: (:) [Write-Error], WriteErrorException + FullyQualifiedErrorId : Microsoft.PowerShell.Commands.WriteErrorException,InstallAsr.ps1Solution: This error indicates that Hyper-V might not be installed on your VM. Run the following PowerShell command with admin rights:
Enable-WindowsOptionalFeature -Online -FeatureName Microsoft-Hyper-V -All

Submit tooling feedback
To report app feedback for disaster recovery or if other issues are encountered, let us know via the Feedback Hub by performing the following actions:
Run the following PowerShell command as admin on your device to collect error logs in
.zipformat:azcmagent logs -o "C:\AzureArc\azcmagent-logs.zip"Open the Feedback Hub on your device.
Under Summarize your feedback, type Azure Arc disaster recovery (preview).
Under Explain in more detail (optional), provide us:
The Windows Server OS and edition you're managing.
Detailed instructions on how to reproduce the error encountered.
Under Choose a category, select Problem, select Windows Server from the drop-down list, select Management from the secondary drop-down list, then select OK.
Under Find similar feedback, see if other users submitted a similar issue. Then select Next.
Under Add more details and Which of the following best describes your problem?, select the most appropriate option per your case.
Under Attachments (optional), provide us:
A screenshot of the issue.
Attach the azcmagent-logs.zip file.
Lastly, select Submit to submit your feedback for review.