Note
Access to this page requires authorization. You can try signing in or changing directories.
Access to this page requires authorization. You can try changing directories.
This article presents information about commonly used ways to configure Extensible Authentication Protocol (EAP) settings. Specifically, it describes configuring EAP profiles by using XML and command-line tools. It also shows how to configure EAP settings and profiles by using various UI in Windows.
XML profiles
As outlined in XML profiles for EAP, connection profiles for Wi-Fi, Ethernet, and VPN are XML files that contain the configuration options for the connection. These profiles can be imported/exported and manually edited. When profiles are created or edited in UI (as detailed in the following sections), Windows internally sets the corresponding XML configuration options. As a result, you can use the UI to create a profile, and then export it to see the XML configuration options that were set.
Note
Not every configuration option is exposed in the UI. Depending on your scenario, you might need to manually edit the XML profile to set the desired configuration options. You then import the updated profile for deployment.
For example, when using Mobile Device Management (MDM) policies (such as Wi-Fi CSP), you need to provision the full XML profile.
An example of a Wi-Fi profile can be found in this sample.
Import and export profiles by using command-line tools
Importing and exporting profiles by using a command-line tool can be helpful in many scenarios. For example, when configuring MDM or Group Policy isn't possible, manually or scripting these commands can be the quickest option. It can also be used to export profiles after configuring them through other UI.
netsh
netsh is a command-line tool that can be used to view and configure various network related settings. For more information, see Network shell (netsh). netsh can be called from both cmd and powershell. The following table lists some common netsh commands and examples for importing and exporting profiles. You can use /? with any netsh command to get more information about the command, including syntax.
| Command | Description |
|---|---|
netsh wlan show profiles |
Shows all Wi-Fi profiles, including the profile name. |
netsh wlan show profiles name="ProfileName" |
Shows detailed information about a specific Wi-Fi profile. |
netsh wlan export profile name="ProfileName" folder="C:\Profiles" |
Exports a Wi-Fi profile to the specified folder. The folder must exist. |
netsh wlan add profile filename="C:\Profiles\ProfileName.xml" |
Adds a Wi-Fi profile from the specified file. |
netsh wlan delete profile name="ProfileName" |
Deletes a Wi-Fi profile. |
PowerShell
PowerShell is a command-line shell and scripting language that can be used to view and configure various settings. It includes various commands (cmdlets) that can be used to import and export connection profiles. You can use the Get-Help cmdlet with any cmdlet to get more information about that cmdlet, including syntax.
For detailed information about these cmdlets, see Get-VpnConnection, Set-VpnConnection, and Add-VpnConnection.
| Command | Description |
|---|---|
Get-VpnConnection |
Shows all VPN profiles, including the profile name and other details. |
Get-VpnConnection -Name "ProfileName" |
Shows summary information about a specific VPN profile. |
(Get-VpnConnection -Name "ProfileName").EapConfigXmlStream.InnerXml \| Out-File -FilePath "C:\Profiles\vpn_eap.xml" |
Exports the EAP configuration for a specific VPN profile to a file. |
Set-VpnConnection -Name "ProfileName" -EapConfigXmlStream (Get-Content -Path "C:\Profiles\vpn_eap.xml") |
Imports the EAP configuration from a file and updates the specified VPN profile with it. |
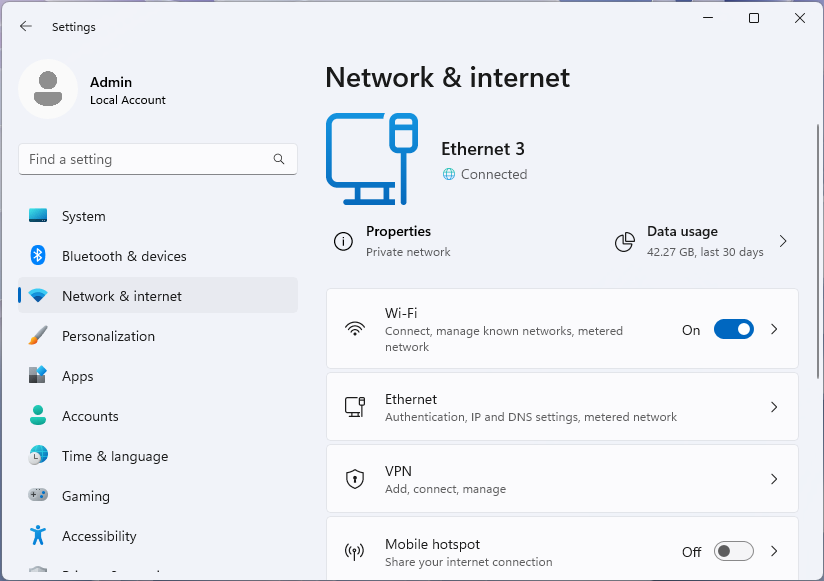
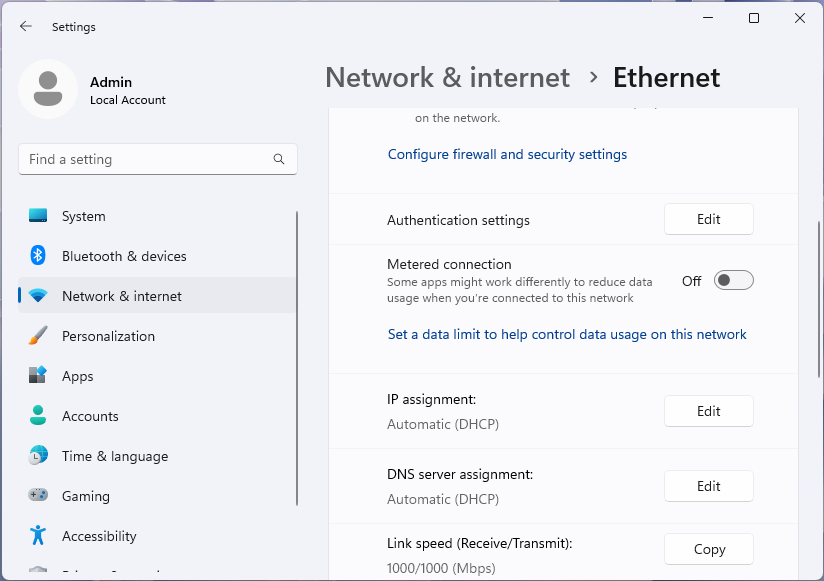
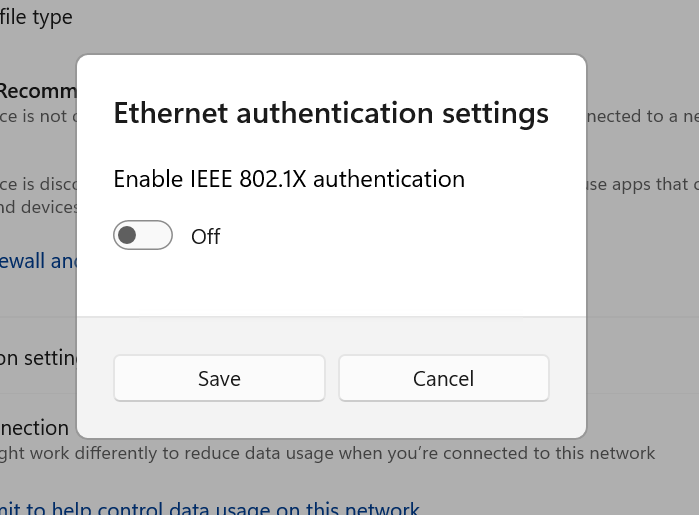
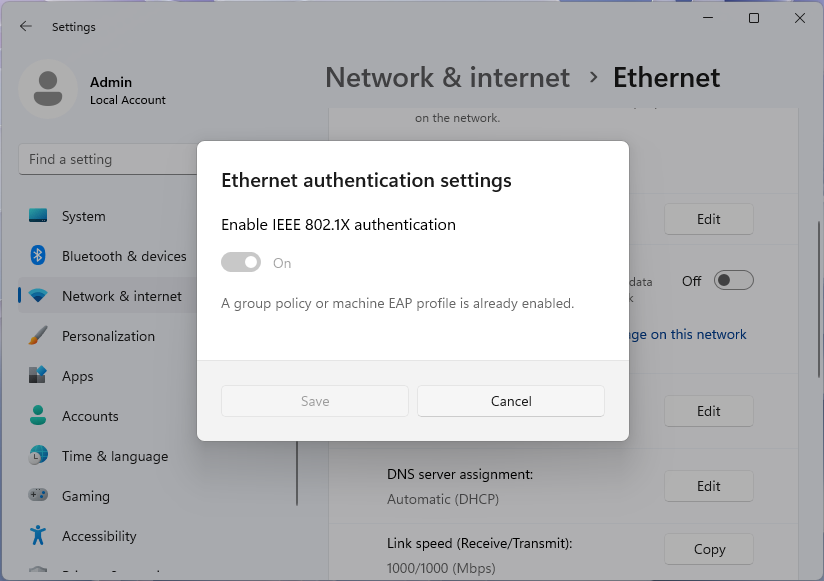
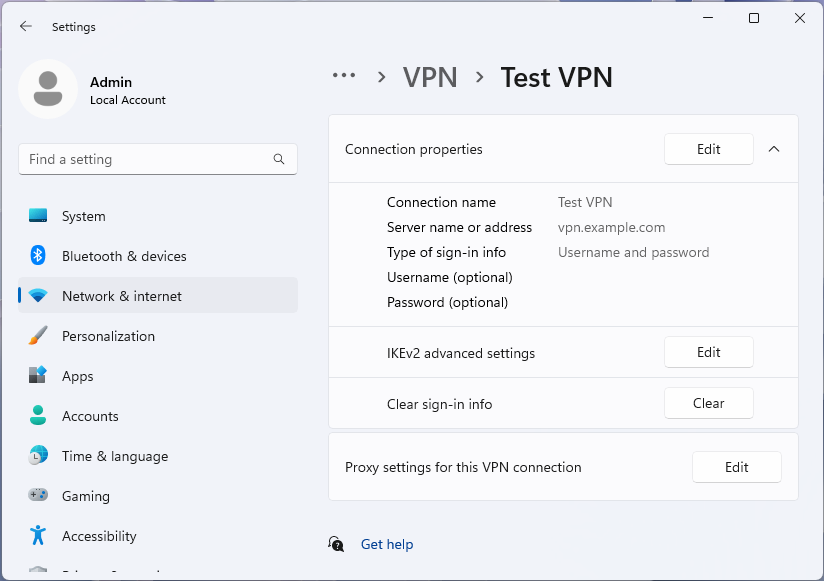
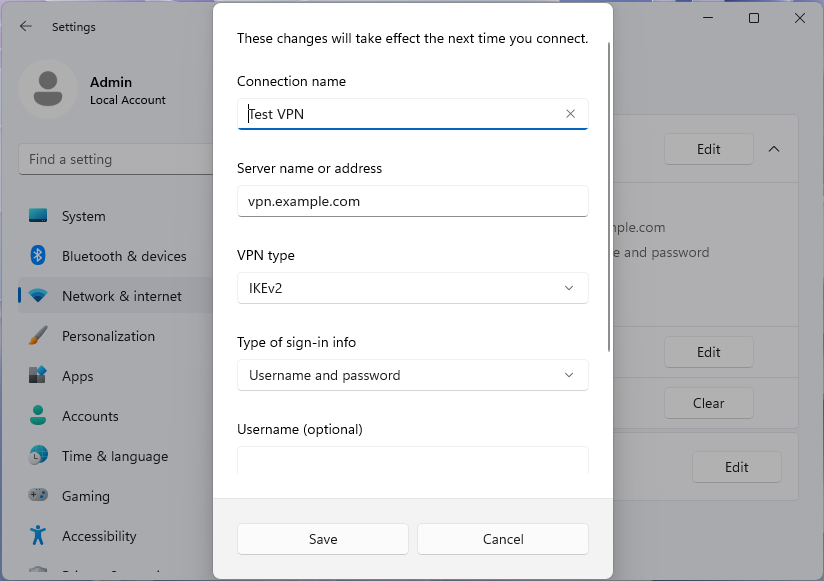
Settings app (desktop Windows)
On the Windows desktop client, many common Wi-Fi, Ethernet, and VPN settings can be configured through the Settings app. The following screenshots show the Windows 11 Settings app, but the UI is similar in Windows 10. However, certain features and options might be available only in Windows 11.
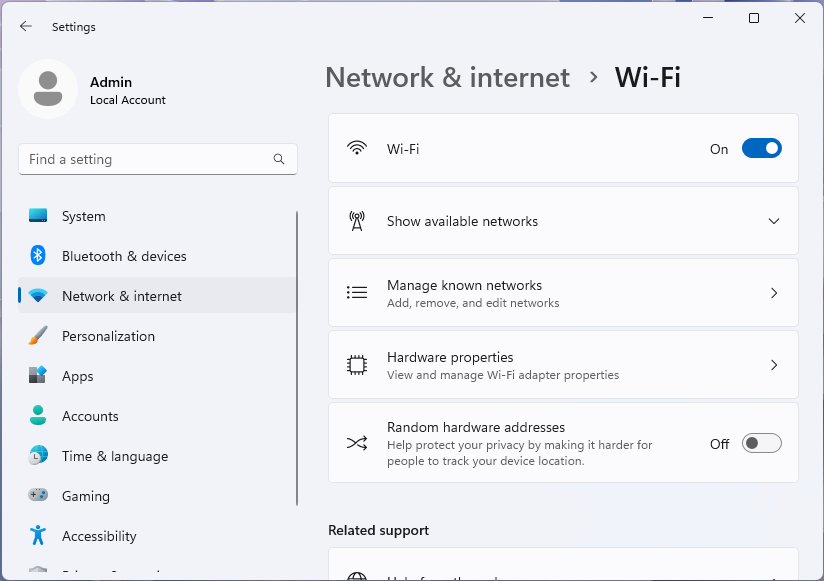
Windows 10 and Windows 11 have support for adding Wi-Fi profiles with a specific configuration (including 802.1X) in the Settings app. This setting can be found in the Settings app under Network & internet > Wi-Fi > Manage known networks > Add network:
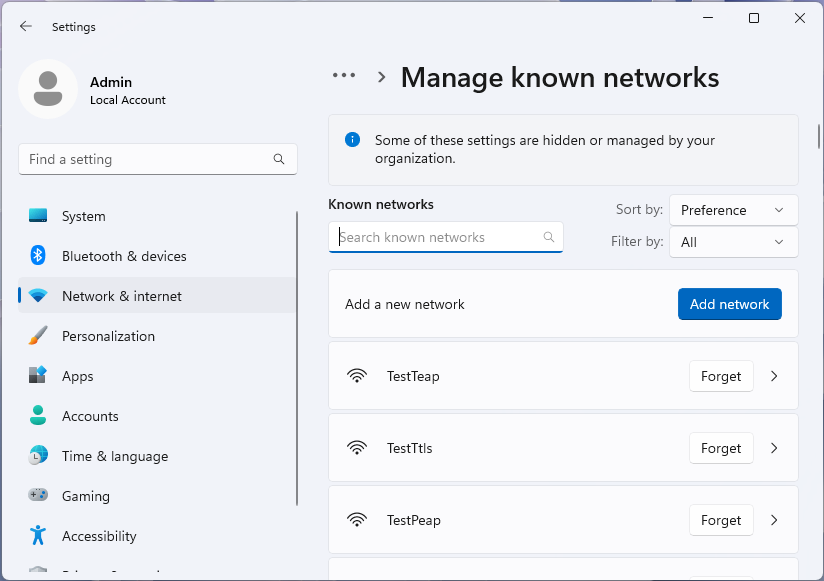
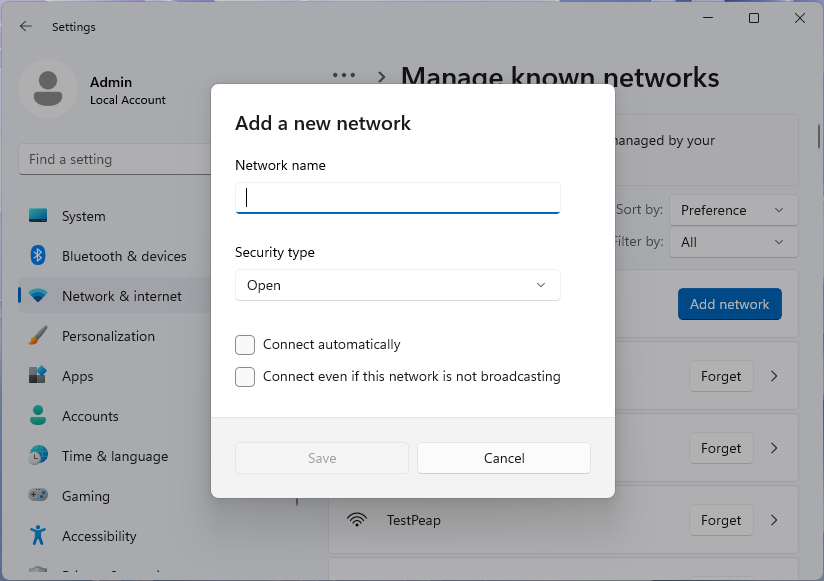
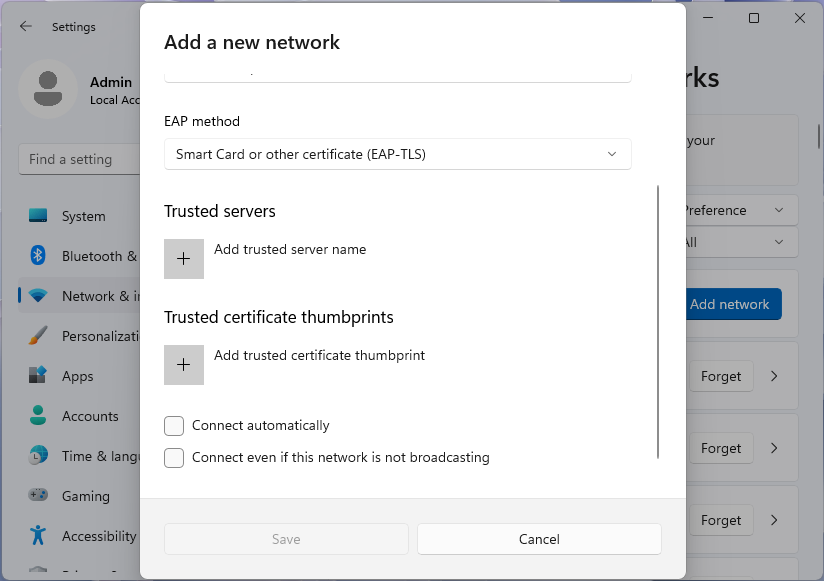
This dialog allows you to configure the SSID, security type, and other settings for the Wi-Fi profile. When a security type supporting EAP is selected, such as WPA3-Enterprise AES, the dialog shows an option to configure the EAP settings:
Tip
After the network is added, you can't edit the EAP settings by using the Settings app. To edit the EAP settings, do one of the following:
- Delete the profile and add it again with the correct settings.
- Use the
netshcommands described in netsh to manually edit the profile.

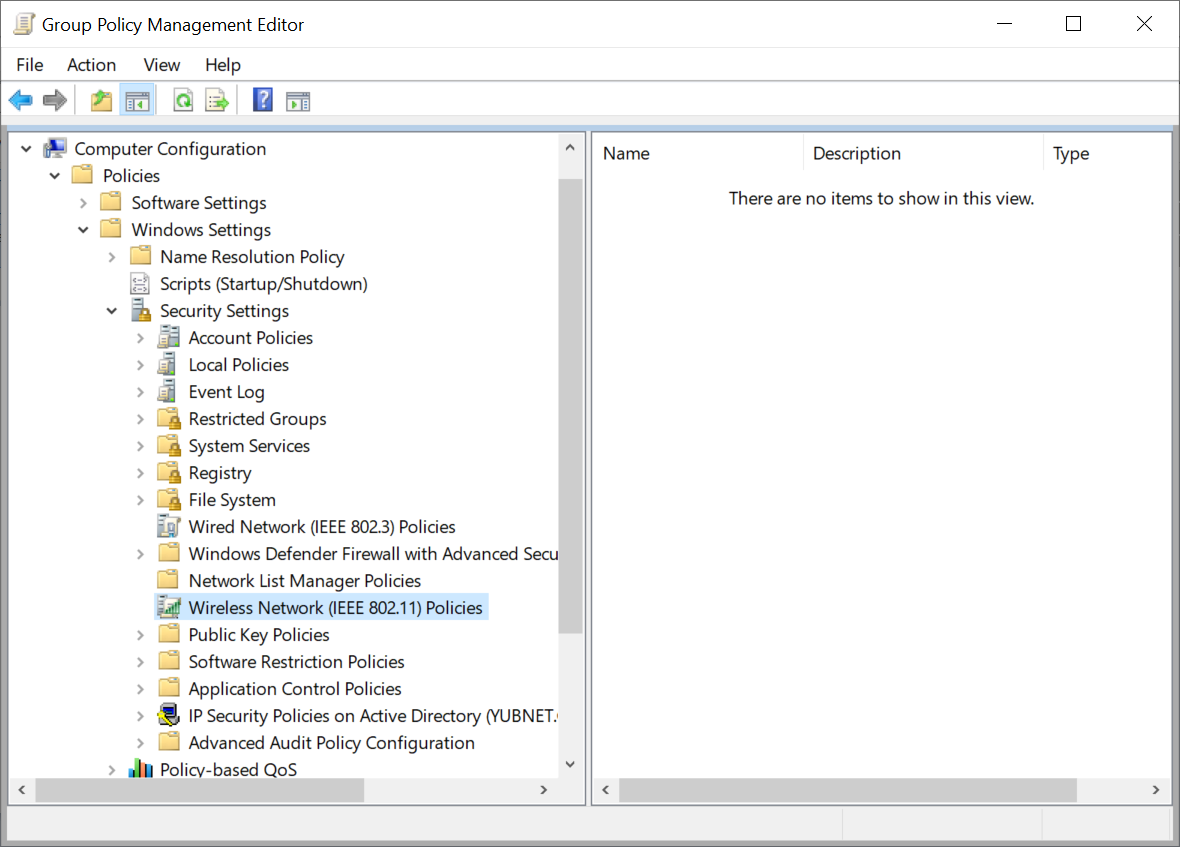
Group Policy Editor (desktop and server)
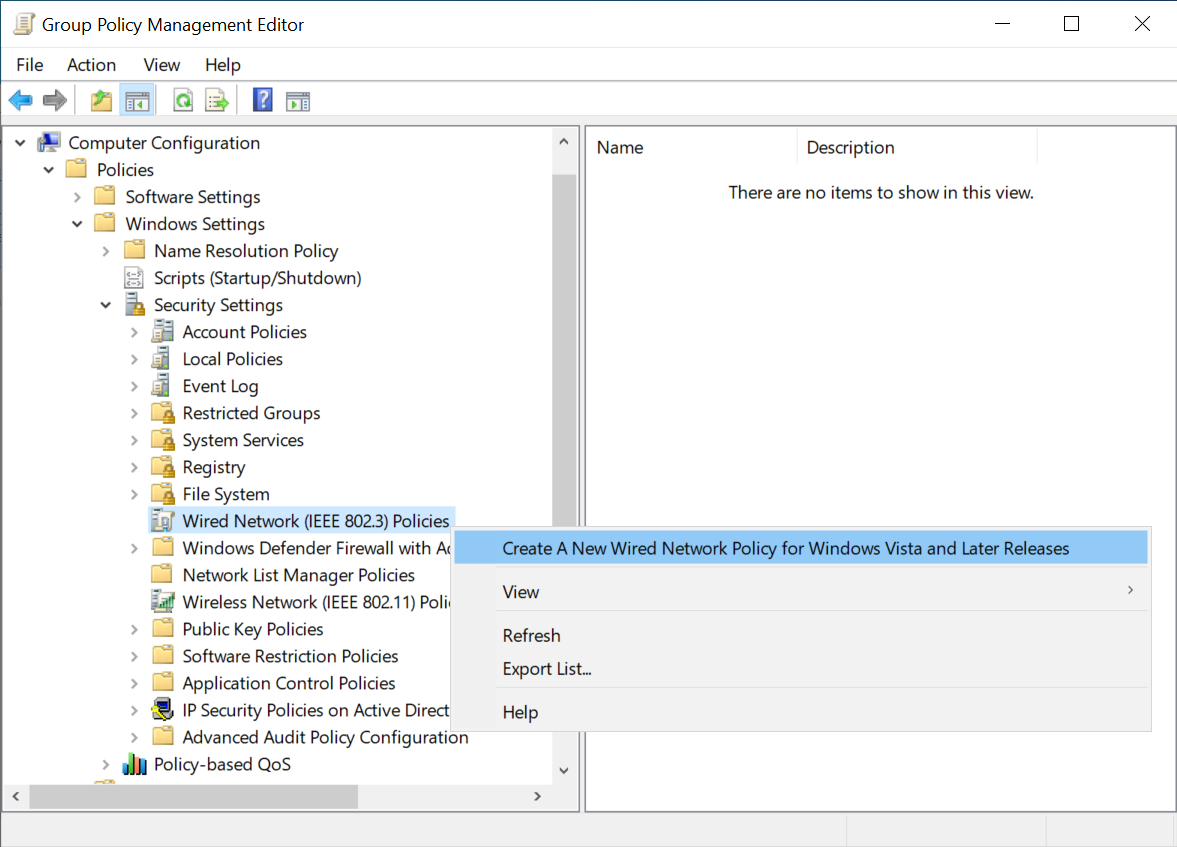
Group Policy is an infrastructure that lets you manage configurations for users and computers. By using Group Policy, you can configure Wi-Fi, Ethernet, and VPN settings based on rules that you define. The following screenshots show the Windows Server 2022 Group Policy Management Editor, but the UI is similar for the Desktop Windows Control Panel and Local Group Policy Editor. For more information on the options shown in the following screenshots, see EAP for network access.
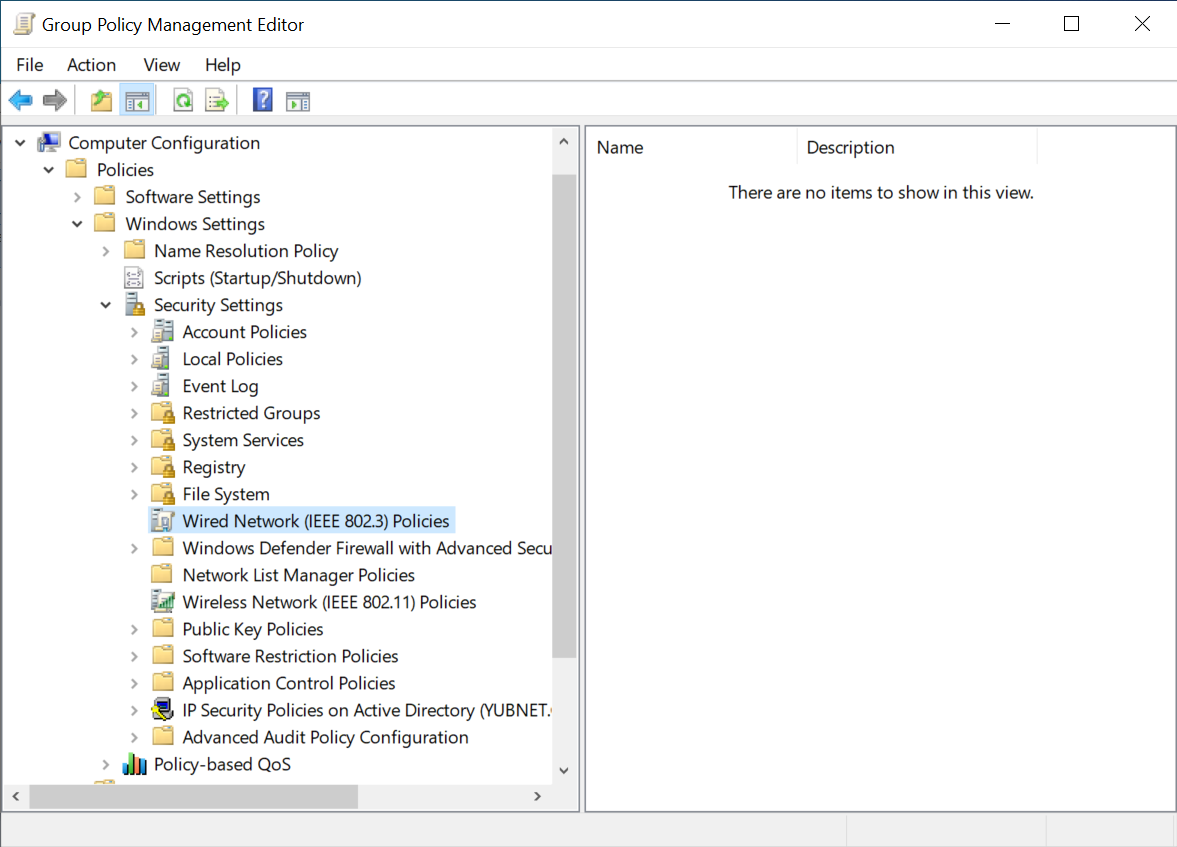
Group Policy options for Wi-Fi are located under Computer Configuration > Policies > Windows Settings > Security Settings > Wireless Network (IEEE 802.11) Policies:
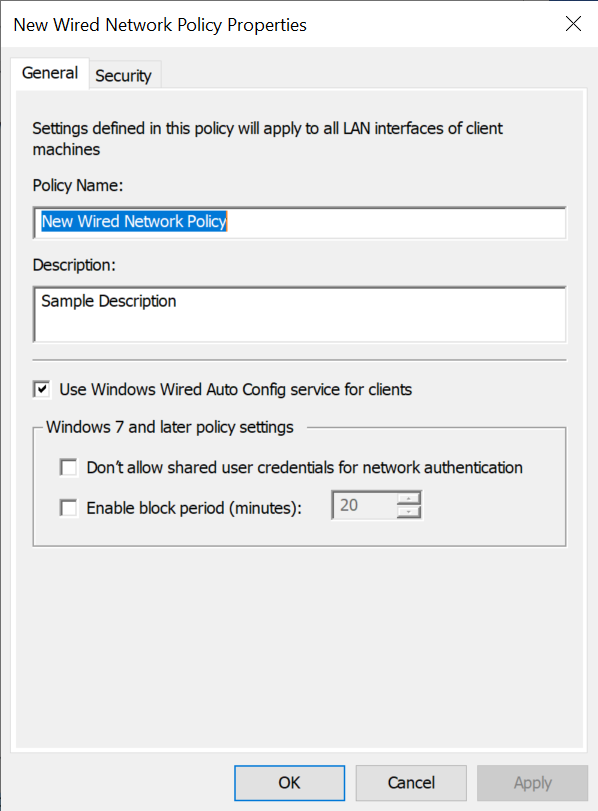
Right-clicking on Wireless Network (IEEE 802.11) Policies and selecting Create A New Wireless Network Policy for Windows Vista and Later Releases opens the New Wireless Network Policy Properties dialog:

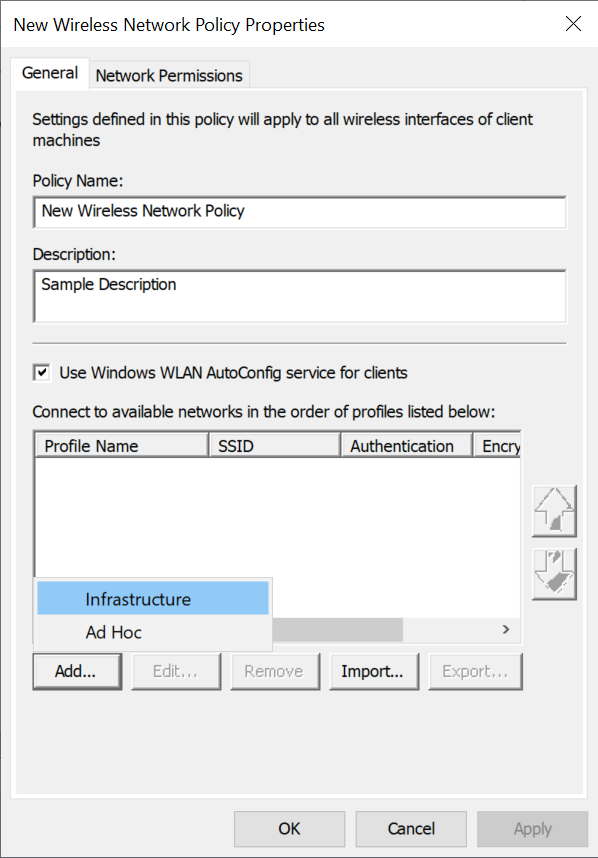
This dialog allows you to set the policy name, a description, and Add/Edit/Remove profiles, as well as Import and Export XML Profiles.
Selecting Add and then selecting Infrastructure opens the New Profile properties dialog:
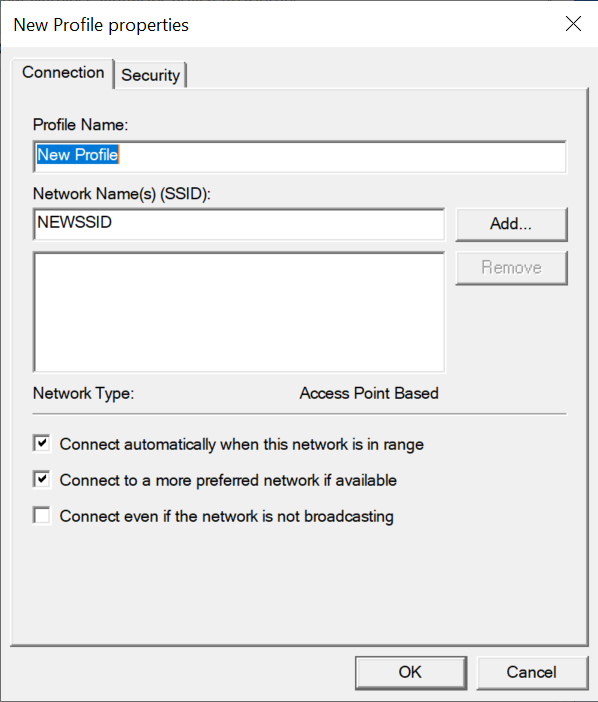
This dialog allows you to set the Profile Name and add the SSIDs that the profile applies to.
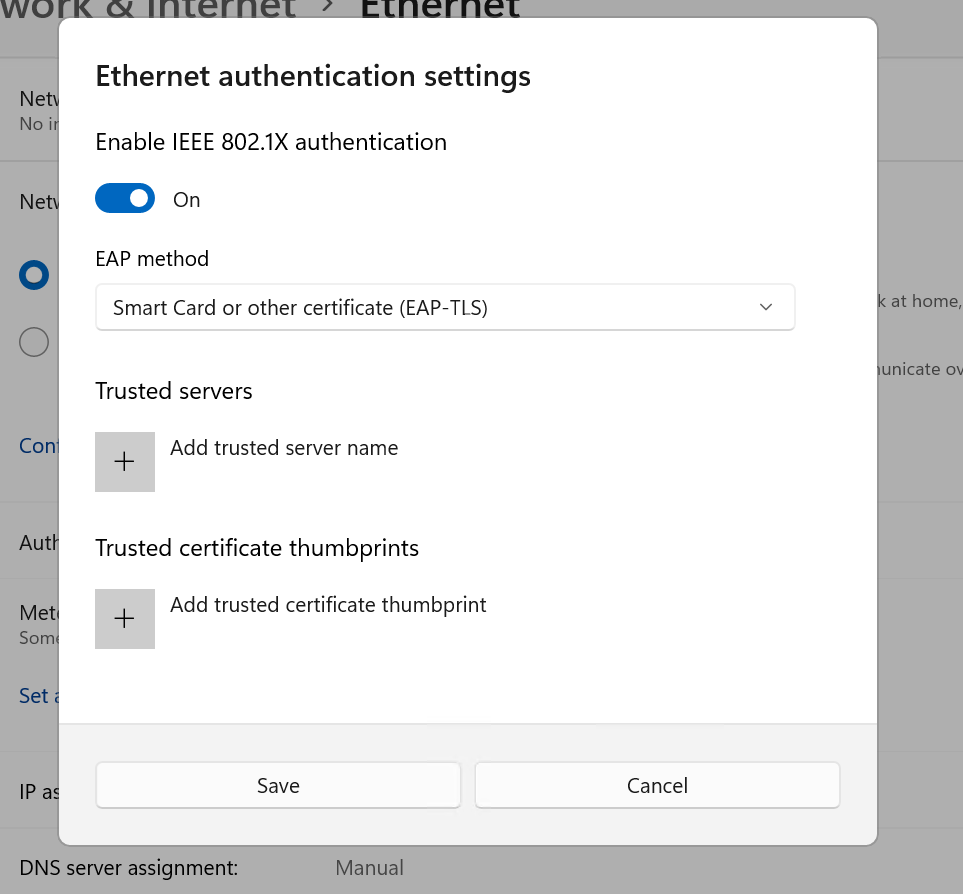
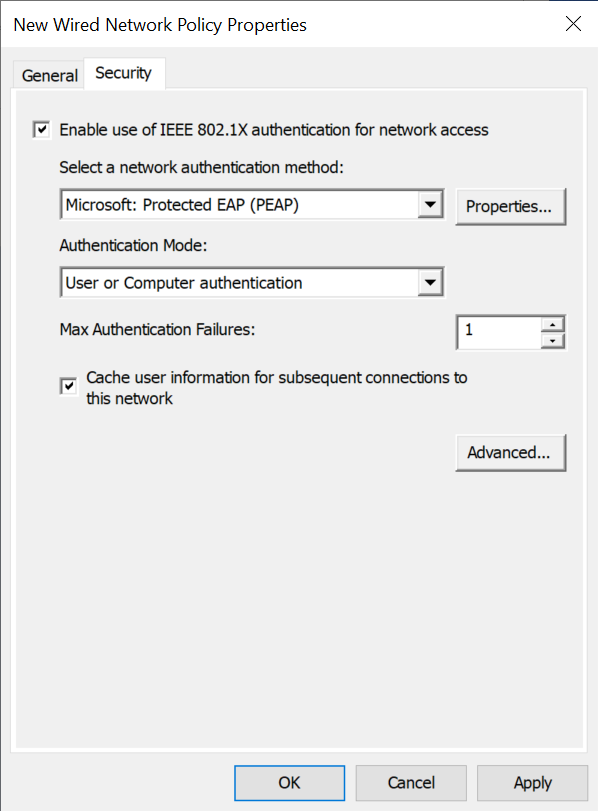
Selecting Security allows you to configure the EAP settings for the profile:
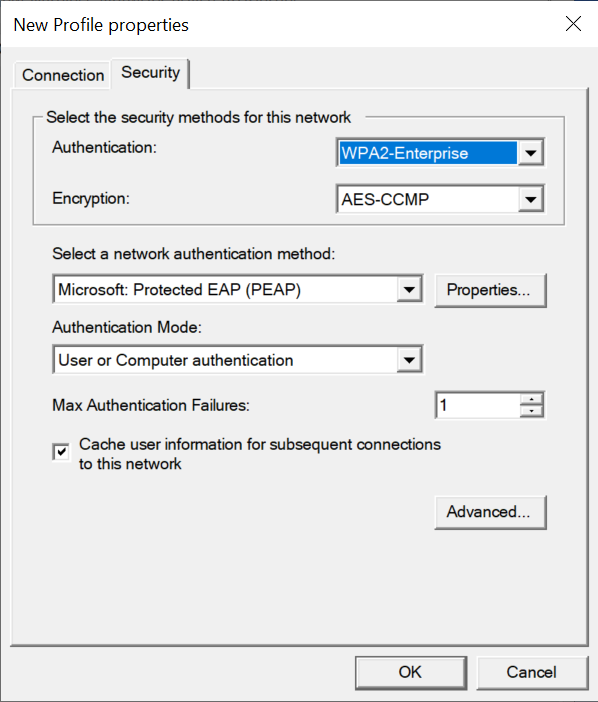
This dialog allows you to configure the security type and other settings for the Wi-Fi profile. When an Authentication type supporting 802.1X authentication is selected (such as WPA2-Enterprise), the 802.1X security options are visible. See EAP methods for details on each network authentication method.
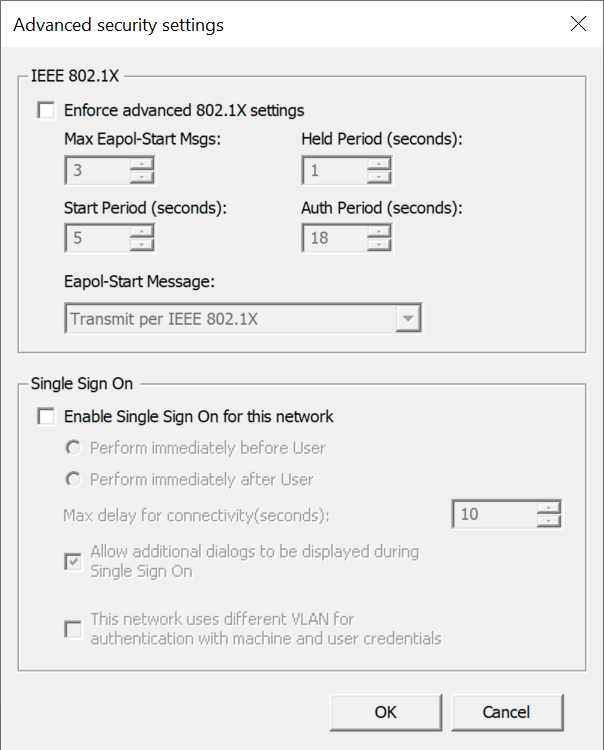
When the Advanced... button is selected, the Advanced Security Settings dialog is shown:
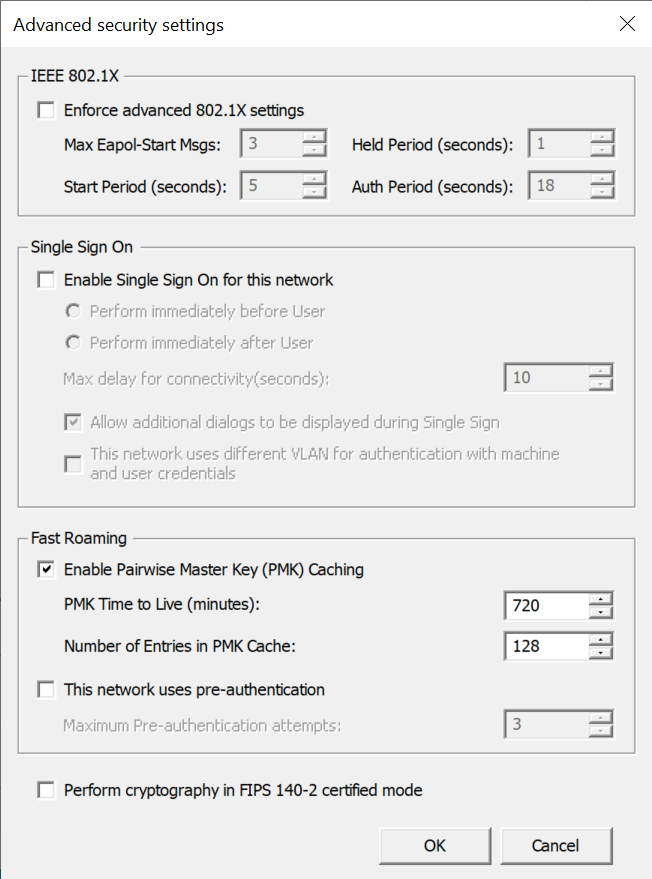
This dialog allows you to set some advanced 802.1X settings and Single Sign On options.
Tip
Not every setting is available for configuration in the Group Policy Editor. However, you can work around this by importing an XML profile with the desired settings. For more information, see XML Profiles.
EAP methods
For an overview on the different EAP methods, see Authentication methods.
Microsoft: Smart card or other certificate
For more information on this dialog, see EAP-TLS.
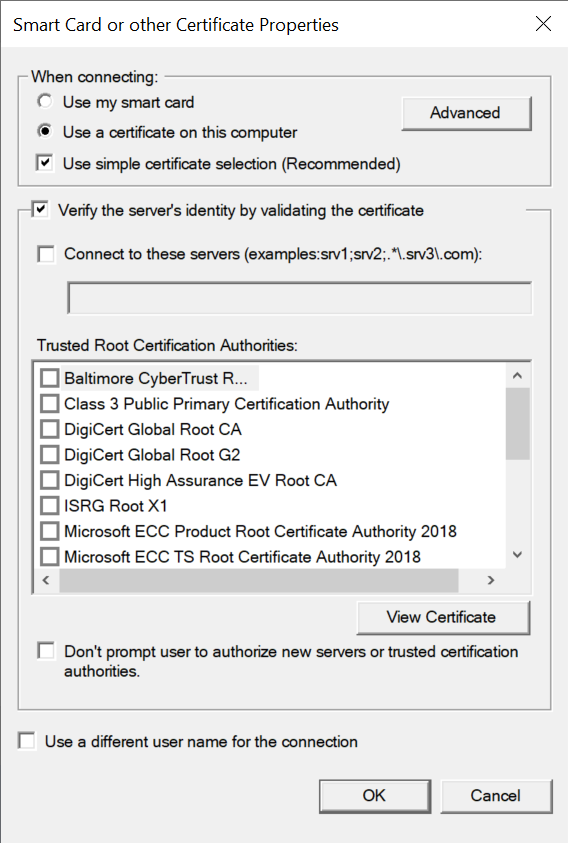
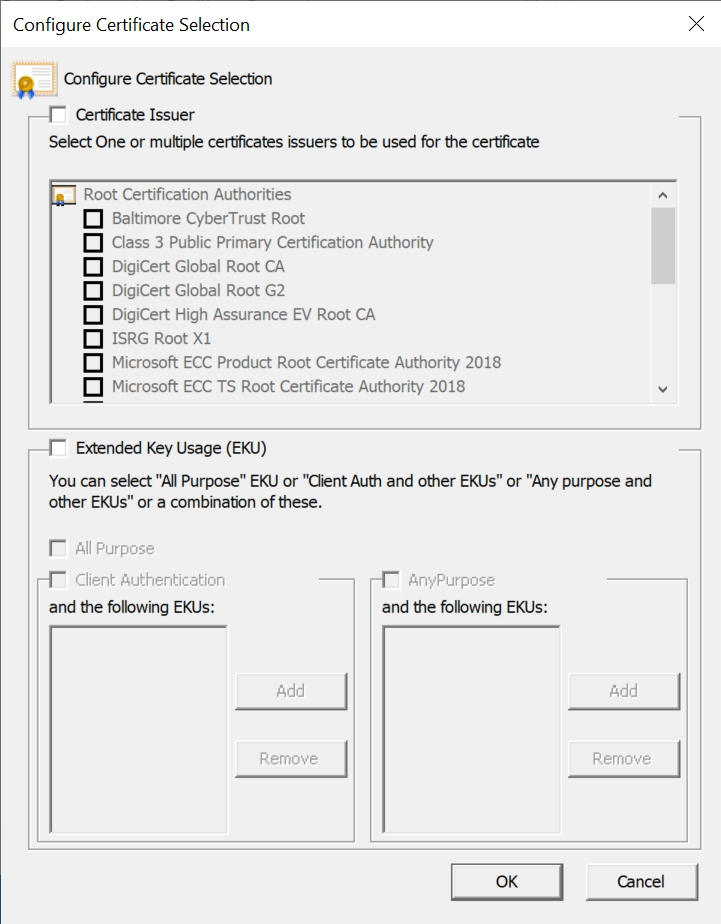
Selecting Advanced opens the Configure Certificate Selection dialog:
Microsoft: Protected EAP (PEAP)
For more information on this dialog, see PEAP.
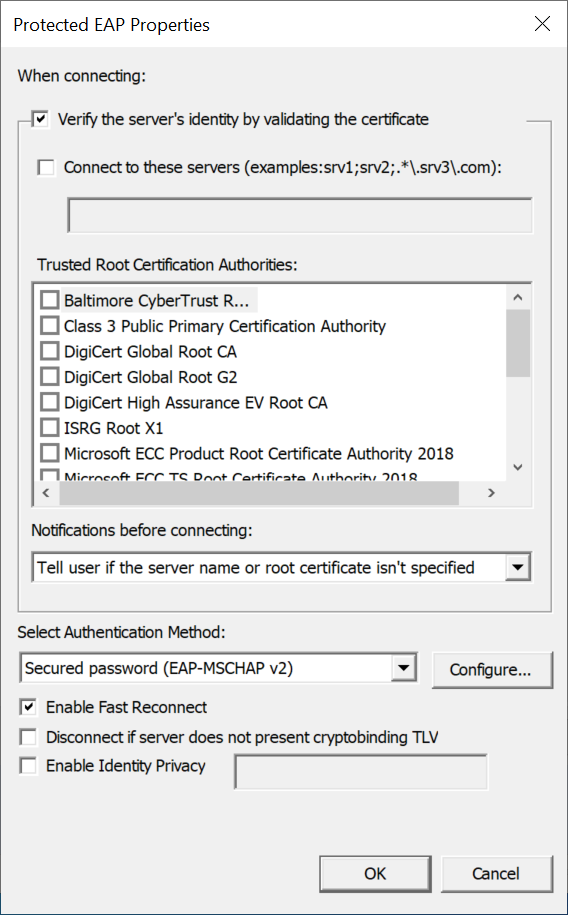
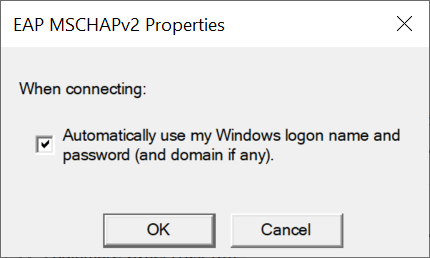
Selecting Configure... when Secured password (EAP-MSCHAP v2) is selected opens the EAP MSCHAPv2 dialog:
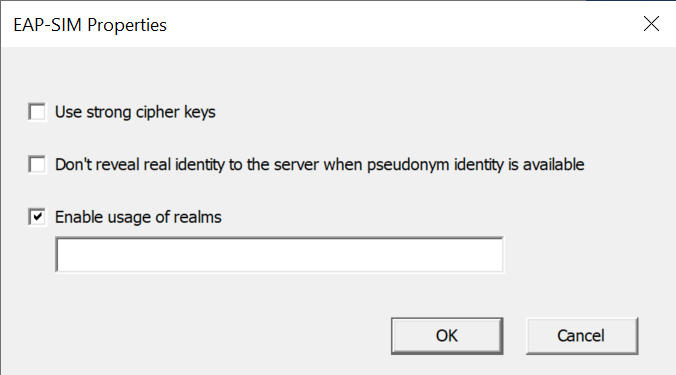
Microsoft: EAP-SIM
For more information on this dialog, see EAP-SIM.
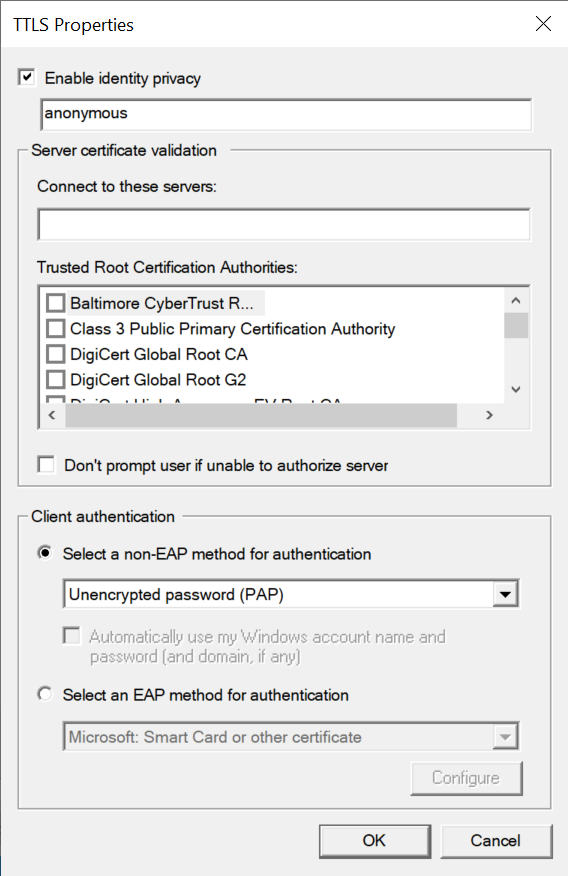
Microsoft: EAP-TTLS
For more information on this dialog, see EAP-TTLS.
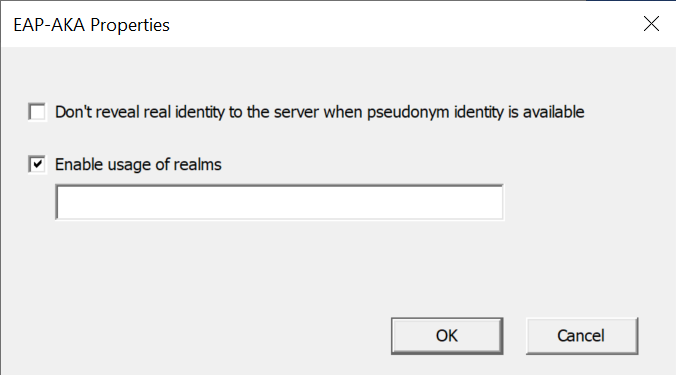
Microsoft: EAP-AKA
For more information on this dialog, see EAP-AKA.
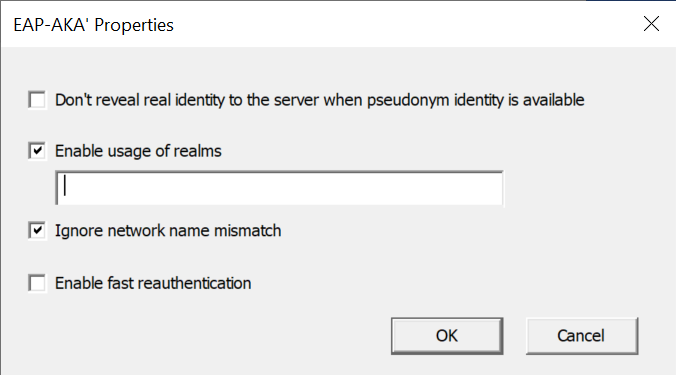
Microsoft: EAP-AKA'
For more information on this dialog, see EAP-AKA'.
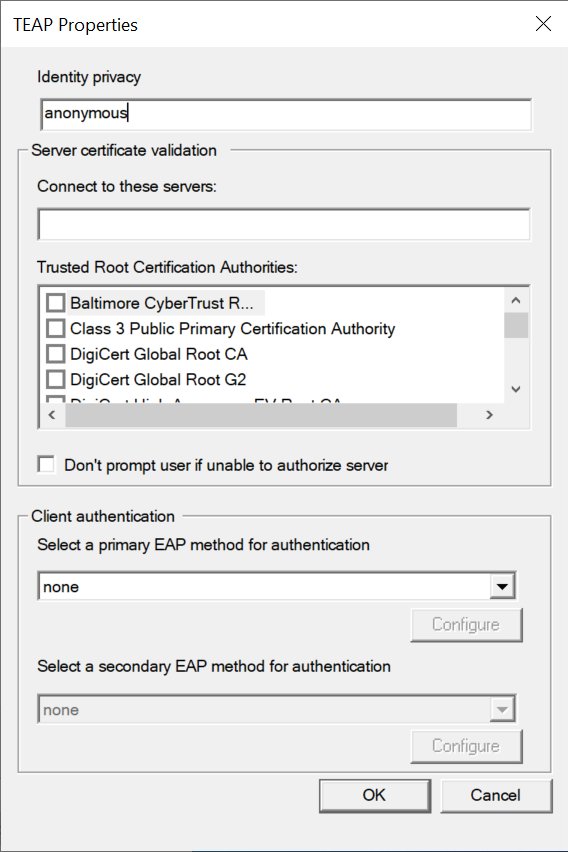
Microsoft: EAP-TEAP
For more information on this dialog, see TEAP.