Note
Access to this page requires authorization. You can try signing in or changing directories.
Access to this page requires authorization. You can try changing directories.
You can use the information in this article to configure licensing for session hosts on your Remote Desktop Services (RDS) deployments. The process is slightly different depending on which roles you assigned to the session host you're licensing.
Prerequisites
In order to install licenses for your session hosts, you need a Remote Desktop license server with per-user or per-device client access licenses (CALs) activated.
Configure licensing for an RDS deployment that includes the RD Connection Broker role
If you need to license session hosts where your RDS deployment doesn't include the connection broker role, you must specify a license server by using group policy either centrally from your Active Directory domain, or locally on each session host. You also need to do specify a license server when using Windows Server with Azure Virtual Desktop.
To specify a license server:
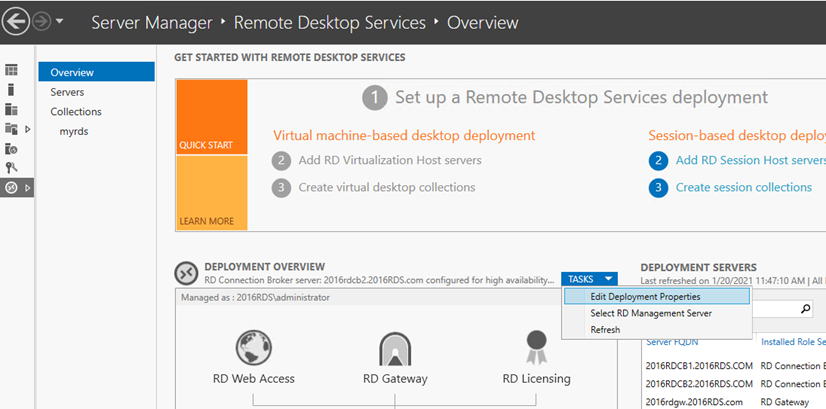
On the RD Connection Broker computer, open Server Manager.
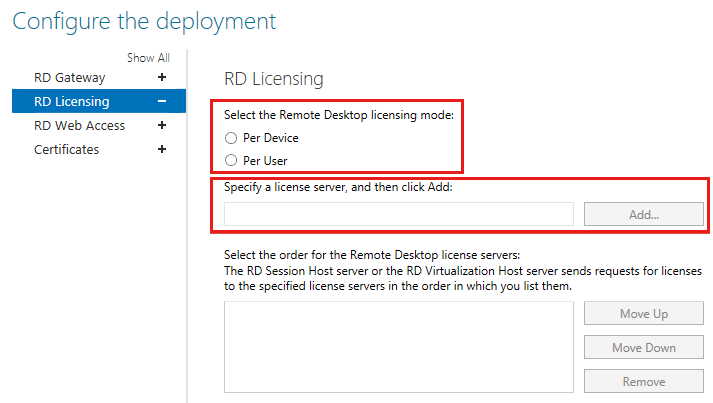
In Server Manager, select Remote Desktop Services > Overview > Edit Deployment Properties > RD Licensing.
Select the Remote Desktop licensing mode (either Per User or Per Device, as appropriate for your deployment).
Note
If you use domain-joined servers for your RDS deployment, you can use both Per User and Per Device CALs. If you use workgroup servers for your RDS deployment, you have to use Per Device CALs In that case, Per User CALs aren't permitted.
Specify a license server, and then select Add.
Configure licensing for an RDS deployment that includes only the RD Session Host role and the RD Licensing role
Depending on whether you want to configure Group Policy centrally from your domain or locally on each session host:
Open the Group Policy Management Console (GPMC) and create or edit a policy that targets your session hosts.
Open the Local Group Policy Editor on the session host.
Go to Computer Configuration > Administrative Templates > Windows Components > Remote Desktop Services > Remote Desktop Session Host > Licensing.

In the policy list, right-click Use the specified Remote Desktop license servers, and then select Properties.
Select Enabled, and then enter the name of the license server under License servers to use. If you have more than one license server, use commas to separate their names.
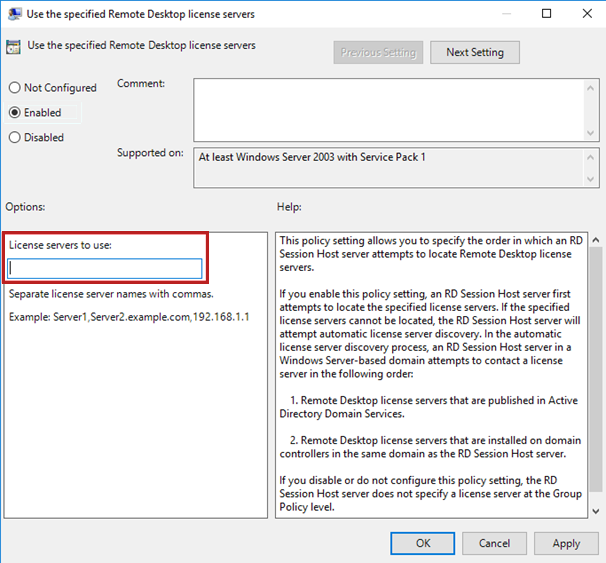
Select OK.
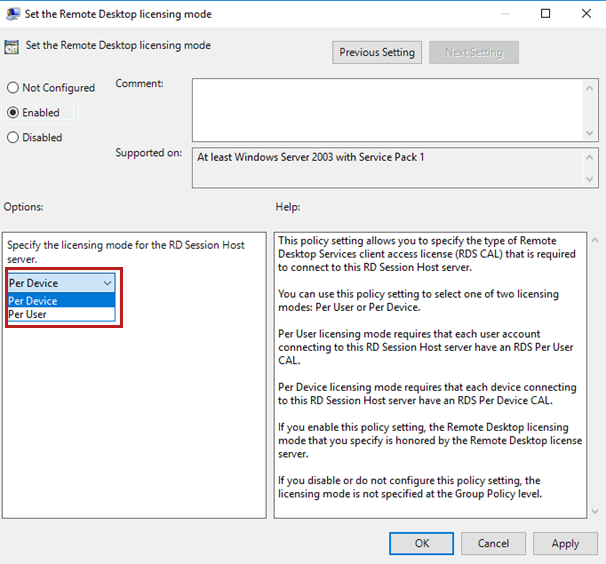
In the policy list, right-click Set the Remote Desktop licensing mode, and then select Properties.
Select Enabled.
Under Specify the licensing mode for the Remote Desktop Session Host server, select Per Device or Per User, as appropriate for your deployment.
Ensure an RD Session Host can access an RD licensing server in the same work group
This section only applies to work groups. Skip this section if your RD Session Host and RD licensing server are joined to a domain in Active Directory. You can also skip this section if the RD licensing server and RD Session Host server are the same machine.
After you apply the security update for CVE-2024-38099, RD licensing servers enforce that RD Session Host servers present nonanonymous credentials when requesting or querying licenses. To enforce nonanymous credentials exist, confirm that the NT AUTHORITY\NETWORK SERVICE account under which the Remote Desktop Service runs on the RD Session Host has access to credentials. Configure the machines in a work group using the following steps.
First, we recommend creating a dedicated user on the RD licensing server:
Connect to the RD licensing server. If doing so remotely, you might need to start the Remote Desktop Connection application using the
mstsc.exe /admincommand if the target machine can't contact an RD licensing server.Once connected, right-click Start, then select Run, and enter
lusrmgr.msc. Then press ENTER.Select Users in the left pane.
Open the Action menu and select New User.
Choose a username and a unique strong password for the user. Then confirm the password.
Uncheck the User must change password at next logon checkbox.
Select Create.
Then, on each RD Session Host server that needs to connect to the RD licensing server, add the user:
Connect to the RD Session Host machine. If doing so remotely, you might need to start the Remote Desktop Connection application if the target machine can’t contact any RD licensing server. Open Remote Desktop Connection as an administrator, or use the command:
mstsc.exe /admin.Start a Command Prompt as NT AUTHORITY\NETWORK SERVICE. You can do this with PsExec from the Sysinternals Utilities, by running the following command as an administrator:
psexec.exe -I -u "NT AUTHORITY\NETWORK SERVICE" cmd.exeThen, add the hostname or IP address of your licensing server, and a username and password to the licensing server with the following command:
cmdkey /add:<NAME-OF-THE-LICENSING-SERVER> /user:<NAME-OF-THE-LICENSING-SERVER>\<USERNAME> /passWhen prompted for the password, enter the password previously selected and press ENTER.
The RD Session Host should now be able to connect to the RD licensing server.
Alternatively, the requirement for proper authentication can be disabled on the licensing server. If you would like to disable the enforcement of authentication on your RD licensing server despite the risk, you can modify the registry.
Warning
Disabling the enforcement of authentication on the RD licensing server isn't recommended and can result in increased security risks. Use it at your own risk.
If you use Registry Editor incorrectly, you might cause serious problems that might require you to reinstall your operating system. Microsoft can't guarantee that you can solve problems that result from using Registry Editor incorrectly. Use Registry Editor at your own risk.
To update the registry key and value on the RD licensing server:
Select Start, type Registry Editor, then open it.
Navigate to and modify the key:
HKLM\SYSTEM\CurrentControlSet\Services\TermServLicensing\Parameterswith the following values:Name: DisableWorkgroupAuthEnforcement
Type: REG_DWORD
Data: 1
Warning
Future versions of Windows might stop honoring this setting.
Next steps
Learn how to create reports to track RDS per-user CALs issued by a Remote Desktop license server at Track your Remote Desktop Services client access licenses (RDS CALs).