Note
Access to this page requires authorization. You can try signing in or changing directories.
Access to this page requires authorization. You can try changing directories.
In this tutorial, we'll build a simple Universal Windows Platform application that uses a trained machine learning model to recognize a numeric digit drawn by the user. This tutorial primarily focuses on how to load and use Windows ML in your UWP application.
The following video walks through the sample that this tutorial is based on.
If you'd prefer to simply look at the code of the finished tutorial, you can find it on the WinML GitHub repository. It's also available in C++/CX.
Prerequisites
- Windows 10 (Version 1809 or higher)
- Windows 10 SDK (Build 17763 or higher)
- Visual Studio 2019 (or Visual Studio 2017, version 15.7.4 or later)
- Windows Machine Learning Code Generator extension for Visual Studio 2019 or 2017
- Some basic UWP and C# knowledge
1. Open the project in Visual Studio
Once you've downloaded the project from GitHub, launch Visual Studio and open the MNIST_Demo.sln file (it should be located at <Path to repo>\Windows-Machine-Learning\Samples\MNIST\Tutorial\cs). If the solution is shown as unavailable, you'll need to right-click the project in the Solution Explorer and select Reload Project.
We've provided a template with implemented XAML controls and events, including:
- An InkCanvas to draw the digit.
- Buttons to interpret the digit and clear the canvas.
- Helper routines to convert the InkCanvas output to a VideoFrame.
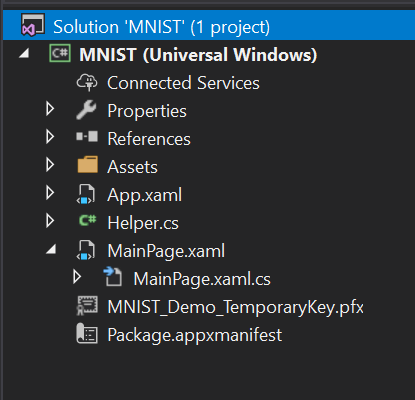
Inside the Solution Explorer, the project has three main code files:
- MainPage.xaml - All of our XAML code to create the UI for the InkCanvas, buttons, and labels.
- MainPage.xaml.cs - Where our application code lives.
- Helper.cs - Helper routines to crop and convert image formats.
2. Build and run the project
In the Visual Studio toolbar, change the Solution Platform to x64 to run the project on your local machine if your device is 64-bit, or x86 if it's 32-bit. (You can check in Windows Settings: System > About > Device specifications > System type.)
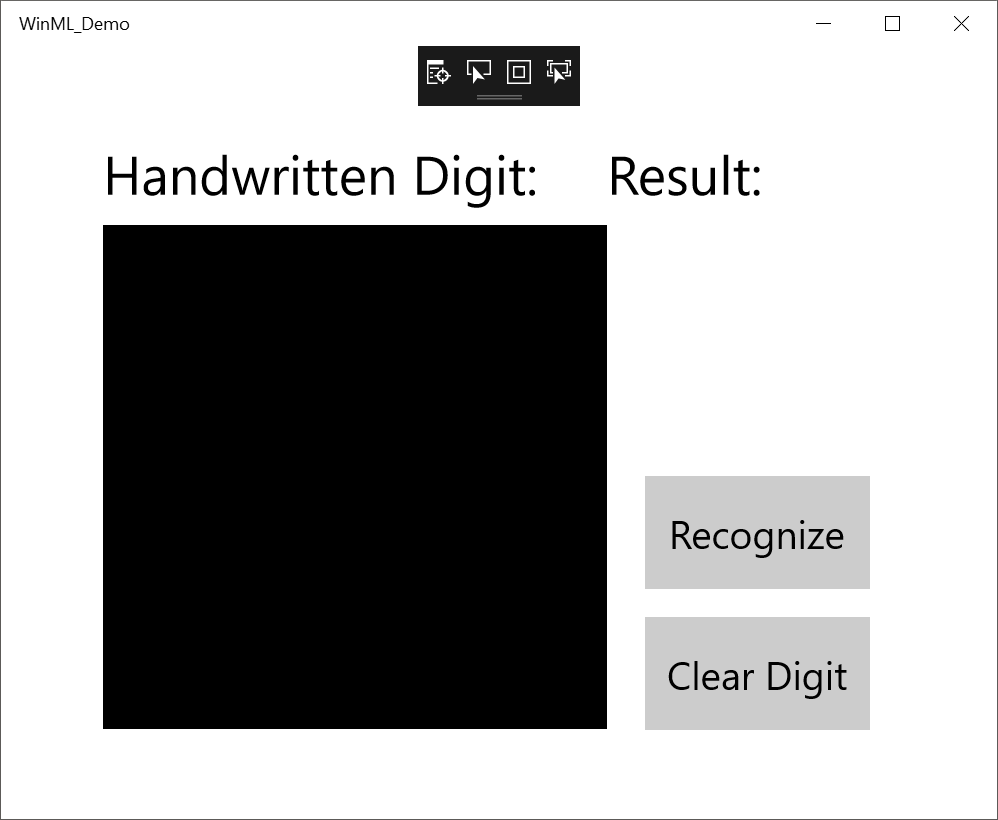
To run the project, click the Start Debugging button on the toolbar, or press F5. The application should show an InkCanvas where users can write a digit, a Recognize button to interpret the number, an empty label field where the interpreted digit will be displayed as text, and a Clear Digit button to clear the InkCanvas.
Note
If the project won't build, you might need to change the project's deployment target version. Right-click the project in the Solution Explorer and select Properties. In the Application tab, set the Target version and Min version to match your OS and SDK.
Note
If you get a warning that the application is already installed, just select Yes to continue with deployment. You may need to close Visual Studio and re-open if it still doesn't work.
3. Download a model
Next, let's get a machine learning model to add to our application. For this tutorial, we'll use a pre-trained MNIST model that was trained with the Microsoft Cognitive Toolkit (CNTK) and exported to ONNX format.
The MNIST model has already been included in your Assets folder, and you will need to add it to your application as an existing item. You can also download the pre-trained model from the ONNX Model Zoo on GitHub.
4. Add the model
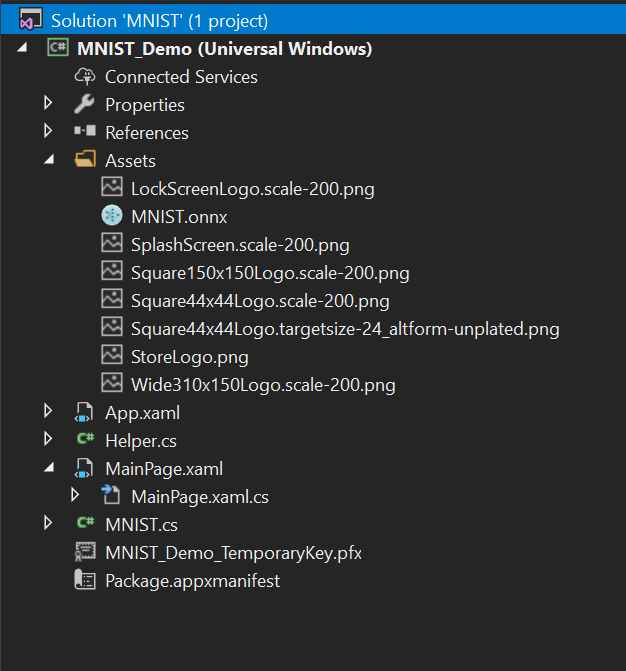
Right click on the Assets folder in the Solution Explorer, and select Add > Existing Item. Point the file picker to the location of your ONNX model, and click Add.
The project should now have two new files:
- mnist.onnx - Your trained model.
- mnist.cs - The Windows ML-generated code.
To make sure the model builds when we compile our application, right click on the mnist.onnx file, and select Properties. For Build Action, select Content.
Now, let's take a look at the newly generated code in the mnist.cs file. We have three classes:
- mnistModel creates the machine learning model representation, creates a session on the system default device, binds the specific inputs and outputs to the model, and evaluates the model asynchronously.
- mnistInput initializes the input types that the model expects. In this case, the input expects an ImageFeatureValue.
- mnistOutput initializes the types that the model will output. In this case, the output will be a list called Plus214_Output_0 of type TensorFloat.
We'll now use these classes to load, bind, and evaluate the model in our project.
5. Load, bind, and evaluate the model
For Windows ML applications, the pattern we want to follow is: Load > Bind > Evaluate.
- Load the machine learning model.
- Bind inputs and outputs to the model.
- Evaluate the model and view results.
We'll use the interface code generated in mnist.cs to load, bind, and evaluate the model in our application.
First, in MainPage.xaml.cs, let's instantiate the model, inputs, and outputs. Add the following member variables to the MainPage class:
private mnistModel ModelGen;
private mnistInput ModelInput = new mnistInput();
private mnistOutput ModelOutput;
Then, in LoadModelAsync, we'll load the model. This method should be called before we use any of the model's methods (that is, on MainPage's Loaded event, at an OnNavigatedTo override, or anywhere before recognizeButton_Click is called). The mnistModel class represents the MNIST model and creates the session on the system default device. To load the model, we call the CreateFromStreamAsync method, passing in the ONNX file as the parameter.
private async Task LoadModelAsync()
{
    // Load a machine learning model
    StorageFile modelFile = await StorageFile.GetFileFromApplicationUriAsync(new Uri($"ms-appx:///Assets/mnist.onnx"));
    ModelGen = await mnistModel.CreateFromStreamAsync(modelFile as IRandomAccessStreamReference);
}
Note
If you get red underlines under IRandomAccessStreamReference, you need to include its namespace. Put your cursor over it, press Ctrl + . and select using Windows.Storage.Streams from the drop-down menu.
Next, we want to bind our inputs and outputs to the model. The generated code also includes mnistInput and mnistOutput wrapper classes. The mnistInput class represents the model's expected inputs, and the mnistOutput class represents the model's expected outputs.
To initialize the model's input object, call the mnistInput class constructor, passing in your application data, and make sure that your input data matches the input type that your model expects. The mnistInput class expects an ImageFeatureValue, so we use a helper method to get an ImageFeatureValue for the input.
Using our included helper functions in helper.cs, we will copy the contents of the InkCanvas, convert it to type ImageFeatureValue, and bind it to our model.
private async void recognizeButton_Click(object sender, RoutedEventArgs e)
{
    // Bind model input with contents from InkCanvas
    VideoFrame vf = await helper.GetHandWrittenImage(inkGrid);
    ModelInput.Input3 = ImageFeatureValue.CreateFromVideoFrame(vf);
}
For output, we simply call EvaluateAsync with the specified input. Once your inputs are initialized, call the model's EvaluateAsync method to evaluate your model on the input data. EvaluateAsync binds your inputs and outputs to the model object and evaluates the model on the inputs.
Since the model returns an output tensor, we'll first want to convert it to a friendly datatype, and then parse the returned list to determine which digit had the highest probability and display that one.
private async void recognizeButton_Click(object sender, RoutedEventArgs e)
{
    // Bind model input with contents from InkCanvas
    VideoFrame vf = await helper.GetHandWrittenImage(inkGrid);
    ModelInput.Input3 = ImageFeatureValue.CreateFromVideoFrame(vf);

    // Evaluate the model
    ModelOutput = await ModelGen.EvaluateAsync(ModelInput);

    // Convert output to datatype
    IReadOnlyList<float> vectorImage = ModelOutput.Plus214_Output_0.GetAsVectorView();
    IList<float> imageList = vectorImage.ToList();

    // Query to check for highest probability digit
    var maxIndex = imageList.IndexOf(imageList.Max());

    // Display the results
    numberLabel.Text = maxIndex.ToString();
}
Finally, we'll want to clear out the InkCanvas to allow users to draw another number.
private void clearButton_Click(object sender, RoutedEventArgs e)
{
    inkCanvas.InkPresenter.StrokeContainer.Clear();
    numberLabel.Text = "";
}
6. Launch the application
Once we build and launch the application (press F5), we'll be able to recognize a number drawn on the InkCanvas.
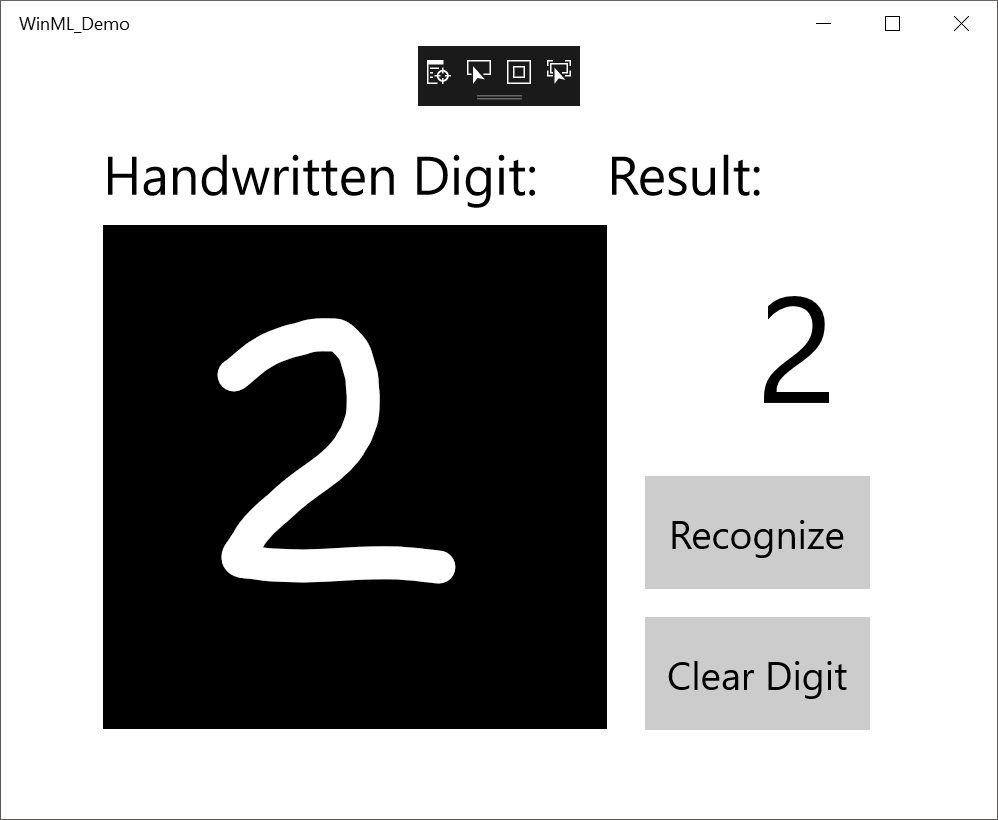
That's it - you've made your first Windows ML application! For more samples that demonstrate how to use Windows ML, check out our Windows-Machine-Learning repo on GitHub.
Note
Use the following resources for help with Windows ML:
- To ask or answer technical questions about Windows ML, please use the windows-machine-learning tag on Stack Overflow.
- To report a bug, please file an issue on our GitHub.