Note
Access to this page requires authorization. You can try signing in or changing directories.
Access to this page requires authorization. You can try changing directories.
In this quickstart you go from an empty folder to a published Windows app using AI assistance throughout. No Visual Studio required.
Note
Prefer working in Visual Studio? See Set up GitHub Copilot for Windows development. This quickstart uses VS Code and the winapp CLI.
- Install the required tools (~5 minutes)
- Scaffold a WinUI app from the command line
- Use the
winui-devAI agent to add features - Package and publish to the Microsoft Store
Time to complete: approximately 30 minutes
Cost: free (GitHub Copilot free tier is sufficient)
Prerequisites
Install the following tools before you start. All are free.
1. Visual Studio Code
winget install Microsoft.VisualStudioCode
2. .NET SDK 10 or later
winget install Microsoft.DotNet.SDK.10
3. Windows App Development CLI (winapp CLI)
winget install Microsoft.winappcli --source winget
4. WinUI dotnet new templates
dotnet new install Microsoft.WindowsAppSDK.WinUI.CSharp.Templates
5. GitHub CLI (required for gh copilot commands — needs a GitHub Copilot subscription, free tier available)
winget install GitHub.cli
Important
Close and reopen your terminal after the install completes. The gh command won't be available until a new shell session picks up the updated PATH.
gh auth login
gh extension install github/gh-copilot
6. WinUI agent plugin for GitHub Copilot
gh copilot plugin install winui@awesome-copilot
7. WinApp extension for VS Code
code --install-extension microsoft-winappcli.winapp
Or search WinApp in the Extensions panel (Ctrl+Shift+X). See VS Code tools for a full command reference.
Verify your setup
winapp --version
Step 1: Scaffold a new WinUI app
Create a new folder and scaffold a WinUI app with a NavigationView layout:
mkdir MyFirstApp
cd MyFirstApp
dotnet new winui-navview
Step 2: Run the app
Build and run the app to confirm everything is working before you start adding features:
dotnet run
The app launches as a loose-layout package — no MSIX install required. You should see a WinUI 3 app with a NavigationView containing Home, About, and Settings pages:
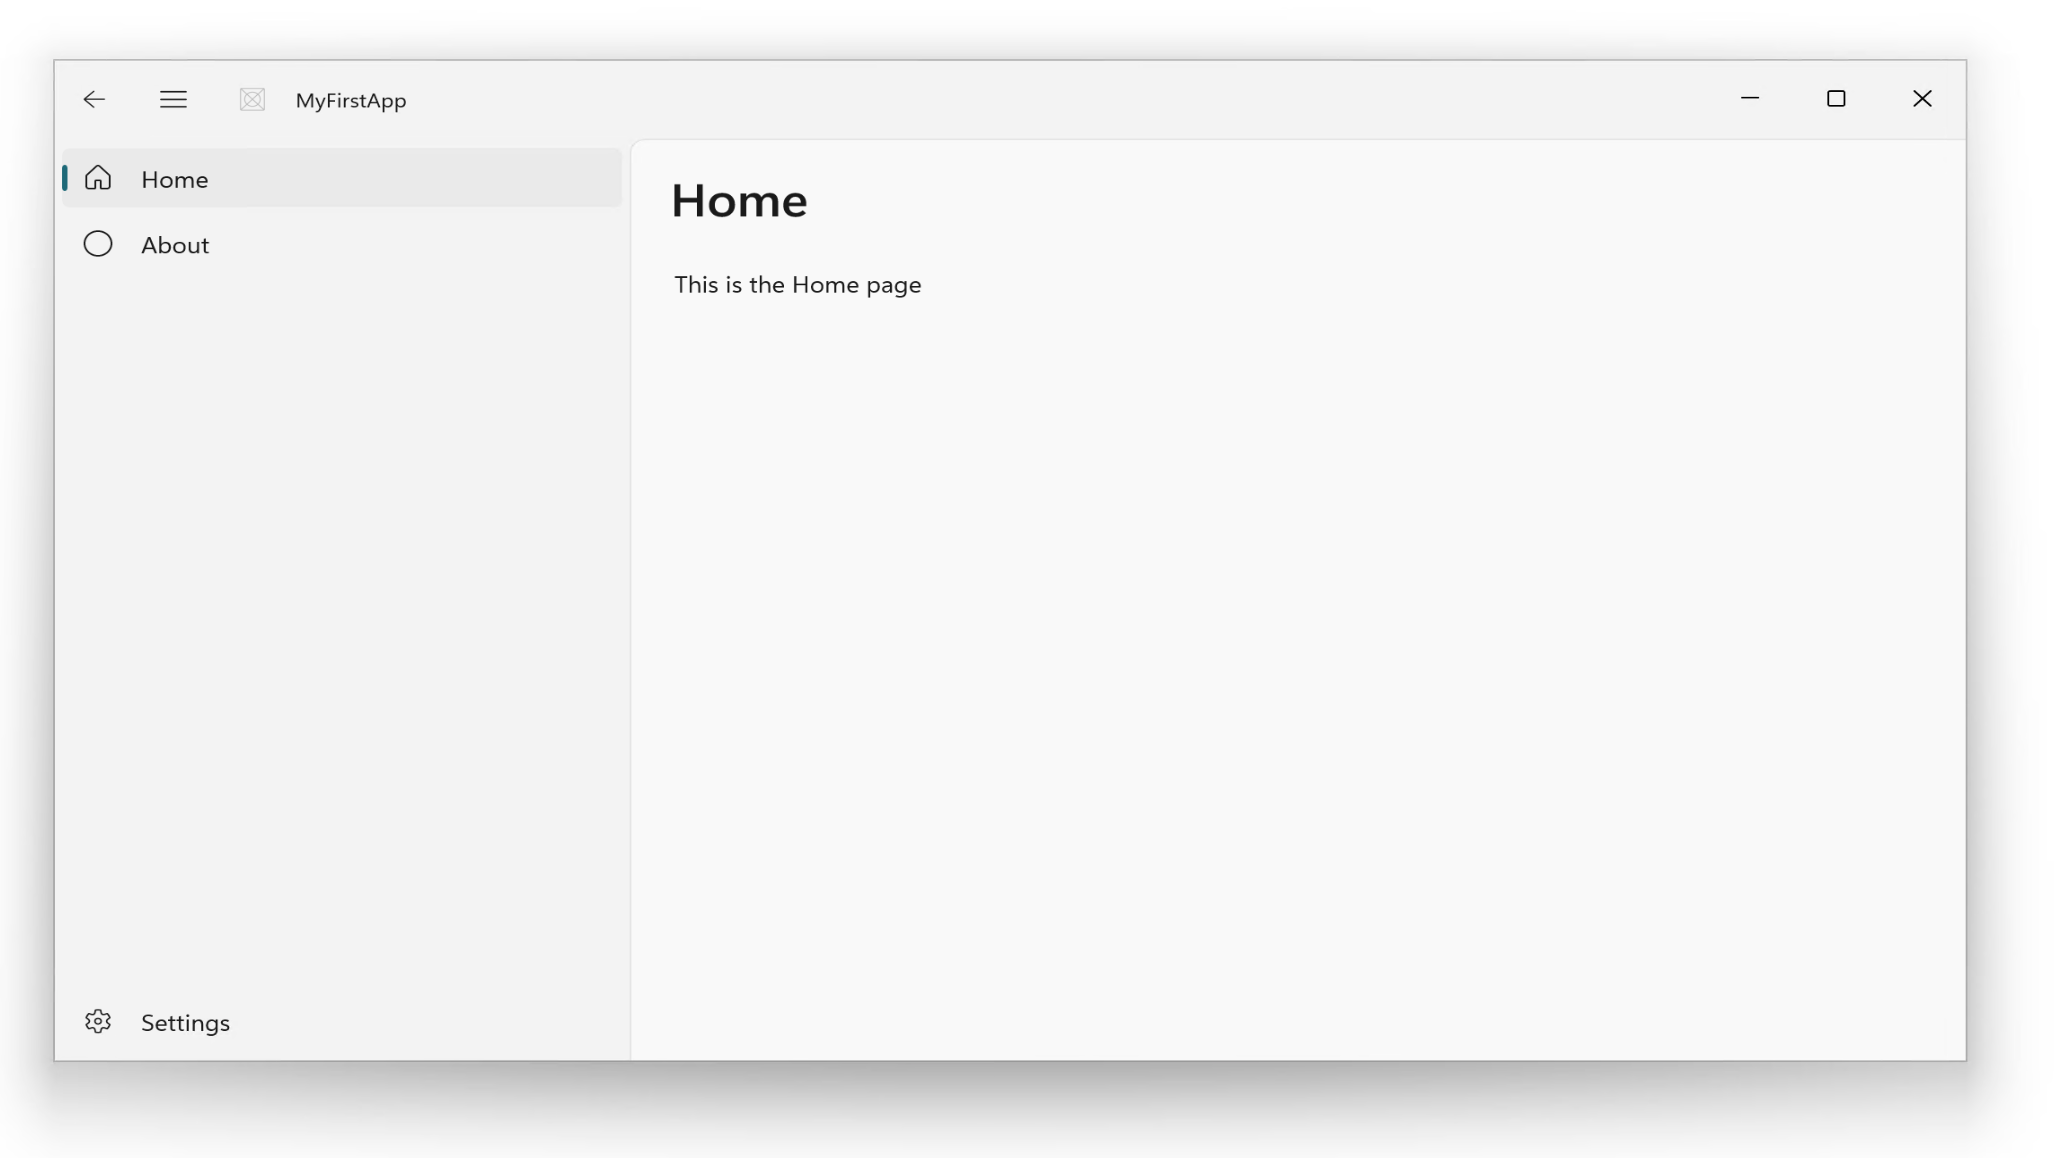
Once it launches successfully, open the project in VS Code:
code .
Note
Don't press F5 before the first successful dotnet run. VS Code's debugger looks for an .exe that doesn't exist yet. After dotnet run succeeds, F5 and the Run button in the WinApp extension panel both work normally.
Step 3: Use the AI agent to add a feature
In VS Code, open GitHub Copilot Chat (Ctrl+Alt+I), switch to Agent mode, and select the winui-dev agent. Type a request such as:
Add a settings page to my WinUI NavigationView app with a toggle for dark mode
The agent generates the code, creates any required files, and updates your navigation structure. Review the changes, then verify the result:
dotnet run
Navigate to the Settings page in the running app to confirm the feature was added correctly.
Tip
Want to automate UI verification? See Testing WinUI apps for winapp ui commands that inspect, search, and screenshot your app's UI tree — useful for CI pipelines.
Step 4: Package the app
Publish your app to a folder, then package it as an MSIX installer.
Important
The packaging step installs a certificate to your machine's trusted root store and requires an elevated (Administrator) terminal. Right-click PowerShell or Windows Terminal and select Run as administrator, then navigate back to your project folder.
dotnet publish -o ./publish
winapp pack ./publish --generate-cert --install-cert
--generate-cert --install-cert creates and installs a local development certificate so you can install and test the package. Don't distribute packages signed with this certificate.
You don't need your own code-signing certificate to publish to the Microsoft Store, because the Store signs your package. Before you submit, make sure the package identity in your manifest matches your app's identity in Partner Center. Work through the Store readiness checklist to catch common upload and certification problems.
Step 5: Publish to the Microsoft Store
Publishing has two parts: a one-time setup in Partner Center, and then command-line submissions for updates.
Set up your developer account. Registration and verification can take several days, so start early, ideally before you begin this quickstart.
Make your first submission in Partner Center. Reserve your app's name, then complete the first submission of your app in Partner Center. See Create an app submission. Packaged desktop apps, including WinUI 3 apps, need a privacy policy URL in the submission.
Submit updates from the command line. After your app is published, you can submit updated packages:
winapp store publish ./*.msix --appId <your-app-id>
Note
Publishing requires a Partner Center account. App certification typically takes 1–3 business days.
Before you use winapp store for updates:
winapp storeruns the Microsoft Store Developer CLI, which can't make your app's first submission. Complete the first submission in Partner Center.- Your Partner Center account must have an associated Microsoft Entra ID tenant, and you sign in to the CLI with your Microsoft Entra ID credentials, not a personal Microsoft account. See the Microsoft Store Developer CLI prerequisites.
- Updates through the CLI are currently supported for free products only.
Next steps
You've built and published a Windows app using only free tools and AI assistance. Here's where to go next:
- Go deeper on AI: WinUI agent plugin — learn all 8 skills and when to use each
- Use VS Code fully: VS Code tools — run, debug, package, and sign without the terminal
- Have an existing app?: Migrate from WPF or migrate from UWP with AI assistance
- Write better tests: AI-assisted testing — generate and automate UI tests
- Understand the risks: Security and responsible AI — what to review before shipping AI-generated code
Collaborate with us on GitHub
The source for this content can be found on GitHub, where you can also create and review issues and pull requests. For more information, see our contributor guide.

Windows developer