Note
Access to this page requires authorization. You can try signing in or changing directories.
Access to this page requires authorization. You can try changing directories.
WiFi Direct is supported on Windows 10 IoT Core devices through the use of a WiFi Direct enabled USB WiFi adapter. To make sure that WiFi Direct is enabled, two things need to be true:
- the hardware of the USB WiFi adapter needs to support WiFi Direct,
- the corresponding driver of the USB WiFi adapter needs to support WiFi Direct.
WiFi Direct provides a solution for WiFi device-to-device connectivity without the need for either a Wireless Access Point (wireless AP) to set up the connection. Take a look at the UWP APIs available in the Windows.Devices.WiFiDirect namespace to see what you can do with WiFiDirect.
Supported Adapters
A list of WiFi adapters that have been tested on Windows 10 IoT Core can be found on our Supported Hardware page.
Basic sample for WiFi Direct
You can easily test the WiFi Direct functionality with the WiFi Direct UWP sample. We will use the C# version and run the sample of two devices.
Set up the two devices
- MinnowBoardMax (MBM) running Windows 10 IoT Core (see instructions here), with a CanaKit WiFi dongle
- Connect monitor, keyboard, and mouse to the MBM
- A Windows 10 PC running the latest Windows 10 Anniversary Update. The PC (or laptop) will need to have WiFi Direct support (e.g. a Microsoft Surface)
- Install Visual Studio 2017 on your Windows 10 PC
- Clone or download the WiFi Direct UWP sample(root of the GitHub repo is here).
- Load the C# version of the WiFi Direct UWP sample in Visual Studio 2017
Run the sample on the two devices
Compile the sample and deploy/run it on the MBM:
- Set the "Solution Platforms" combobox to "x86"
- Select "Remote Machine" from the "Run" dropdown
- Start the sample on the MBM without debugging (either by pressing Ctrl-F5 or by selecting "Start Without Debugging" from the "Debug" menu)
- You should see the WiFi Direct sample running on the monitor connected to the MBM
Compile the sample and deploy/run it on the Windows 10 PC:
- Set the "Solution Platforms" combobox to "x86"
- Select "Local" from the "Run" dropdown
- Start the sample (either F5 or Ctrl-F5)
- You should see the WiFi Direct sample running on your Windows 10 PC
Set up Advertiser and Connector
On the MBM, select (1) "Advertiser" and press the "Start Advertisement" button
The MBM will start advertising itself on the WiFi Direct channel
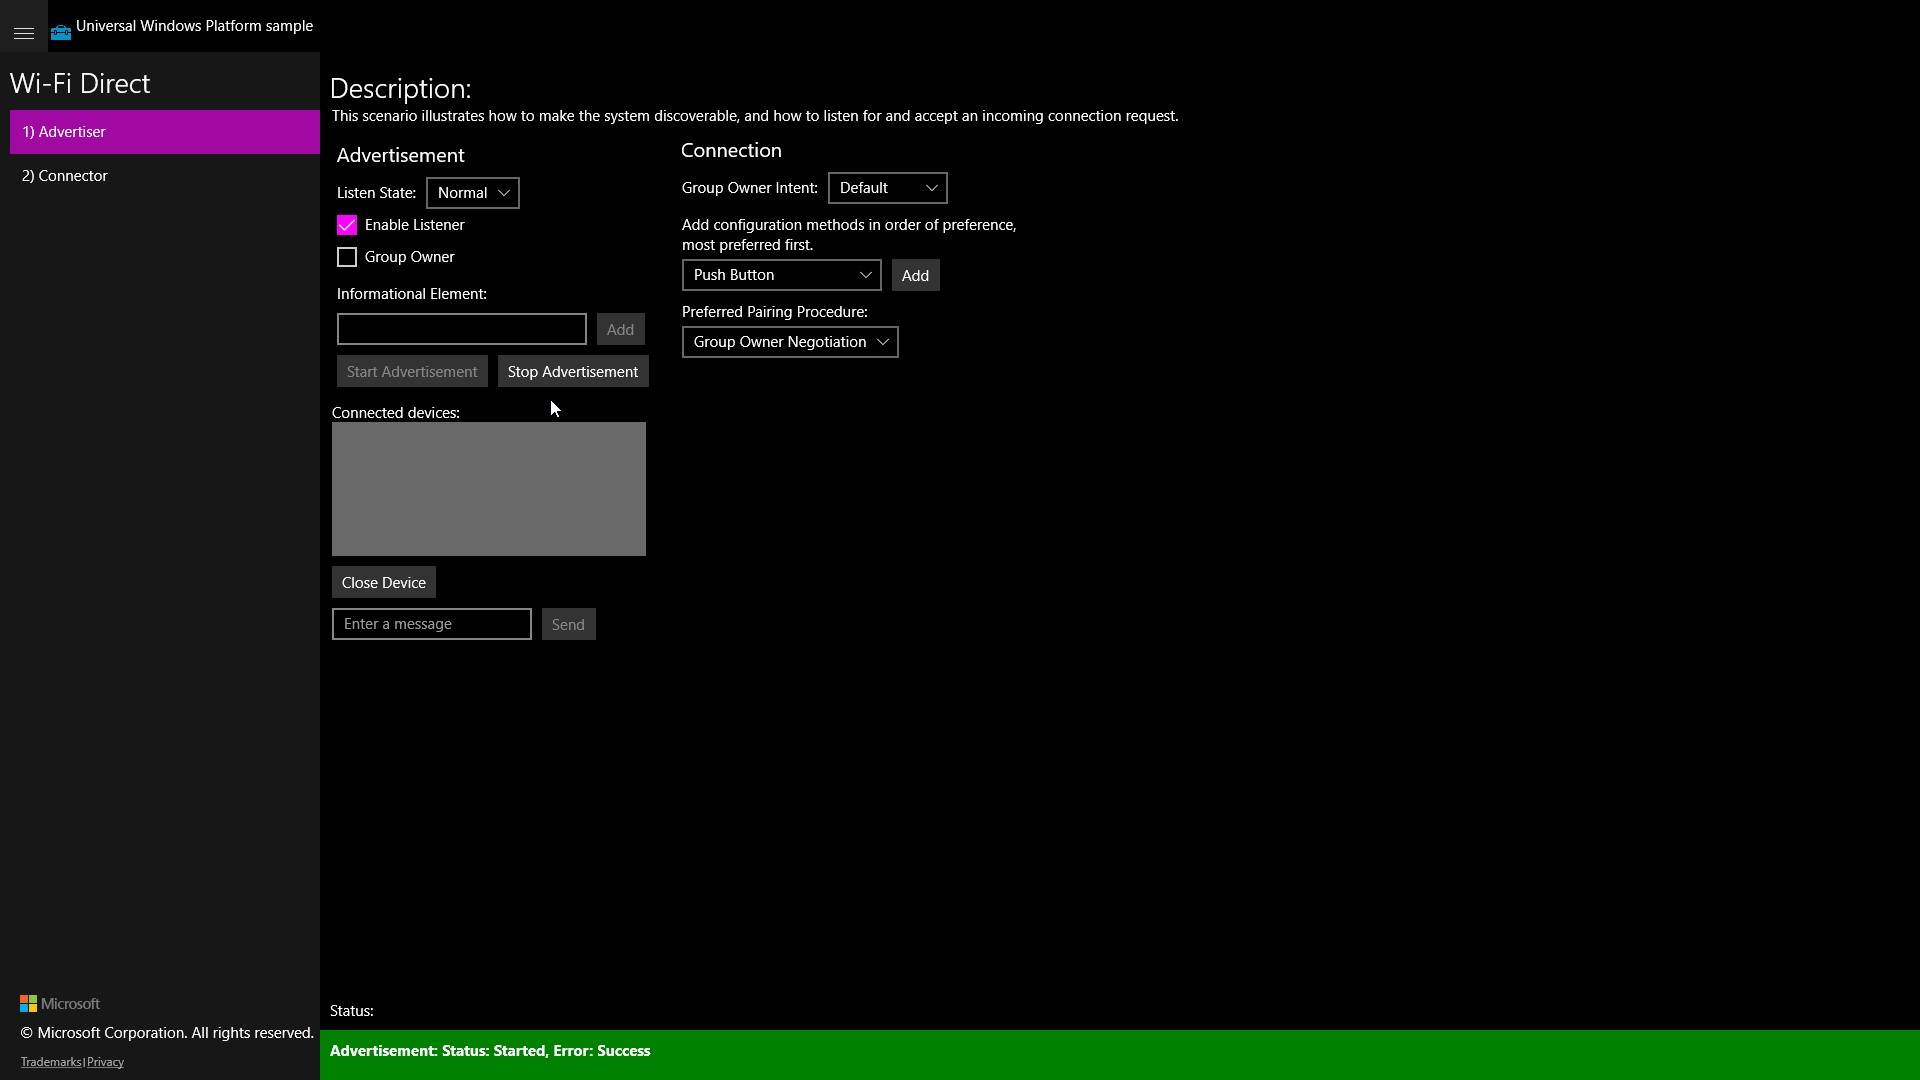
Notice the "Advertisement Status" banner at the bottom of the app.
On the Windows 10 PC, select (2) "Connector" and press the "Start Watcher" button
The Windows 10 PC will start scanning for available WiFi Direct connections
When the scanning is complete, you should see the name of your MBM in the "Discovered Devices" list
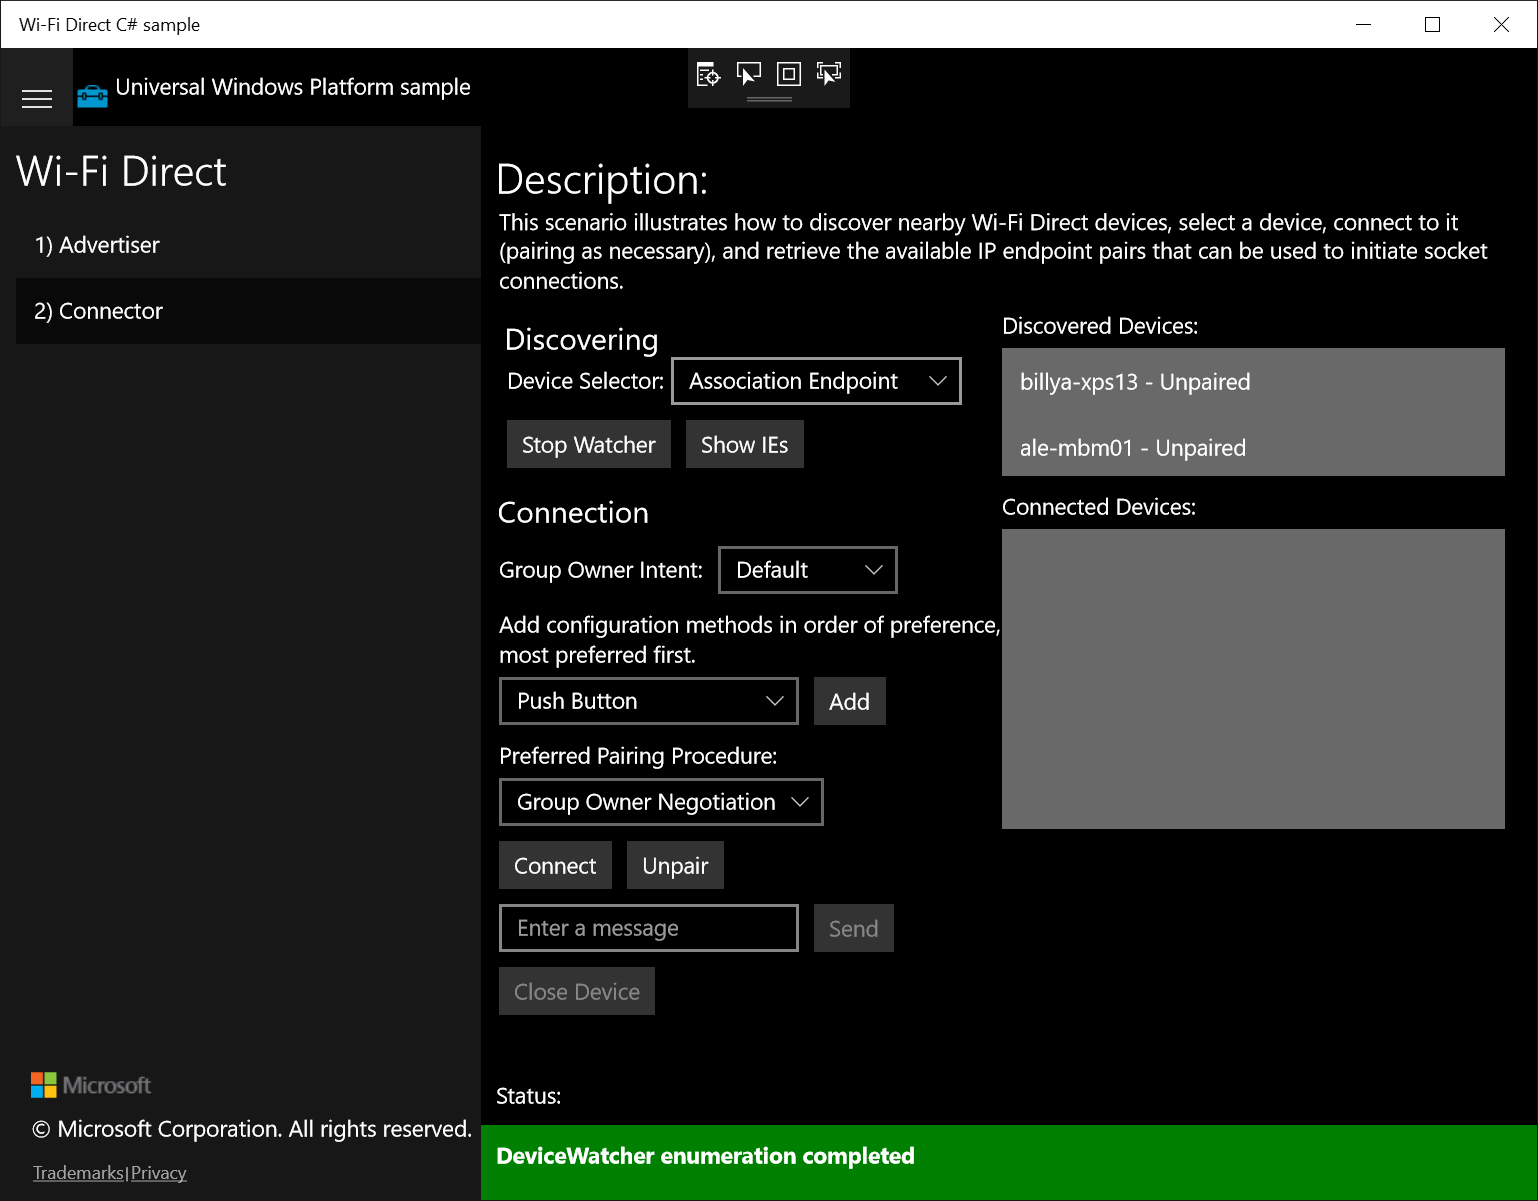
You can see two devices listed (we're interested in "ale-mbm01"), and the "DeviceWatcher enumeration completed" message.
Pair the devices
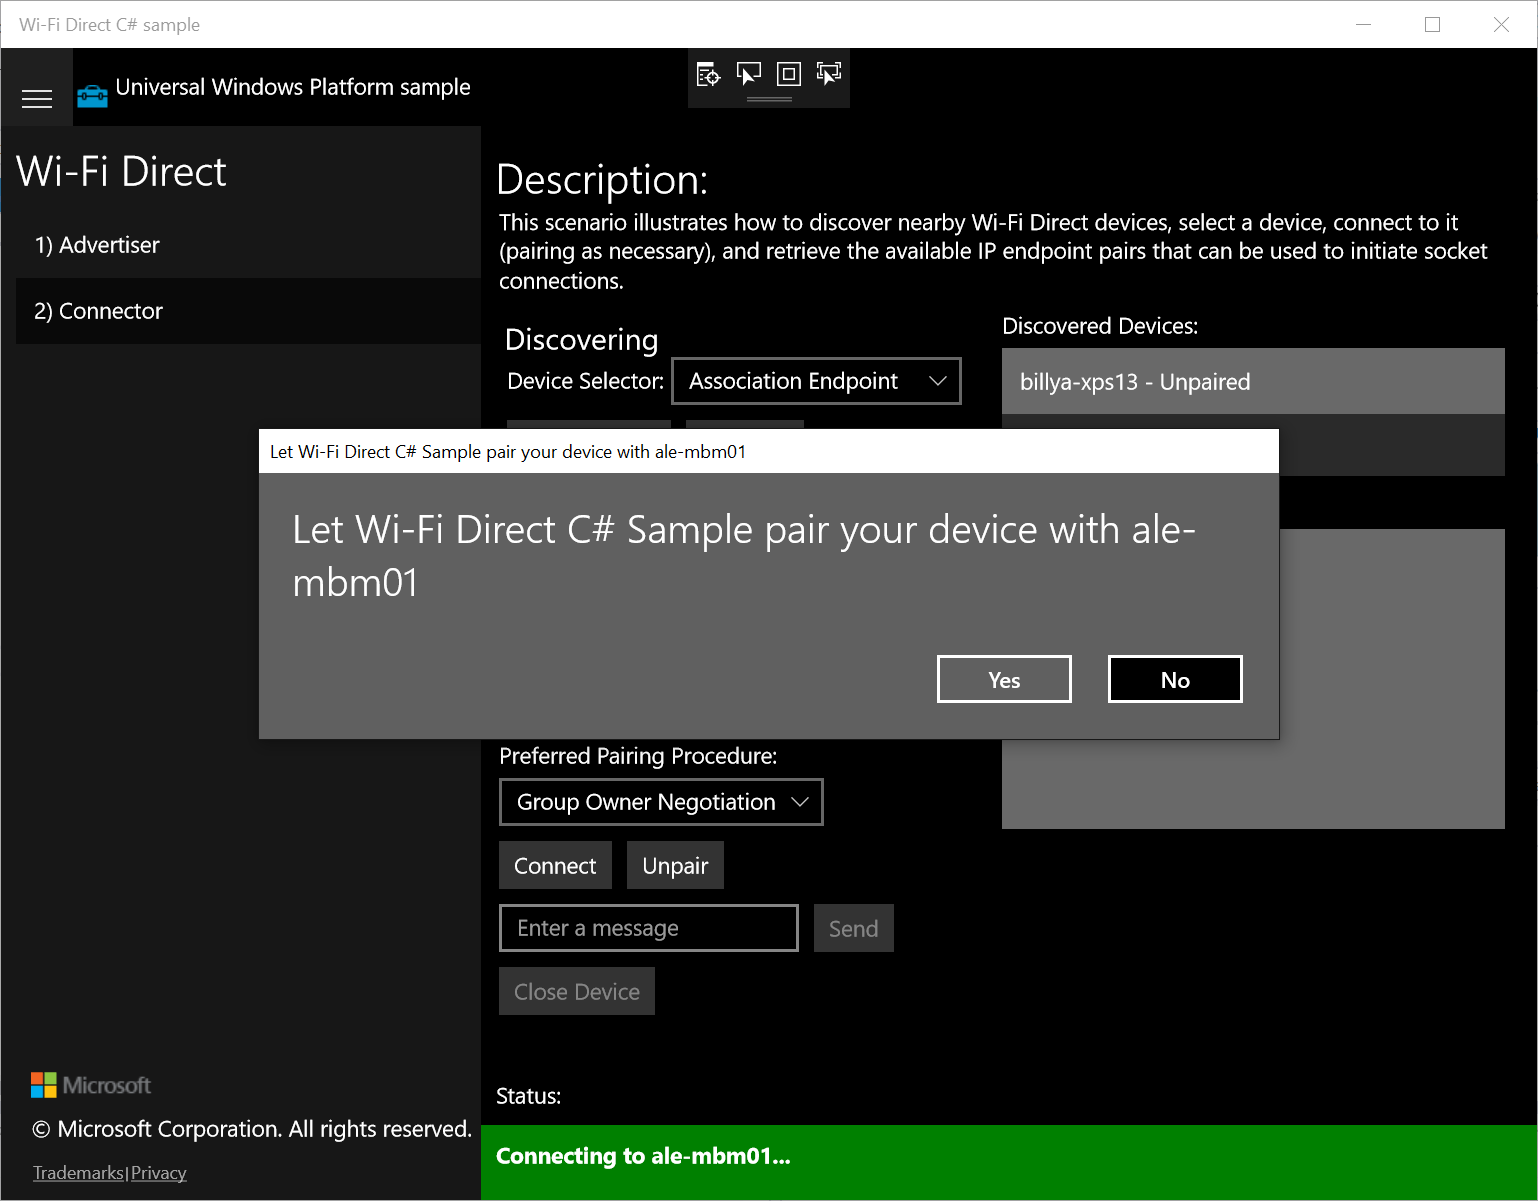
On the Windows 10 PC, select the MBM ("ale-mbm01" in our example) from the "Discovered Devices" list and press the "Connect" button
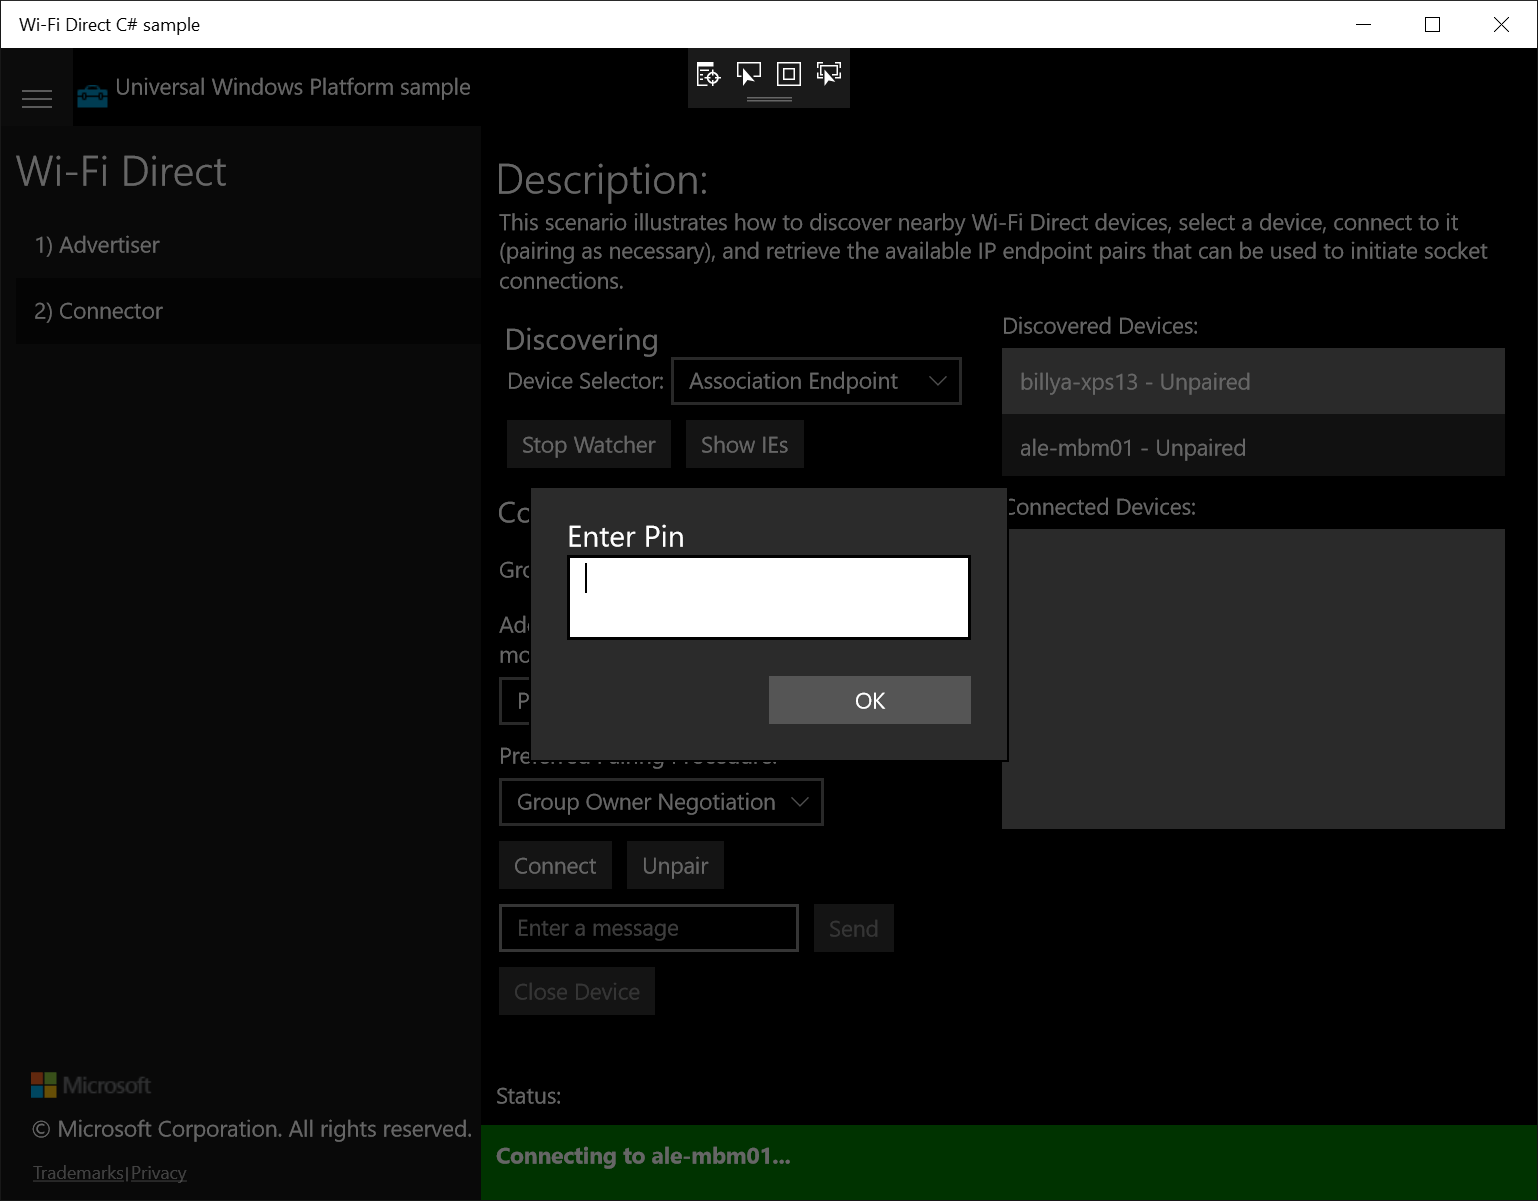
On the Windows 10 PC, press "Yes" to initiate the pairing process
On the MBM monitor, you should a message with the PIN
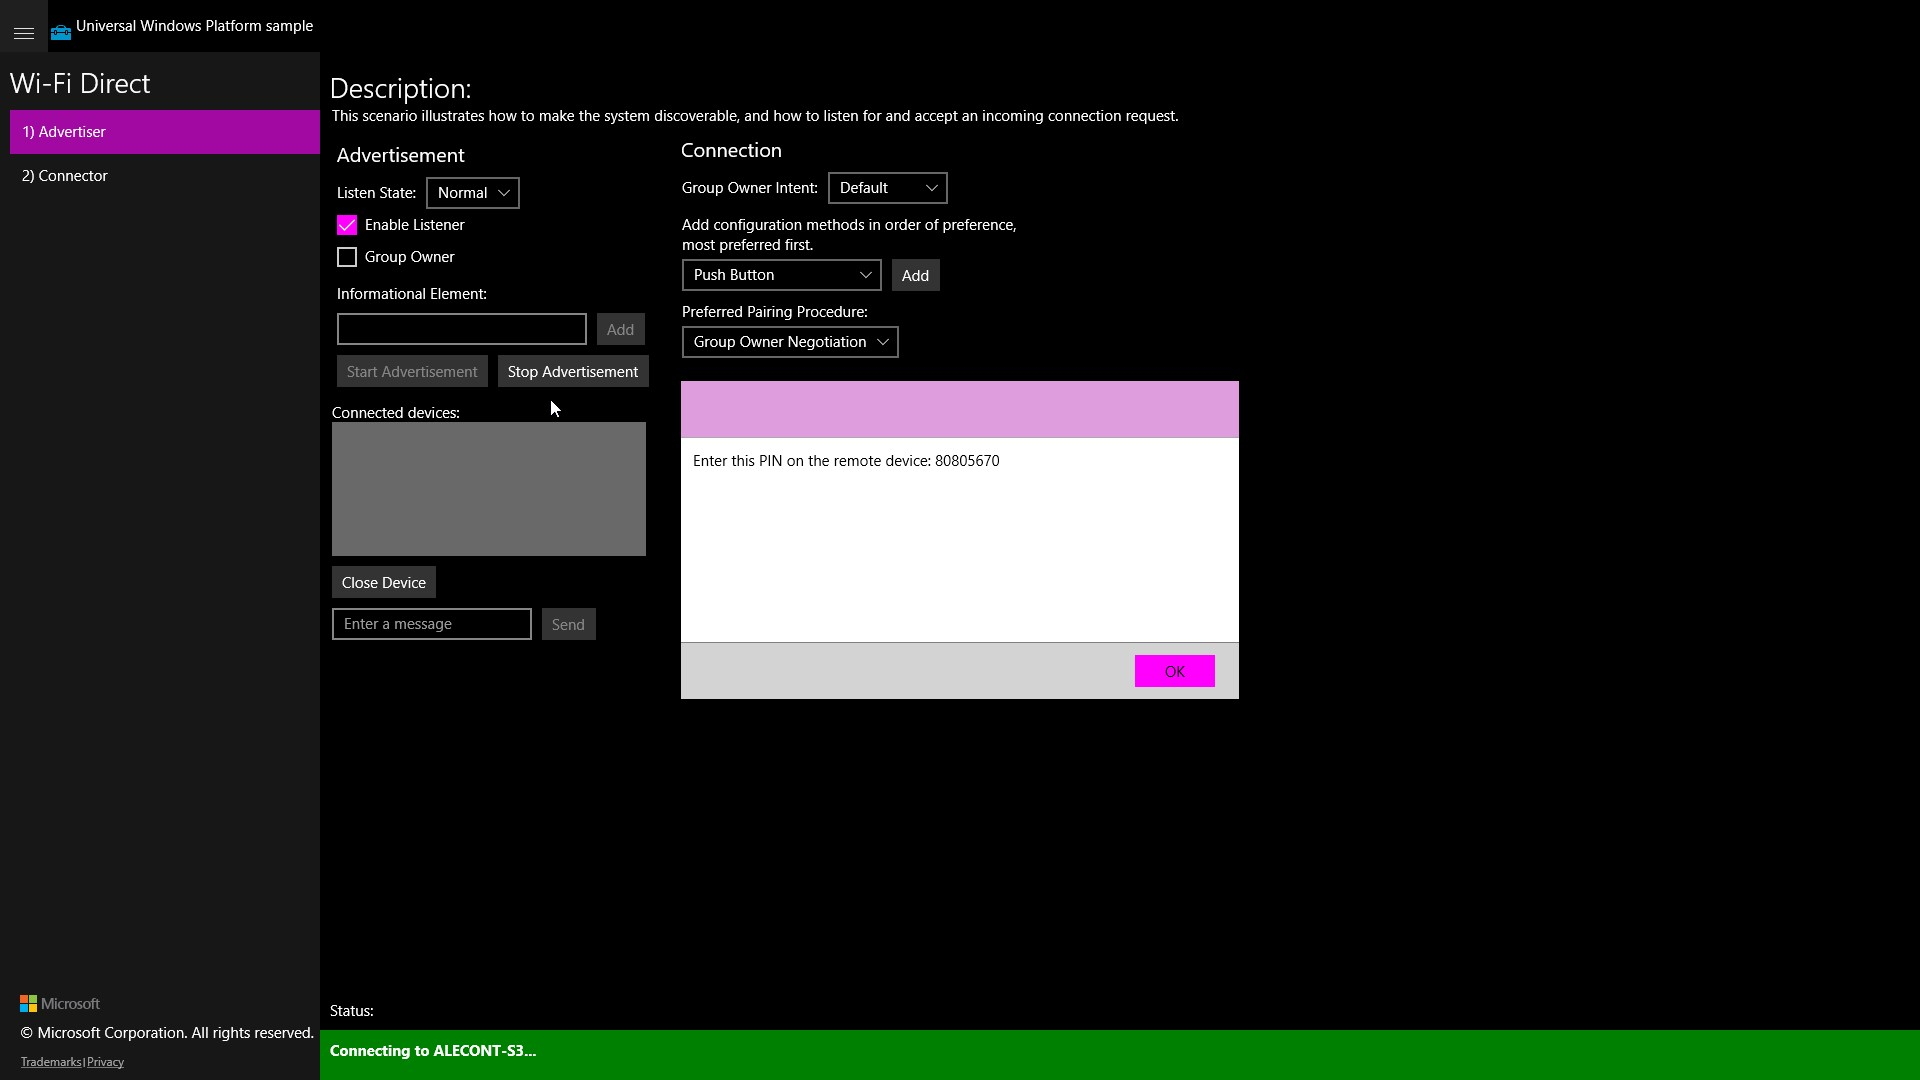
On the Windows 10 PC, you should see a dialog where you need to enter the PIN
Talk on the channel
The two devices should be connected. You should see a randomly generated device ID ("hqffpzhz.ggg" in our example) on both screens in the "Connected Devices" list
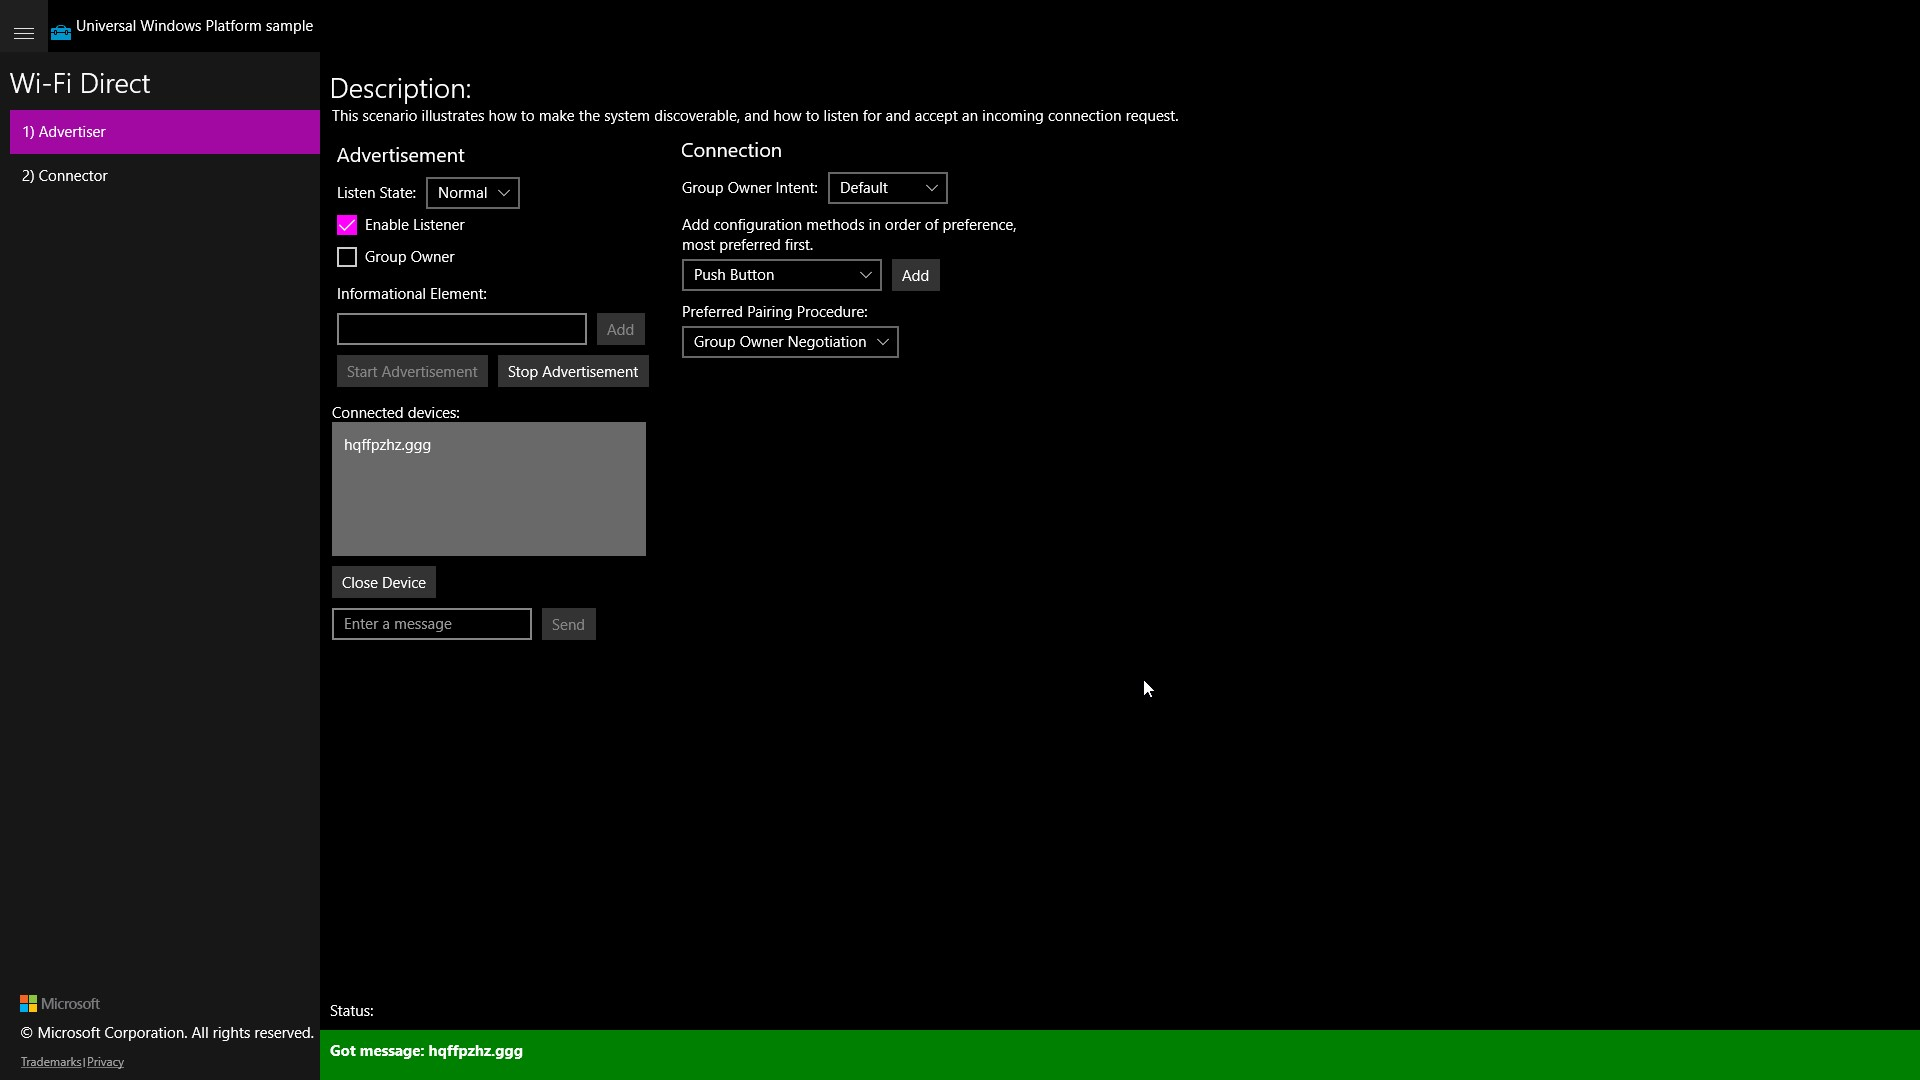
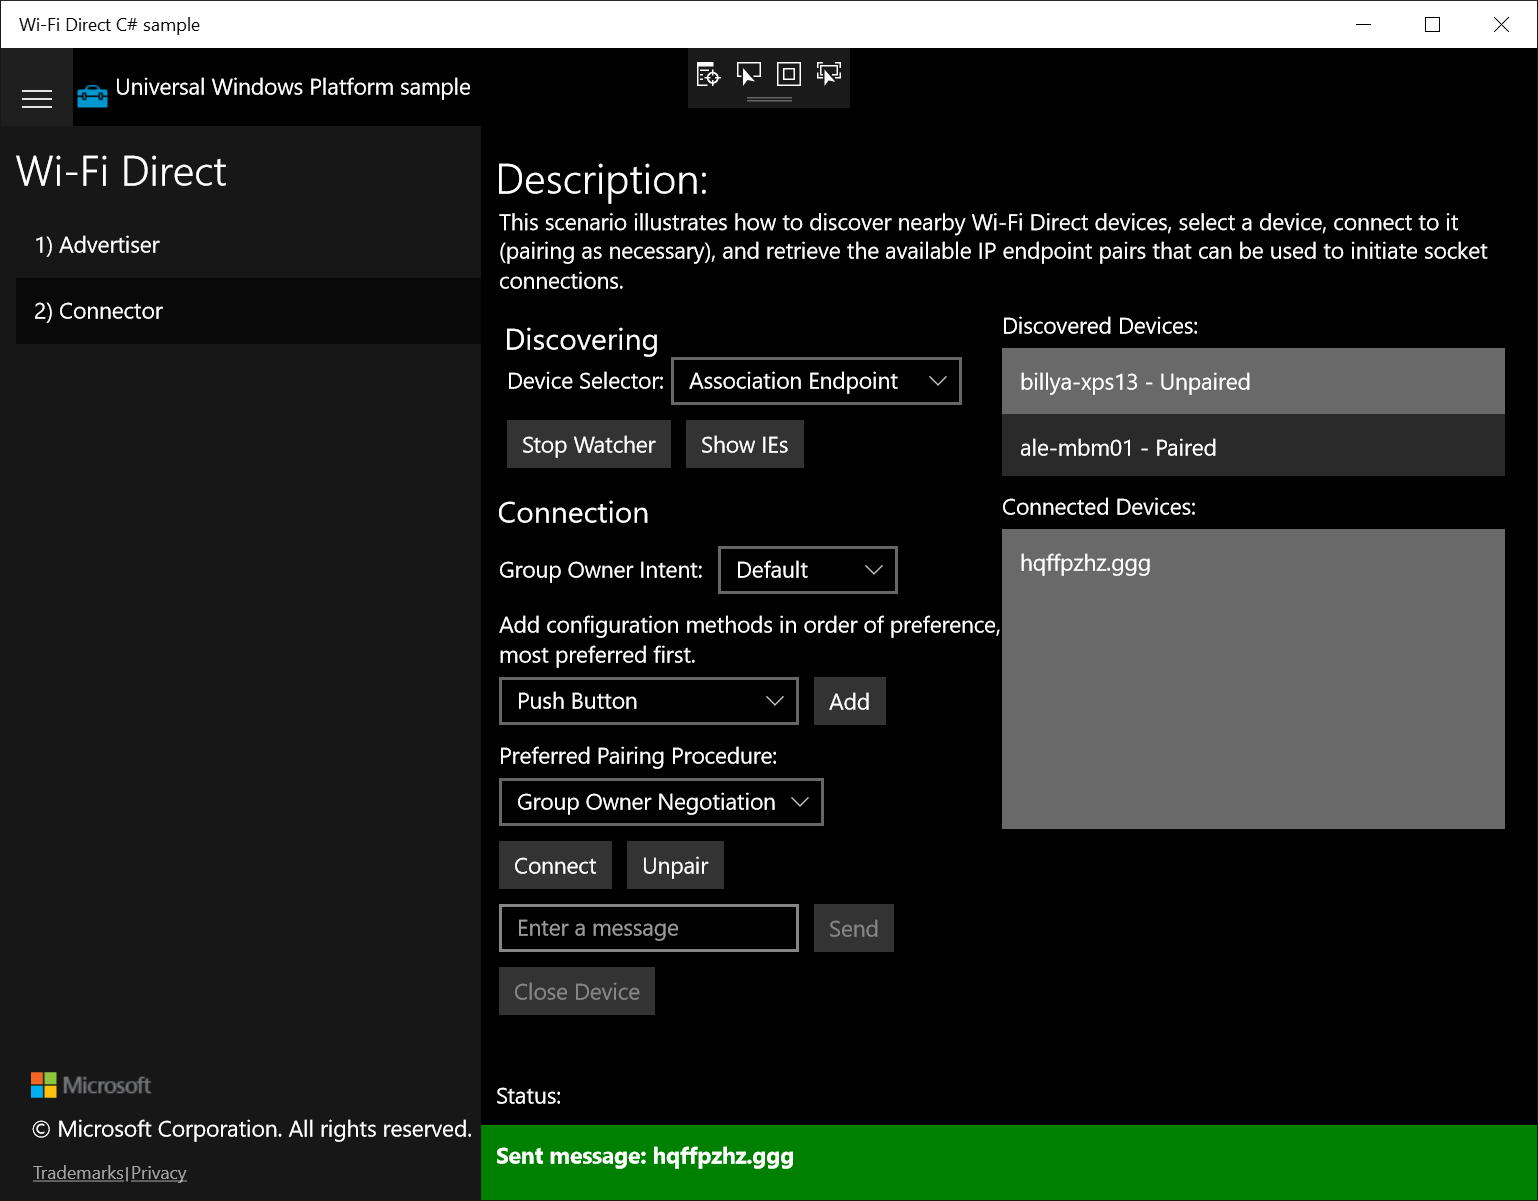
You now have a full-duplex channel (or socket) setup
- on the MBM, select the device ("hqffpzhz.ggg") from the "Connected Devices" list
- type a message in the "Enter a message" textbox
- press the "Send" button
- you should see the message being received from the Windows 10 PC
- try sending a message from the Windows 10 PC to the MBM