Setting up a Qualcomm device
If you're looking to manufacture with a Qualcomm device, please refer to the IoT Core Manufacturing Guide. You cannot use maker images for manufacturing.
Note
Make sure the device is now booting from the eMMC memory by entering the BIOS setup again and switching the Boot Drive order to load from the Hard Drive instead of from the USB Drive.
Using eMMC
- Download and install the DragonBoard Update Tool for your x86 or x64 machine.
- Download the Windows 10 IoT Core DragonBoard FFU.
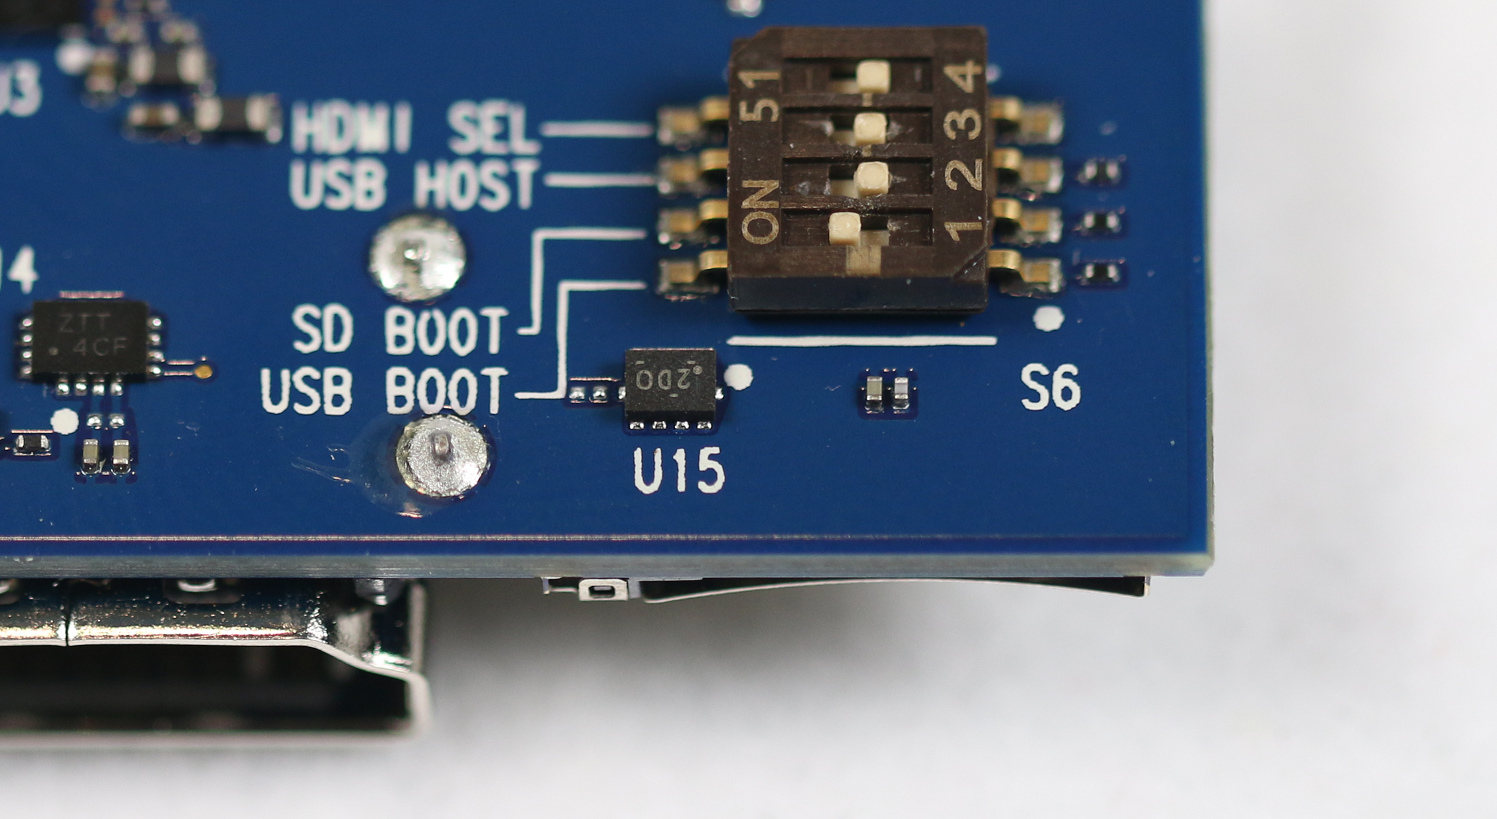
- Double-click on the downloaded ISO file and locate the mounted Virtual CD-drive. This drive will contain an installer file (.msi); double-click on it. This creates a new directory on your PC under
C:\Program Files (x86)\Microsoft IoT\FFU\in which you should see an image file, "flash.ffu". - Ensure your DragonBoard is in download mode by setting the first boot switch on the board to USB Boot, as shown below. Then, connect the DragonBoard to the host PC via a microUSB cable, then plug in the DragonBoard to a 12V (> 1A) power supply.
- Start the DragonBoard Update Tool, which should detect that the DragonBoard is connected to your PC with a green circle. "Browse" to the DragonBoard's FFU that you downloaded, then click the Program button.
- Click "Browse" again and select "rawprogram0.xml" that was generated in step 5. Then click the "Program" button.
- Once the download is complete, disconnect the power supply and microUSB cable from the board and toggle the USB Boot switch back to OFF. Connect an HDMI display, a mouse, and a keyboard to the DragonBoard and reconnect the power supply. After a few minutes, you should see the Windows 10 IoT Core default application.
Connect to a network
Wired connection
If your device comes with an Ethernet port or USB Ethernet adapter support to enable a wired connection, attach an Ethernet cable to connect it to your network.
Wireless connection
If your device supports Wi-Fi connectivity and you've connected a display to it, you'll need to:
- Go into your default application and click the settings button next to the clock.
- On the settings page, select Network and Wi-Fi.
- Your device will begin scanning for wireless networks.
- Once your network appears in this list, select it and click Connect.
If you haven't connected a display and would like to connect via Wi-Fi, you'll need to:
- Go to the IoT Dashboard and click on My Devices.
- Find your unconfigured board from the list. Its name will begin with "AJ_"... (e.g. AJ_58EA6C68). If you don't see your board appear after a few minutes, try rebooting your board.
- Click on Configure Device and enter your network credentials. This will connect your board to the network.
Note
Wifi on your computer will need to be turned on in order to find other networks.
Connect to Windows Device Portal
Use the Windows Device Portal to connect your device through a web browser. The device portal makes valuable configuration and device management capabilities available.