Note
Access to this page requires authorization. You can try signing in or changing directories.
Access to this page requires authorization. You can try changing directories.
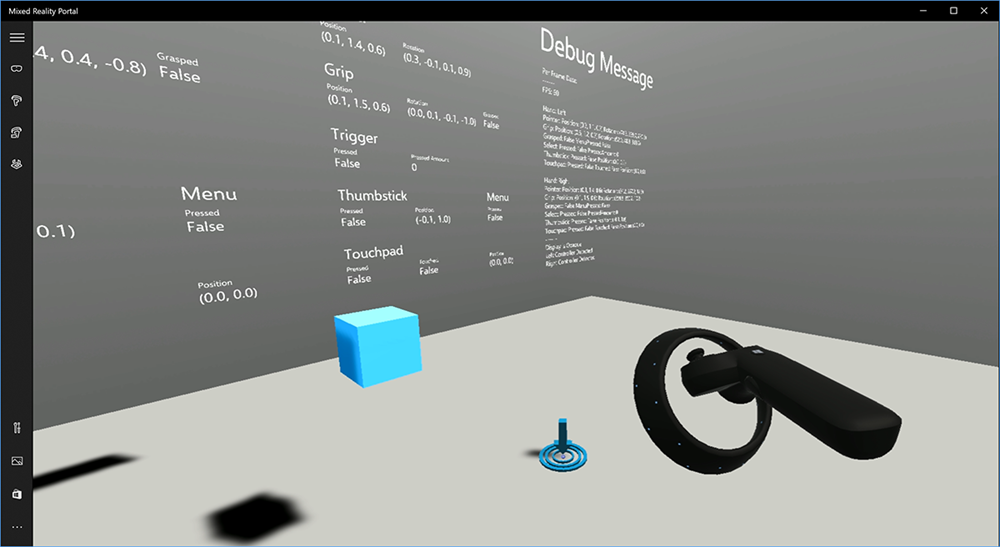
There are two key ways to take action on your gaze in Unity, hand gestures and motion controllers in HoloLens and Immersive HMD. You access the data for both sources of spatial input through the same APIs in Unity.
Unity provides two primary ways to access spatial input data for Windows Mixed Reality. The common Input.GetButton/Input.GetAxis APIs work across multiple Unity XR SDKs, while the InteractionManager/GestureRecognizer API specific to Windows Mixed Reality exposes the full set of spatial input data.
High-level composite gesture APIs (GestureRecognizer)
Namespace: UnityEngine.XR.WSA.Input
Types: GestureRecognizer, GestureSettings, InteractionSourceKind
Your app can also recognize higher-level composite gestures for spatial input sources, Tap, Hold, Manipulation, and Navigation gestures. You can recognize these composite gestures across both hands and motion controllers using the GestureRecognizer.
Each Gesture event on the GestureRecognizer provides the SourceKind for the input as well as the targeting head ray at the time of the event. Some events provide additional context-specific information.
There are only a few steps required to capture gestures using a Gesture Recognizer:
- Create a new Gesture Recognizer
- Specify which gestures to watch for
- Subscribe to events for those gestures
- Start capturing gestures
Create a new Gesture Recognizer
To use the GestureRecognizer, you must have created a GestureRecognizer:
GestureRecognizer recognizer = new GestureRecognizer();
Specify which gestures to watch for
Specify which gestures you're interested in via SetRecognizableGestures():
recognizer.SetRecognizableGestures(GestureSettings.Tap | GestureSettings.Hold);
Subscribe to events for those gestures
Subscribe to events for the gestures you're interested in.
void Start()
{
    recognizer.Tapped += GestureRecognizer_Tapped;
    recognizer.HoldStarted += GestureRecognizer_HoldStarted;
    recognizer.HoldCompleted += GestureRecognizer_HoldCompleted;
    recognizer.HoldCanceled += GestureRecognizer_HoldCanceled;
}
Note
Navigation and Manipulation gestures are mutually exclusive on an instance of a GestureRecognizer.
Start capturing gestures
By default, a GestureRecognizer doesn't monitor input until StartCapturingGestures() is called. It's possible that a gesture event may be generated after StopCapturingGestures() is called if input was performed before the frame where StopCapturingGestures() was processed. The GestureRecognizer will remember whether it was on or off during the previous frame in which the gesture actually occurred, and so it's reliable to start and stop gesture monitoring based on this frame's gaze targeting.
recognizer.StartCapturingGestures();
Stop capturing gestures
To stop gesture recognition:
recognizer.StopCapturingGestures();
Removing a gesture recognizer
Remember to unsubscribe from subscribed events before destroying a GestureRecognizer object.
void OnDestroy()
{
    recognizer.Tapped -= GestureRecognizer_Tapped;
    recognizer.HoldStarted -= GestureRecognizer_HoldStarted;
    recognizer.HoldCompleted -= GestureRecognizer_HoldCompleted;
    recognizer.HoldCanceled -= GestureRecognizer_HoldCanceled;
}
Rendering the motion controller model in Unity
Motion controller model and teleportation
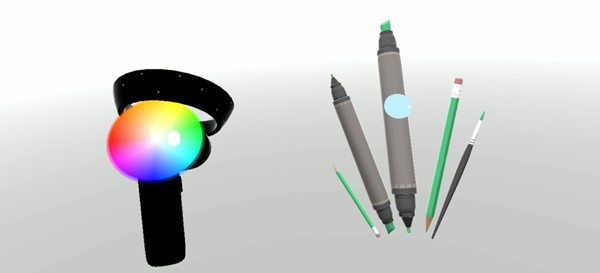
To render motion controllers in your app that match the physical controllers your users are holding and articulate as various buttons are pressed, you can use the MotionController prefab in the Mixed Reality Toolkit. This prefab dynamically loads the correct glTF model at runtime from the system's installed motion controller driver. It's important to load these models dynamically rather than importing them manually in the editor, so that your app will show physically accurate 3D models for any current and future controllers your users may have.
- Follow the Getting Started instructions to download the Mixed Reality Toolkit and add it to your Unity project.
- If you replaced your camera with the MixedRealityCameraParent prefab as part of the Getting Started steps, you're good to go! That prefab includes motion controller rendering. Otherwise, add Assets/HoloToolkit/Input/Prefabs/MotionControllers.prefab into your scene from the Project pane. You'll want to add that prefab as a child of whatever parent object you use to move the camera around when the user teleports within your scene, so that the controllers come along with the user. If your app doesn't involve teleporting, just add the prefab at the root of your scene.
Throwing objects
Throwing objects in virtual reality is a harder problem than it may at first seem. As with most physically based interactions, when throwing in game acts in an unexpected way, it's immediately obvious and breaks immersion. We've spent some time thinking deeply about how to represent a physically correct throwing behavior, and have come up with a few guidelines, enabled through updates to our platform, that we would like to share with you.
You can find an example of how we recommend to implement throwing here. This sample follows these four guidelines:
Use the controller’s velocity instead of position. In the November update to Windows, we introduced a change in behavior when in the ''Approximate'' positional tracking state. When in this state, velocity information about the controller will continue to be reported for as long as we believe its high accuracy, which is often longer than position remains high accuracy.
Incorporate the angular velocity of the controller. This logic is all contained in the
throwing.csfile in theGetThrownObjectVelAngVelstatic method, within the package linked above:As angular velocity is conserved, the thrown object must maintain the same angular velocity as it had at the moment of the throw:
objectAngularVelocity = throwingControllerAngularVelocity;As the center of mass of the thrown object is likely not at the origin of the grip pose, it likely has a different velocity than that of the controller in the frame of reference of the user. The portion of the object’s velocity contributed in this way is the instantaneous tangential velocity of the center of mass of the thrown object around the controller origin. This tangential velocity is the cross product of the angular velocity of the controller with the vector representing the distance between the controller origin and the center of mass of the thrown object.
Vector3 radialVec = thrownObjectCenterOfMass - throwingControllerPos;
Vector3 tangentialVelocity = Vector3.Cross(throwingControllerAngularVelocity, radialVec);
The total velocity of the thrown object is the sum of velocity of the controller and this tangential velocity:
objectVelocity = throwingControllerVelocity + tangentialVelocity;
Pay close attention to the time at which we apply the velocity. When a button is pressed, it can take up to 20 ms for that event to bubble up through Bluetooth to the operating system. This means that if you poll for a controller state change from pressed to not pressed or the other way around, the controller pose information you get with it will actually be ahead of this change in state. Further, the controller pose presented by our polling API is forward predicted to reflect a likely pose at the time the frame will be displayed which could be more than 20 ms in the future. This is good for rendering held objects, but compounds our time problem for targeting the object as we calculate the trajectory for the moment the user released the throw. Fortunately, with the November update, when a Unity event like InteractionSourcePressed or InteractionSourceReleased is sent, the state includes the historical pose data from back when the button was pressed or released. To get the most accurate controller rendering and controller targeting during throws, you must correctly use polling and eventing, as appropriate:
- For controller rendering each frame, your app should position the controller's GameObject at the forward-predicted controller pose for the current frame’s photon time. You get this data from Unity polling APIs like XR.InputTracking.GetLocalPosition or XR.WSA.Input.InteractionManager.GetCurrentReading.
- For controller targeting upon a press or release, your app should raycast and calculate trajectories based on the historical controller pose for that press or release event. You get this data from Unity eventing APIs, like InteractionManager.InteractionSourcePressed.
Use the grip pose. Angular velocity and velocity are reported relative to the grip pose, not pointer pose.
Throwing will continue to improve with future Windows updates, and you can expect to find more information on it here.
Gesture and Motion Controllers in MRTK
You can access gesture and motion controller from the input Manager.
Follow along with tutorials
Step-by-step tutorials, with more detailed customization examples, are available in the Mixed Reality Academy:
MR Input 213 - Motion controller
Next Development Checkpoint
If you're following the Unity development journey we've laid out, you're in the midst of exploring the MRTK core building blocks. From here, you can continue to the next building block:
Or jump to Mixed Reality platform capabilities and APIs:
You can always go back to the Unity development checkpoints at any time.