Note
Access to this page requires authorization. You can try signing in or changing directories.
Access to this page requires authorization. You can try changing directories.
If you have a Unity project that's already set up for OpenXR (you have the Unity OpenXR plugin installed and configured) and you want to add the capability to target your app for HoloLens 2 or Windows Mixed Reality headsets, follow the instructions below.
To determine if your project has the Mixed Reality OpenXR plugin installed:
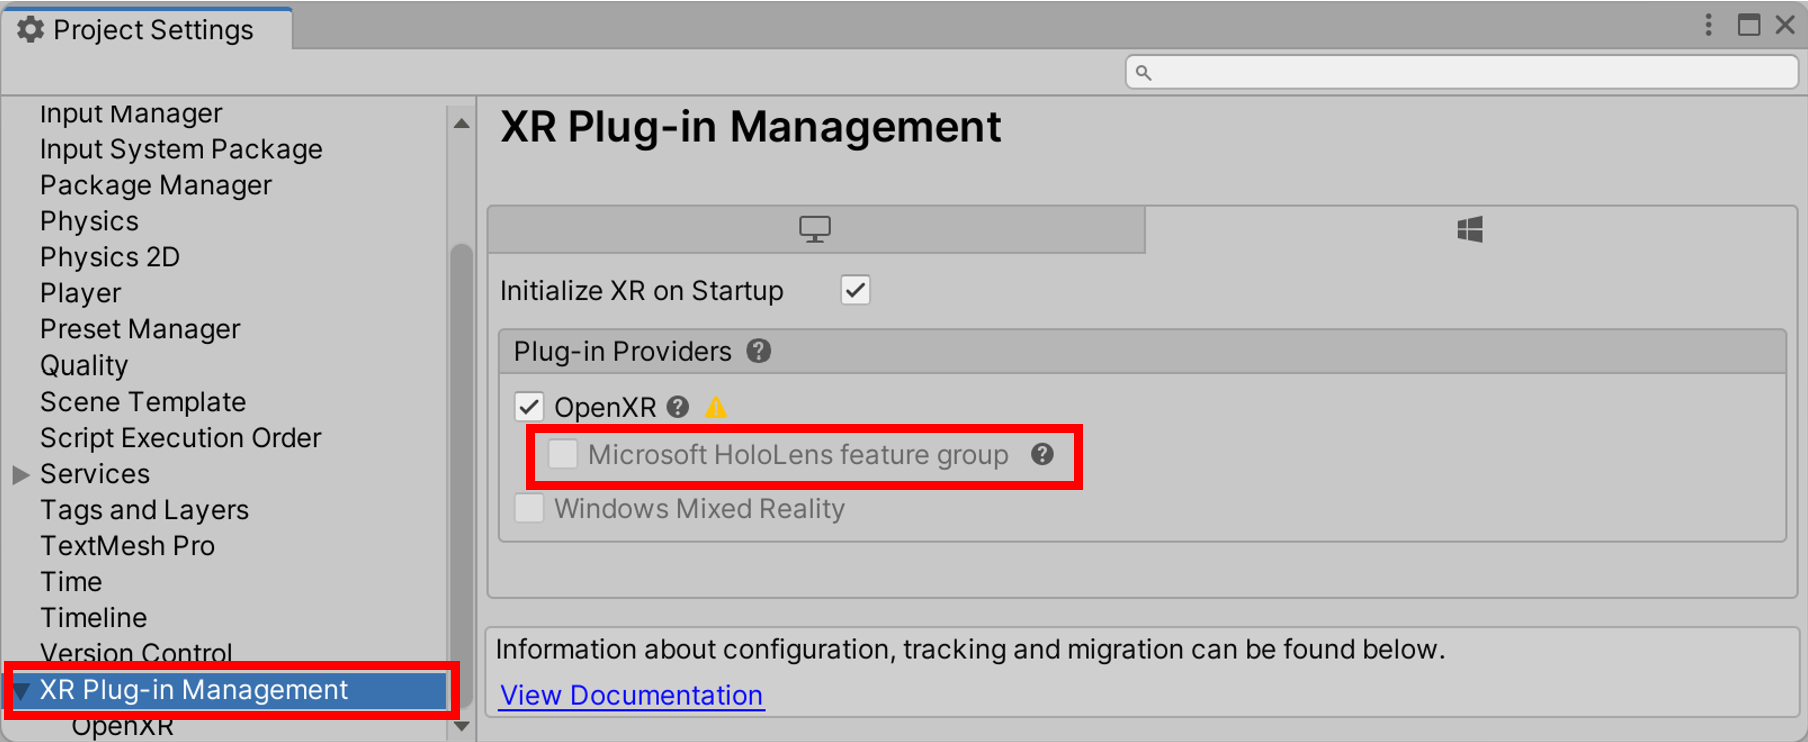
In Unity, on the menu bar, select Edit > Project Settings.
Ensure that you're on the XR Plug-in Management page with the Universal Windows Platform settings (Windows logo tab) displayed.
If Microsoft HoloLens feature group is grayed out or doesn't exist, the Mixed Reality OpenXR plugin isn't installed.
If the plugin is installed, proceed to the section named configure the project to use the Mixed Reality OpenXR Plugin. Otherwise, continue to follow the instructions below.
Download and install the Mixed Reality Feature Tool
The Mixed Reality OpenXR Plugin comes in the form of a package for Unity. The best way to discover, update, and import feature packages is with the Mixed Reality Feature Tool. You can search packages by name or category, see their dependencies, and view proposed changes to your project's manifest file before importing.
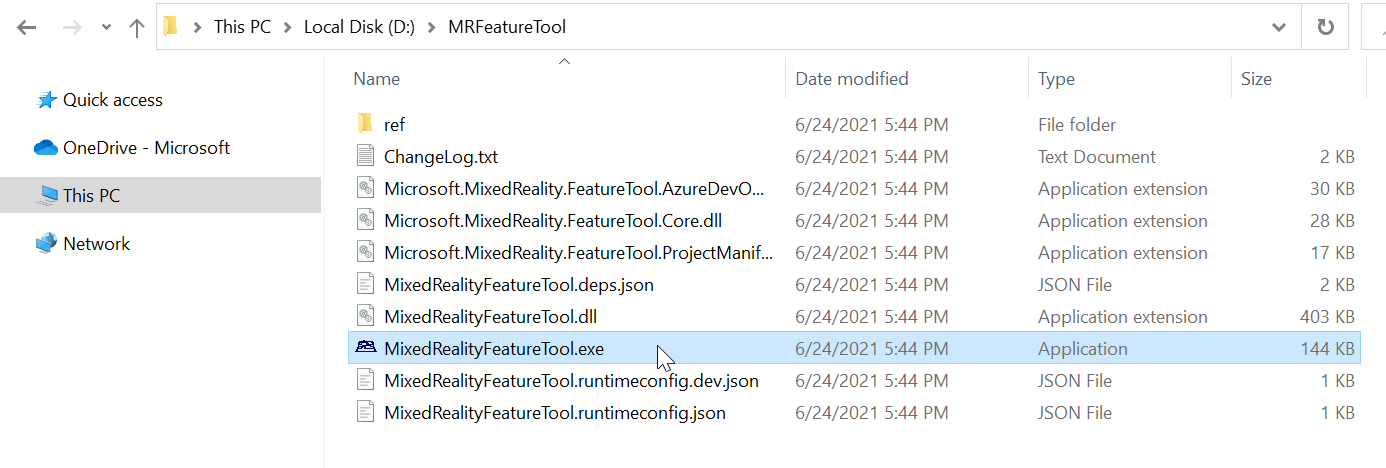
Download the latest version of the Mixed Reality Feature Tool from the Microsoft Download Center.
After the download finishes, navigate to the executable file MixedRealityFeatureTool.exe and then use it to launch the Mixed Reality Feature Tool.
Import the Mixed Reality OpenXR Plugin
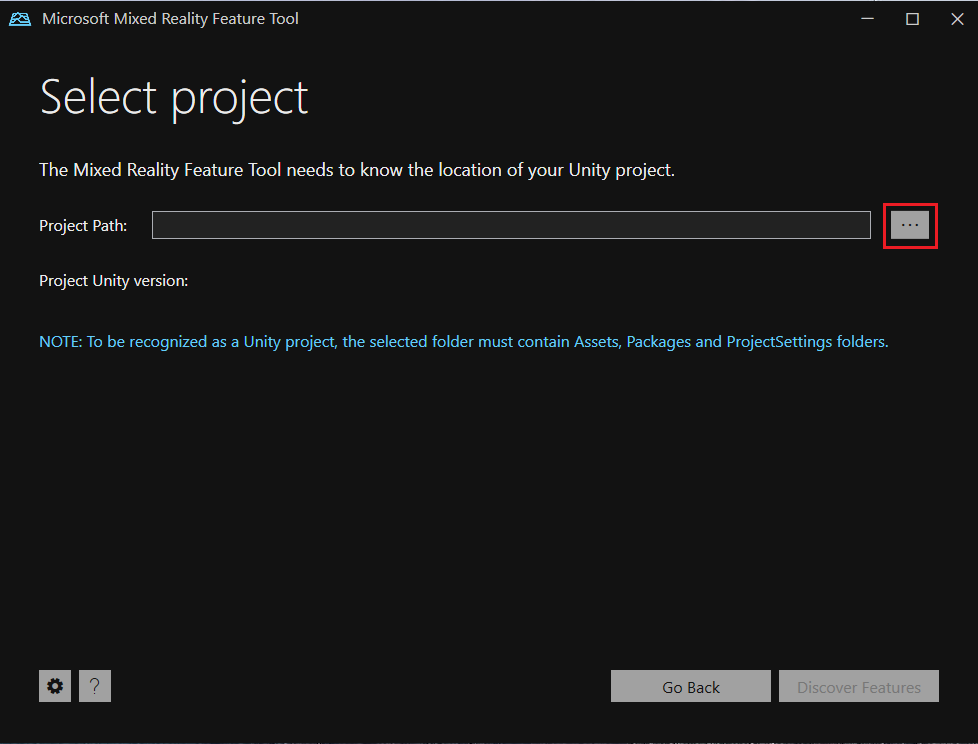
In the Mixed Reality Feature Tool, select Start.

Select the Browse button (it's the "three-dot" button in the image below), then navigate to the folder containing your Unity project, and then open it.
Note
The Project Path box in the Tool must contain some value, so it inserts a backslash ("_") by default.
After you select a folder, the Tool checks to ensure that it's a valid Unity project folder.
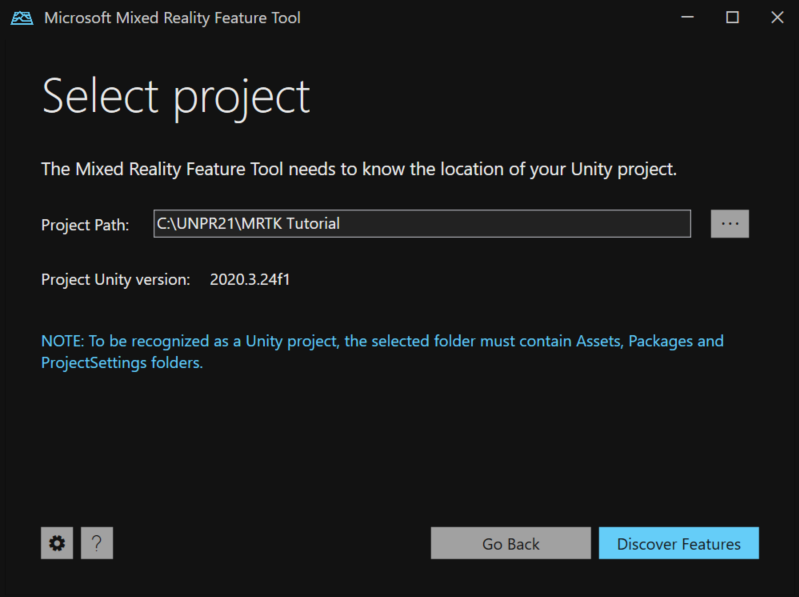
Select Discover Features.
Note: You may need to wait a few seconds while the Tool refreshes the packages from the feeds.
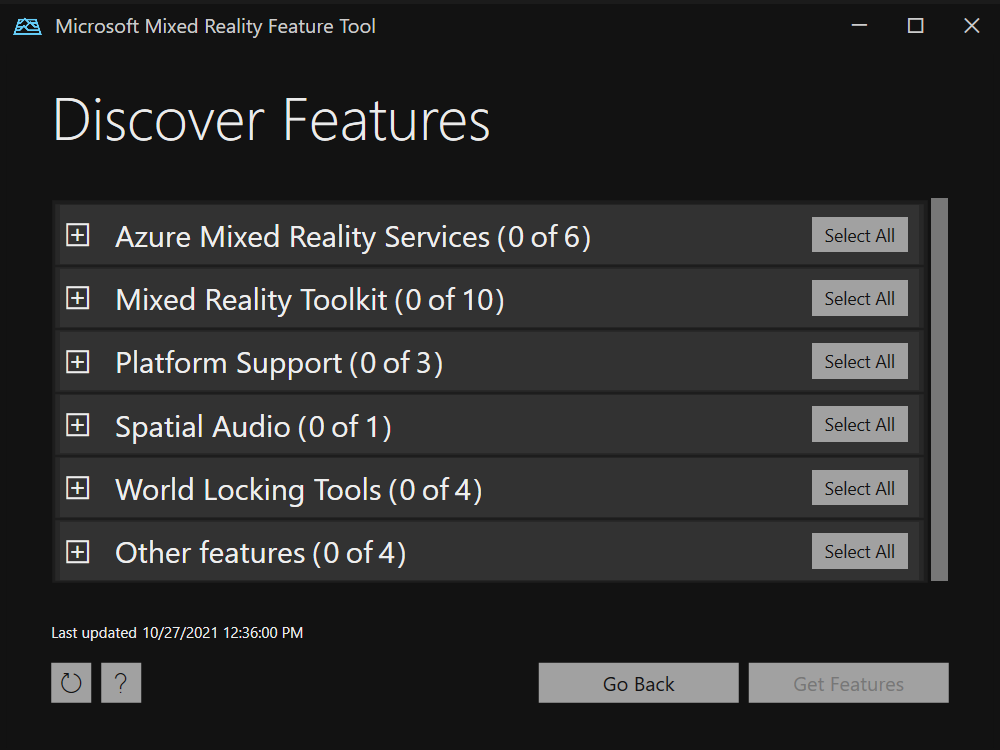
On the Discover Features page, note that there is a list of six package groups.
Click the "+" button to the left of Platform Support (0 of 5) and then select the latest version of Mixed Reality OpenXR Plugin.
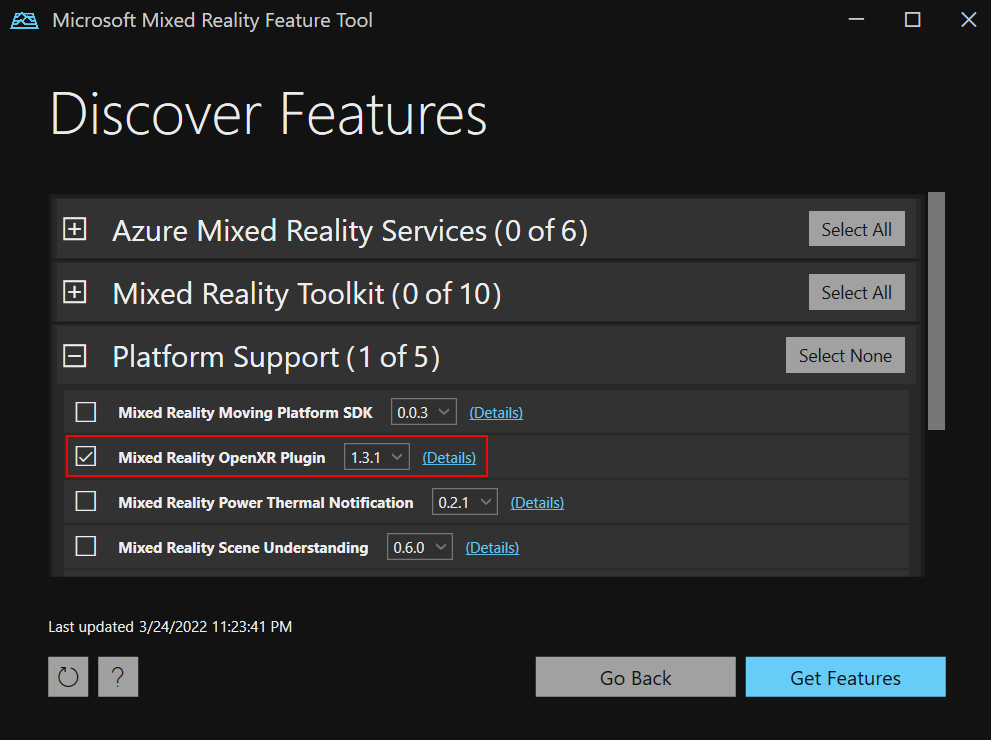
After you've made your selection(s), click Get Features.
Select Validate to validate the packages you selected. You should see a dialog that says No validation issues were detected. When you do, click OK.
On the Import Features page, the left-side column, Features, displays the packages you just selected. The right-side column, Required dependencies, displays any dependencies. You can click the Details link for any of these items to learn more about them.
When you're ready to move on, select Import. On the Review and Approve page, you can review information about the packages.
Select Approve.
Return to the Unity Editor and click a blank area in the UI. You'll see a progress bar showing you that the package is being imported.
Configure the project to use the Mixed Reality OpenXR Plugin
- If you're targeting HoloLens 2, see configure for HoloLens 2 via Project Validation for further instructions. Alternatively, to apply recommended settings by hand, see configure for HoloLens 2 manually.
- If you're targeting Windows Mixed Reality headsets, see configure for desktop VR.