Note
Access to this page requires authorization. You can try signing in or changing directories.
Access to this page requires authorization. You can try changing directories.
ConstraintManager allows you to apply a set of constraint components to a transform. By default, the constraint manager will automatically collect all attached constraint components and apply them to the target object. However, users can also opt to configure the list of applied constraints manually and only allow a subset of attached constraints to be used.
Note
MRTK3 currently offers a limited subset of the constraints from MRTK 2.x. We're currently investigating a refactor of the Constraints system to unify the developer workflow with Solvers and Elastics. Stay tuned!
Currently, the following MRTK UX elements support constraints:
The constraint manager can operate in two modes:
- Auto constraint selection
- Manual constraint selection
Constraint selection
Auto constraint selection
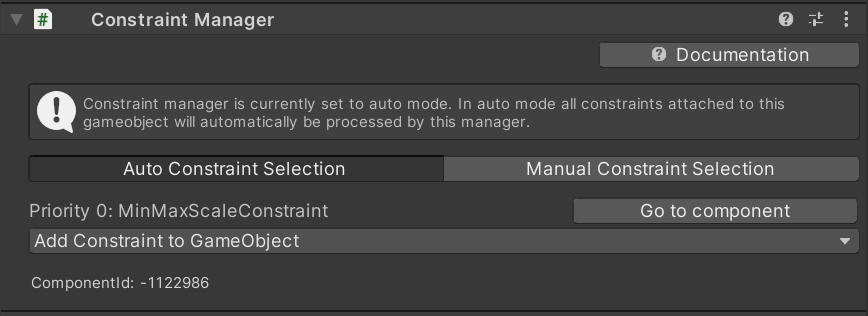
The default Auto mode will list all attached constraint components. You can jump straight to the component in the inspector using the Go to component buttons or add a new constraint from the dropdown.
Manual constraint selection

If the constraint manager is set to manual mode, only constraints linked in the constraint list are processed and applied to the transform. When enabling manual mode for the first time, the manager will auto-populate the list with all currently attached constraints.
Note
The Remove Entry action will only remove the constraint from the manual selection list. The component will still be present on the GameObject.
Execution order
The execution order of each constraint can be defined in the Execution Order option on the constraint itself. The order will be reflected in the list displayed in the constraint manager. Some constraints will behave differently when they're combined in different orders, so keep in mind the priorities of each constraint and adjust their order accordingly.
Transform constraints
You can use constraints to limit manipulation in some way. For example, some applications may require rotation and that the object remain upright. In this case, a RotationAxisConstraint can be added to the object and used to limit rotation to y-axis rotation. MRTK provides several constraints, all of which are described below.
It's also possible to define new constraints and use them to create unique manipulation behavior that may be needed for some applications. To do this, create a script that inherits from TransformConstraint and implement the abstract ConstraintType property and the abstract ApplyConstraint method. Your new constraint should appear in the dropdown, and should be registered in the constraint manager automatically when added to the object.
All of the constraints provided by MRTK share the following properties:
Hand Type specifies whether the constraint is used for one-handed, two-handed, or both kinds of manipulation. Because this property is a flag, both options can be selected.
- One-handed: Constraint will be used during one-handed manipulation if selected.
- Two-handed: Constraint will be used during two-handed manipulation if selected.
ProximityType specifies whether the constraint is used for near, far, or both kinds of manipulation. Because this property is a flag, both options can be selected.
- Near: Constraint will be used during near manipulation if selected.
- Far: Constraint will be used during far manipulation if selected.
FaceUserConstraint
This constraint limits the rotation of an object such that it will always face the user. The Face Away option controls whether the positive or negative Z axis is used.
FixedDistanceConstraint
This constraint fixes the distance between the manipulated object and another object transform on manipulation start. This is useful for behaviour such as fixing the distance from the manipulated object to the head transform. The Constraint transform field defaults to the camera transform, and is the other transform that the manipulated object will have a fixed distance to.
MaintainApparentSizeConstraint
When this constraint is attached to an object, no matter how far the object is from the user, it will maintain the same apparent size to the user (i.e. it will take up the same proportion of the user's field of view). This can be used to ensure that a slate or text panel remains readable while manipulating.
MoveAxisConstraint
This constraint can be used to fix along which axes a manipulated object can be moved. This can be useful for manipulating objects over the surface of a plane, or along a line.
The Constraint on movement field specifies which axes to prevent movement on. By default, these axes will be global rather than local, but this can be changed below. Because this property is a flag, any number of options can be selected.
MinMaxScaleConstraint
This constraint limits the scale of an object, useful for preventing users from scaling objects to unusably small or large sizes. It works for both handle-based scaling (with BoundsControl) and with two-handed direct scaling (with ObjectManipulator). The Relative to initial state option defines whether the specific Minimum and Maximum scale values are absolute values or whether they are multiplied on the initial scale of the object.
RotationAxisConstraint
This constraint can be used to fix about which axes a manipulated object can be rotated. This can be useful for keeping a manipulated object upright, but still allowing y-axis rotations, for example.
The Constraint on rotation field specifies which axes to prevent rotation about. By default, these axes will be global rather than local, but this can be changed below. Because this property is a flag, any number of options can be selected.