Note
Access to this page requires authorization. You can try signing in or changing directories.
Access to this page requires authorization. You can try changing directories.
This document will show you how to create application shortcuts using Package Support Framework (PSF) that run scripts via the MSIX Packaging Tool and the Contoso Expense WPF application.
The idea is to copy the application shortcut, that will be available inside the package, to the user's Desktop through the PSF scripts.
There are a couple of things to keep in mind:
- Only create a shortcut if they are absolutely necessary. The goal is to not clutter the user's desktop.
- The MSIX application must be installed before creating the shortcut, so that we can specify the MSIX application path during the shortcut creation.
- At the same time, the MSIX application path can change, once it has the version number specified in the installation folder. Example of the Contoso Expenses installation path:
C:\Program Files\WindowsApps\ContosoExpenses_1.0.0.0_x86__3z09h3y28h0qg
To avoid having to change the application shortcut every time the application is updated, create the shortcut by pointing to the AppExecutionAlias. The AppExecutionAlias allows it to launch the application with the value defined in the alias session of the application manifest, so there is no need to specify the full application path. Therefore, before create the shortcut, define the alias in the application manifest. Otherwise, Windows Explorer will not recognize the alias and it will not allow us to create the shortcut.
Create the application alias
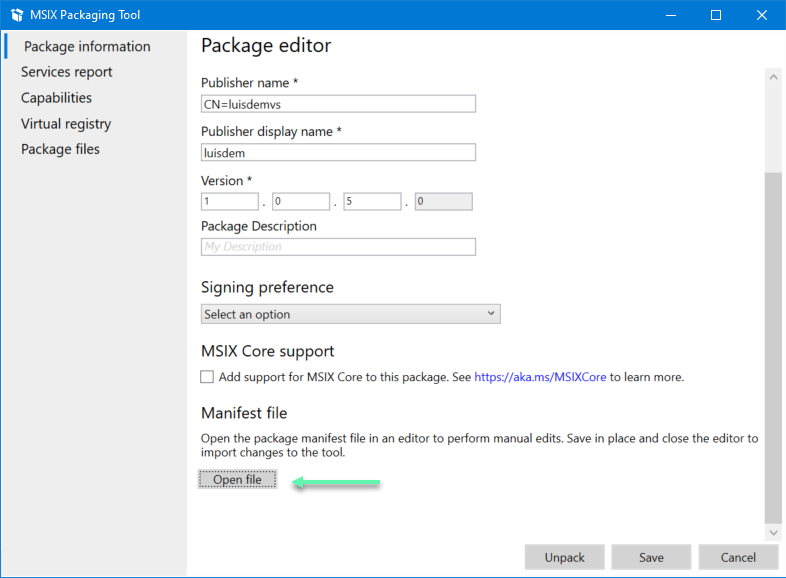
Click on the Package information menu item and click on Open File, available on the bottom of UI, to edit the application manifest:
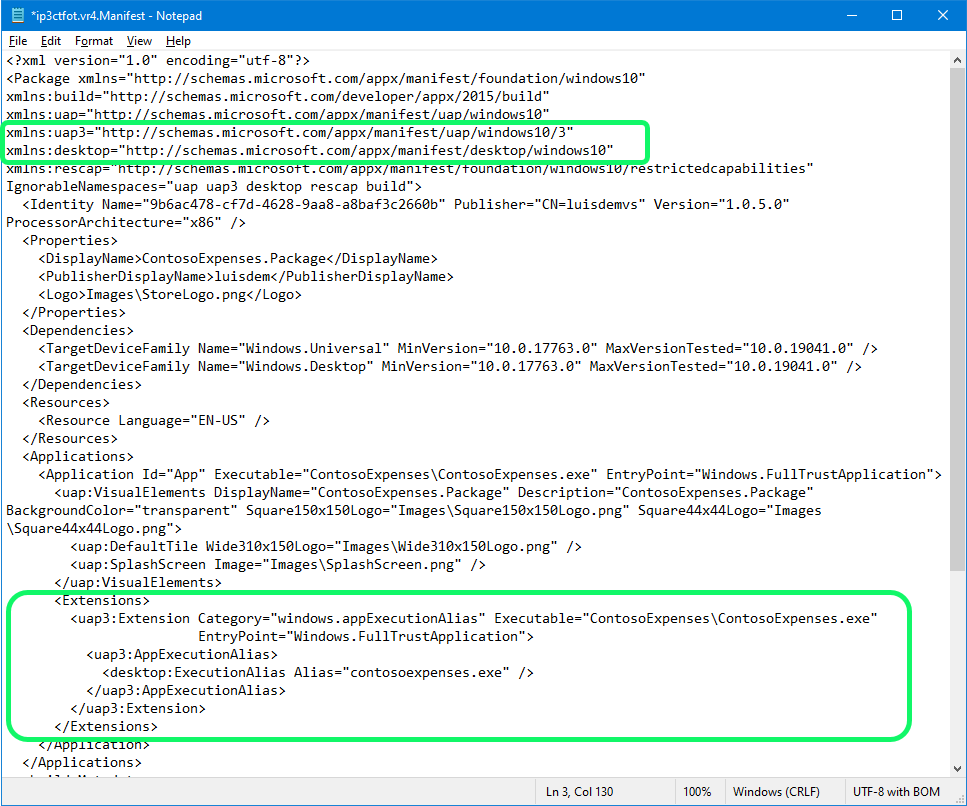
Include the following namespaces, that will be used to create the alias, as follows:
xmlns:uap3="http://schemas.microsoft.com/appx/manifest/uap/windows10/3" xmlns:desktop="http://schemas.microsoft.com/appx/manifest/desktop/windows10"
Include the value uap3 and desktop in the IgnorableNamespaces element:
IgnorableNamespaces="uap uap3 desktop rescap build"
Include the application's execution alias after the </uap:VisualElements> element:
  <Extensions>
    <uap3:Extension Category="windows.appExecutionAlias"
                    Executable="ContosoExpenses\ContosoExpenses.exe"
                    EntryPoint="Windows.FullTrustApplication">
      <uap3:AppExecutionAlias>
        <desktop:ExecutionAlias Alias="contosoexpenses.exe" />
        </uap3:AppExecutionAlias>
      </uap3:Extension>
  </Extensions>
Follows the manifest with the modifications:
Save and close the manifest file.
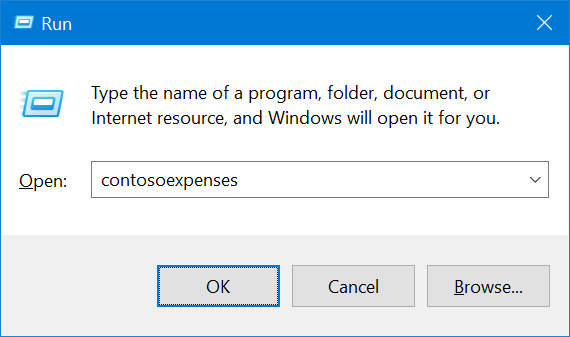
Switch back to the MSIX Packaging Tool and generate a new package. Once the package is created, install the package and start the application through the alias, for example, by pressing Win+R and typing contosoexpenses:
Now that the alias is created, it is possible to proceed to the next steps.
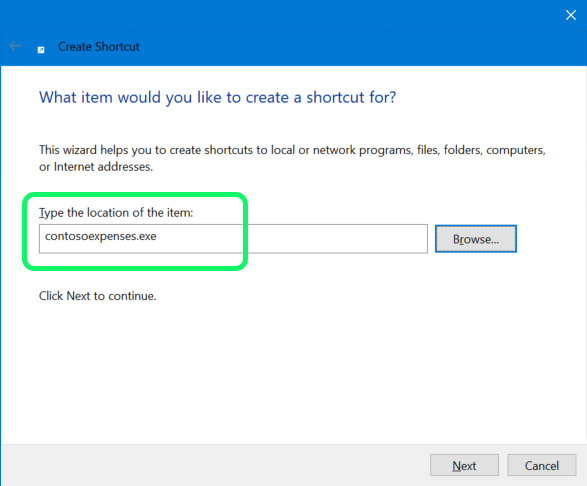
Create the application shortcut
Create a new application shortcut in a folder of your preference using the alias contosoexpenses.exe, as follows:
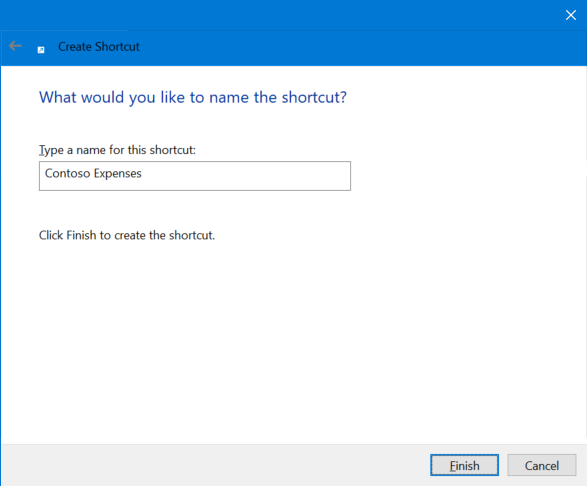
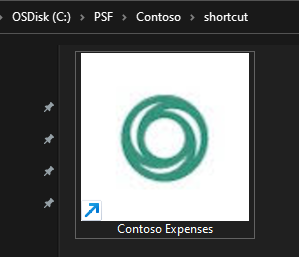
Name the shortcut for Contoso Expenses:
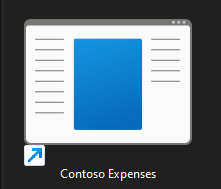
By default, the shortcut will be a generic icon:
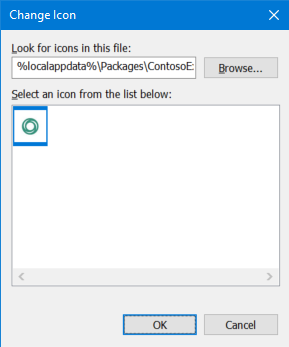
Changing the shortcut is straightforward but the challenge here is to avoid using the full application path that has the version number and that may change in a future update. One way to solve this, is to copy the icon from the package to the %appdata% used by the MSIX application, i.e., the %localappdata%\Packages\ContosoExpenses_3z09h3y28h0qg\LocalCache\Roaming_ folder that doesn't have version number.
To change the application shortcut, for now, it is needed to manually copy the icon to that folder. This will be automated later using PSF scripts.
![]()
Now, it is possible to change the shortcut icon to the %localappdata% path:
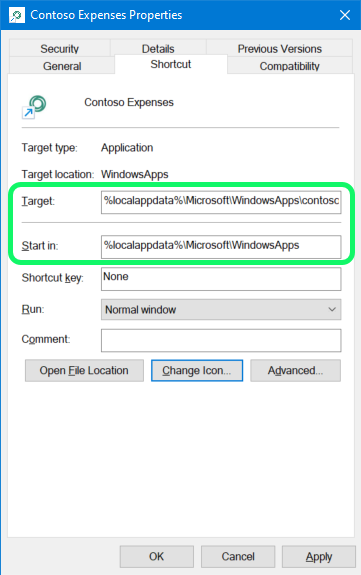
Still in the shortcut properties, take advantage and change the values of the target and start in properties para %localappdata%\Microsoft\WindowsApps\contosoexpenses.exe e %localappdata%\Microsoft\WindowsApps respectively:
Now that the shortcut is working, the next step is to add it to the package and to automate the creation process.
Get the PSF files
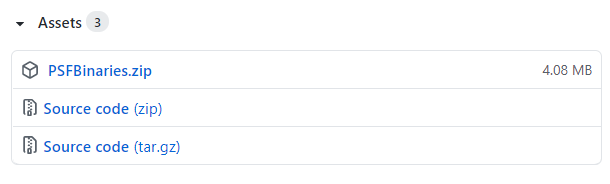
Download the PSFBinaries.zip from the PSF Github repo.
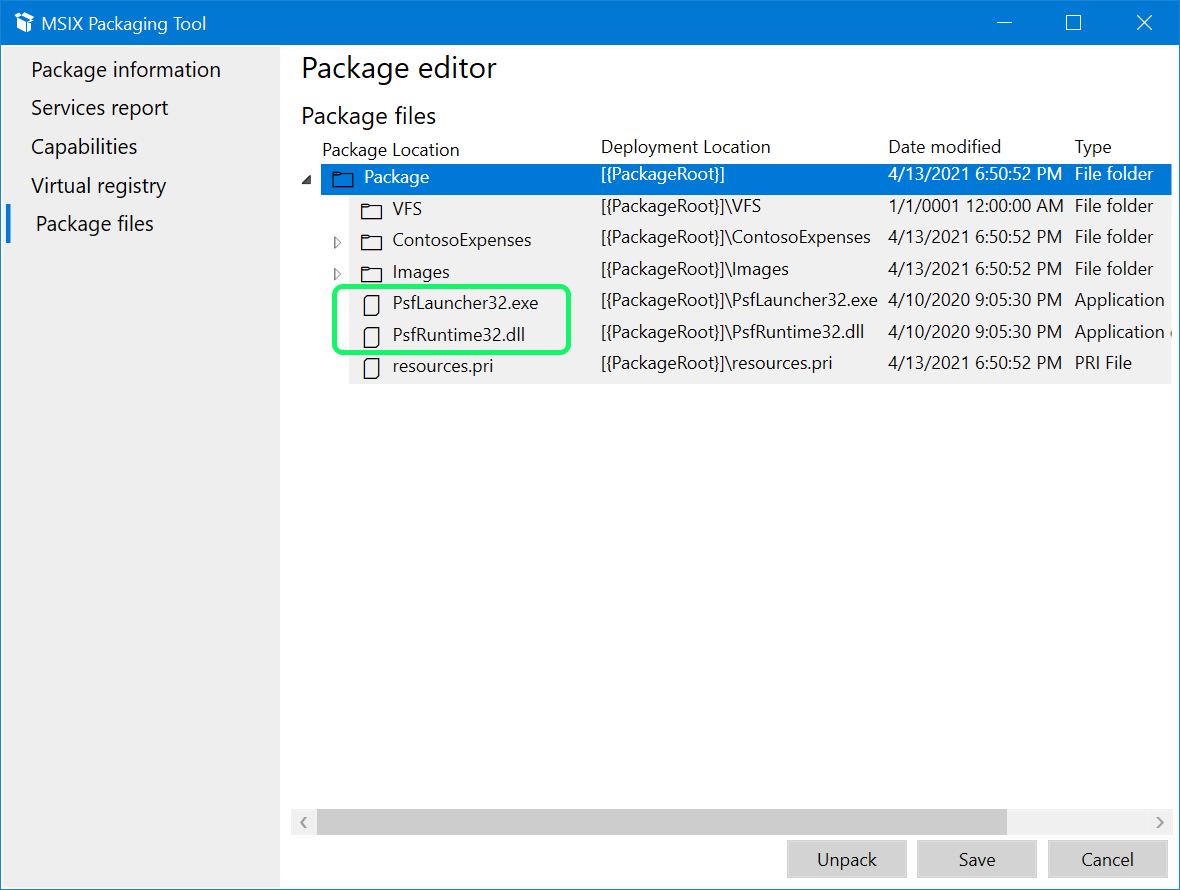
Extract the required 32-bit or 64-bit files to the root of your package directory, depending if your application is 32 or 64-bit. Use the following table as a guide.
| Application executable is x64 | Application executable is x86 |
|---|---|
| PSFLauncher64.exe | PSFLauncher32.exe |
| PSFRuntime64.dll | PSFRuntime32.dll |
Include the PSF files in the package
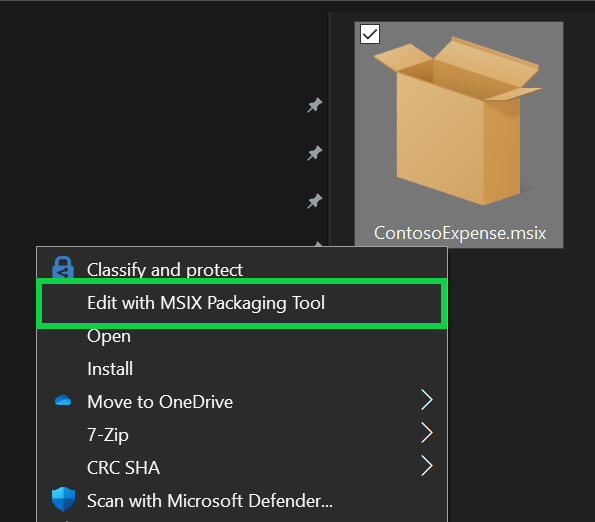
Edit the Contoso Expense through MSIX Packaging Tool :
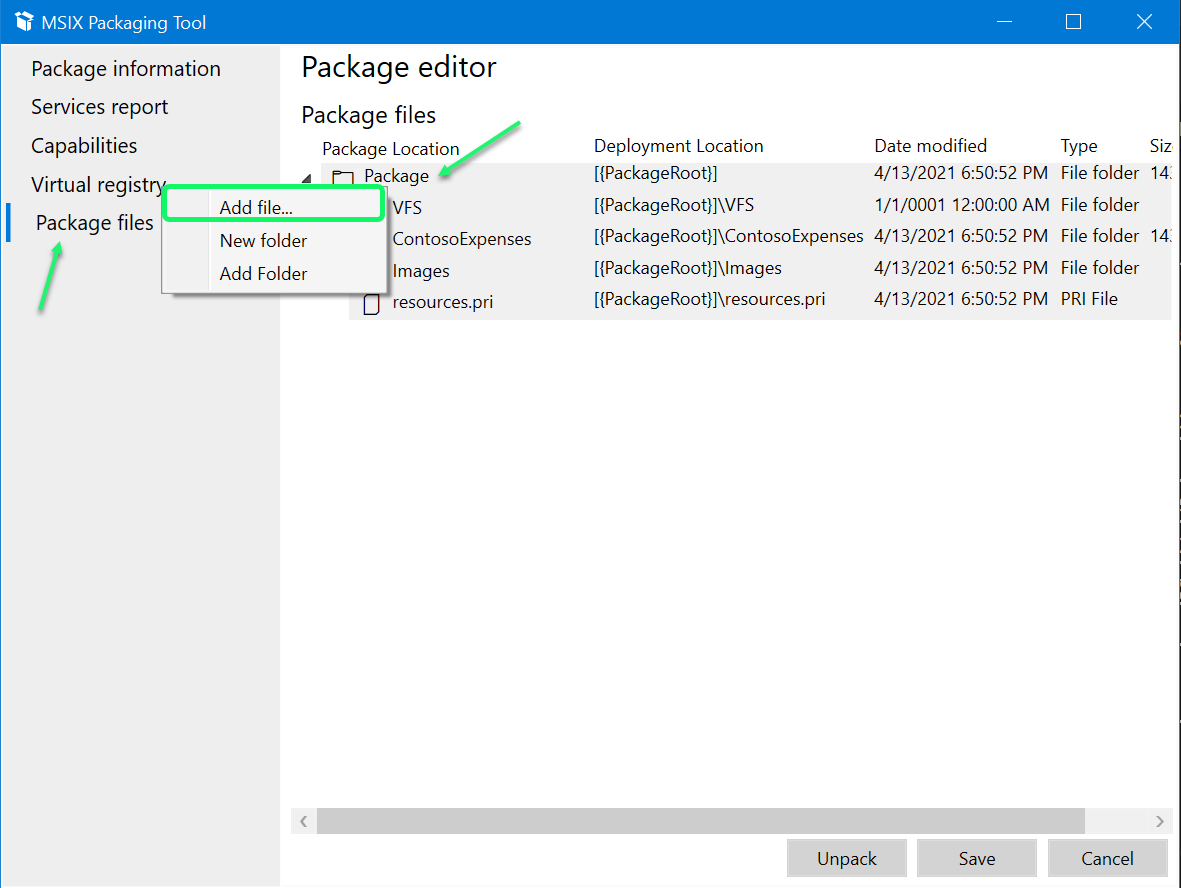
Click on the Package Files menu item, click with the right button on the Package folder and select Add File...:
As the ContosoExpense build here is 32-bit, it was added the PSF 32-bit required files. Your package content should now look something like this:
Update the package manifest for PSF
Click on the Package information menu item and click on Open File, available on the bottom of UI, to edit the application manifest:
In this step, it is necessary to change the application entry point (ContosoExpenses\ContosoExpenses.exe) by the PSFLauncher32.exe.
<Application Id="App" Executable="PSFLauncher32.exe" EntryPoint="Windows.FullTrustApplication">
Save and close the manifest file.
Create the config.json file
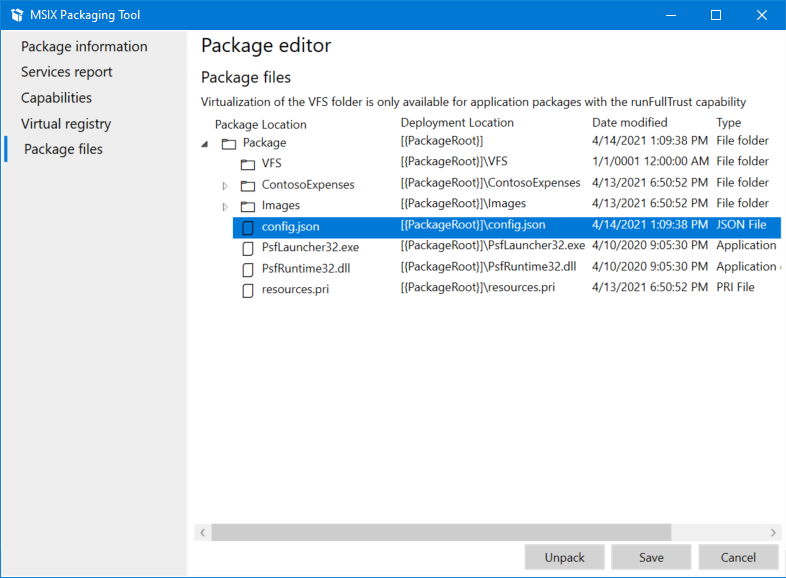
Switch back to the MSIX Packaging Tool, click on Package files, select the Package folder and add a new config.json file with the following content.
{
  "applications": [
    {
      "id": "App",
      "executable": "ContosoExpenses\\ContosoExpenses.exe",
      "workingDirectory": "ContosoExpenses\\",
      "startScript":
      {
        "scriptPath": "createshortcut.ps1",
        "runInVirtualEnvironment": false,
        "waitForScriptToFinish": true,
        "showWindow": false,
        "runOnce": true
      }
    }
  ]
}
👀 Observe that the application id is the same from the manifest:
The config.json file must be created in the package root, as follows:
The config.json file is being used to specify that the createshortcut.ps1 script should run only once in the first application initialization. As the working directory is set to ContosoExpenses, the createshortcut.ps1 script (that will be created later) and the StartingScriptWrapper.ps1 script (from PSF files) must be added to the ContosoExpenses folder.
Create the PowerShell script
Create the createshortcut.ps1 script with the following content:
Copy-Item "Contoso Expenses.lnk" "$env:USERPROFILE\desktop\Contoso Expenses.lnk"

Copy-Item "contoso.ico" $env:APPDATA\contoso.ico
The createshortcut.ps1 script will copy the "Contoso Expenses.lnk" shortcut, created previously and that will be available inside the package, to the user desktop. The second instruction, copies the contoso.icon to the MSIX APPDATA folder (%localappdata%\Packages\ContosoExpenses_3z09h3y28h0qg\LocalCache\Roaming).
The next step is to copy the following files to the ContosoExpenses folder of the package:
- Contoso Expenses.lnk
- Contoso.ico
- StartingScriptWrapper.ps1
- createshortcut.ps1
Finally, the last step is to create and install the new version of the application package. During the first application initialization, the createshortcut.ps1 script will run and it will create the Contoso Expense shortcut in the user Desktop.