Note
Access to this page requires authorization. You can try signing in or changing directories.
Access to this page requires authorization. You can try changing directories.
In this step-by-step tutorial, we assume that you already have a game in Unity, ready to be built and deployed.
See also a video version of this tutorial.
Looking to version your Unity UWP project? See Version control your UWP project.
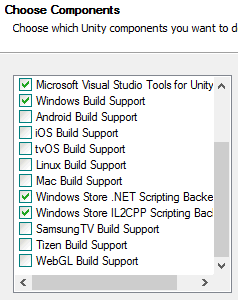
Step 0: Ensure Unity is installed correctly
When installing Unity, these components must be selected:
Step 1: Building the UWP solution
In your Unity game project, open the Build Settings windows located at File -> Build Settings, and go to the Microsoft Store options menu.

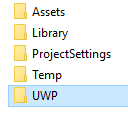
Make sure the SDK setting is set to Universal 10, and then select the Build button, which will launch a File Explorer window asking for a destination folder. Create a folder named UWP next to the Assets directory of your project, and choose this folder as the destination folder of the build.
Unity has now created a new Visual Studio solution that we will use to deploy your UWP game from.
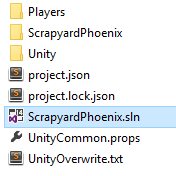
Step 2: Deploying your game
Open the newly generated solution in the UWP folder, and then change the target platform to x64.

Now that you have a UWP Visual Studio solution for your game, following these steps will allow you to successfully deploy your game onto your retail Xbox One!
Step 3: Modify and rebuild
If changes are made to anything that isn't a script, for these changes to be shown in your game's UWP build, the project must be rebuilt from within the Editor (as described in Step 1).
Versioning your UWP project
There are a few common situations where adding parts of this newly generated UWP directory to version control becomes necessary. For example, if you're adding a new dependency to the UWP project (for example, the Xbox Live SDK). We go over this example in detail at Version control your UWP project.