Note
Access to this page requires authorization. You can try signing in or changing directories.
Access to this page requires authorization. You can try changing directories.
This guide explains how to use Adobe Edge to build HTML5 creatives that will properly track clicks in Xandr. It assumes that you are familiar using Adobe Edge to build creatives.
With Xandr HTML5 library
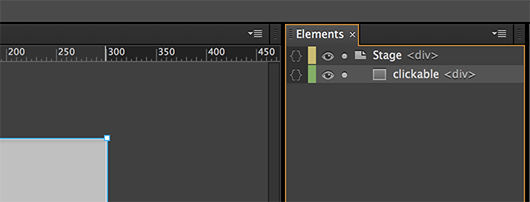
From within Adobe Edge, select the element you want to make clickable from the Elements panel. (Naming the element "clickable" is not required.)
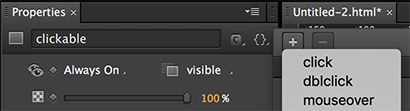
Open Actions for the selected element. The Actions panel will pop-up with a dropdown menu. Then select click in the dropdown menu.
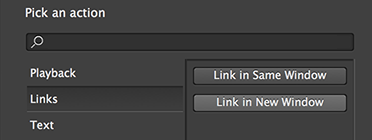
Select Links and Link in New Window from the Pick an Action area.
You will see code that looks like this.
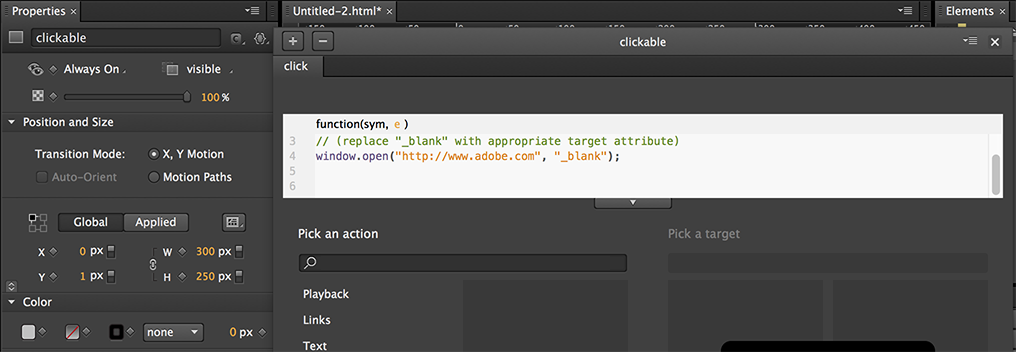
Replace the “https://www.adobe.com” with
APPNEXUS.getClickTag(). Make sure to remove the quotations.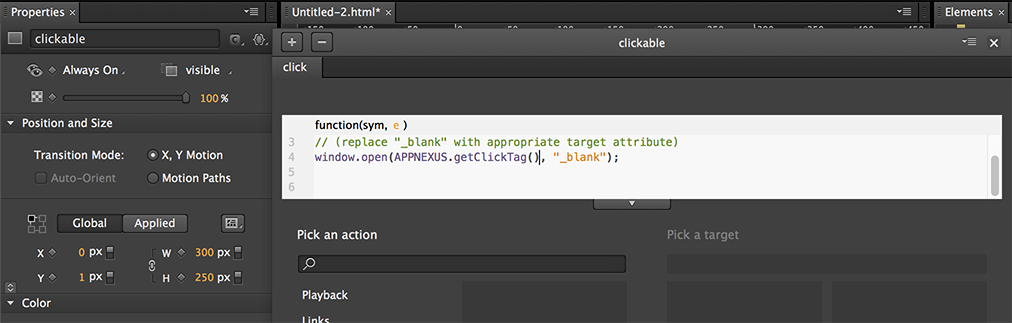
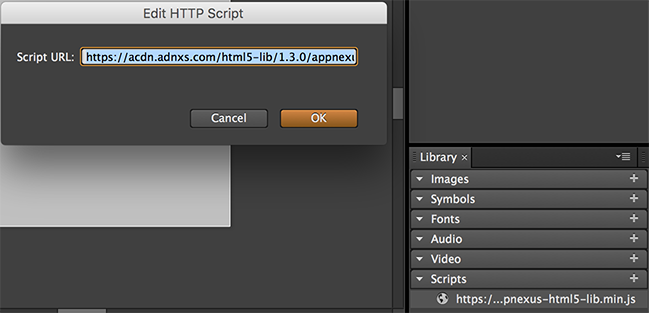
From the Library panel, in the Scripts drop-down, click Add JS File from URL... Paste https://acdn.adnxs.com/html5-lib/1.3.0/appnexus-html5-lib.min.js into the field and click OK.
Tip
Use https to ensure the creative can serve on secure inventory.
Click Preview in Browser to open the ad in your browser. Add
?clickTag=http://YOUR-URL-HERE.comat the end of the URL in the address bar with the landing page you want to test. Refresh the page and click on the ad. A new window with the landing page you entered should open in your browser. When the creative is served, Xandr sets the value ofclickTagto Xandr's click tracker and sets a redirect to the landing page URL provided in Microsoft Monetize.
Without Xandr HTML5 library
From within Adobe Edge, select the element you want to make clickable from the Elements panel. (Naming the element "clickable" is not required).
Open Actions for the selected element. The Actions panel will pop-up with a dropdown menu. Then select click in the dropdown menu.
Paste the code below into the text box provided (this is your
clickTagcode).function getParameterByName(name) { var match = RegExp('[?&]' + name + '=([^&]*)').exec(window.location.search); return match && decodeURIComponent(match[1].replace(/\+/g, ' ')); } window.open(getParameterByName('clickTag'), '_blank');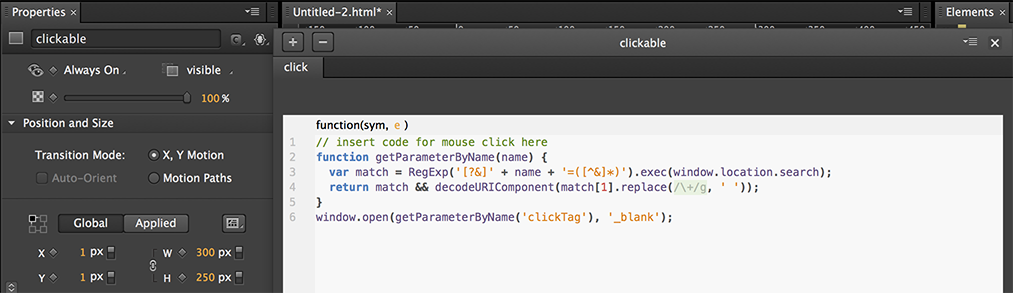
Click Preview in Browser to open the ad in your browser. Add
?clickTag=http://YOUR-URL-HERE.comat the end of the URL in the address bar with the landing page you want to test. Refresh the page and click on the creative. A new window with the landing page you entered should open in your browser. When the creative is served, Xandr sets the value ofclickTagto Xandr's click tracker and sets a redirect to the landing page URL provided in Microsoft Monetize.