Training
Learning path
Use advance techniques in canvas apps to perform custom updates and optimization - Training
Use advance techniques in canvas apps to perform custom updates and optimization
This browser is no longer supported.
Upgrade to Microsoft Edge to take advantage of the latest features, security updates, and technical support.
This page shows you how to use the UI to map your supply to the corresponding Xandr objects. Please follow these instructions for each publisher you work with.
To map your supply using the API, see Use the API to Synchronize Your Inventory Structure.
Before you begin, you must meet the following criteria:
Only the features relevant to Supply Partners are covered. Please ignore other features not mentioned here.
Go to Publisher > All Publishers.
Click Create Publisher. This opens the Create New Publisher dialog.
Enter the following Publisher Details:
espn.com, the publisher should be named as the legal entity for ESPN.ext_pub_code field.Note
Using the Code field is highly recommended at both the publisher and placement levels to ensure that your inventory is as granular as possible so that it can be investigated accurately for quality issues, and specifically for domain detectability. While not required, this step will help you to split your inventory into highly detectable and less detectable tags, allowing you to isolate the impacts of non-detectable domains on the rest of your inventory's viability.
On the Exposure Settings tab, select how much information you want Xandr to expose to buyers when reselling the publisher's placements. The more information you expose, the easier it is for buyers to target the resold inventory.
On the Ad Quality tab, leave the default selection, Only Apply Network Profile.
Note
During your initial integration, you should have worked with Xandr to create a global ad quality profile to control which creatives can appear on your publisher's inventory. This default selection applies that global ad quality profile to your publisher. If you need to control ad quality on a publisher-by-publisher basis, please reach out to your Xandr representative.
Click Save.
When you create a publisher, we automatically create a placement group for the publisher's placements. If all of the inventory from the publisher is for one type of supply (Standard Websites, Mobile-Optimized Websites, or Mobile Application), you don't need to create any additional placement groups; you simply need to edit the placement group and make sure the correct supply type is selected:
Select the placement group and click Full Edit.
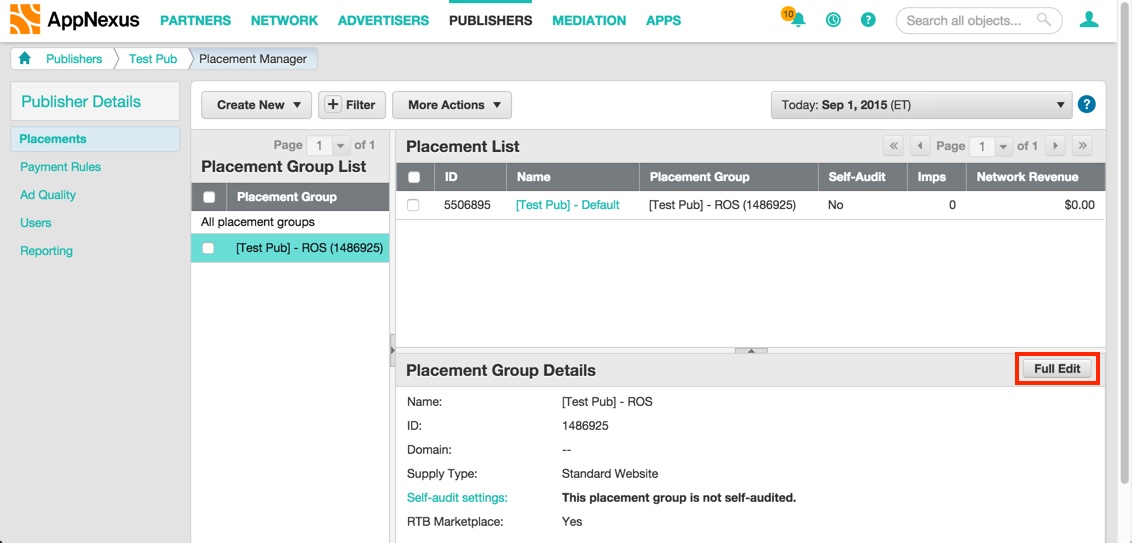
Select the correct Supply Type.
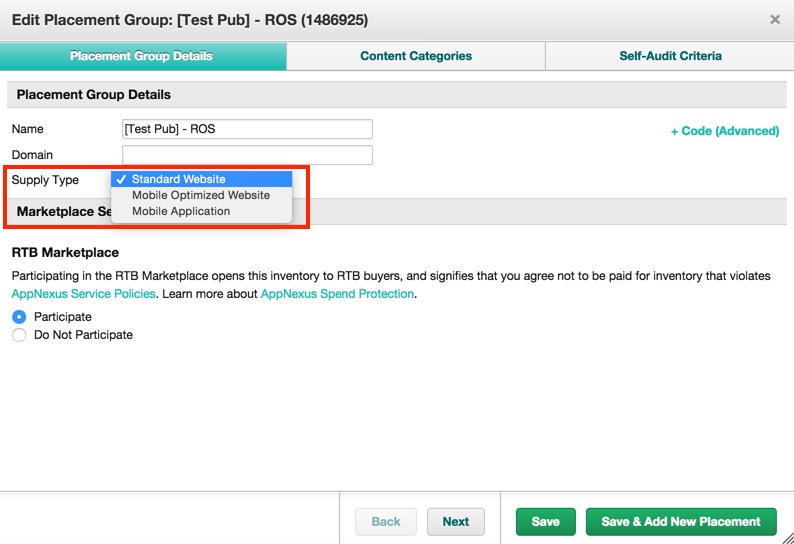
Click Save.
For each of the publisher's placements, follow the steps below. Note that only the features relevant to Supply Partners are covered, as well as some features that are not generally recommended but may be useful in some situations. Please ignore other features not mentioned here.
Tip
In order to improve your experience with Domain Detection, it's best practice to break your new inventory into new placements if you're able to do so. In the event of potentially problematic inventory or tags coming through a publisher, more granular inventory grouping and better labeling gives you the ability to isolate the impact of tags at high risk of being deactivated while protecting the rest of your inventory from impact.
However, creating new placements to work with Domain Detection is optional. If you choose not to do this, you can simply use the default placement that was created when the publisher was saved. Just be sure to set an ext_pub_code to be sent with your bid requests at the publisher level. This can be done via the Code field in the publisher's advanced options (see above).
Go to Publishers > Placement Manager.
Select the placement group into which you want to assign the placement and then click Create New > Placement.
This opens the Create New Placement dialog.
Enter the following Placement Details:
ext_pub_code field.Note
Using the Code field is required at both the publisher and placement levels to ensure that your inventory is as granular as possible so that it can be investigated accurately for quality issues, and specifically for domain detectability. While not required, this step will help you to split your inventory into highly detectable and less detectable tags, allowing you to isolate the impacts of non-detectable domains on the rest of your inventory's viability.
In the Allowed Media and Size sections, leave the default selections. These details are passed in your bid request and don't need to be set here.
On the Content Categories tab, Xandr recommends that you do not apply any universal or custom content categories unless you have familiarity and relationships with buyers who will want to target very specific categories of inventory.
On the Self-Audit Settings tab, you can self-classify the placement for sensitive attributes and intended audience. Your advertisers and buyers who trust your self-audit can target these settings in their campaigns. Xandr may also audit this inventory if it meets volume thresholds.
Click Save.
You can test that the mapping is working correctly by using a debug auction. Send a test impression to our endpoint with the debug parameters and check that the impression reaches the expected placement.
$cat debug.json
{
        "id": {
                "imp": [{
                        "id": "1",
                        "video": {
                                "mimes": [
                                        "application/x-shockwave-flash",
                                        "video/mp4",
                                        "video/x-flv"
                                        ],
                                 "linearity": 1,
                                 "minduration": 0,
                                 "maxduration": 999,
                                 "protocols": [2,5],
                                 "w": 640,
                                 "h": 360,
                                 "startdelay": 0,
                                 "minbitrate": 0,
                                 "maxbitrate": 1500,
                                 "delivery": [2],
                                 "pos": 0,
                                 "api": [1]
                                        },
                                 "bidfloor": 1,
                                 "bidfloorcur": "EUR"
                                } ],
                        "site": {
                                "domain": "test.com" },
                                "device": {
                                                "dnt": 0,
                                                "ua": "Mozilla/5.0 (Windows NT 6.3; WOW64; rv:39.0) Gecko/20100101 Firefox/39.0",
                                                "ip": "212.185.163.114",
                                                "os": "Win_8",
                                                "osv": "8",
                                                "js": 0,
                                                "devicetype": 2
                                                },
                                 "user": {
                                                 "id": "USER_ID"
                                                        },
                                "at": 2,
                                "tmax": 100,
                                "cur": ["EUR","USD"]}'
}
$curl -b cookies -c cookies -s -i d @debug.json 'https://<MEMBER_NAME>-<GEO>.com/openrtb2?member_id=MEMBER_ID&debug_member=DEBUG_MEMBER&dongle=DONGLE'
In the example above, <GEO> has potential values "useast", "uswest", "apac", "emea".
Training
Learning path
Use advance techniques in canvas apps to perform custom updates and optimization - Training
Use advance techniques in canvas apps to perform custom updates and optimization
Documentation
Synchronize Your Inventory Structure
Learn why its important to synchronize your inventory structure with Xandr on a regular basis as not doing so can lead to the inventory being unsellable via Xandr.
Understanding the Sell-Side Object Hierarchy
This page deals with sell-side Object hierarchy and the relationship between objects like Publishers and placements.
External Seller Troubleshooting
In this article, explore the common challenges encountered by external sellers, along with troubleshooting guidance to help resolve them.