Note
Access to this page requires authorization. You can try signing in or changing directories.
Access to this page requires authorization. You can try changing directories.
This document contains the XBOX Nano Controller repair procedures.
Important
Before starting any repair, read this document and the Safety and General Guidelines in their entirety. Use Device Information and Service Parts to identify the device and replacement parts.
Component Removal and Replacement Procedures
Prior to Device Disassembly
- Read this repair document and the Safety and General Guidelines in their entirety before starting any repairs. Pay special attention to Repair-Specific Precautions and Warnings and Battery Safety.
Prerequisite Steps
Steps outlined in this section should be conducted prior to starting any repair on an XBOX device.
- Power off device – Ensure the device is powered off completely and the battery has been fully discharged. Refer to the Repair-Specific Precautions and Warnings section for details. Once discharged, the device should be disconnected from all power sources.
- ESD Prevention – Ensure ESD prevention steps and general guidelines are followed prior to opening the device. Refer to the ESD Prevention section for details.
- Position Device – To prevent damage to the device, ensure the device is placed on a clean surface free of debris.
Battery Replacement Process
Preliminary Requirements
Important
Be sure to follow all special bolded notes, cautions, & warnings in each process section.
Required Tools
- T6 (Torx) driver
- Anti-static wrist strap (1 MOhm resistance)
- Soft ESD-safe mat
- Nylon Spudger
- ESD safe tweezers
Primary Components
- Battery Back Case Assembly (Refer to Illustrated Service Parts List)
Warning
Only handle the battery by the plastic frame. Bending, twisting, or impacting the battery may damage the battery, damage the device, and/or result in severe personal injury or property damage. Always use two hands when handling the battery.
Warning
Do not attempt to detach, pry, or otherwise separate the battery from the plastic frame. The battery is bonded to the back case and cannot be removed. Instead replace the complete battery FRU, which is supplied as the back case plastic with the battery pre-attached. Always remove and install the battery and back case as a single, integrated unit.
Important
Place the battery somewhere where the battery cannot accidentally be contacted or damaged. DO NOT place anything on top of the battery.
Important
When disposing of the battery, ensure you are recycling according to local laws.
Important
The Motherboard and Battery are very sensitive to ESD and can be easily damaged. It is critical that you ensure proper grounding before performing any work on these parts.
Warning
In the instance of a battery event, submerge the entire device in a 1-gallon Enclosure filled with .5 gallons of clean sand. Ensure the entire device is submerged. DO NOT attempt to pick up the device.
Procedure – Preparation (Battery)
- Power Off Device – Ensure the device is powered off by fully discharging the battery. Refer to the Repair-Specific Precautions and Warnings section. The device should be disconnected from a power supply and all cables are removed.
Procedure – Removal (Battery)
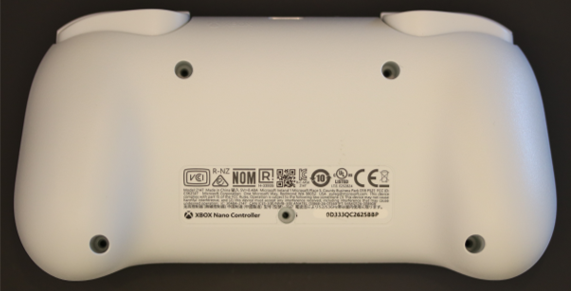
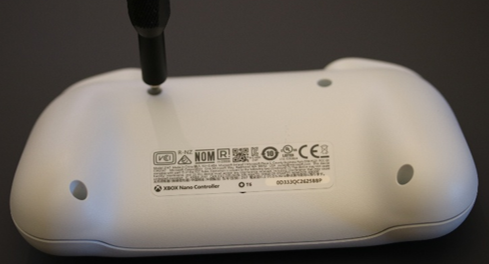
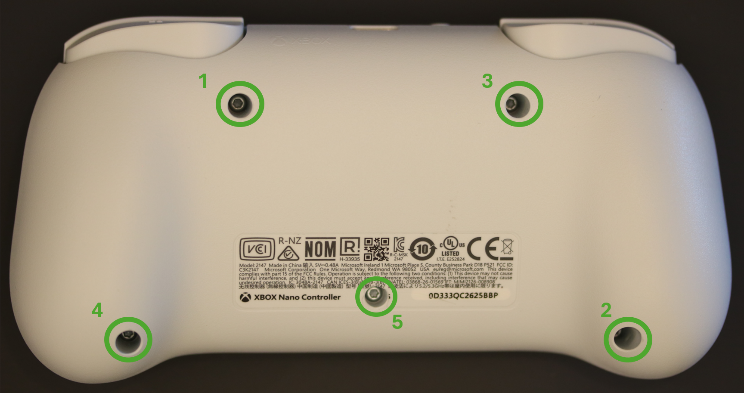
Remove the Battery Screws – Using a T6 (Torx) driver, remove the five screws from the back case. The fifth screw is hidden beneath the bottom middle portion of the PID label, directly over the Torx screw symbol (6-point star).
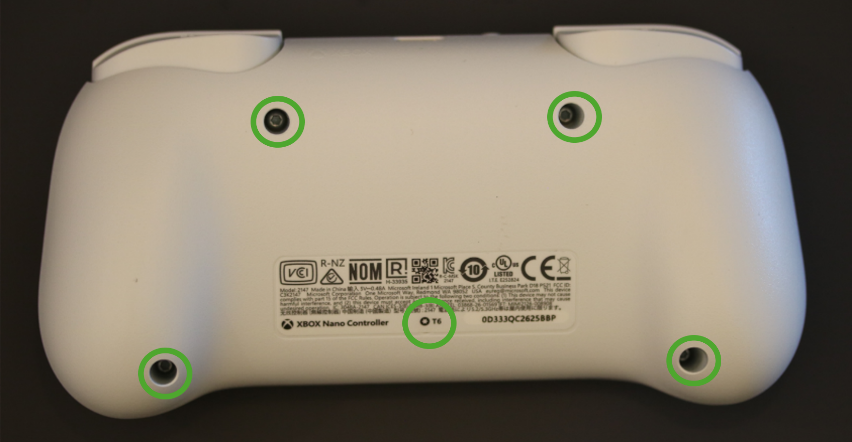
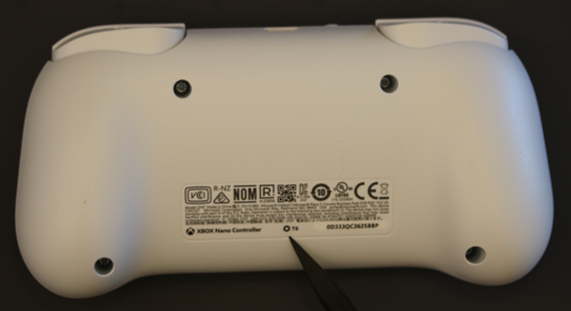
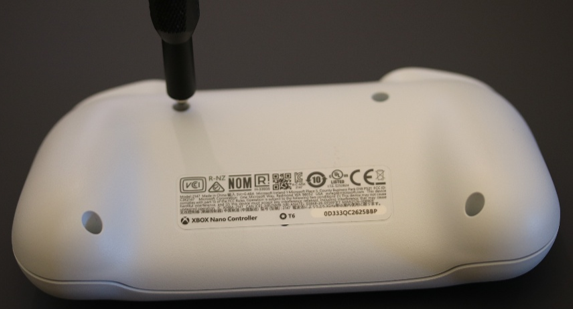
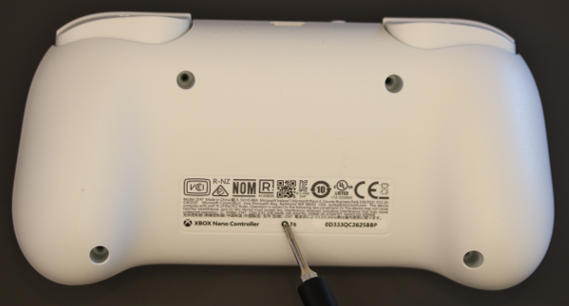
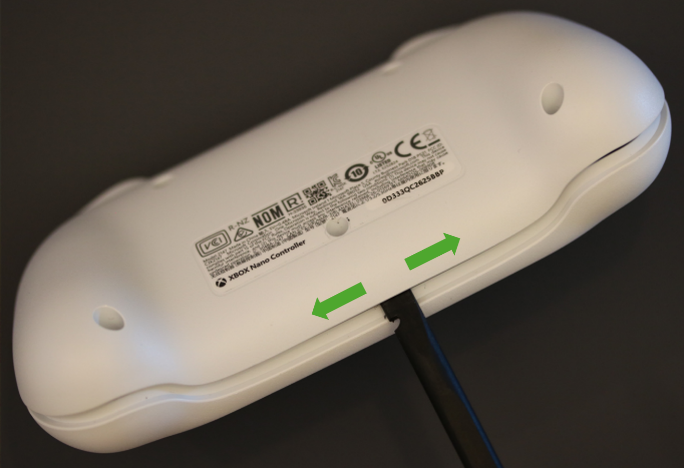
Separate Bottom Enclosure – Insert a plastic spudger into the horizontal seam between the top and bottom enclosures to begin separation. Start at the bottom center section, then carefully move the tool along the seam towards both the left and right edges, releasing all plastic snaps.
Note
Limit tool insertion depth to a maximum of 5 mm to prevent internal damage.
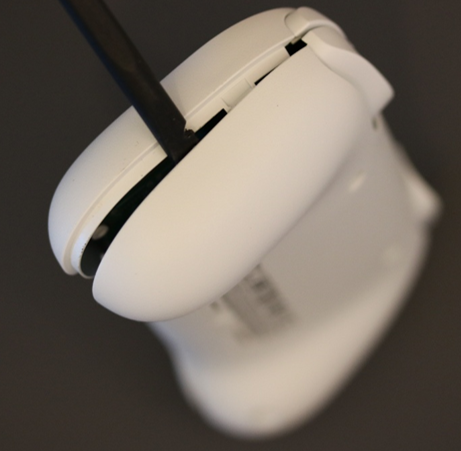
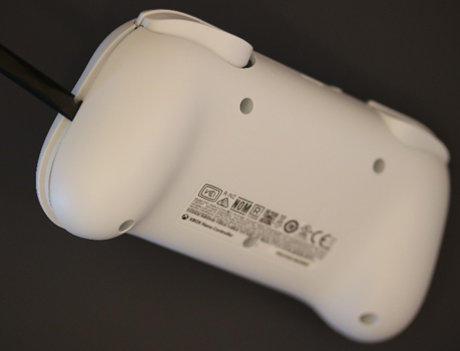
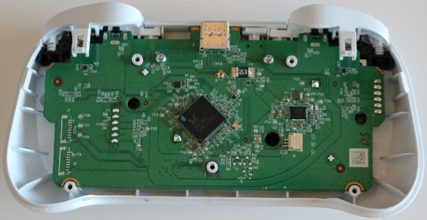
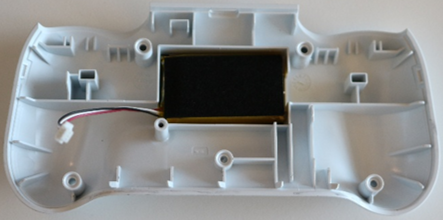
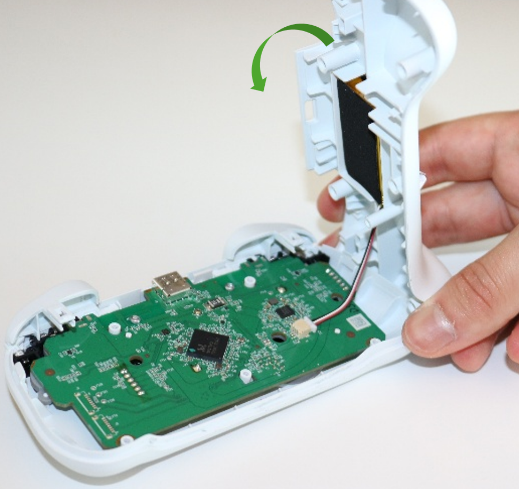
Rotate Bottom Enclosure – Hold the back case housing and carefully tilt it forward to disengage it from the USB-C connector located at the front of the device. After USB-C disengagement, rotate the housing 90 degrees to the right, as illustrated.
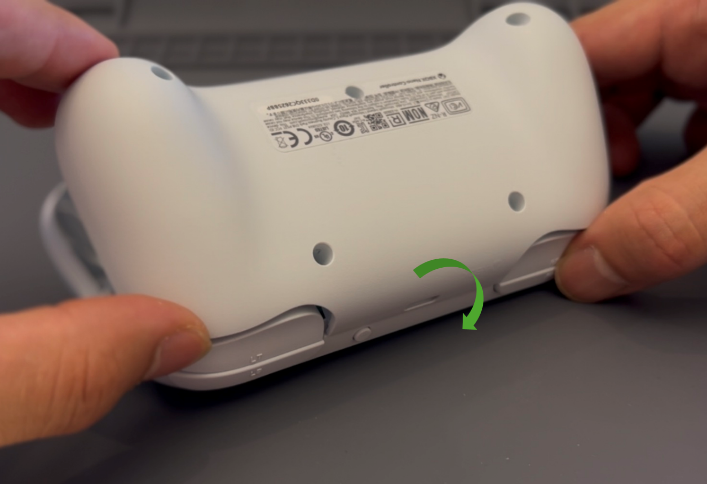
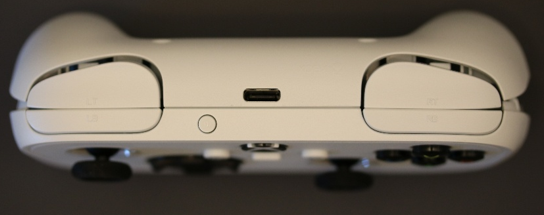
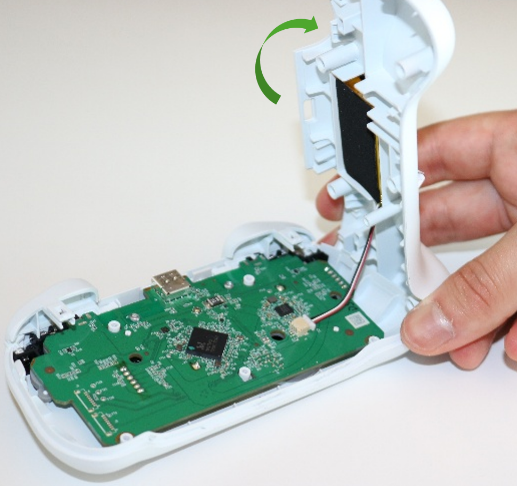
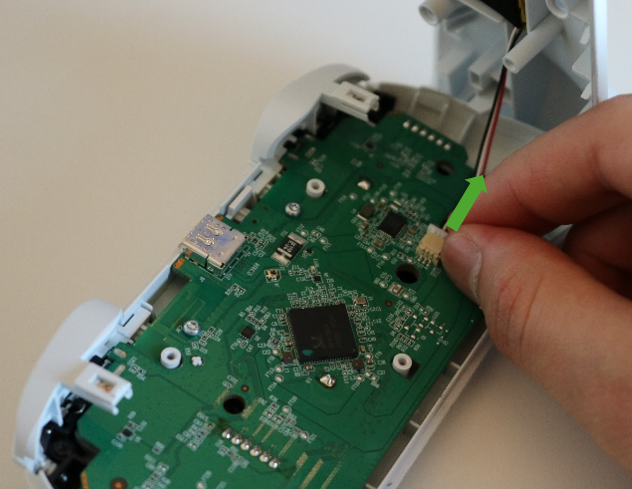
Disengage Battery Connector – Locate the battery connector on the bottom-right side of the motherboard. To disconnect, pull the connector horizontally towards the right while holding the white plastic end of the battery cable.
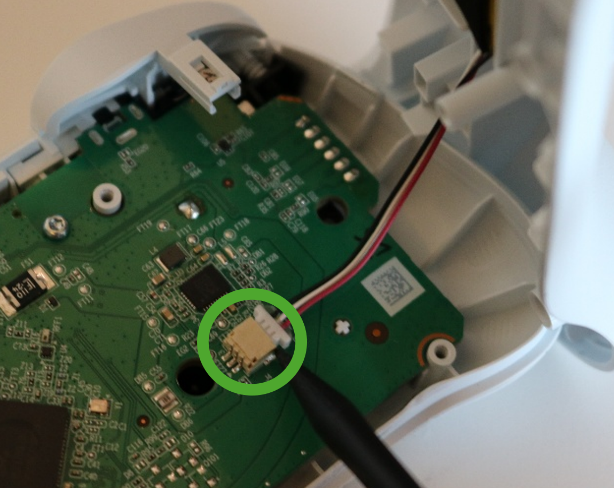
Procedure – Installation (Battery)
Inspect the device – Check the device for any loose articles that may be present. Perform the following actions:
- Check and remove any foreign objects
- Verify all removed screws are accounted for and have not been misplaced inside the device.
- Confirm the protective sponge/foam is present and properly positioned on the new battery FRU before installation.
Note
Some devices may include a foam pad installed on the bottom-left section of the motherboard. Inspect the area to determine whether the foam pad is present. If present, perform the procedure outlined in Step 2. If not present, proceed directly to Step 3.
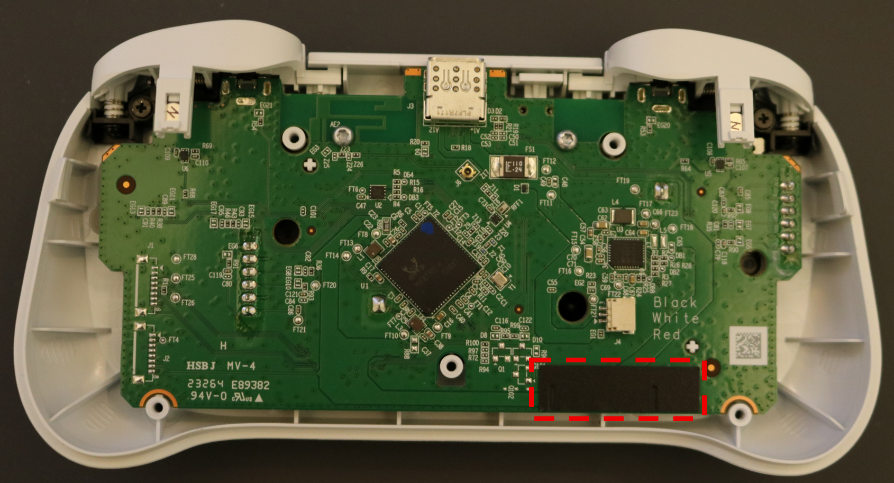
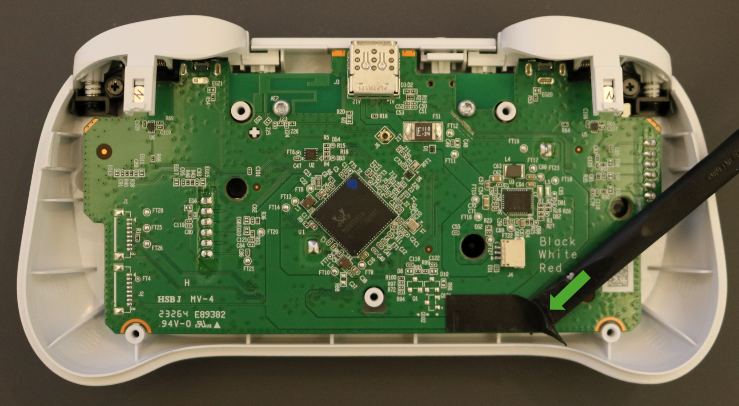
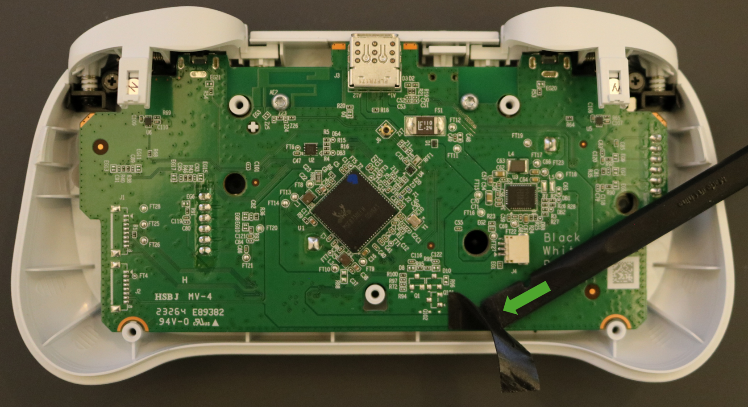
Remove the foam pad (if present) – Carefully lift one corner of the foam pad using a plastic spudger. Use tweezers to grasp the lifted corner and peel the foam pad away from the motherboard. Repeat as necessary until all foam material has been removed. Verify that no foam fragments, adhesive residue, or other debris remain on the motherboard before proceeding to the next step.
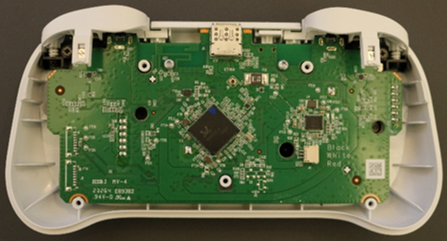
Reconnect battery connector – Align the battery connector with its receptacle located at the bottom-right of the motherboard. Hold the white plastic housing and press horizontally towards the left until fully engaged.
Note
Do not apply force to the wire.
Warning
Only handle the new battery by the plastic frame. Bending, twisting, or impacting the battery may damage the battery, damage the device, and/or result in severe personal injury or property damage. Always use two hands when handling the battery.
Warning
Before installing a new battery FRU, confirm that the protective sponge/foam is present and correctly positioned on the battery. Do not install a battery FRU if the protective foam is missing, damaged, or dislodged.
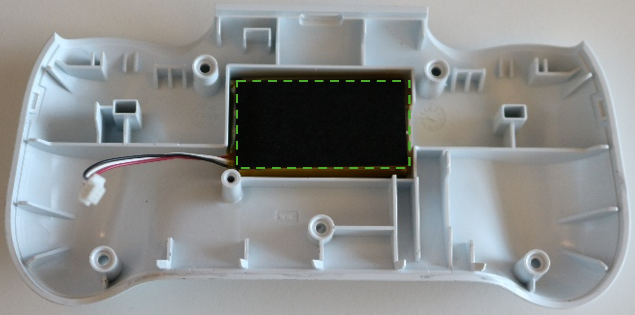
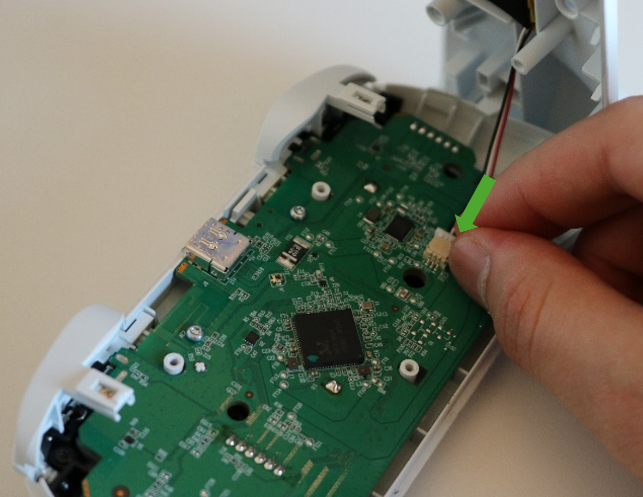
Reposition back case housing – Rotate the housing 90 degrees back into alignment and carefully re-engage it with the USB-C connector on the front side of the device. Lightly press along the seams until all retaining clips are fully secured.
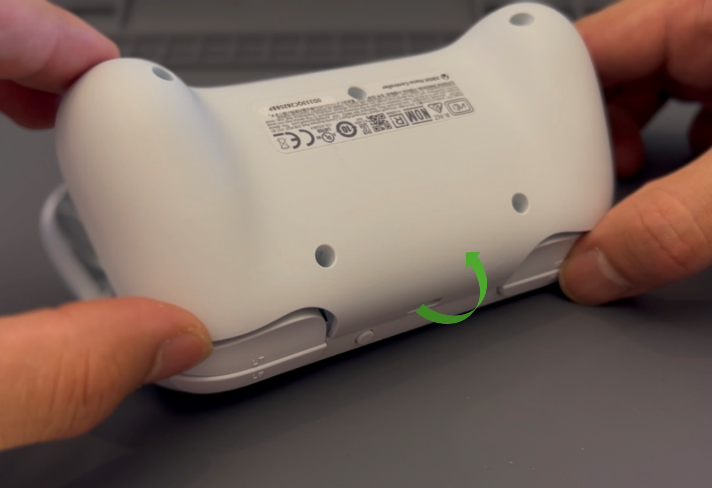
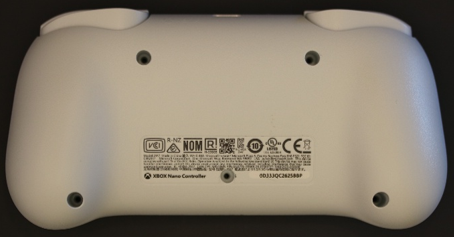
Reinstall screws– Using a T6 (Torx) driver, reinstall the five screws in the specified order. Turn each screw until finger tight, then turn another 1/8 turn (45-degrees), or until fully fastened.
Important
Be careful not to overtighten screws. If the Battery frame is cracked or the battery is damaged in any way during installation, it cannot be used and must be replaced.
Procedure – Finalize (Battery)
- Power on Device – Connect a Power Supply to the device and power it on.