Note
Access to this page requires authorization. You can try signing in or changing directories.
Access to this page requires authorization. You can try changing directories.
Network admins, Verified admins & Engage admins can use the Manage GDPR data subject requests module in the Viva Engage admin center to process data subject requests for GDPR.
Before you proceed, if necessary, review the following documents:
To remove user access to the Viva Engage network, consult the following documents:
Remove a user based upon a GDPR request
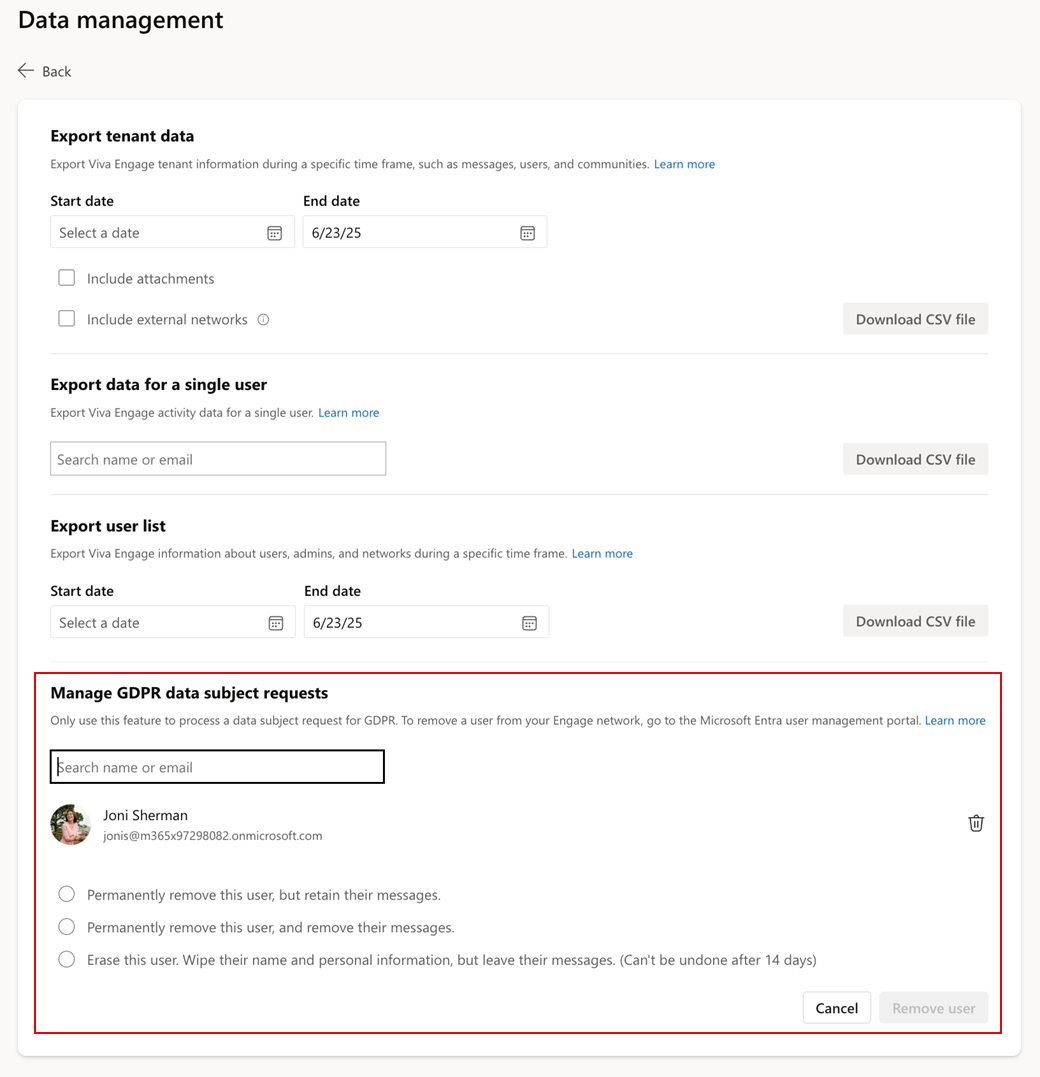
Go to the Viva Engage Admin Center.
Select Governance and compliance > Data management.
Check the options for Manage GDPR data subject requests. GDPR subject requests support three distinct options:
- Permanently remove this user, but retain their messages - Removes the user and retains their posted messages and content.
- Permanently remove this user, and remove their messages - Removes the user and their posted messages and content. You can't reverse this action.
- Erase this user. Wipe their name and personal information, but leave their messages (Can't be undone after 14 days) - Deactivates the user for 14 days to give the admin time to evaluate files and messages before permanently deleting the user.
When finished, select Remove user.
The following image illustrates.
GDPR subject requests support three distinct options:
- Permanently remove this user, but retain their messages - Removes the user and retains their posted messages and content.
- Permanently remove this user, and remove their messages - Removes the user and their posted messages and content. You can't reverse this action.
- Erase this user. Wipe their name and personal information, but leave their messages (Can't be undone after 14 days) - Deactivates the user for 14 days to give the admin time to evaluate files and messages before permanently deleting the user.
All choices for deletion remove the following data:
Who the user follows, what conversations and articles they follow, and who follows them
The user's bookmarks, language preferences, notification settings, and account activity
The user profile
The user's group memberships
Org chart
The list of networks for which they were a member.
The first two deletion options preserve the user's name in Viva Engage's stored data. The Erase this user option also removes the user's name.