Note
Access to this page requires authorization. You can try signing in or changing directories.
Access to this page requires authorization. You can try changing directories.
It's important to prevent accidentally locking yourself out of your Microsoft Entra organization because you can't sign in or activate a role. You can reduce the impact of accidental lack of administrative access by creating two or more emergency access accounts in your organization.
User accounts with the Global Administrator role have high privileges in the system, and this role includes emergency access accounts with the Global Administrator role. Use emergency access accounts only for emergency or "break glass" scenarios where normal administrative accounts can't be used. Restrict emergency account use to only the times when it's absolutely necessary.
This article provides guidelines for managing emergency access accounts in Microsoft Entra ID.
Why use an emergency access account
An organization might need to use an emergency access account in the following situations:
- The user accounts are federated, and federation is currently unavailable because of a cell-network break or an identity-provider outage. For example, if the identity provider host in your environment goes down, users might be unable to sign in when Microsoft Entra ID redirects to their identity provider.
- The administrators register through Microsoft Entra multifactor authentication, and all their individual devices are unavailable or the service is unavailable. Users might be unable to complete multifactor authentication to activate a role. For example, a cell network outage is preventing them from answering phone calls or receiving text messages, the only two authentication mechanisms that they registered for their device.
- The person with the most recent Global Administrator access leaves the organization. Microsoft Entra ID prevents the last Global Administrator account from being deleted, but it doesn't prevent the account from being deleted or disabled on-premises. Either situation might make the organization unable to recover the account.
- Unforeseen circumstances such as a natural disaster emergency, during which a mobile phone or other networks might be unavailable.
- All Global Administrator and Privileged Role Administrator role assignments are eligible (not active), activation requires approval, and no approvers are selected (or all selected approvers were removed from the directory). Active Global Administrators and Privileged Role Administrators are the default approvers when none are selected, but because none are active, no one can approve activation and tenant administration is effectively locked.
Create emergency access accounts
Create two or more emergency access accounts. These accounts should be cloud-only accounts that use the *.onmicrosoft.com domain and that aren't federated or synchronized from an on-premises environment. At a high level, follow these steps.
Find your existing emergency access accounts or create new cloud-only users and assign them the Global Administrator role.
Choose one of these passwordless authentication methods for your emergency access accounts. These methods satisfy the mandatory multifactor authentication requirements.
- Passkey (FIDO2) (Recommended)
- Certificate-based authentication if your organization already has a Public Key Infrastructure (PKI) setup
Register credentials for the authentication method you chose in the previous step.
- Passkey (FIDO2): Enable passkeys (FIDO2) for your organization, then register a passkey (FIDO2)
- Certificate-based authentication: Configure certificate-based authentication
Verify that emergency access accounts are excluded from any Conditional Access policy that blocks or restricts sign-in. The phishing-resistant authentication method registered in the previous step protects the account; an enforced Conditional Access policy could prevent sign-in during the exact emergency the account is designed for. Report-only policies don't block access and don't require an exclusion. For details, see Conditional Access considerations.
Configuration requirements
When you configure these accounts, ensure the following requirements are met:
Don't associate emergency access accounts with any individual user in the organization. Store credentials in a known secure location that's available to multiple members of the administration team. Don't connect these accounts with any employee-supplied devices, such as phones. This approach unifies emergency access account management. Most organizations need emergency access accounts not only for Microsoft Cloud infrastructure, but also for on-premises environments, federated SaaS applications, and other critical systems.
Alternatively, you can choose to create individual emergency access accounts for administrators. This solution promotes accountability and allows administrators to use emergency access accounts from remote locations.
Use strong authentication for your emergency access accounts and make sure it doesn't use the same authentication methods as your other administrative accounts. For example, if your normal administrator account uses the Microsoft Authenticator app for strong authentication, use a FIDO2 security key for your emergency accounts. To avoid adding external requirements into the authentication process, consider the dependencies of various authentication methods.
The device or credential must not expire or be in scope of automated cleanup due to lack of use.
In Microsoft Entra Privileged Identity Management, make the Global Administrator role assignment active permanent rather than eligible for your emergency access accounts.
Individuals authorized to use these emergency access accounts must utilize a designated, secure workstation or similar client computing environment, such as a Privileged Access Workstation. Use these workstations when interacting with the emergency access accounts. For more information about configuring a Microsoft Entra tenant where there are designated workstations, see deploying a privileged access solution.
Federation guidance
Some organizations use Active Directory Domain Services and Active Directory Federation Service (AD FS) or similar identity provider to federate to Microsoft Entra ID. Keep the emergency access for on-premises systems and the emergency access for cloud services distinct, with no dependency of one on the other. Mastering or sourcing authentication for accounts with emergency access privileges from other systems adds unnecessary risk if an outage occurs in those systems.
Store account credentials safely
Ensure that the credentials for emergency access accounts are kept secure and known only to individuals who are authorized to use them. For example, you might use FIDO2 security keys for Microsoft Entra ID or smartcards for Windows Server Active Directory. Store credentials in secure, fireproof safes that are in secure, separate locations.
Conditional Access considerations
Exclude emergency access accounts from Conditional Access policies that block or restrict sign-in. Report-only policies don't block access and don't need to exclude emergency accounts. If an emergency access account is subject to a Conditional Access policy that requires MFA, a compliant device, or another control, the account might be unusable during the exact emergency scenarios it's designed for.
When planning your Conditional Access deployment, consider the following points:
- Create a dedicated security group for your emergency access accounts, such as EmergencyAccess, and exclude this group from Conditional Access policies that block or restrict sign-in.
- Regularly test (for example, every quarter) that emergency access accounts can sign in successfully with your current Conditional Access configuration.
- Create contingency Conditional Access policies that you can enable during an outage to restore access for critical users. For more information, see Create a resilient access control management strategy.
For more information about planning Conditional Access exclusions, see Plan a Conditional Access deployment.
Security guardrails summary
The following checklist summarizes the security requirements for emergency access accounts:
- Maintain at least two emergency access accounts for redundancy.
- Use cloud-only accounts (
.onmicrosoft.comdomain) with no dependency on federated identity providers. - Use phishing-resistant authentication methods (FIDO2 security keys or certificate-based authentication) that are different from your normal admin accounts.
- Ensure credentials and devices don't expire and aren't subject to automated cleanup.
- In Privileged Identity Management, assign the Global Administrator role as permanent active (not eligible) for emergency accounts.
- Require the use of a designated secure workstation or Privileged Access Workstation when using emergency access accounts.
- Store credentials in separate, secure, fireproof locations accessible to authorized individuals.
- Exclude emergency access accounts from Conditional Access policies that block or restrict sign-in. Report-only policies don't require an exclusion.
- Monitor all sign-in and audit log activity for emergency access accounts with alerts to detect unnecessary or unauthorized use.
- Validate account functionality at least every 90 days.
Auditability and compliance
Organizations in regulated industries might need to demonstrate that the use of emergency access accounts is properly governed. The monitoring and validation practices described in this article support auditability:
- Sign-in and audit log monitoring: Configure alerts for every use of an emergency access account. Capture sign-in logs and audit logs for review. For details, see Monitor sign-in and audit logs in this article.
- Post-mortem review: After any use of an emergency access account, conduct a review to determine whether the use was authorized and whether the actions taken were appropriate. For details, see Prepare a post-mortem team in this article.
- Regular validation: Perform account validation drills at least every 90 days, including reviewing the authorized-user list and testing sign-in and administrative task functionality. For details, see Validate accounts regularly in this article.
- Compliance mapping: If your organization must comply with HIPAA regulations, Microsoft provides guidance on how emergency access accounts map to HIPAA emergency access procedure requirements. For more information, see HIPAA access controls.
Monitor sign-in and audit logs
Monitor sign-in and audit log activity from the emergency accounts and trigger notifications to other administrators. When you monitor the activity for emergency access accounts, you can verify these accounts are only used for testing or actual emergencies. You can use Azure Monitor, Microsoft Sentinel, or other tools to monitor the sign-in logs and trigger email and SMS alerts to your administrators whenever emergency access accounts sign in. This section illustrates using Azure Monitor.
Prerequisites
- Send Microsoft Entra sign-in logs to Azure Monitor.
Obtain Object IDs of the emergency access accounts
Sign in to the Microsoft Entra admin center as at least a User Administrator.
Browse to Entra ID > Users.
Search for the emergency access account and select the user's name.
Copy and save the Object ID attribute so that you can use it later.
Repeat previous steps for second emergency access account.
Create an alert rule
Sign in to the Azure portal as at least a Monitoring Contributor.
Search for and open Monitor.
In the left menu, select Alerts.
Select + Create > Alert rule. The Create an alert rule page opens.
On the Scope tab:
- In the Select a resource pane, find and select your Log Analytics workspace.
- Verify that the subscription matches the workspace you configured in the prerequisites.
- Select Apply.
On the Condition tab:
From the Signal name drop-down, select Custom log search.
Set the Query type to Aggregated logs.
Under Search query, enter one of the following queries, inserting the object IDs of the two emergency access accounts.
Note
For each additional emergency access account you want to include, add another
or UserId == "ObjectGuid"to the query.Sample queries:
// Search for a single Object ID (UserID)
SigninLogs
| where UserId == "00aa00aa-bb11-cc22-dd33-44ee44ee44ee"
| project TimeGenerated, UserPrincipalName, UserId, IPAddress, ResultType, ResultDescription
// Search for multiple Object IDs (UserIds) SigninLogs | where UserId == "00aa00aa-bb11-cc22-dd33-44ee44ee44ee" or UserId == "11bb11bb-cc22-dd33-ee44-55ff55ff55ff" | project TimeGenerated, UserPrincipalName, UserId, IPAddress, ResultType, ResultDescription// Search for a single UserPrincipalName SigninLogs | where UserPrincipalName == "user@yourdomain.onmicrosoft.com" | project TimeGenerated, UserPrincipalName, UserId, IPAddress, ResultType, ResultDescriptionUnder Measurement, set how to summarize the results of the query:
- Select the Measure.
- Select the Aggregation type.
- Select the Aggregation granularity.
Under Split by dimensions, select the Resource ID column.
Under Alert logic:
- Set the Threshold type to Static.
- Set the Operator to Greater than.
- Set the Threshold value to 0.
- Set the Frequency of evaluation to how often you want the query to run.

Select Next to proceed.
On the Actions tab, select an action group to be notified by the alert. If you want to create one, see Create an action group.
On the Details tab:
- Select the Severity of the event. Use 0 - Critical.
- Enter the Alert rule name and add an optional description.
- Select the Region.
- Select which Identity to use when running the log query.
- Under Advanced options, select Enable upon creation.
- Select Next to proceed.
On the Tags tab, add any tags you want to associate with the alert rule.
Select Review + create, then select Create.

Create an action group
Select Create an action group.
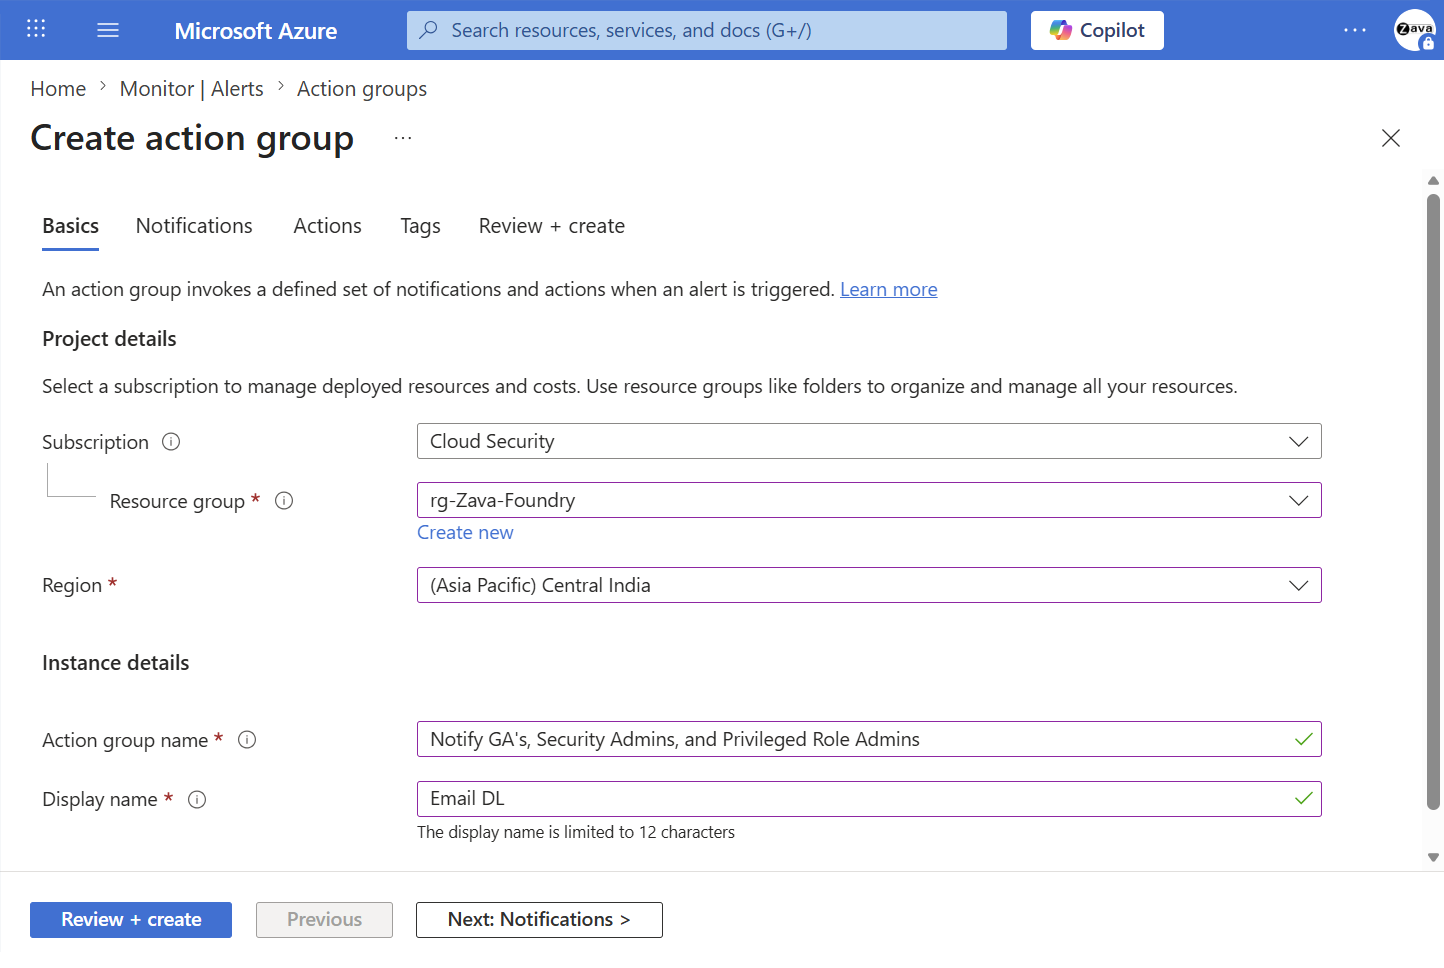
On the Basics tab, enter the following information:
- Subscription and Resource group: Select where to store the action group.
- Region: Select the region for the action group.
- Action group name: Enter a descriptive name.
- Display name: Enter a short name (maximum 12 characters) that appears in notifications.
Select Next: Notifications.
Under Notification type, select Email/SMS message/Push/Voice.
Enter a notification name such as Notify Global Administrator.
Select Edit details, configure the notification methods and contact information, and then select OK.
Add any other notifications you want to trigger.
Select Next: Actions to configure any additional automated actions, or select Review + create to finish.

Prepare a post-mortem team to evaluate each emergency access account credential use
If the alert is triggered, preserve the logs from Microsoft Entra and other workloads. Conduct a review of the circumstances and the results of the emergency access account usage. This review determines whether the account was used:
- For a planned drill to validate its suitability
- In response to an actual emergency where no administrator could use their regular accounts
- As a result of misuse or unauthorized usage of the account
Next, examine the logs to determine what actions the individual with the emergency access account took to ensure that those actions align with the authorized use of the account.
Validate accounts regularly
In addition to training staff members to use emergency access accounts, have an ongoing process to validate that authorized staff can access the emergency access accounts. Regularly conduct drills to validate the functionality of the accounts and to confirm that monitoring and alerting rules are triggered in case an account is misused. At a minimum, perform the following steps at regular intervals:
- Ensure that security-monitoring staff are aware that the account-check activity is ongoing.
- Review and update the list of individuals authorized to use the emergency access account credentials.
- Ensure that the emergency break glass process to use these accounts is documented and current.
- Ensure that administrators and security officers who might need to perform these steps during an emergency are trained on the process.
- Validate that the emergency access accounts can sign in and perform administrative tasks.
- Ensure that users didn't register multifactor authentication or self-service password reset (SSPR) to any individual user's device or personal details.
- If the accounts are registered for multifactor authentication to a device, for use during sign-in or role activation, ensure that the device is accessible to all administrators who might need to use it during an emergency. Also verify that the device can communicate through at least two network paths that don't share a common failure mode. For example, the device can communicate to the internet through both a facility's wireless network and a cell provider network.
- Regularly change the combinations on any safes and after someone with access leaves the organization.
Perform these steps at regular intervals and for key changes:
- At least every 90 days
- When there's a recent change in IT staff, such as after termination or position change
- When the Microsoft Entra subscriptions in the organization change
Next steps
- How to verify that users are set up for mandatory MFA
- Require phishing-resistant multifactor authentication for administrators
- Securing privileged access for hybrid and cloud deployments in Microsoft Entra ID
- Configure additional protections for privileged roles in Microsoft 365, if you're using Microsoft 365
- Start an access review of privileged roles and transition existing privileged role assignments to more specific administrator roles