Get started with the Azure API Center extension for Visual Studio Code (preview)
To build, discover, try, and consume APIs in your API center, you can use the Azure API Center extension in your Visual Studio Code development environment:
Build APIs - Make APIs you're building discoverable to others by registering them in your API center. Shift-left API design conformance checks into Visual Studio Code with integrated linting support. Ensure that new API versions don't break API consumers with breaking change detection.
Discover APIs - Browse the APIs in your API center, and view their details and documentation.
Try APIs - Use Swagger UI or REST client to explore API requests and responses.
Consume APIs - Generate API SDK clients for your favorite language including JavaScript, TypeScript, .NET, Python, and Java, using the Microsoft Kiota engine that generates SDKs for Microsoft Graph, GitHub, and more.
Note
The Azure API Center extension for Visual Studio Code is in preview. Learn more about the extension preview.
Prerequisites
One or more API centers in your Azure subscription. If you haven't created one already, see Quickstart: Create your API center.
Currently, you need to be assigned the Contributor role or higher permissions to access API centers with the extension.
The following Visual Studio Code extensions are optional and needed only for certain scenarios as indicated:
- REST client extension - to send HTTP requests and view the responses in Visual Studio Code directly
- Microsoft Kiota extension - to generate API clients
- Spectral extension - to run shift-left API design conformance checks in Visual Studio Code
- Optic CLI - to detect breaking changes between API specification documents
Setup
- Install the Azure API Center extension for Visual Studio Code from the Visual Studio Code Marketplace. Install optional extensions as needed.
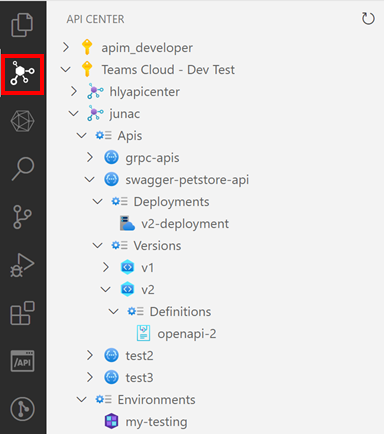
- In Visual Studio Code, in the Activity Bar on the left, select API Center.
- If you're not signed in to your Azure account, select Sign in to Azure..., and follow the prompts to sign in. Select an Azure account with the API center (or API centers) you wish to view APIs from. You can also filter on specific subscriptions if you have many to view from.
Register APIs
Register an API in your API center directly from Visual Studio Code, either by registering it as a one-time operation or with a CI/CD pipeline.
- Use the Ctrl+Shift+P keyboard shortcut to open the Command Palette. Type Azure API Center: Register API and hit Enter.
- Select how you want to register your API with your API center:
- Step-by-step is best for one-time registration of APIs.
- CI/CD adds a preconfigured GitHub or Azure DevOps pipeline to your active Visual Studio Code workspace that is run as part of a CI/CD workflow on each commit to source control. It's recommended to inventory APIs with your API center using CI/CD to ensure API metadata including specification and version stay current in your API center as the API continues to evolve over time.
- Complete registration steps:
- For Step-by-step, select the API center to register APIs with, and answer prompts with information including API title, type, lifecycle stage, version, and specification to complete API registration.
- For CI/CD, select either GitHub or Azure DevOps, depending on your preferred source control mechanism. A Visual Studio Code workspace must be open for the Azure API Center extension to add a pipeline to your workspace. After the file is added, complete steps documented in the CI/CD pipeline file itself to configure Azure Pipeline/GitHub Action environment variables and identity. On push to source control, the API will be registered in your API center.
API design conformance
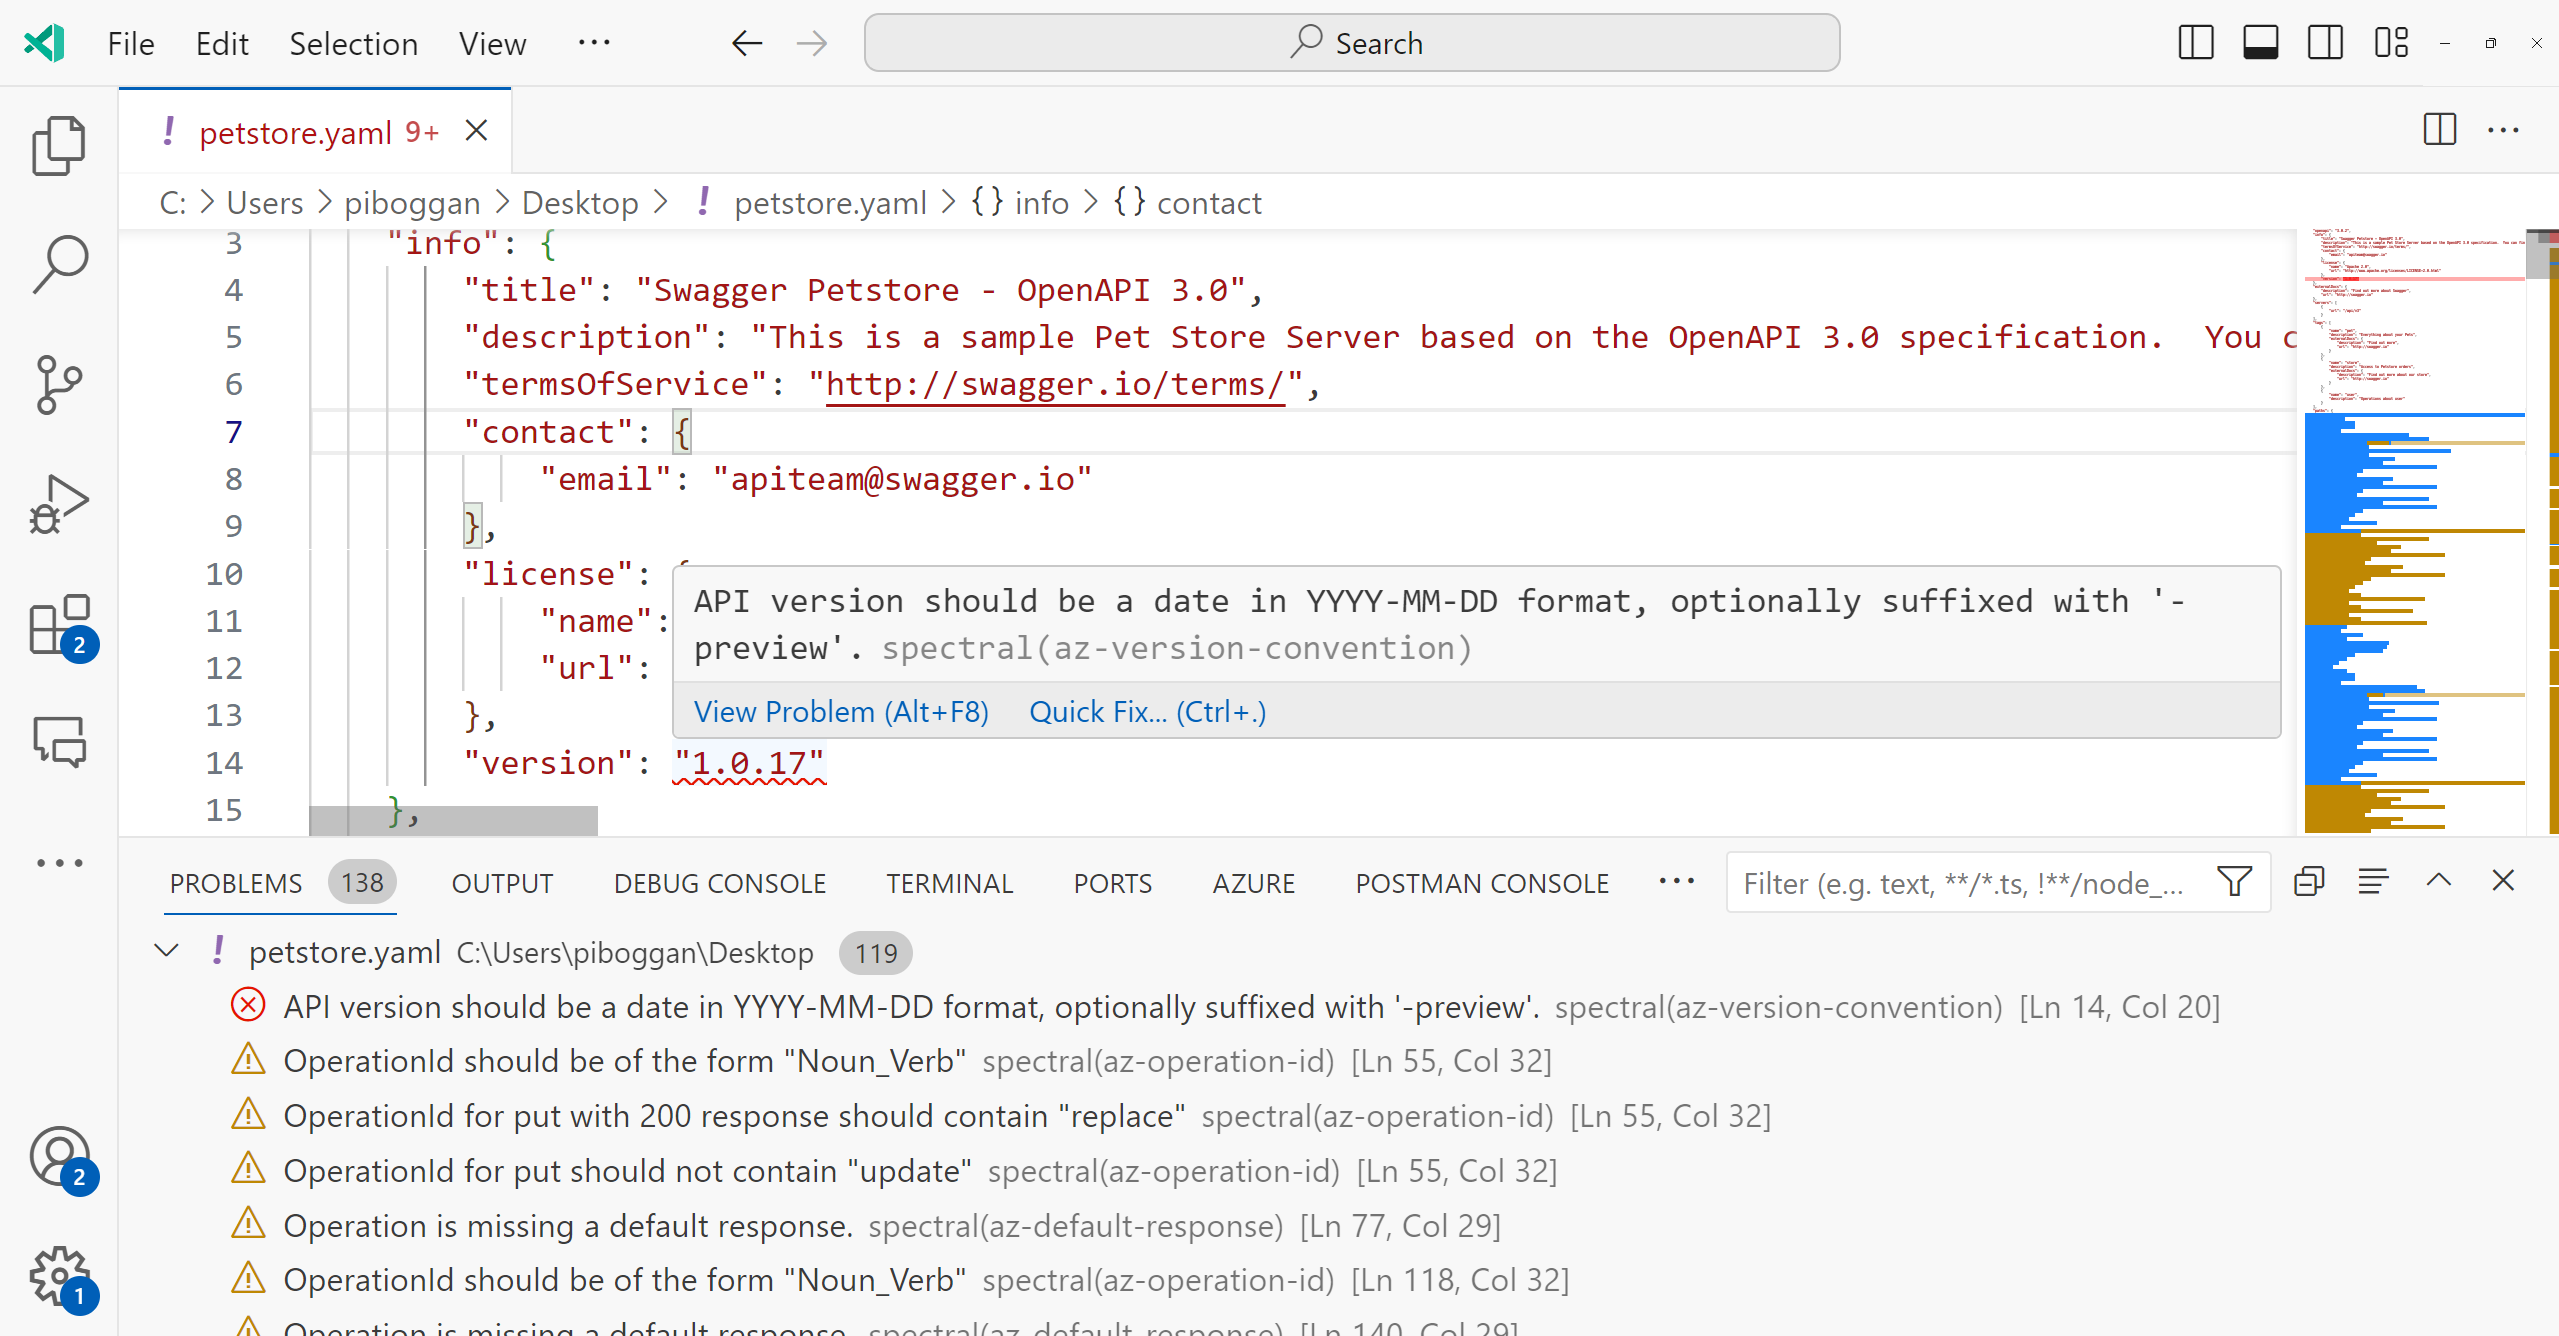
To ensure design conformance with organizational standards as you build APIs, the Azure API Center extension for Visual Studio Code provides integrated support for API specification linting with Spectral.
- Use the Ctrl+Shift+P keyboard shortcut to open the Command Palette. Type Azure API Center: Set active API Style Guide and hit Enter.
- Select one of the default rules provided, or, if your organization has a style guide already available, use Select Local File or Input Remote URL to specify the active ruleset in Visual Studio Code. Hit Enter.
Once an active API style guide is set, opening any OpenAPI or AsyncAPI-based specification file will trigger a local linting operation in Visual Studio Code. Results are displayed both inline in the editor, as well as in the Problems window (View > Problems or Ctrl+Shift+M).
Breaking change detection
When introducing new versions of your API, it's important to ensure that changes introduced do not break API consumers on previous versions of your API. The Azure API Center extension for Visual Studio Code makes this easy with breaking change detection for OpenAPI specification documents powered by Optic.
- Use the Ctrl+Shift+P keyboard shortcut to open the Command Palette. Type Azure API Center: Detect Breaking Change and hit Enter.
- Select the first API specification document to compare. Valid options include API specifications found in your API center, a local file, or the active editor in Visual Studio Code.
- Select the second API specification document to compare. Valid options include API specifications found in your API center, a local file, or the active editor in Visual Studio Code.
Visual Studio Code will open a diff view between the two API specifications. Any breaking changes are displayed both inline in the editor, as well as in the Problems window (View > Problems or Ctrl+Shift+M).
Discover APIs
Your API center resources appear in the tree view on the left-hand side. Expand an API center resource to see APIs, versions, definitions, environments, and deployments.
Search for APIs within an API Center by using the search icon shown in the Apis tree view item.
View API documentation
You can view the documentation for an API definition in your API center and try API operations. This feature is only available for OpenAPI-based APIs in your API center.
Expand the API Center tree view to show an API definition.
Right-click on the definition, and select Open API Documentation. A new tab appears with the Swagger UI for the API definition.
To try the API, select an endpoint, select Try it out, enter required parameters, and select Execute.
Note
Depending on the API, you might need to provide authorization credentials or an API key to try the API.
Generate HTTP file
You can view a .http file based on the API definition in your API center. If the REST Client extension is installed, you can make requests directory from the Visual Studio Code editor. This feature is only available for OpenAPI-based APIs in your API center.
Expand the API Center tree view to show an API definition.
Right-click on the definition, and select Generate HTTP File. A new tab appears that renders a .http document populated by the API specification.
To make a request, select an endpoint, and select Send Request.
Note
Depending on the API, you might need to provide authorization credentials or an API key to make the request.
Generate API client
Use the Microsoft Kiota extension to generate an API client for your favorite language. This feature is only available for OpenAPI-based APIs in your API center.
- Expand the API Center tree view to show an API definition.
- Right-click on the definition, and select Generate API Client. The Kiota OpenAPI Generator pane appears.
- Select the API endpoints and HTTP operations you wish to include in your SDKs.
- Select Generate API client.
The client is generated.
For details on using the Kiota extension, see Microsoft Kiota extension for Visual Studio Code.
Related content
Feedback
Coming soon: Throughout 2024 we will be phasing out GitHub Issues as the feedback mechanism for content and replacing it with a new feedback system. For more information see: https://aka.ms/ContentUserFeedback.
Submit and view feedback for


