Note
Access to this page requires authorization. You can try signing in or changing directories.
Access to this page requires authorization. You can try changing directories.
In this quickstart, you create a single database in Azure SQL Database using either the Azure portal, a PowerShell script, or an Azure CLI script. You then query the database using Query editor in the Azure portal.
Watch this video in the Azure SQL Database essentials series for an overview of the deployment process:
Prerequisites
- An active Azure subscription. If you don't have one, create a free account.
- Much of this article can be accomplished with the Azure portal alone. Optionally, use the latest version of Azure PowerShell or Azure CLI.
Permissions
To create databases via Transact-SQL: CREATE DATABASE permissions are necessary. To create a database a login must be either the server admin login (created when the Azure SQL Database logical server was provisioned), the Microsoft Entra admin of the server, a member of the dbmanager database role in master. For more information, see CREATE DATABASE.
To create databases via the Azure portal, PowerShell, Azure CLI, or REST API: Azure RBAC permissions are needed, specifically the Contributor, SQL DB Contributor, or SQL Server Contributor Azure RBAC role. For more information, see Azure RBAC built-in roles.
Create a single database
This quickstart creates a single database in the serverless compute tier.
Note
Try Azure SQL Database free of charge and get 100,000 vCore seconds of serverless compute and 32 GB of storage every month.
To create a single database in the Azure portal, this quickstart starts at the Azure SQL page.
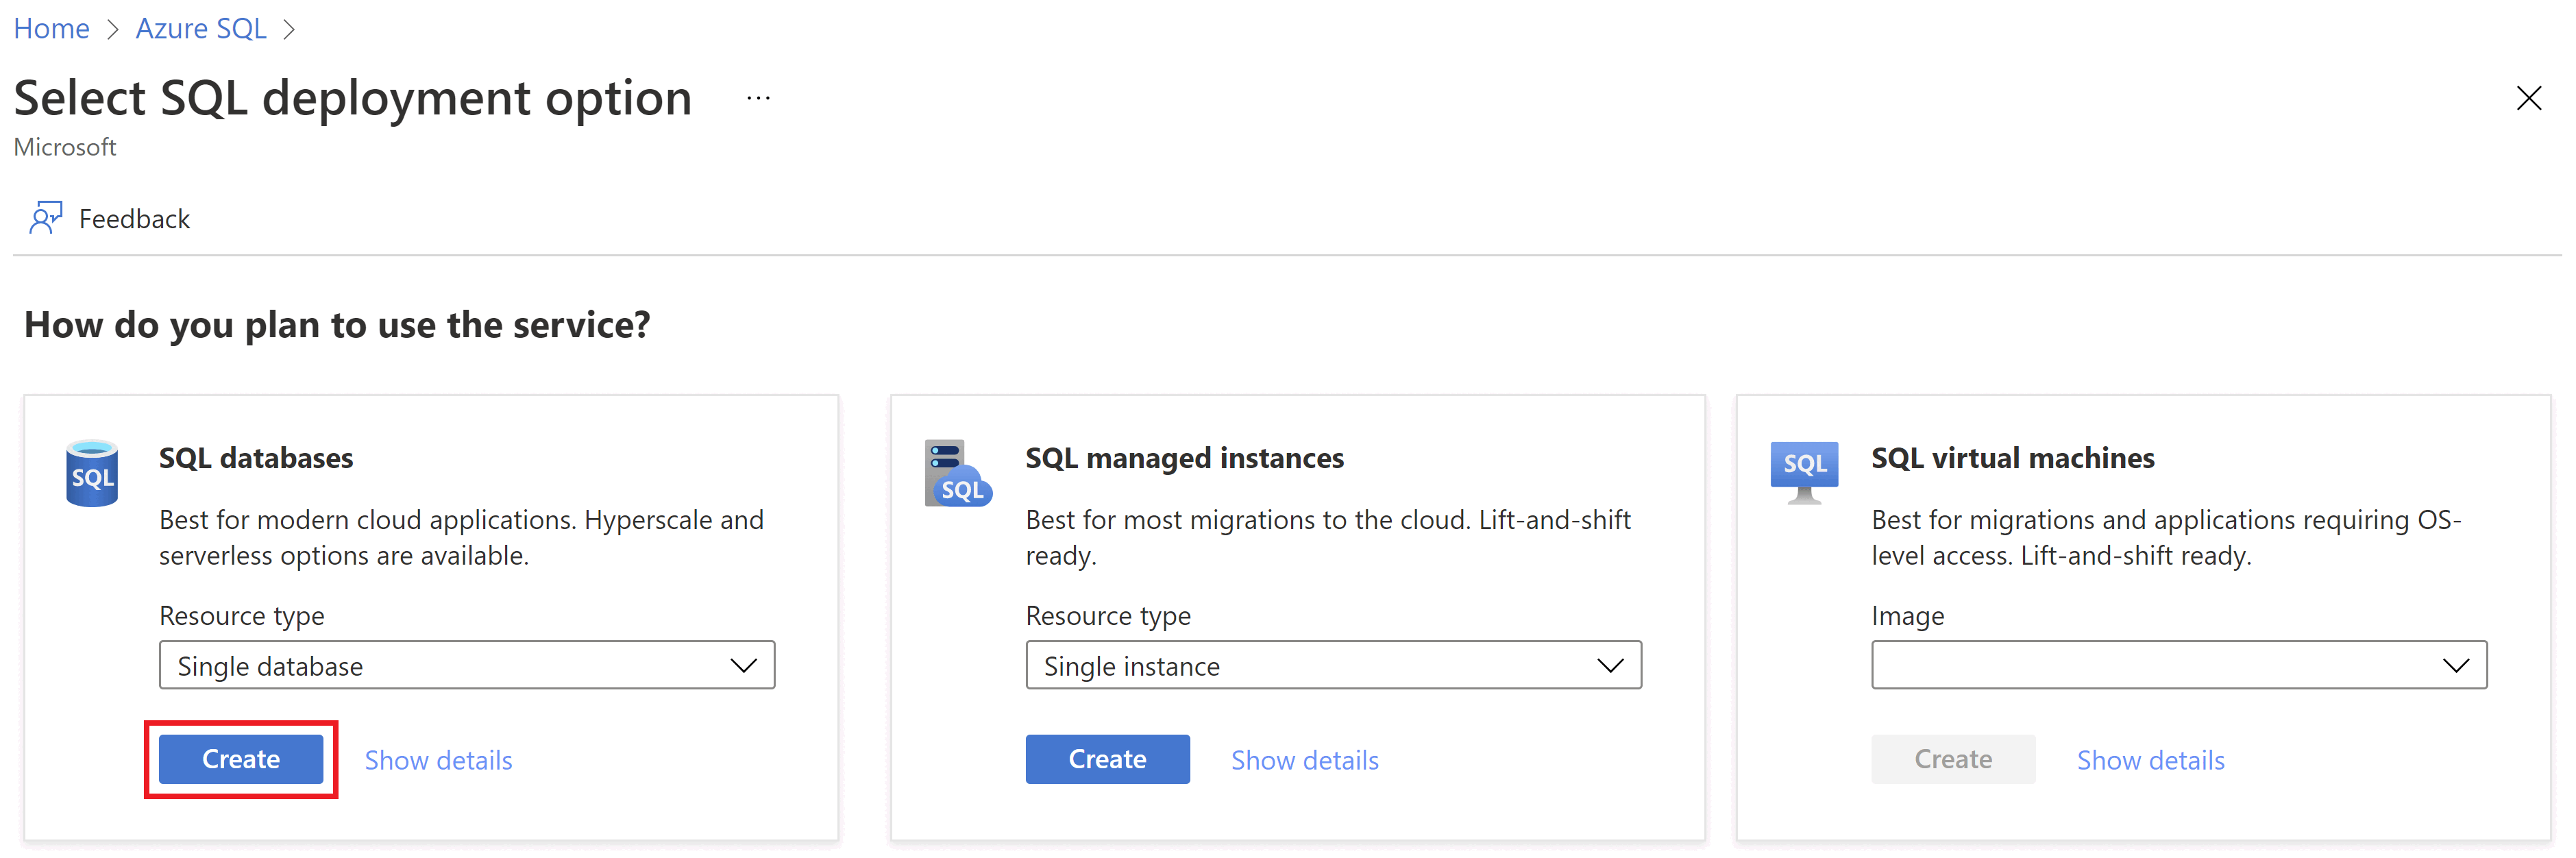
Browse to the Select SQL Deployment option page.
Under SQL databases, leave Resource type set to Single database, and select Create.
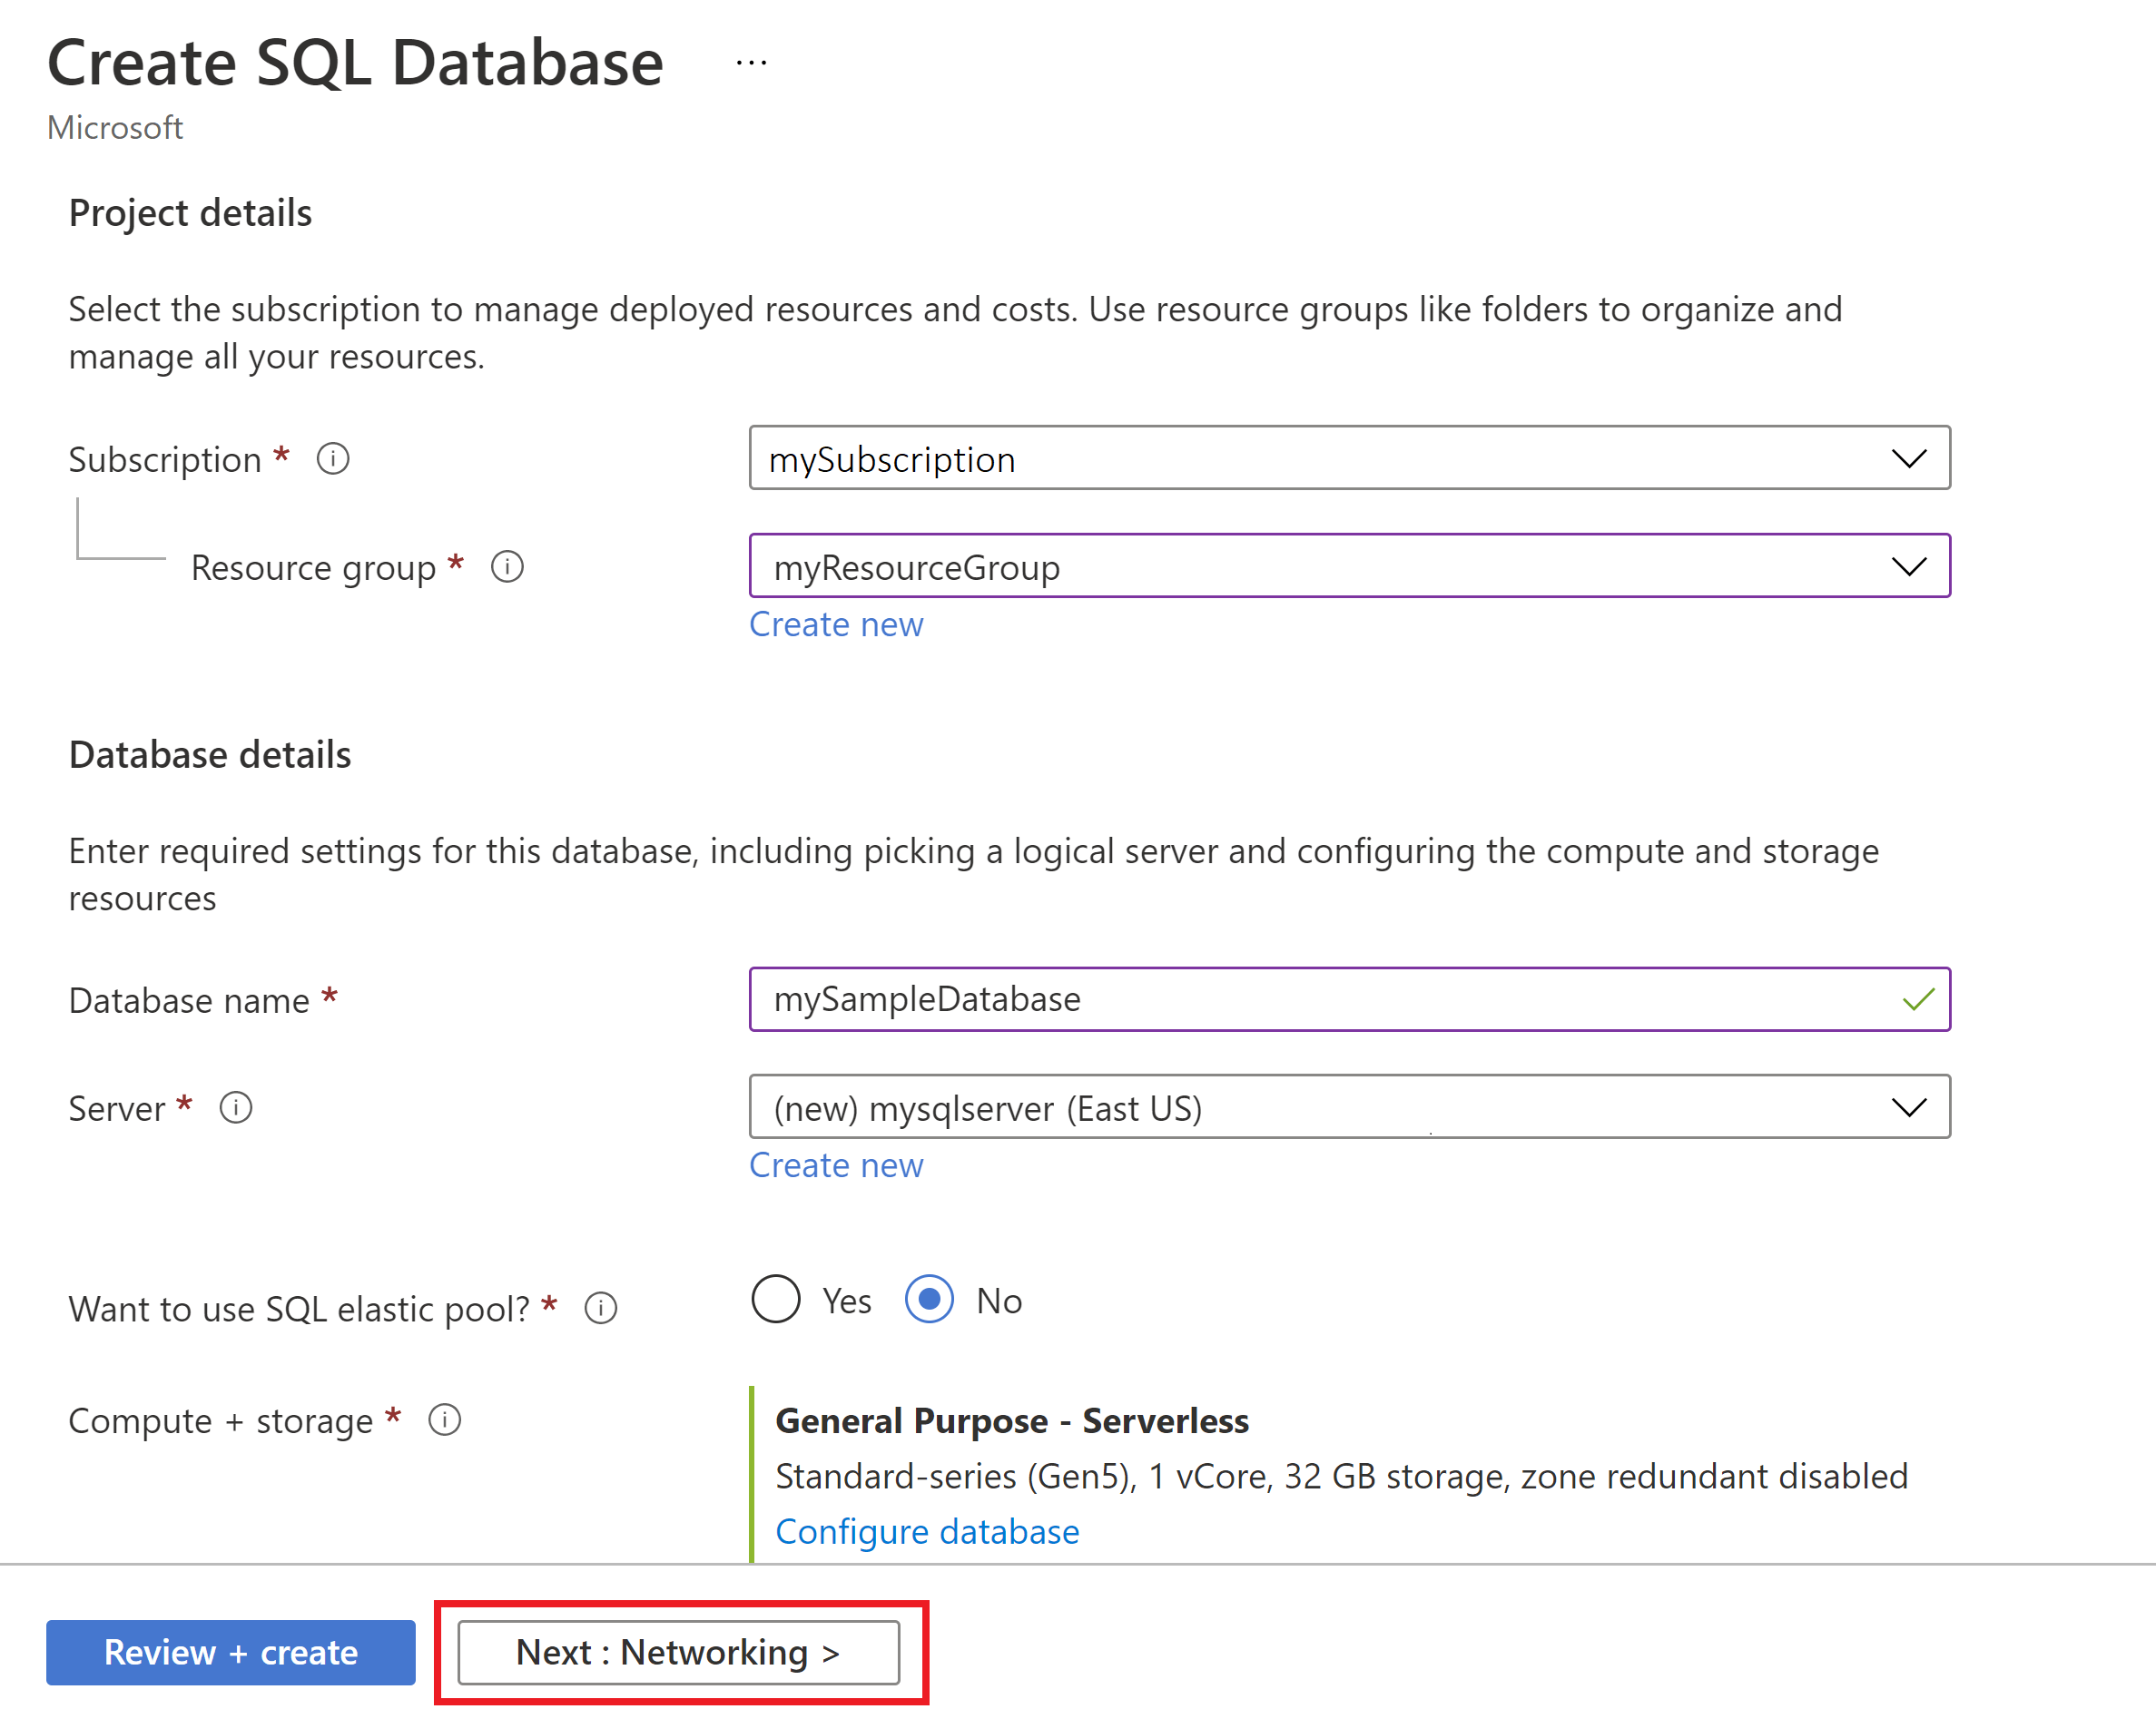
On the Basics tab of the Create SQL Database form, under Project details, select the desired Azure Subscription.
For Resource group, select Create new, enter myResourceGroup, and select OK.
For Database name, enter mySampleDatabase.
For Server, select Create new, and fill out the New server form with the following values:
Server name: Enter mysqlserver, and add some characters for uniqueness. We can't provide an exact server name to use because server names must be globally unique for all servers in Azure, not just unique within a subscription. So enter something like
mysqlserver12345, and the portal lets you know if it's available or not.Location: Select a location from the dropdown list.
Authentication method: Select Use SQL authentication.
Server admin login: Enter azureuser.
Password: Enter a password that meets requirements, and enter it again in the Confirm password field.
Select OK.
Leave Want to use SQL elastic pool set to No.
For Workload environment, specify Development for this exercise.
The Azure portal provides a Workload environment option that helps to preset some configuration settings. These settings can be overridden. This option applies to the Create SQL Database portal page only. Otherwise, the Workload environment option has no impact on licensing or other database configuration settings.
- Choosing the development workload environment sets a few options, including:
- Backup storage redundancy option is locally redundant storage. Locally redundant storage incurs less cost and is appropriate for pre-production environments that do not require the redundance of zone- or geo-replicated storage.
- Compute + storage is General Purpose, Serverless with a single vCore. By default, there is a one-hour auto-pause delay.
- Choosing the Production workload environment sets:
- Backup storage redundancy is geo-redundant storage, the default.
- Compute + storage is General Purpose, Provisioned with 2 vCores and 32 GB of storage. This can be further modified in the next step.
- Choosing the development workload environment sets a few options, including:
Under Compute + storage, select Configure database.
This quickstart uses a serverless database, so leave Service tier set to General Purpose (Most budget-friendly, serverless compute) and set Compute tier to Serverless. Select Apply.
Under Backup storage redundancy, choose a redundancy option for the storage account where your backups will be saved. To learn more, see backup storage redundancy.
Select Next: Networking at the bottom of the page.
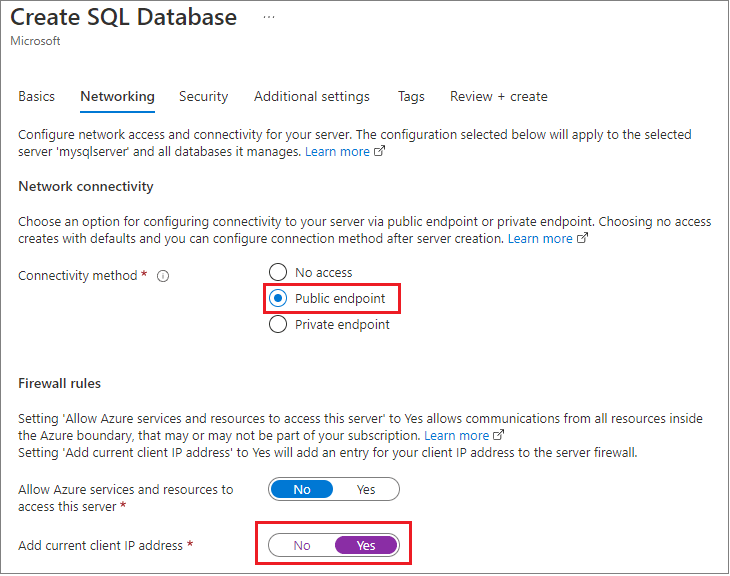
On the Networking tab, for Connectivity method, select Public endpoint.
For Firewall rules, set Add current client IP address to Yes. Leave Allow Azure services and resources to access this server set to No.
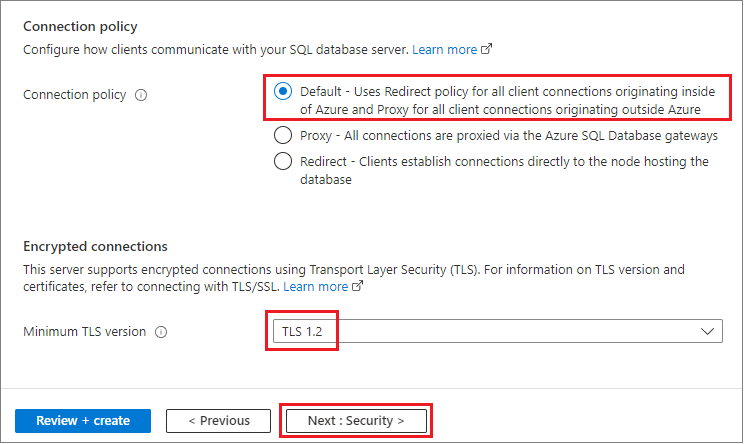
Under Connection policy, choose the Default connection policy, and leave the Minimum TLS version at the default of TLS 1.2.
Select Next: Security at the bottom of the page.
On the Security page, you can choose to start a free trial of Microsoft Defender for SQL, as well as configure Ledger, Managed identities and Azure SQL transparent data encryption with customer-managed key if you desire. Select Next: Additional settings at the bottom of the page.
On the Additional settings tab, in the Data source section, for Use existing data, select Sample. This creates an
AdventureWorksLTsample database so there's some tables and data to query and experiment with, as opposed to an empty blank database. You can also configure database collation and a maintenance window.Select Review + create at the bottom of the page:

On the Review + create page, after reviewing, select Create.


Query the database
Once your database is created, you can use the Query editor (preview) in the Azure portal to connect to the database and query data. For more information, see Azure portal query editor for Azure SQL Database.
In the portal, search for and select SQL databases, and then select your database from the list.
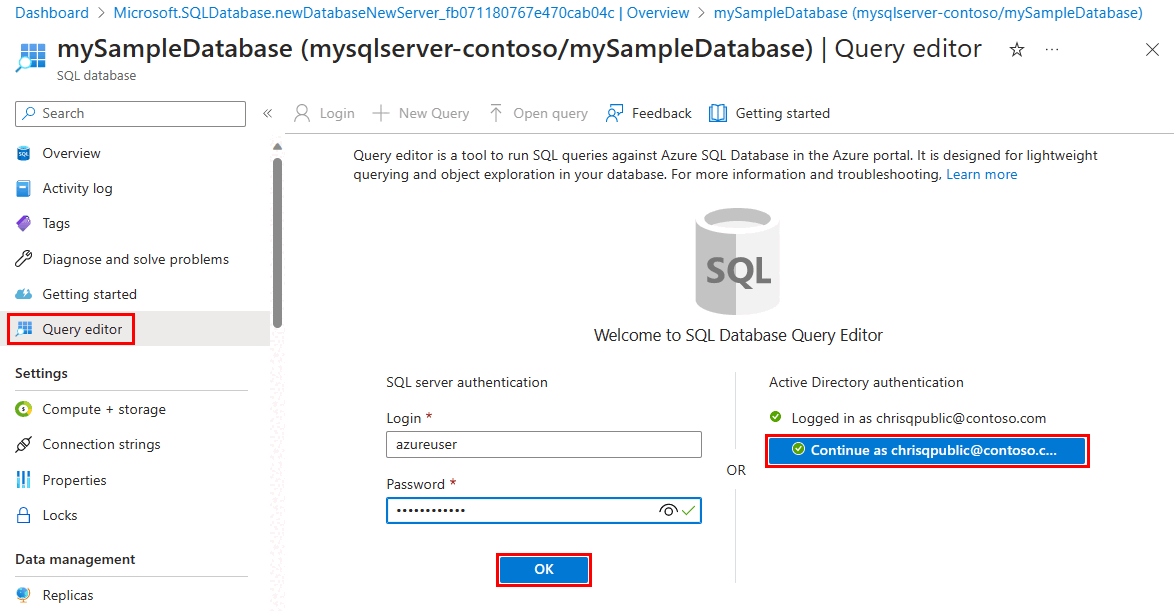
On the page for your database, select Query editor (preview) in the left menu.
Enter your SQL authentication server admin login information or use Microsoft Entra authentication.
Note
Microsoft Entra ID was previously known as Azure Active Directory (Azure AD).
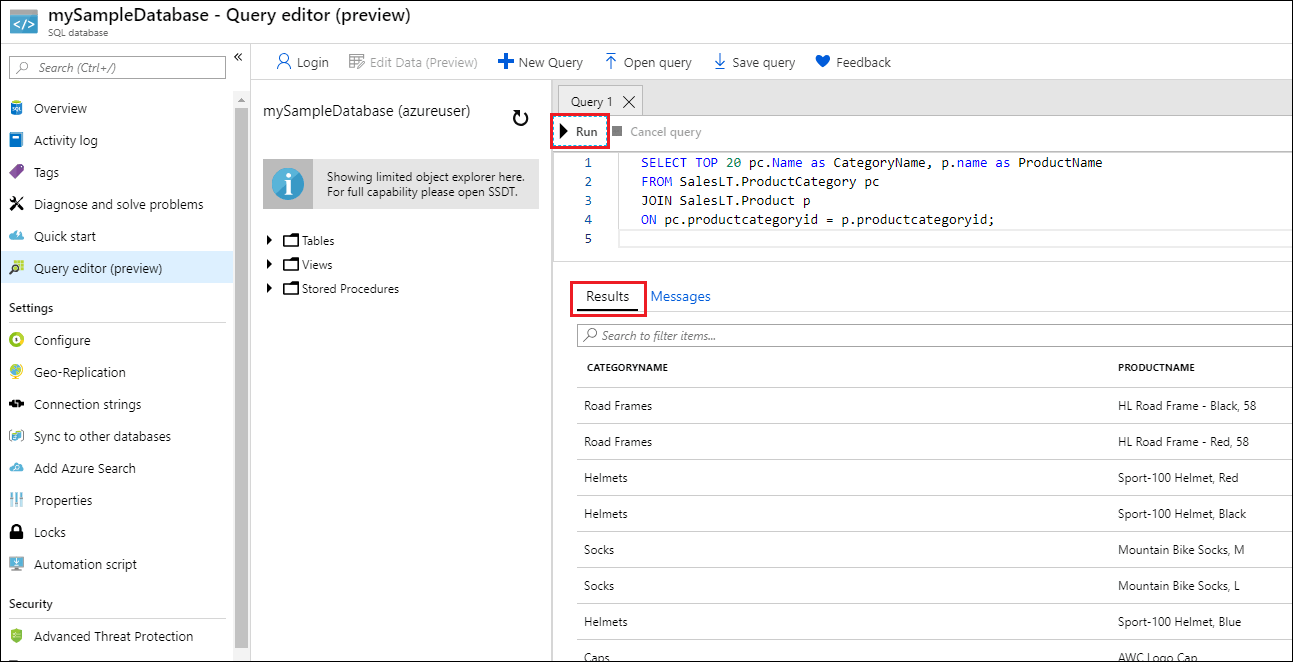
Enter the following query in the Query editor pane.
SELECT TOP 20 pc.Name as CategoryName, p.name as ProductName
FROM SalesLT.ProductCategory pc
JOIN SalesLT.Product p
ON pc.productcategoryid = p.productcategoryid;
Select Run, and then review the query results in the Results pane.
Close the Query editor page, and select OK when prompted to discard your unsaved edits.


Clean up resources
Keep the resource group, server, and single database to go on to the next steps, and learn how to connect and query your database with different methods.
When you're finished using these resources, you can delete the resource group you created, which will also delete the server and single database within it.
To delete myResourceGroup and all its resources using the Azure portal:
- In the portal, search for and select Resource groups, and then select myResourceGroup from the list.
- On the resource group page, select Delete resource group.
- Under Type the resource group name, enter myResourceGroup, and then select Delete.
Next step
Want to optimize and save on your cloud spending?