Convert a legacy Exchange peering to an Azure resource using the Azure portal
In this article, you learn how to convert an existing legacy Exchange peering to an Azure resource using the Azure portal.
If you prefer, you can complete this guide using PowerShell.
Prerequisites
Review the Prerequisites to set up peering with Microsoft and the Exchange peering walkthrough before you begin configuration.
A legacy Exchange peering in your subscription.
Sign in to Azure
Sign in to the Azure portal.
Convert a legacy Exchange peering to an Azure resource
As an Internet Exchange Provider, you can convert a legacy exchange peering to an Azure resource using the Azure portal:
In the search box at the top of the portal, enter peering. Select Peerings from the search results.
On the Peerings page, select + Create.
On the Basics tab of Create a Peering page, enter, or select the following values:
Setting Value Project Details Subscription Select your Azure subscription. Resource Group Select a resource group or create a new one. Instance details Name Enter a name for the peering you're creating. Peer ASN Select your ASN. 

Important
You can only choose an ASN with ValidationState as Approved before you submit a peering request. If you just submitted your PeerAsn request, wait for 12 hours or so for ASN association to be approved. If the ASN you select is pending validation, you'll see an error message. If you don't see the ASN you need to choose, check that you selected the correct subscription. If so, check if you have already created PeerAsn using Associate Peer ASN to Azure subscription.
Select Next : Configuration >.
On the Configuration tab, enter, or select the following values:
Setting Value Peering type Select Exchange. SKU Select Basic Free. Metro Select the metro location where you want to convert peering to an Azure resource. If you have peering connections with Microsoft in the selected metro location that aren't converted to an Azure resource, they'll be listed in the Peering connections section. 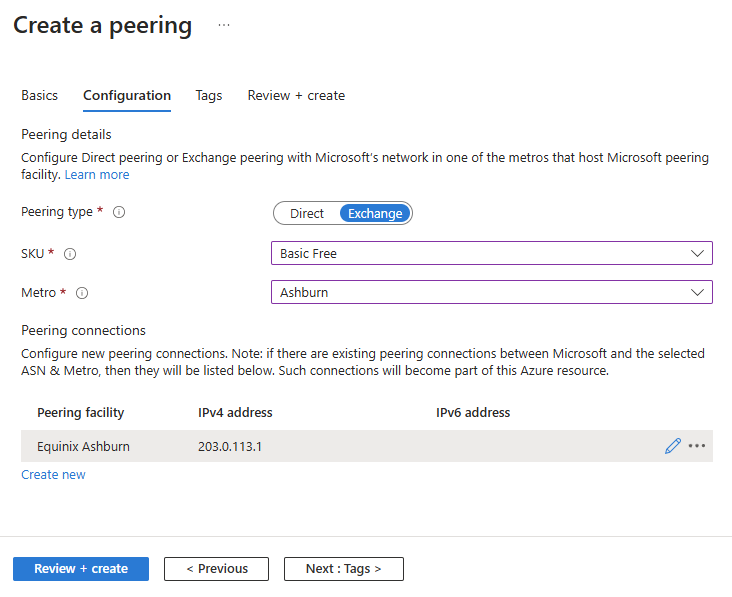
Note
You can't modify settings for legacy peering connections. If you want to add additional peering connections with Microsoft in the selected Metro location, select Create new. For more information, see Create or modify an Exchange peering using the portal.
Select Review + create.
Review the settings, and then select Create.

Verify an Exchange peering
Go to the Peering resource you created in the previous section.
Under Settings, select Connections to see a summary of peering connections between your ASN and Microsoft.

- Connection State corresponds to the state of the peering connection setup. The states displayed in this field follow the state diagram shown in the Exchange peering walkthrough.
- IPv4 Session State and IPv6 Session State correspond to the IPv4 and IPv6 BGP session states, respectively.
