Training
Certification
Microsoft Certified: Azure Virtual Desktop Specialty - Certifications
Plan, deliver, manage, and monitor virtual desktop experiences and remote apps on Microsoft Azure for any device.
This browser is no longer supported.
Upgrade to Microsoft Edge to take advantage of the latest features, security updates, and technical support.
Note
Access to this page requires authorization. You can try signing in or changing directories.
Access to this page requires authorization. You can try changing directories.
This article shows you how to migrate on-premises Hyper-V virtual machines (VMs) to Azure with the Migration and modernization tool.
This tutorial is the third in a series that demonstrates how to assess and migrate machines to Azure.
Note
Tutorials show you the simplest deployment path for a scenario so that you can quickly set up a proof of concept. Tutorials use default options where possible and don't show all possible settings and paths.
In this tutorial, you learn how to:
If you don't have an Azure subscription, create a free account before you begin.
Before you begin this tutorial, you should:
Note
If you're planning to upgrade your Windows operating system (OS), Azure Migrate and Modernize might download the Windows SetupDiag for error details in case upgrade fails. Ensure that the VM created in Azure after the migration has access to SetupDiag. If there's no access to SetupDiag, you might not be able to get detailed OS upgrade failure error codes, but the upgrade can still proceed.
For migrating Hyper-V VMs, the Migration and modernization tool installs software providers (Azure Site Recovery provider and Recovery Services agent) on Hyper-V hosts or cluster nodes. The Azure Migrate appliance isn't used for Hyper-V migration.
In the Azure Migrate project, select Servers, databases, and web apps > Migration and modernization > Discover.
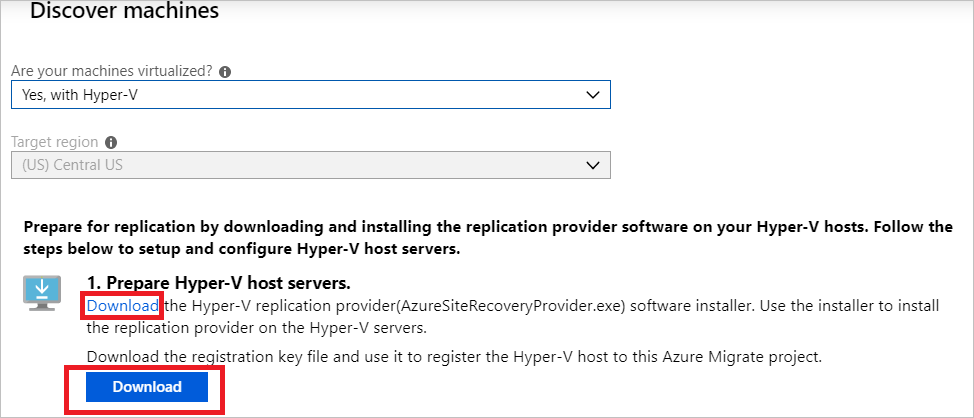
In Discover machines > Are your machines virtualized?, select Yes, with Hyper-V.
In Target region, select the Azure region to which you want to migrate the machines.
Select Confirm that the target region for migration is region-name.
Select Create resources. This step creates a Recovery Services vault in the background.
In Prepare Hyper-V host servers, download the Hyper-V Replication provider and the registration key file.
Copy the provider setup file and registration key file to each Hyper-V host (or cluster node) running the VMs you want to replicate.
To install and register the provider, use the following steps by using either the UI or commands.
Run the provider setup file on each host:
After you install the provider on hosts, go to the Azure portal and in Discover machines, select Finalize registration.
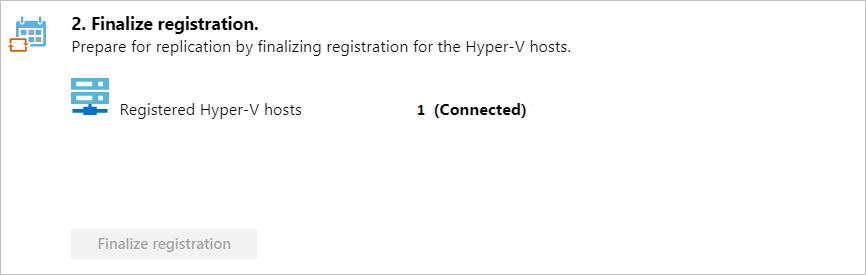
It can take up to 15 minutes after finalizing registration until discovered VMs appear in the Migration and modernization tile. As VMs are discovered, the Discovered servers count rises.
After discovery is finished, you can begin the replication of Hyper-V VMs to Azure.
Note
You can replicate up to 10 machines together. If you need to replicate more, replicate them simultaneously in batches of 10.
In the Azure Migrate project, select Servers, databases, and web apps > Migration and modernization > Replicate.
In Replicate > Source settings > Are your machines virtualized?, select Yes, with Hyper-V. Then select Next: Virtual machines.
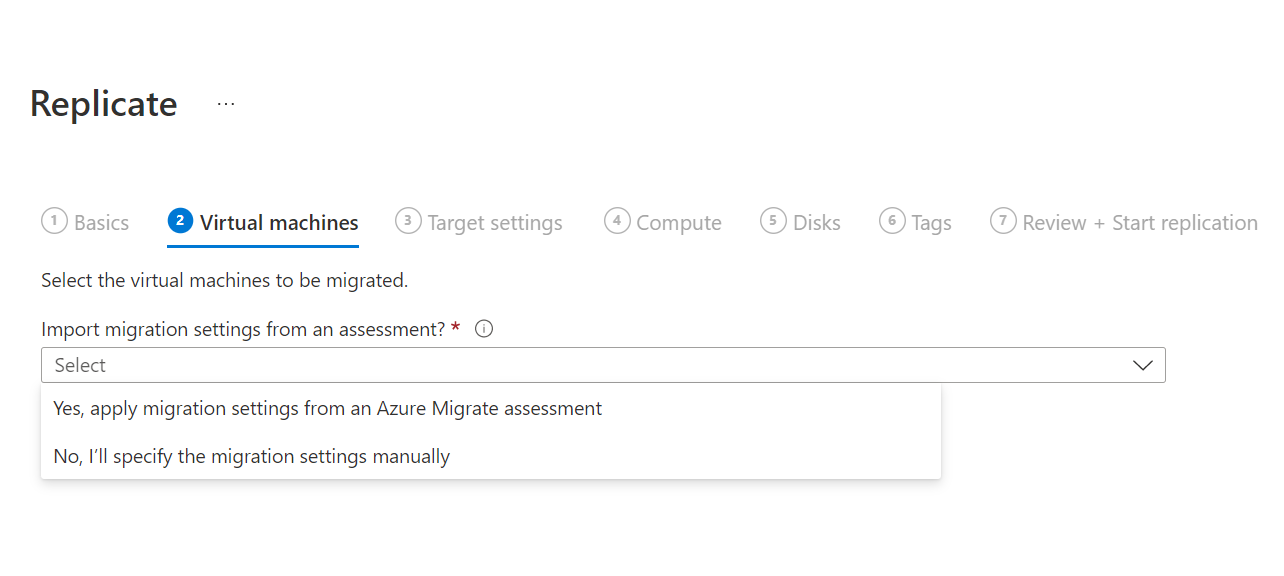
In Virtual machines, select the machines you want to replicate.
If you ran an assessment for the VMs, you can apply VM sizing and disk type (premium/standard) recommendations from the assessment results. To do this step, in Import migration settings from an Azure Migrate assessment?, select Yes.
If you didn't run an assessment, or you don't want to use the assessment settings, select No.
If you selected to use the assessment, select the VM group and assessment name.
In Virtual machines, search for VMs as needed and check each VM you want to migrate. Then, select Next: Target settings.

In Target settings, select the target region to which you'll migrate, the subscription, and the resource group in which the Azure VMs will reside after migration.
In Replication Storage Account, select the Azure Storage account in which replicated data will be stored in Azure.
In Virtual Network, select the Azure virtual network/subnet to which the Azure VMs will be joined after migration.
In Availability options, select:
In Azure Hybrid Benefit:

In Compute, review the VM name, size, OS disk type, and availability configuration (if selected in the previous step). VMs must conform with Azure requirements.
In Disks, specify the VM disks that need to be replicated to Azure. Then select Next.

In Tags, choose to add tags to your VMs, disks, and NICs.

In Review and start replication, review the settings and select Replicate to start the initial replication for the servers.
Note
You can update replication settings any time before replication starts in Manage > Replicated machines. Settings can't be changed after replication starts.
If this is the first VM you're replicating in the Azure Migrate project, the Migration and modernization tool automatically provisions these resources in the same resource group as the project.
You can track job status in the portal notifications.
You can monitor replication status by selecting Replicated servers in Migration and modernization.
When delta replication begins, you can run a test migration for the VMs before you run a full migration to Azure. We highly recommend that you do this step at least once for each machine before you migrate it.
To do a test migration:
In Migration goals, select Servers, databases, and web apps > Migration and modernization, select Replicated servers under Replications.
In the Replicating machines tab, right-click the VM to test and select Test migrate.
In Test Migration, select the Azure virtual network in which the Azure VM will be located after the migration. We recommend that you use a nonproduction virtual network.
You can upgrade the Windows Server OS during test migration. For Hyper-V VMs, automatic detection of an OS isn't yet supported. To upgrade, select the Check for upgrade option. In the pane that appears, select the current OS version and the target version to which you want to upgrade. If the target version is available, it's processed accordingly. Learn more.
The Test Migration job starts. Monitor the job in the portal notifications.
After the migration finishes, view the migrated Azure VM in Virtual Machines in the Azure portal. The machine name has the suffix -Test.
After the test is finished, right-click the Azure VM in Replications and select Clean up test migration.
Note
You can now register your servers running SQL Server with SQL VM RP to take advantage of automated patching, automated backup, and simplified license management by using the SQL IaaS Agent Extension.
After you verify that the test migration works as expected, you can migrate the on-premises machines.
In the Azure Migrate project, select Servers, databases, and web apps > Migration and modernization, select Replicated servers under Replications.
In the Replicating machines tab, right-click the VM to test and select Migrate.
In Migrate > Shut down virtual machines and perform a planned migration with no data loss, select Yes > OK.
You can upgrade the Windows Server OS during migration. For Hyper-V VMs, automatic detection of OS isn't yet supported. To upgrade, select the Check for upgrade option. In the pane that appears, select the current OS version and the target version to which you want to upgrade. If the target version is available, it's processed accordingly. Learn more.
A migration job starts for the VM. Track the job in Azure notifications.
After the job finishes, you can view and manage the VM from the Virtual Machines page.
Investigate the cloud migration journey in the Cloud Adoption Framework for Azure.
Training
Certification
Microsoft Certified: Azure Virtual Desktop Specialty - Certifications
Plan, deliver, manage, and monitor virtual desktop experiences and remote apps on Microsoft Azure for any device.