Tutorial: Create an example policy control configuration set for Azure Private 5G Core
Azure Private 5G Core provides flexible traffic handling. You can customize how your packet core instance applies quality of service (QoS) characteristics to traffic to meet its needs. You can also block or limit certain flows. This tutorial takes you through the steps of creating services and SIM policies for common use cases, and then provisioning SIMs to use the new policy control configuration.
In this tutorial, you'll learn how to:
- Create a new service that filters packets based on their protocol.
- Create a new service that blocks traffic labeled with specific remote IP addresses and ports.
- Create a new service that limits the bandwidth of traffic on matching flows.
- Create two new SIM policies and assign services to them.
- Provision two new SIMs and assign them SIM policies.
Prerequisites
- Read the information in Policy control and familiarize yourself with Azure Private 5G Core policy control configuration.
- Ensure you can sign in to the Azure portal using an account with access to the active subscription you identified in Complete the prerequisite tasks for deploying a private mobile network. This account must have the built-in Contributor role at the subscription scope.
- Identify the name of the Mobile Network resource corresponding to your private mobile network.
- Identify the name of the Slice resource corresponding to your network slice.
- If you want to assign a policy to a 5G SIM, you can choose any slice.
- If you want to assign a policy to a 4G SIM, you must choose the slice configured with slice/service type (SST) value of 1 and an empty slice differentiator (SD).
Create a service for protocol filtering
In this step, we'll create a service that filters packets based on their protocol. Specifically, it'll do the following:
- Block ICMP packets flowing away from UEs.
- Block UDP packets flowing away from UEs on port 11.
- Allow all other ICMP and UDP traffic in both directions, but no other IP traffic.
To create the service:
Sign in to the Azure portal.
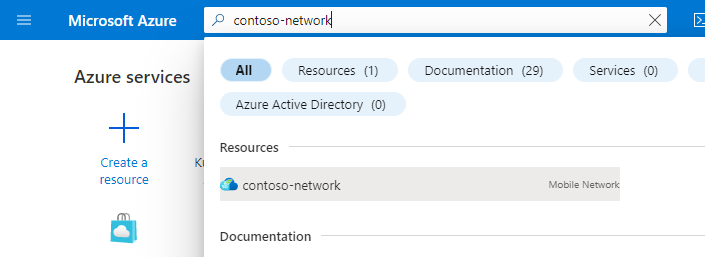
Search for and select the Mobile Network resource representing your private mobile network.
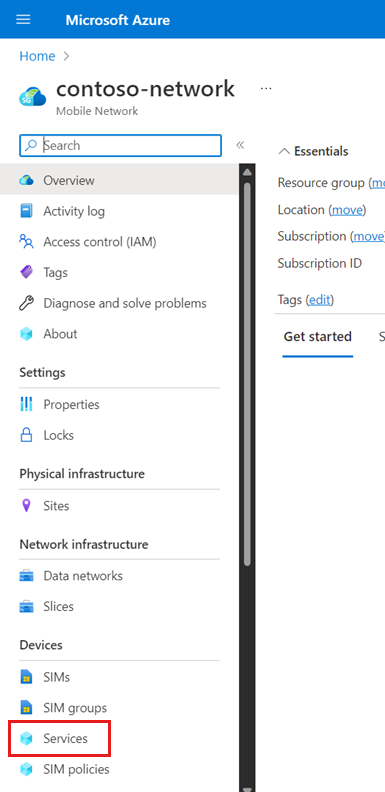
In the Resource menu, select Services.
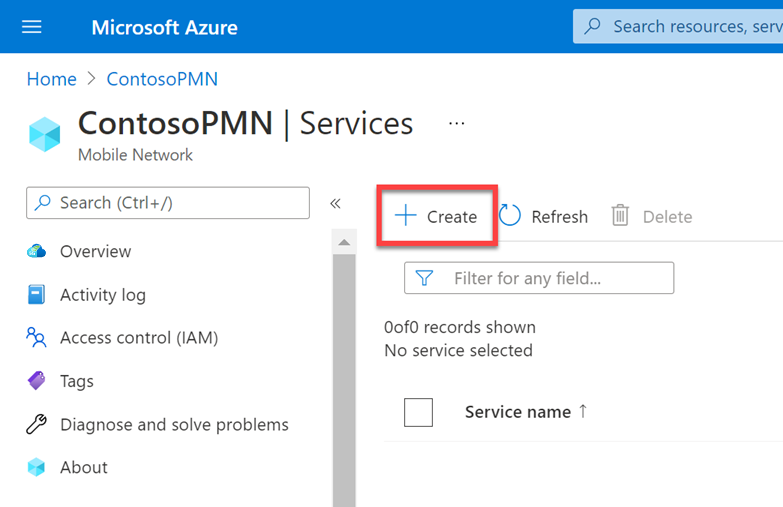
In the Command bar, select Create.
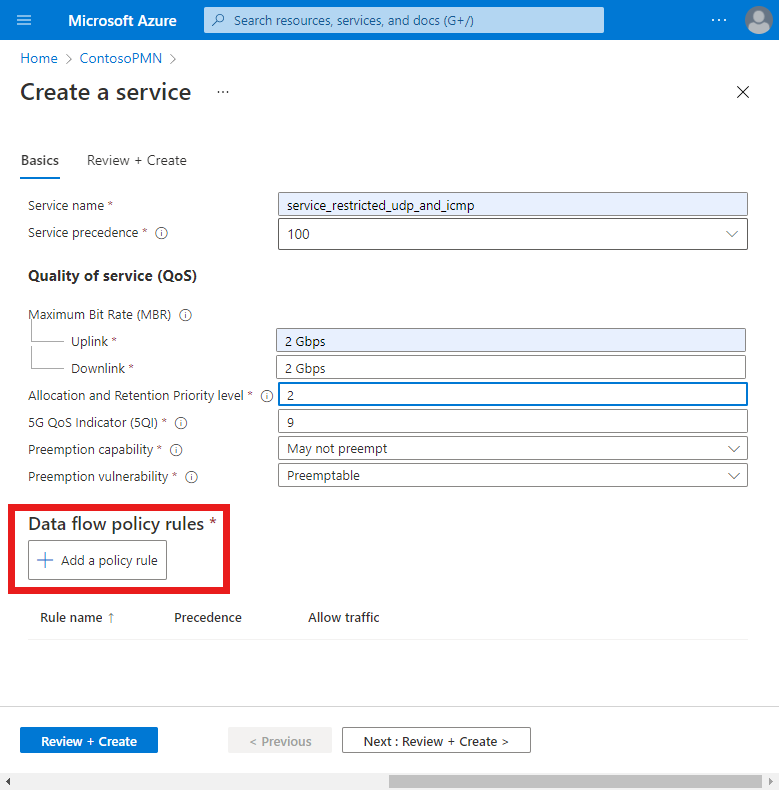
We'll now enter values to define the QoS characteristics that will be applied to service data flows (SDFs) that match this service. On the Basics tab, fill out the fields as follows.
Field Value Service name service_restricted_udp_and_icmpService precedence 100Maximum bit rate (MBR) - Uplink 2 GbpsMaximum bit rate (MBR) - Downlink 2 GbpsAllocation and Retention Priority level 25QI/QCI 9Preemption capability Select May not preempt. Preemption vulnerability Select Not preemptible. Under Data flow policy rules, select Add a policy rule.
We'll now create a data flow policy rule that blocks any packets that match the data flow template we'll configure in the next step. Under Add a policy rule on the right, fill out the fields as follows.
Field Value Rule name rule_block_icmp_and_udp_uplink_trafficPolicy rule precedence Select 10. Allow traffic Select Blocked. We'll now create a data flow template that matches on ICMP packets flowing away from UEs, so that they can be blocked by the
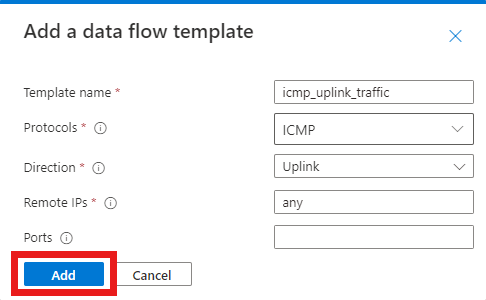
rule_block_icmp_uplink_trafficrule. Under Data flow templates, select Add a data flow template. In the Add a data flow template pop-up, fill out the fields as follows.Field Value Template name icmp_uplink_trafficProtocols Select ICMP. Direction Select Uplink. Remote IPs anyPorts Leave blank. Select Add.
Let's create another data flow template for the same rule that matches on UDP packets flowing away from UEs on port 11.
Under Data flow templates, select Add a data flow template. In the Add a data flow template pop-up, fill out the fields as follows.
Field Value Template name udp_uplink_traffic_port_11Protocols Select UDP. Direction Select Uplink. Remote IPs anyPorts 11Select Add.
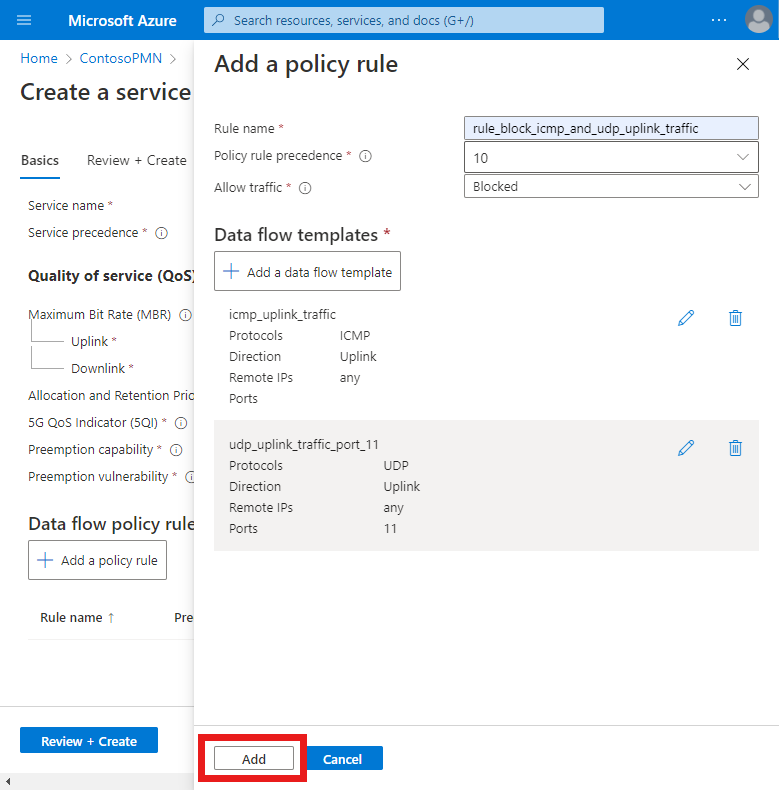
We can now finalize the rule. Under Add a policy rule, select Add.
Finally, we'll create a data policy flow rule that allows all other ICMP and UDP traffic.
Select Add a policy rule and then fill out the fields under Add a policy rule on the right as follows.
Field Value Rule name rule_allow_other_icmp_and_udp_trafficPolicy rule precedence Select 15. Allow traffic Select Enabled. We're now back at the Create a service screen. We'll create a data flow template that matches on all ICMP and UDP in both directions.
Under Data flow policy rules, select Add a data flow template. In the Add a data flow template pop-up, fill out the fields as follows.
Field Value Template name icmp_and_udp_trafficProtocols Select both the UDP and ICMP checkboxes. Direction Select Bidirectional. Remote IPs anyPorts Leave blank. Select Add.
We can now finalize the rule. Under Add a policy rule, select Add.
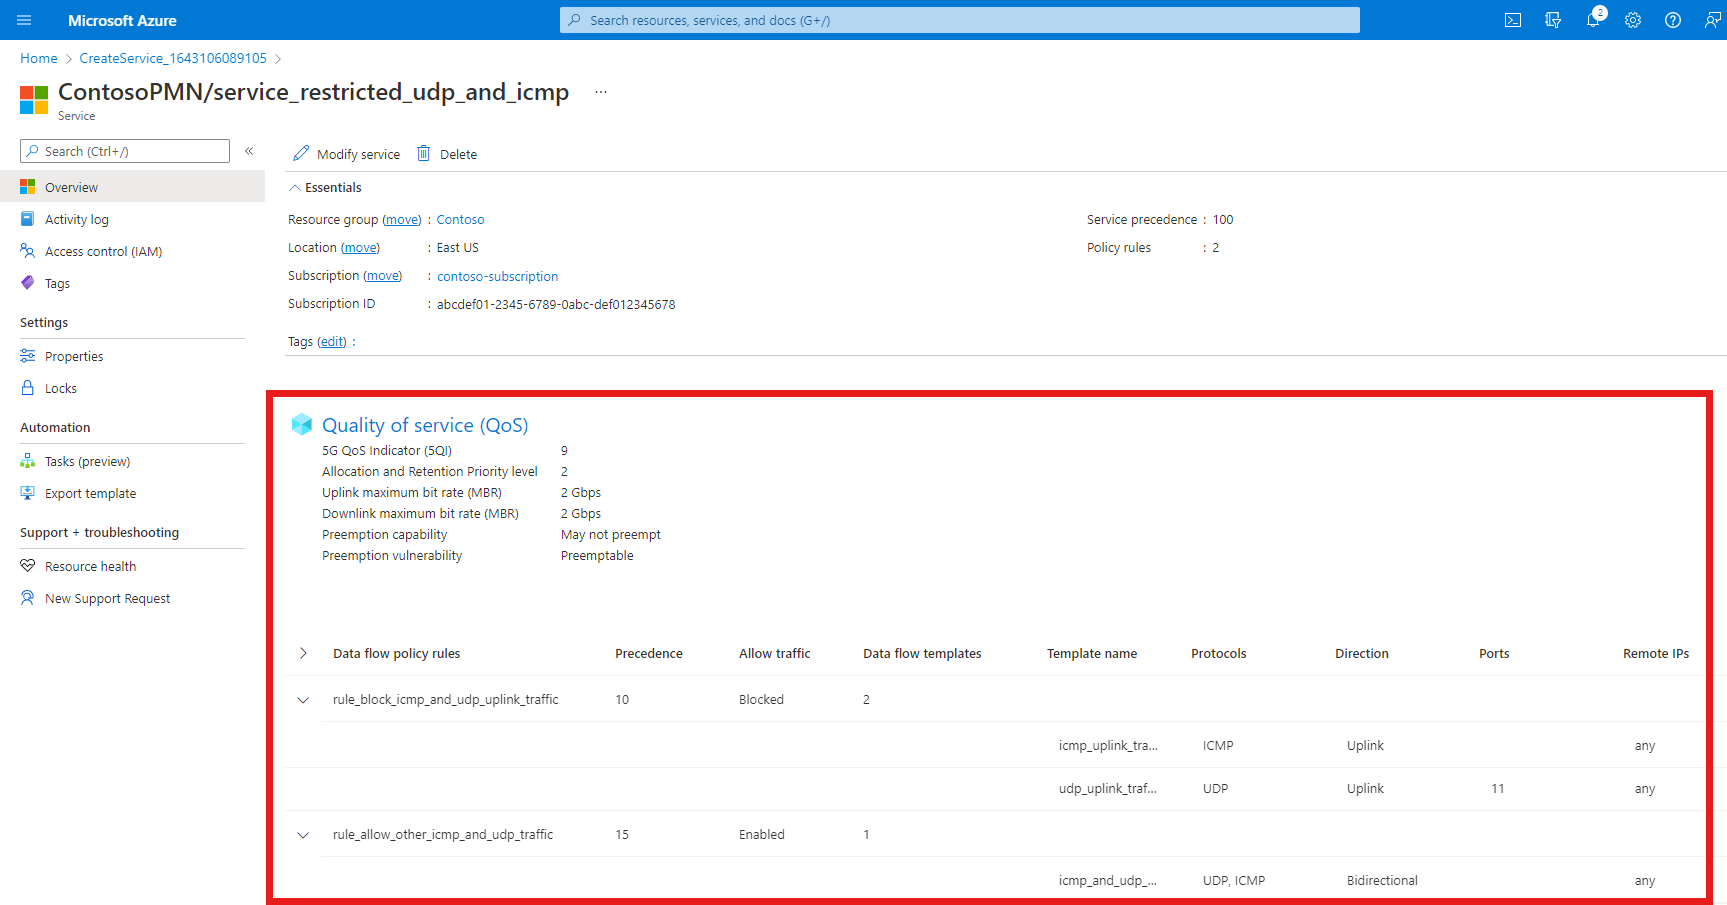
We now have two configured data flow policy rules on the service, which are displayed under the Data flow policy rules heading.
Note that the
rule_block_icmp_and_udp_uplink_trafficrule has a lower value for the Policy rule precedence field than therule_allow_other_icmp_and_udp_trafficrule (10 and 15 respectively). Rules with lower values are given higher priority. This ensures that therule_block_icmp_and_udp_uplink_trafficrule to block packets is applied first, before the widerrule_allow_other_icmp_and_udp_trafficis applied to all remaining packets.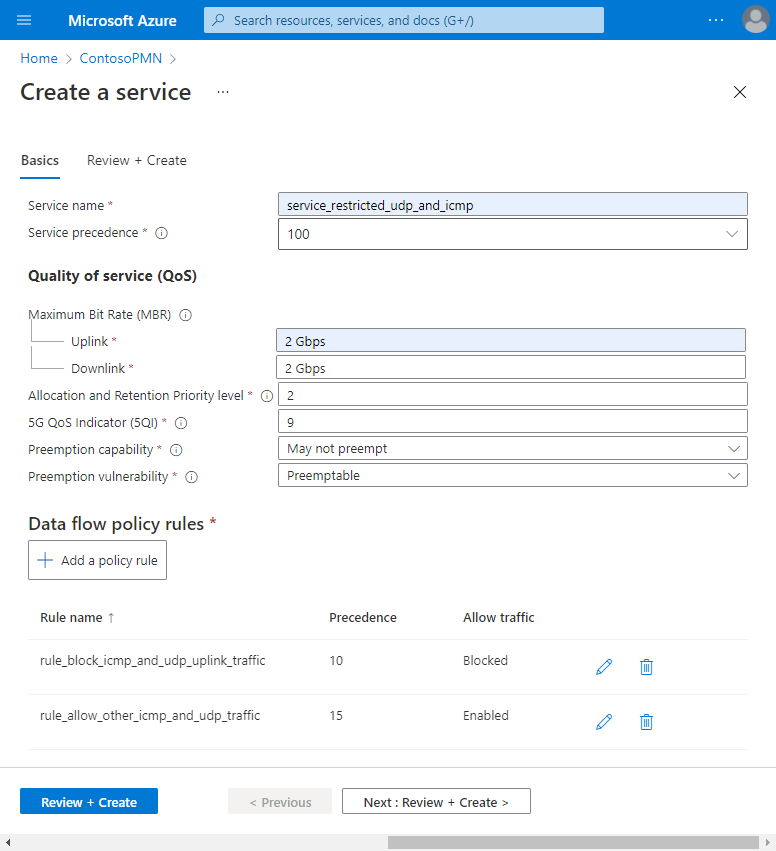
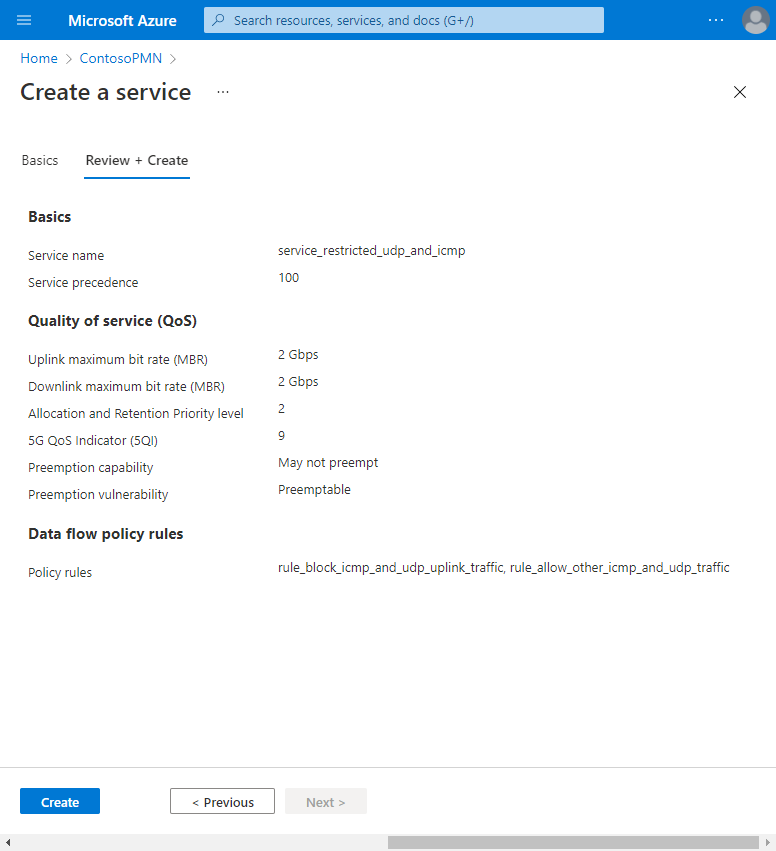
On the Basics configuration tab, select Review + create.
Select Create to create the service.
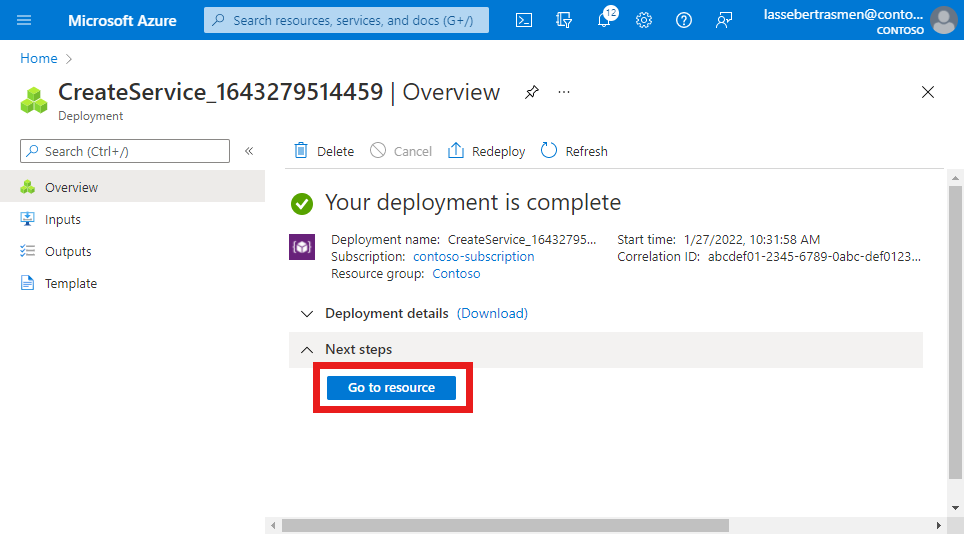
The Azure portal will display the following confirmation screen when the service has been created. Select Go to resource to see the new service resource.
Confirm that the QoS characteristics, data flow policy rules, and service data flow templates listed at the bottom of the screen are configured as expected.

Create a service for blocking traffic from specific sources
In this step, we'll create a service that blocks traffic from specific sources. Specifically, it'll do the following:
- Block UDP packets labeled with the remote address 10.204.141.200 and port 12 flowing towards UEs.
- Block UDP packets labeled with any remote address in the range 10.204.141.0/24 and port 15 flowing in both directions
To create the service:
Search for and select the Mobile Network resource representing your private mobile network.
In the Resource menu, select Services.
In the Command bar, select Create.
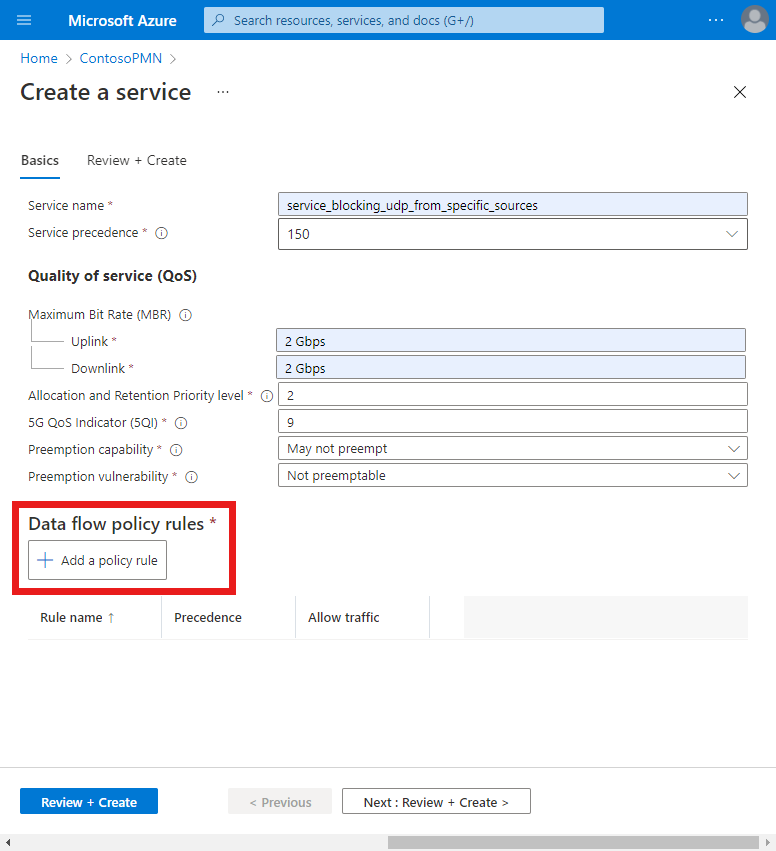
We'll now enter values to define the QoS characteristics that will be applied to SDFs that match this service. On the Basics tab, fill out the fields as follows.
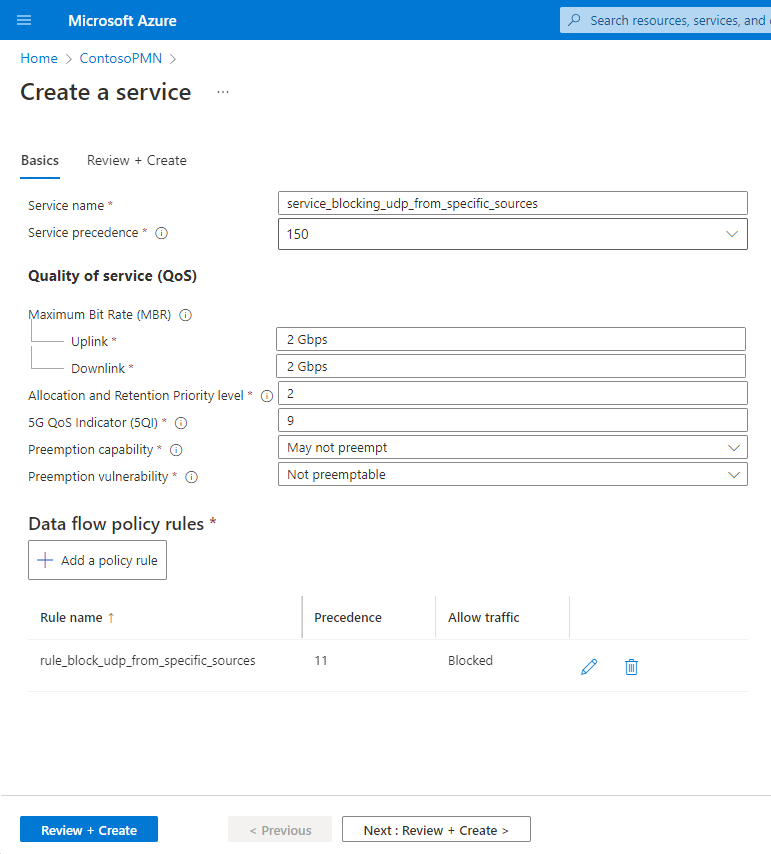
Field Value Service name service_blocking_udp_from_specific_sourcesService precedence 150Maximum bit rate (MBR) - Uplink 2 GbpsMaximum bit rate (MBR) - Downlink 2 GbpsAllocation and Retention Priority level 25QI/QCI 9Preemption capability Select May not preempt. Preemption vulnerability Select Not preemptible. Under Data flow policy rules, select Add a policy rule.
We'll now create a data flow policy rule that blocks any packets that match the data flow template we'll configure in the next step. Under Add a policy rule on the right, fill out the fields as follows.
Field Value Rule name rule_block_udp_from_specific_sourcesPolicy rule precedence Select 11. Allow traffic Select Blocked. Next, we'll create a data flow template that matches on UDP packets flowing towards UEs from 10.204.141.200 on port 12, so that they can be blocked by the
rule_block_udp_from_specific_sourcesrule.Under Data flow templates, select Add a data flow template. In the Add a data flow template pop-up, fill out the fields as follows.
Field Value Template name udp_downlink_trafficProtocols Select UDP. Direction Select Downlink. Remote IPs 10.204.141.200/32Ports 12Select Add.
Finally, we'll create another data flow template for the same rule that matches on UDP packets flowing in either direction that are labeled with any remote address in the range 10.204.141.0/24 and port 15.
Under Data flow templates, select Add a data flow template. In the Add a data flow template pop-up, fill out the fields as follows.
Field Value Template name udp_bidirectional_trafficProtocols Select UDP. Direction Select Bidirectional. Remote IPs 10.204.141.0/24Ports 15Select Add.
We can now finalize the rule. Under Add a policy rule, select Add.
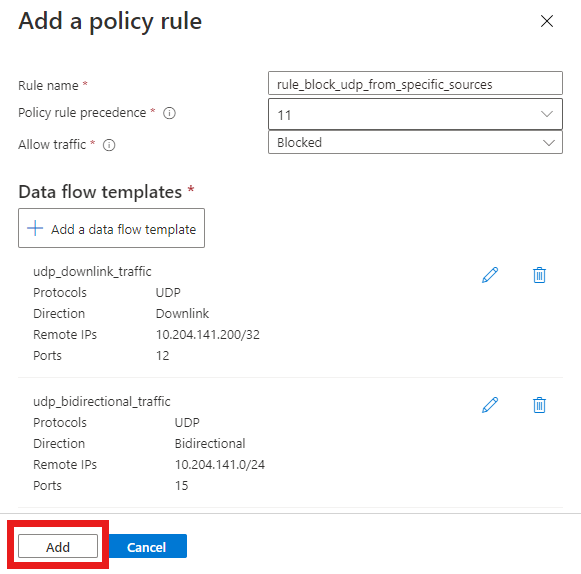
Screenshot of the Azure portal. It shows the Add a policy rule screen with all fields correctly filled out for a rule to block certain UDP traffic. It includes two configured data flow templates. The first matches on UDP packets flowing towards UEs from 10.204.141.200 on port 12. The second matches on UDP packets flowing in either direction that are labeled with any remote address in the range 10.204.141.0/24 and port 15. The Add button is highlighted.
We now have a single data flow policy rule on the service for blocking UDP traffic. This is displayed under the Data flow policy rules heading.
On the Basics configuration tab, select Review + create.
Select Create to create the service.
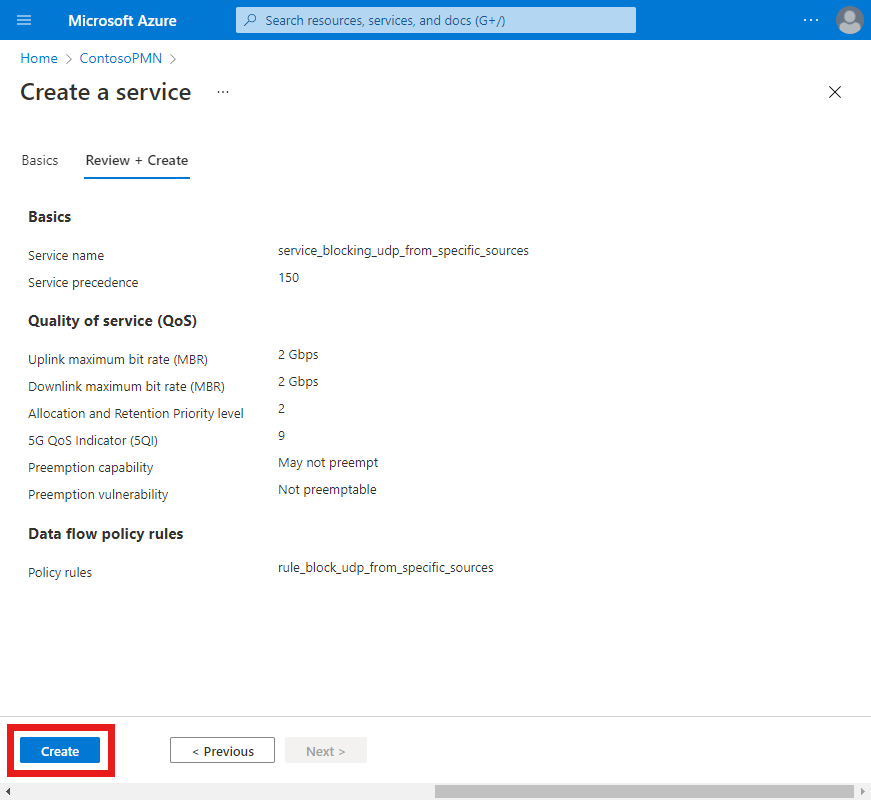
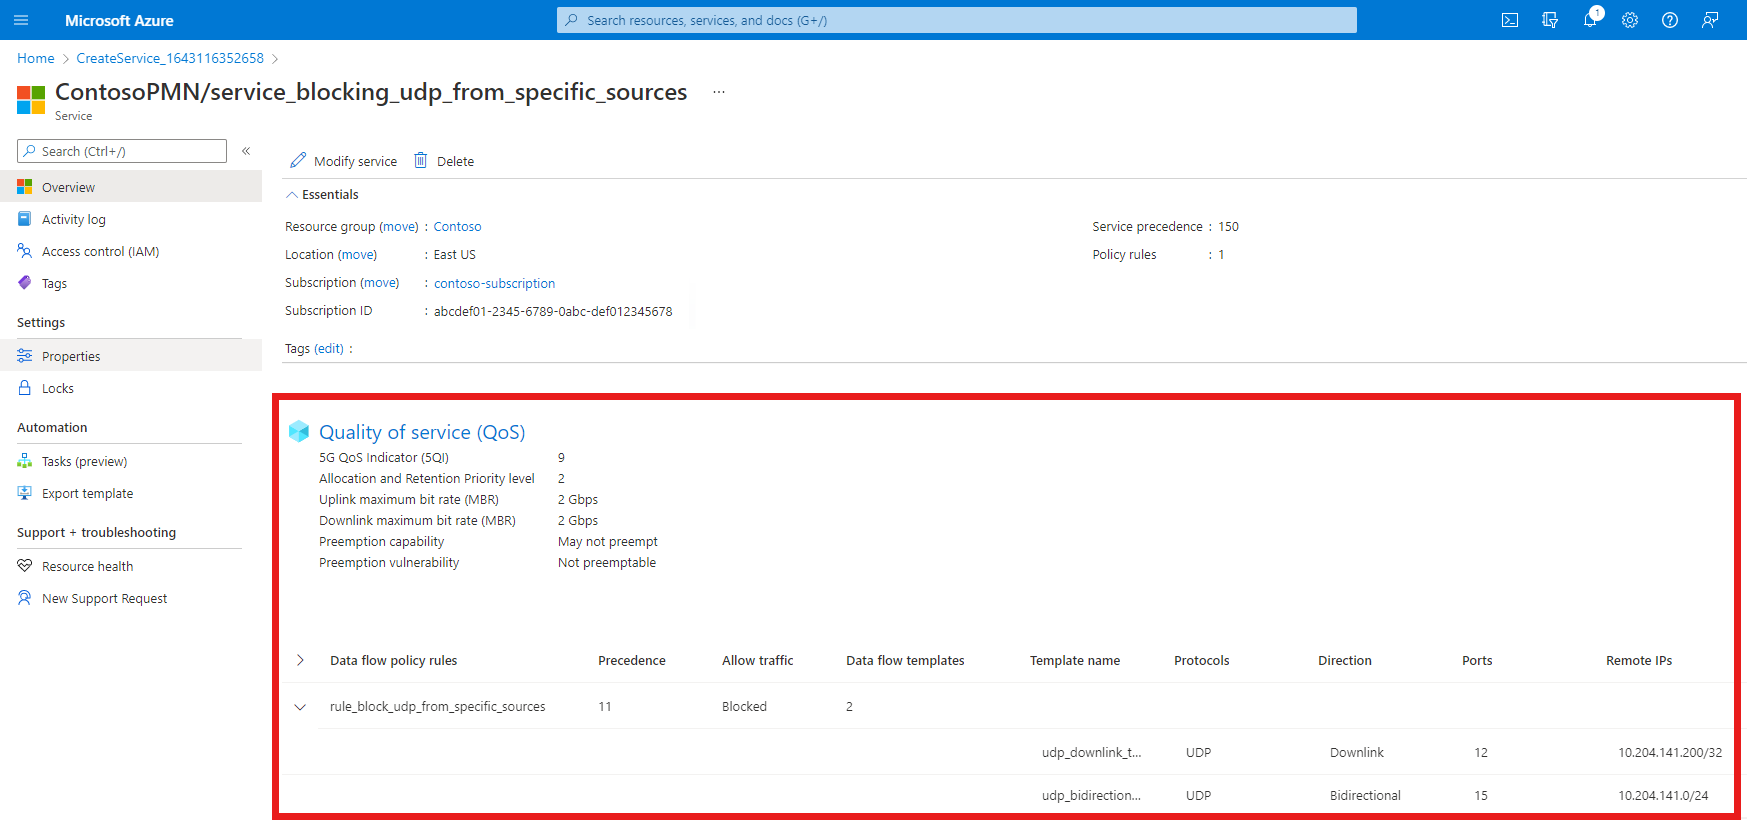
The Azure portal will display the following confirmation screen when the service has been created. Select Go to resource to see the new service resource.
Confirm that the data flow policy rules and service data flow templates listed at the bottom of the screen are configured as expected.

Create a service for limiting traffic
In this step, we'll create a service that limits the bandwidth of traffic on matching flows. Specifically, it'll do the following:
- Limit the maximum bit rate (MBR) for packets flowing away from UEs to 10 Mbps.
- Limit the maximum bit rate (MBR) for packets flowing towards UEs to 15 Mbps.
To create the service:
Search for and select the Mobile Network resource representing your private mobile network.
In the Resource menu, select Services.
In the Command bar, select Create.
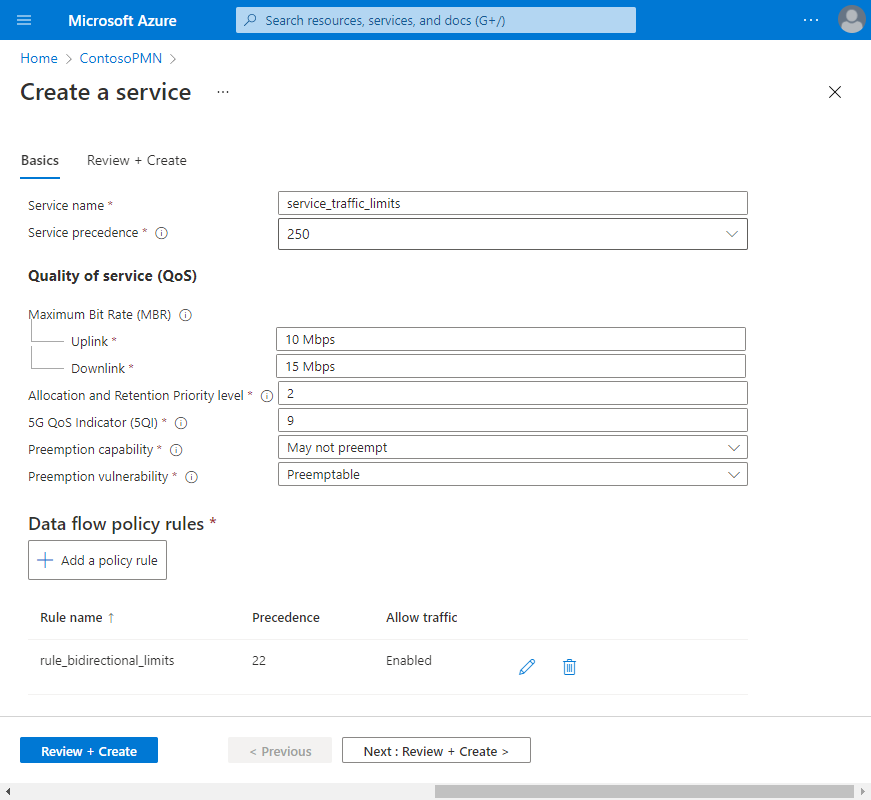
We'll now enter values to define the QoS characteristics that will be applied to SDFs that match this service. We'll use the Maximum bit rate (MBR) - Uplink and Maximum bit rate (MBR) - Downlink fields to set our bandwidth limits. On the Basics tab, fill out the fields as follows.
Field Value Service name service_traffic_limitsService precedence 250Maximum bit rate (MBR) - Uplink 10 MbpsMaximum bit rate (MBR) - Downlink 15 MbpsAllocation and Retention Priority level 25QI/QCI 9Preemption capability Select May not preempt. Preemption vulnerability Select Preemptible. Under Data flow policy rules, select Add a policy rule.
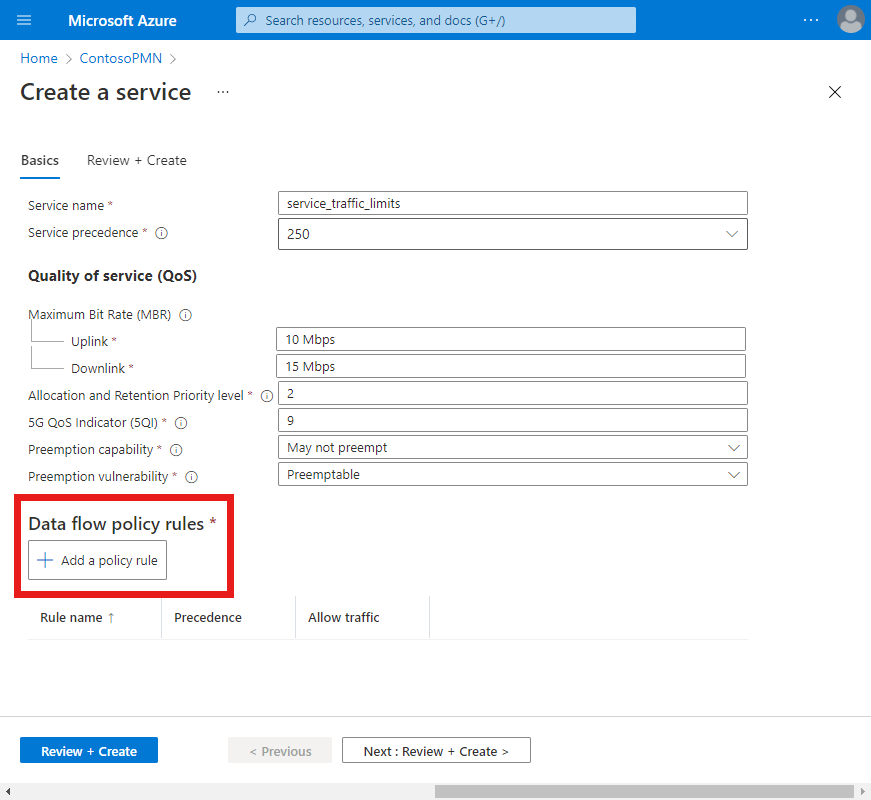
Under Add a policy rule on the right, fill out the fields as follows.
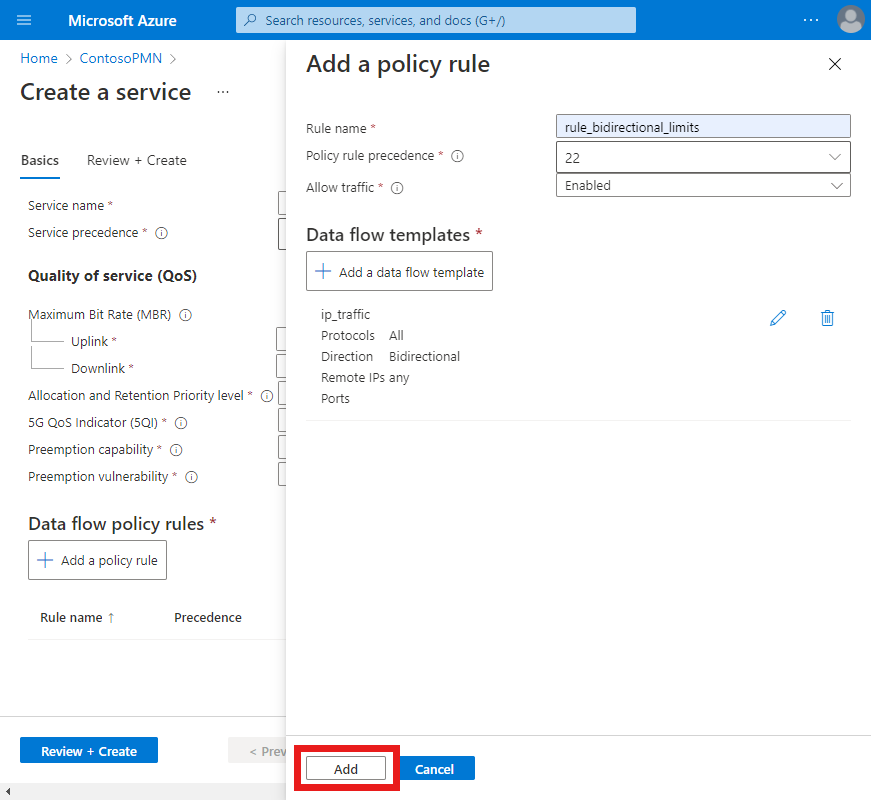
Field Value Rule name rule_bidirectional_limitsPolicy rule precedence Select 22. Allow traffic Select Enabled. We'll now create a data flow template that matches on all IP traffic in both directions.
Select Add a data flow template. In the Add a data flow template pop-up, fill out the fields as follows.
Field Value Template name ip_trafficProtocols Select All. Direction Select Bidirectional. Remote IPs anyPorts Leave blank Select Add.
We can now finalize the rule. Under Add a policy rule, select Add.
We now have a single data flow policy rule configured on the service.
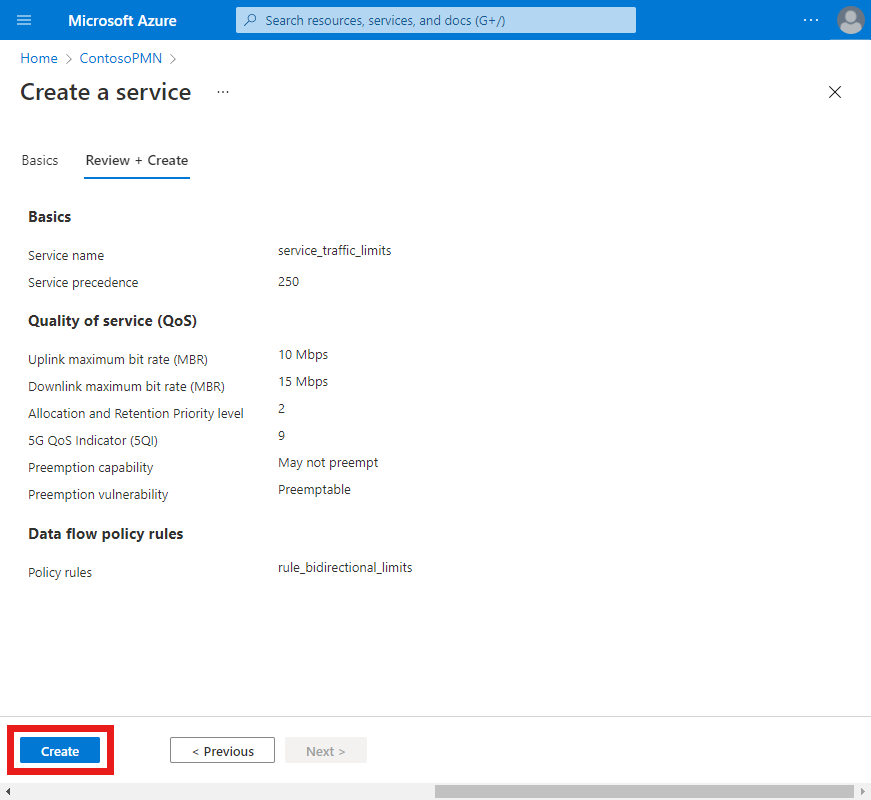
On the Basics configuration tab, select Review + create.
Select Create to create the service.
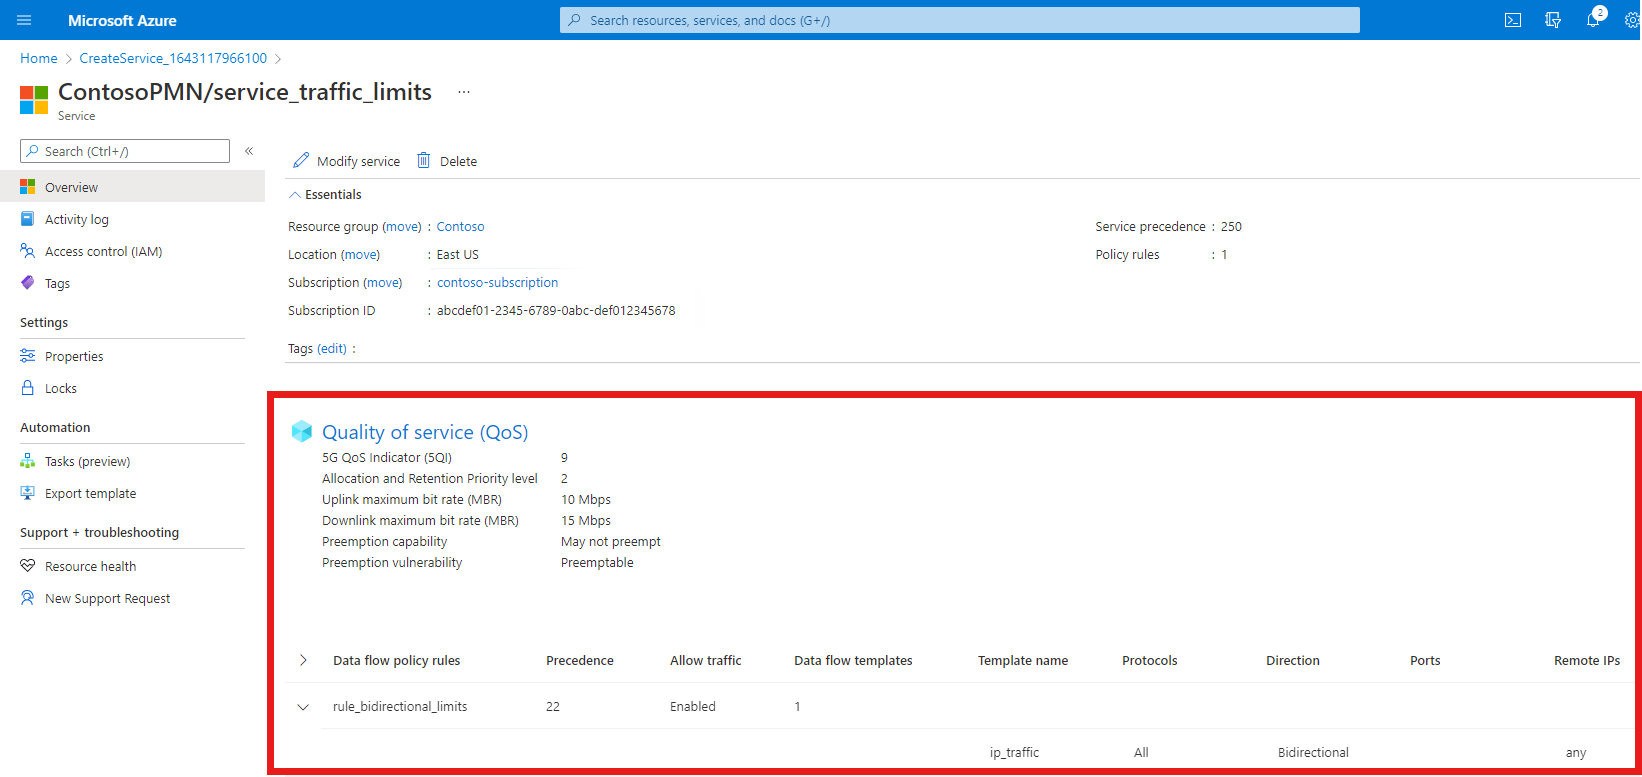
The Azure portal will display the following confirmation screen when the service has been created. Select Go to resource to see the new service resource.
Confirm that the data flow policy rules and service data flow templates listed at the bottom of the screen are configured as expected.

Configure SIM policies
In this step, we'll create two SIM policies. The first SIM policy will use the service we created in Create a service for protocol filtering, and the second will use the service we created in Create a service for blocking traffic from specific sources. Both SIM policies will use the third service we created in Create a service for limiting traffic.
Note
As each SIM policy will have multiple services, there will be packets that match more than one rule across these services. For example, downlink ICMP packets will match on the following rules:
- The
rule_allow_other_icmp_and_udp_trafficrule on theservice_restricted_udp_and_icmpservice. - The
rule_bidirectional_limitsrule on theservice_traffic_limitsservice.
In this case, the packet core instance will prioritize the service with the lowest value for the Service precedence field. It will then apply the QoS characteristics from this service to the packets. In the example above, the service_restricted_udp_and_icmp service has a lower value (100) than the service_traffic_limits service (250). The packet core instance will therefore apply the QoS characteristics given on the service_restricted_udp_and_icmp service to downlink ICMP packets.
Let's create the SIM policies.
Search for and select the Mobile Network resource representing your private mobile network.
In the Resource menu, select SIM policies.
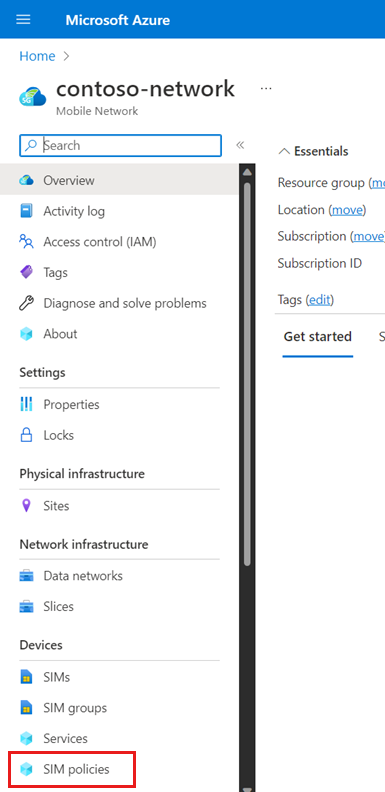
In the Command bar, select Create.
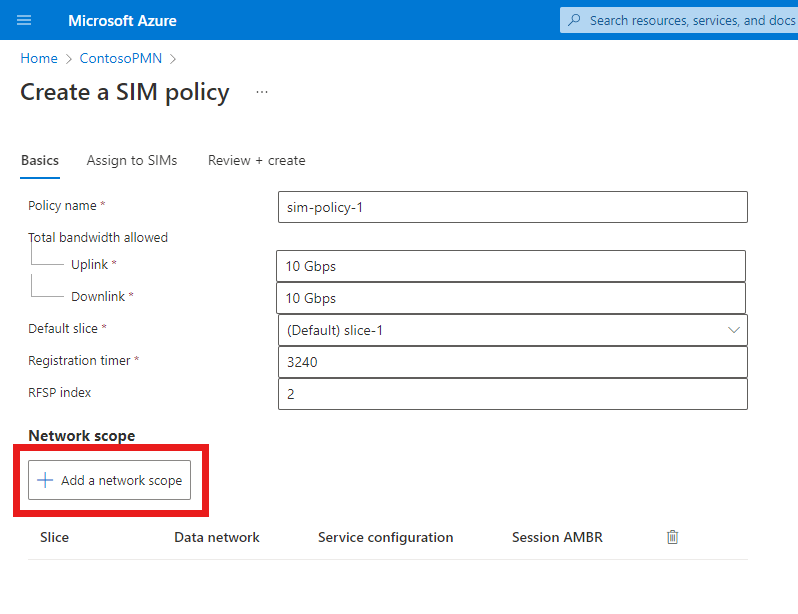
Under Create a SIM policy, fill out the fields as follows.
Field Value Policy name sim-policy-1Total bandwidth allowed - Uplink 10 GbpsTotal bandwidth allowed - Downlink 10 GbpsDefault slice Select the name of your network slice. Registration timer 3240RFSP index 2Select Add a network scope.
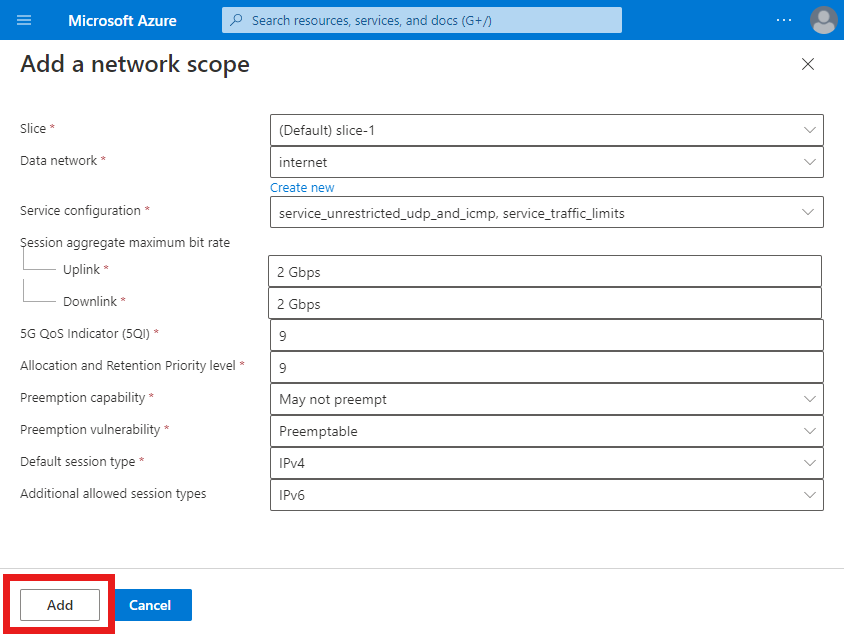
Under Add a network scope, fill out the fields as follows.
Field Value Slice Select the Default slice. Data network Select any data network to which your private mobile network connects. Service configuration Select service_restricted_udp_and_icmp and service_traffic_limits. Session aggregate maximum bit rate - Uplink 2 GbpsSession aggregate maximum bit rate - Downlink 2 Gbps5QI/QCI 9Allocation and Retention Priority level 9Preemption capability Select May not preempt. Preemption vulnerability Select Preemptible. Default session type Select IPv4. Select Add.
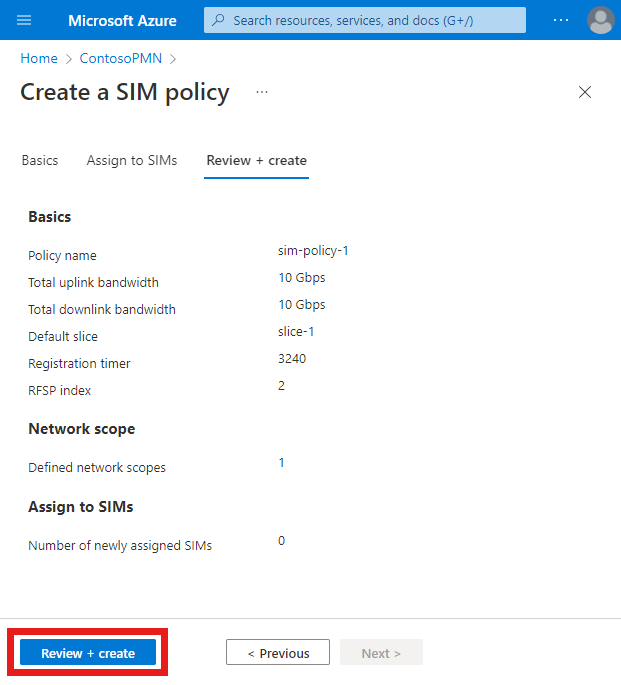
On the Basics configuration tab, select Review + create.
On the Review + create tab, select Review + create.
The Azure portal will display the following confirmation screen when the SIM policy has been created.
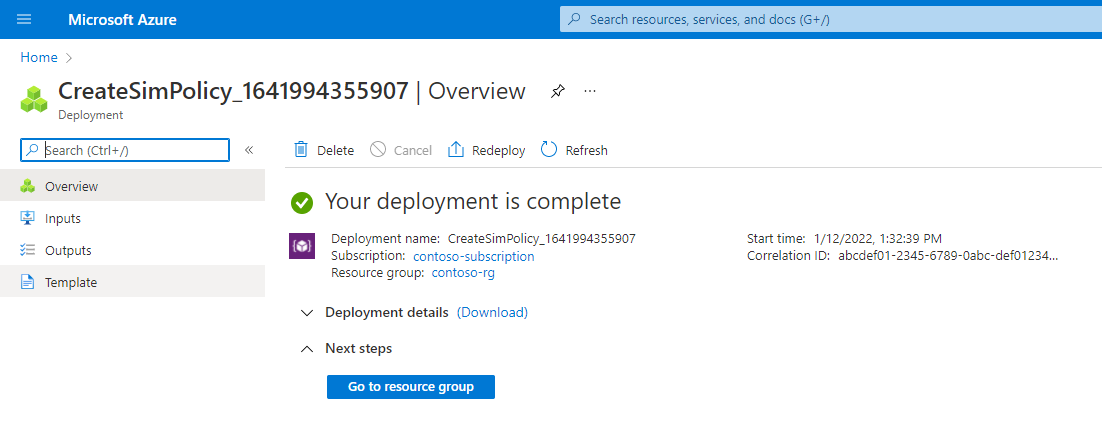
Select Go to resource group.
In the Resource group that appears, select the Mobile Network resource representing your private mobile network.
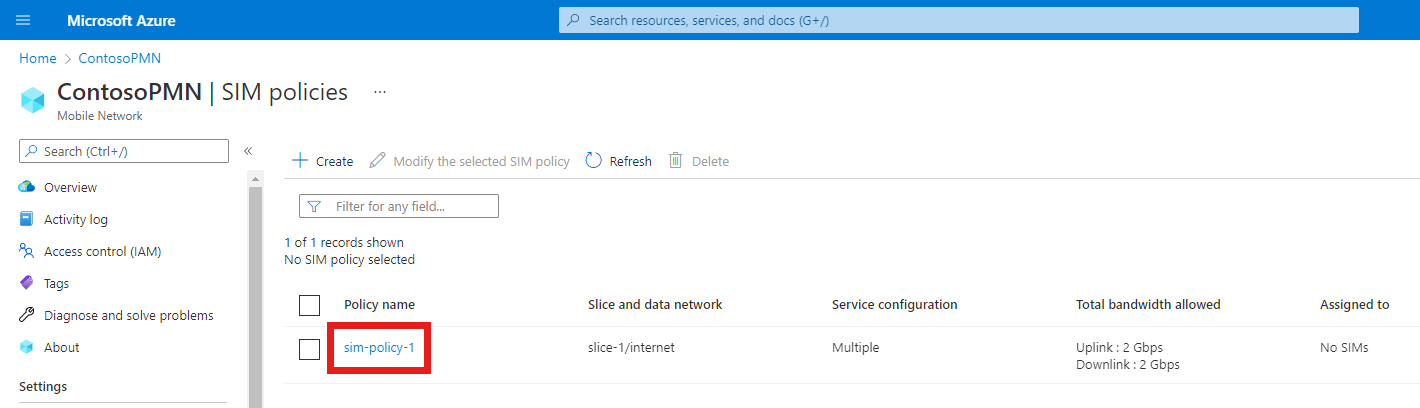
In the Resource menu, select SIM policies.
Select sim-policy-1.
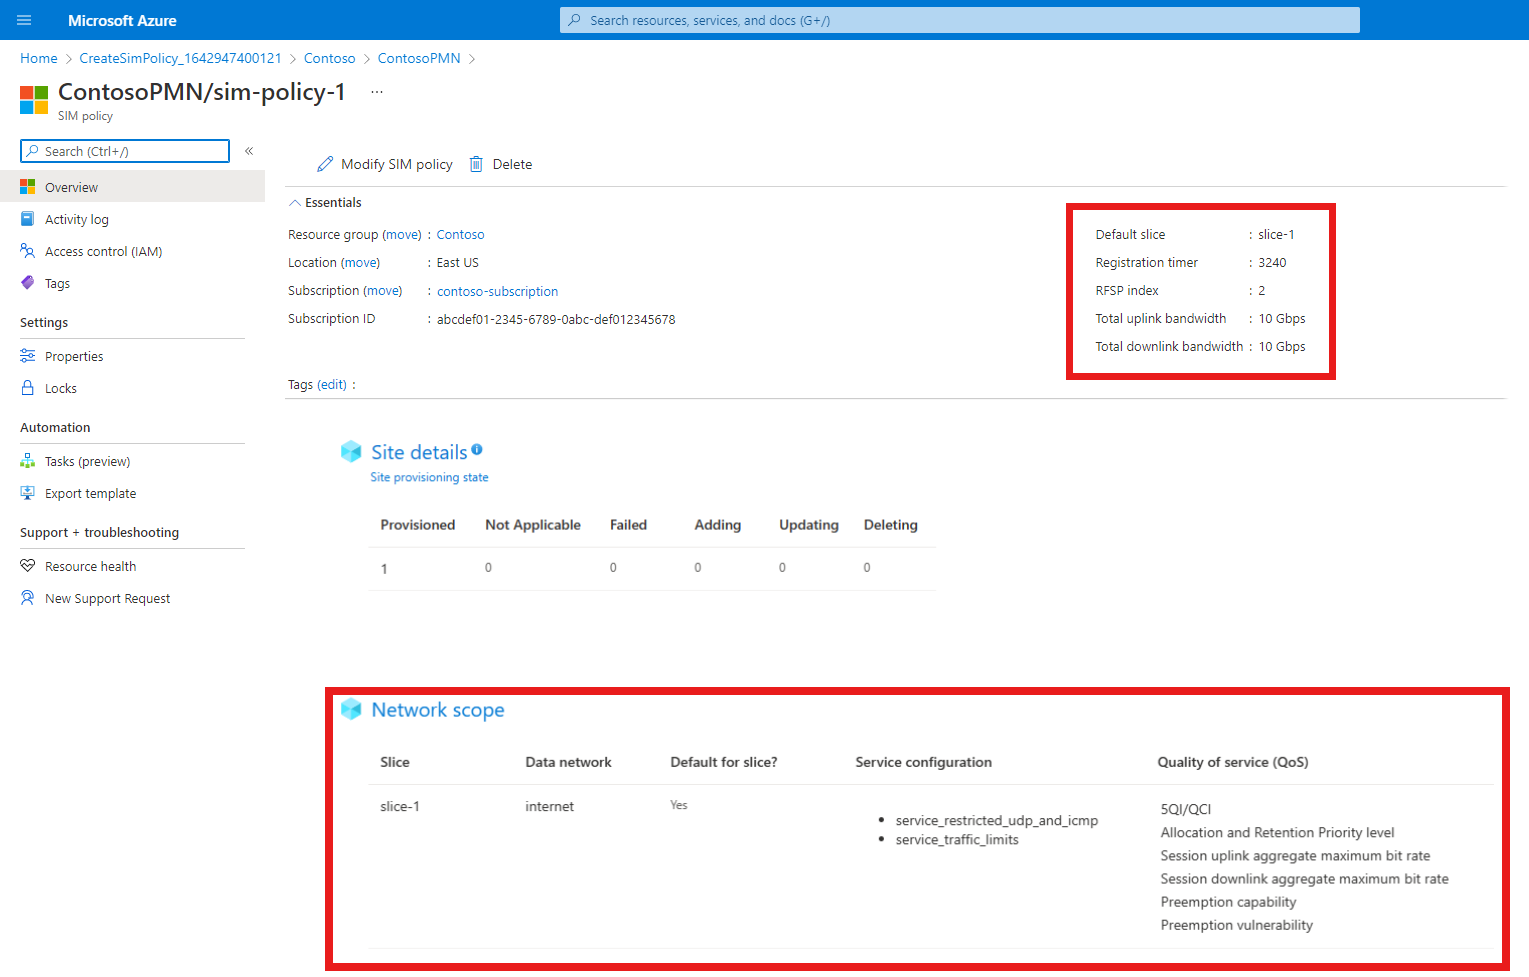
Check that the configuration for the SIM policy is as expected.
- The top level settings for the SIM policy are shown under the Essentials heading.
- The network scope configuration is shown under the Network scope heading including configured services under Service configuration and quality of service configuration under Quality of Service (QoS).
We'll now create the other SIM policy. Search for and select the Mobile Network resource representing the private mobile network for which you want to configure a service.
In the Resource menu, select SIM policies.
In the Command bar, select Create.
Under Create a SIM policy on the right, fill out the fields as follows.
Field Value Policy name sim-policy-2Total bandwidth allowed - Uplink 10 GbpsTotal bandwidth allowed - Downlink 10 GbpsDefault slice Select the name of your network slice. Registration timer 3240RFSP index 2Select Add a network scope.
On the Add a network scope blade, fill out the fields as follows.
Field Value Slice Select the Default slice. Data network Select any data network to which your private mobile network connects. Service configuration Select service_blocking_udp_from_specific_sources and service_traffic_limits. Session aggregate maximum bit rate - Uplink 2 GbpsSession aggregate maximum bit rate - Downlink 2 Gbps5QI/QCI 9Allocation and Retention Priority level 9Preemption capability Select May not preempt. Preemption vulnerability Select Preemptible. Default session type Select IPv4. Select Add.
On the Basics configuration tab, select Review + create.
On the Review + create configuration tab, select Review + create.
The Azure portal will display the following confirmation screen when the SIM policy has been created.
Select Go to resource group.
In the Resource group that appears, select the Mobile Network resource representing your private mobile network.
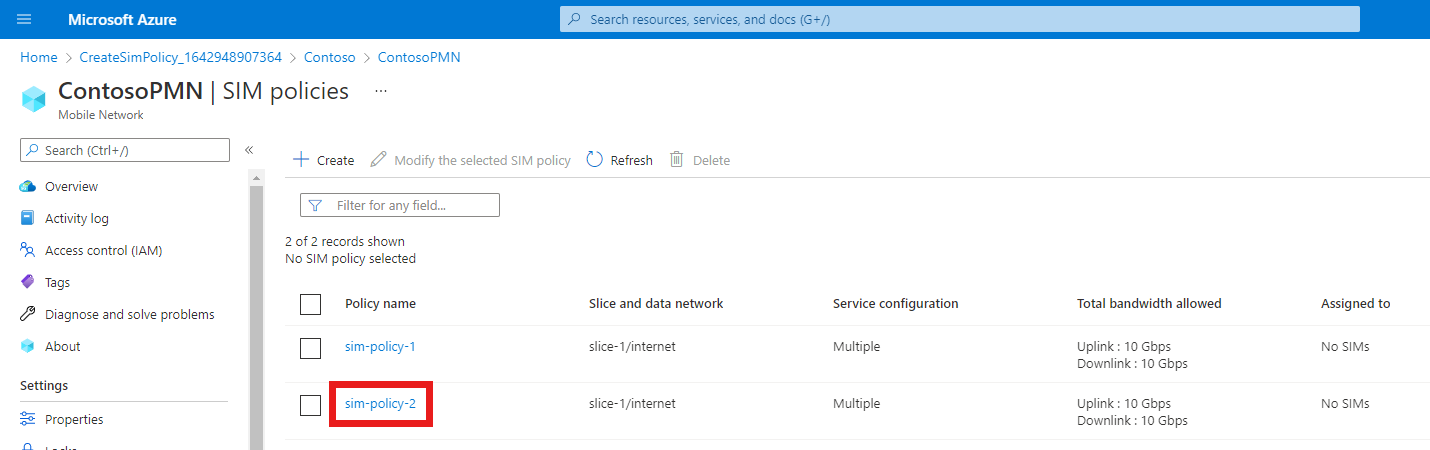
In the Resource menu, select SIM policies.
Select sim-policy-2.
Check that the configuration for the SIM policy is as expected.
- The top level settings for the SIM policy are shown under the Essentials heading.
- The network scope configuration is shown under the Network scope heading including configured services under Service configuration and quality of service configuration under Quality of Service (QoS).


Provision SIMs
In this step, we will provision two SIMs and assign a SIM policy to each one. This will allow the SIMs to connect to the private mobile network and receive the correct QoS policy.
Save the following content as a JSON file and make a note of the filepath.
[
 {
  "simName": "SIM1",
  "integratedCircuitCardIdentifier": "8912345678901234566",
  "internationalMobileSubscriberIdentity": "001019990010001",
  "authenticationKey": "00112233445566778899AABBCCDDEEFF",
  "operatorKeyCode": "63bfa50ee6523365ff14c1f45f88737d",
  "deviceType": "Cellphone"
 },
 {
  "simName": "SIM2",
  "integratedCircuitCardIdentifier": "8922345678901234567",
  "internationalMobileSubscriberIdentity": "001019990010002",
  "authenticationKey": "11112233445566778899AABBCCDDEEFF",
  "operatorKeyCode": "63bfa50ee6523365ff14c1f45f88738d",
  "deviceType": "Sensor"
 }
]
Search for and select the Mobile Network resource representing your private mobile network.
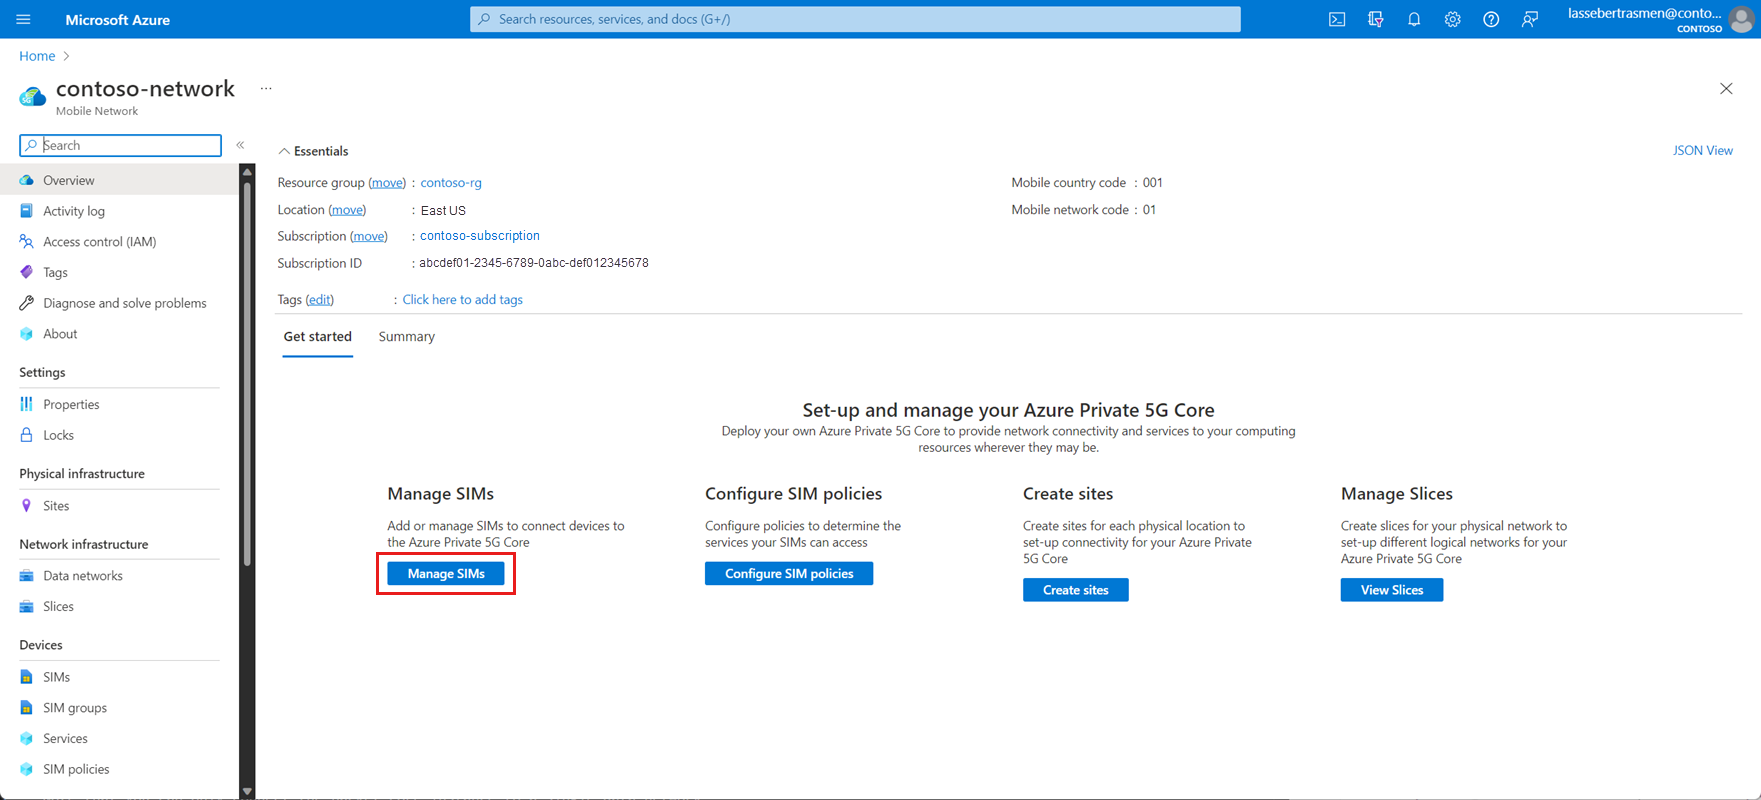
Select Manage SIMs.
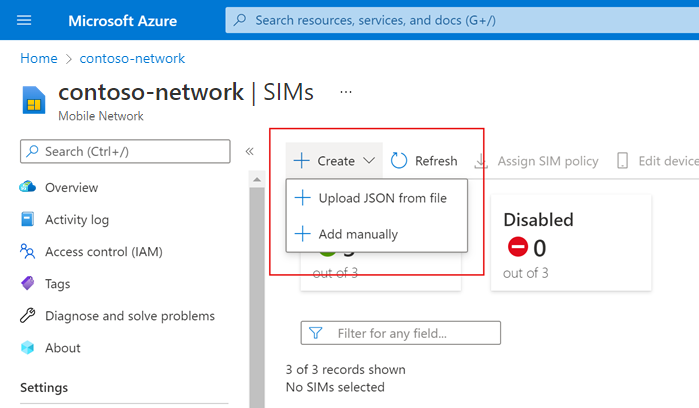
Select Create and then Upload JSON from file.
Select Plaintext as the file type.
Select Browse and then select the JSON file you created at the start of this step.
Under SIM group name, select Create new and then enter SIMGroup1 into the field that appears.
Select Add.
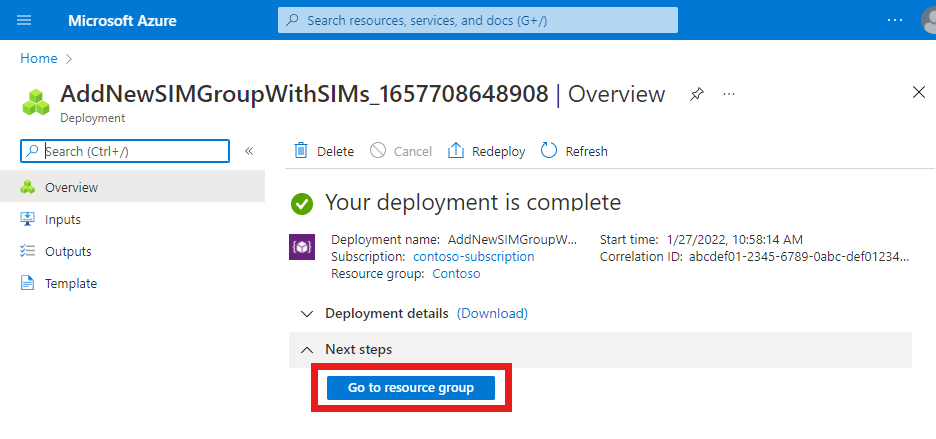
The Azure portal will now begin deploying the SIM group and SIMs. When the deployment is complete, select Go to resource group.
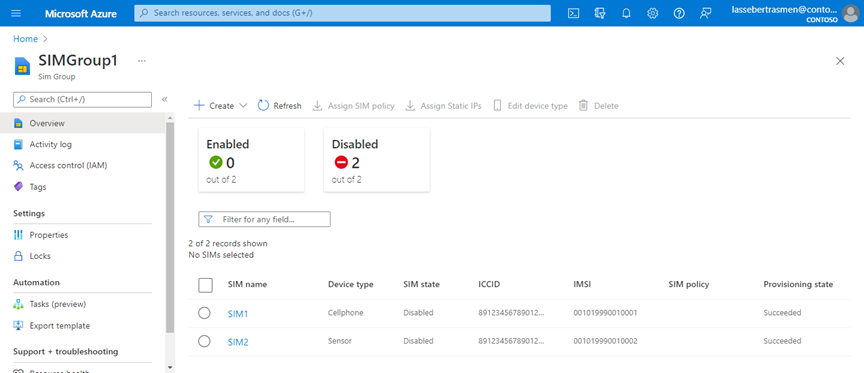
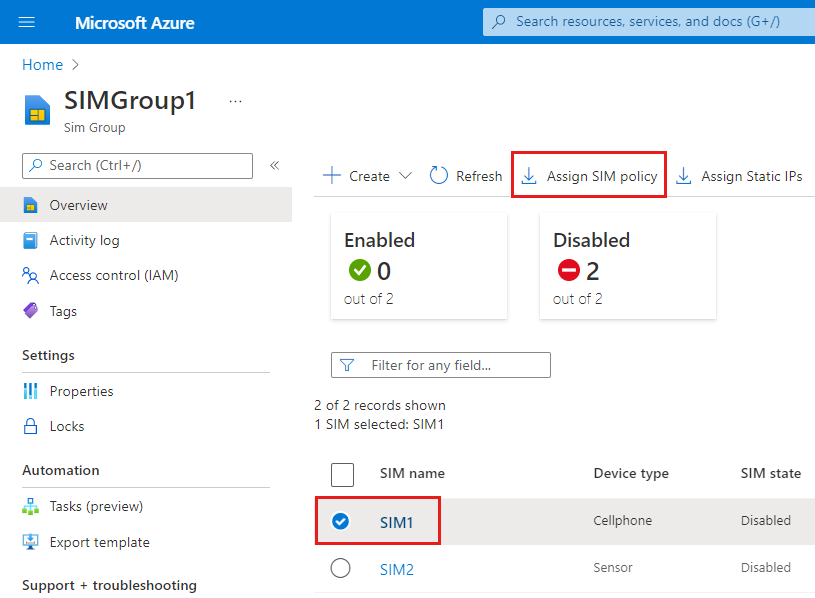
In the Resource group that appears, select the SIMGroup1 resource you've just created. You'll then see your new SIMs in the SIM group.
Select the checkbox next to SIM1.
In the Command bar, select Assign SIM policy.
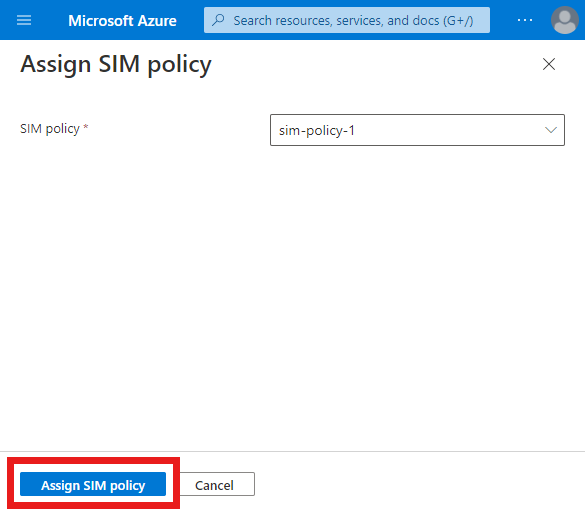
Under Assign SIM policy on the right, set the SIM policy field to sim-policy-1.
Select Assign SIM policy.
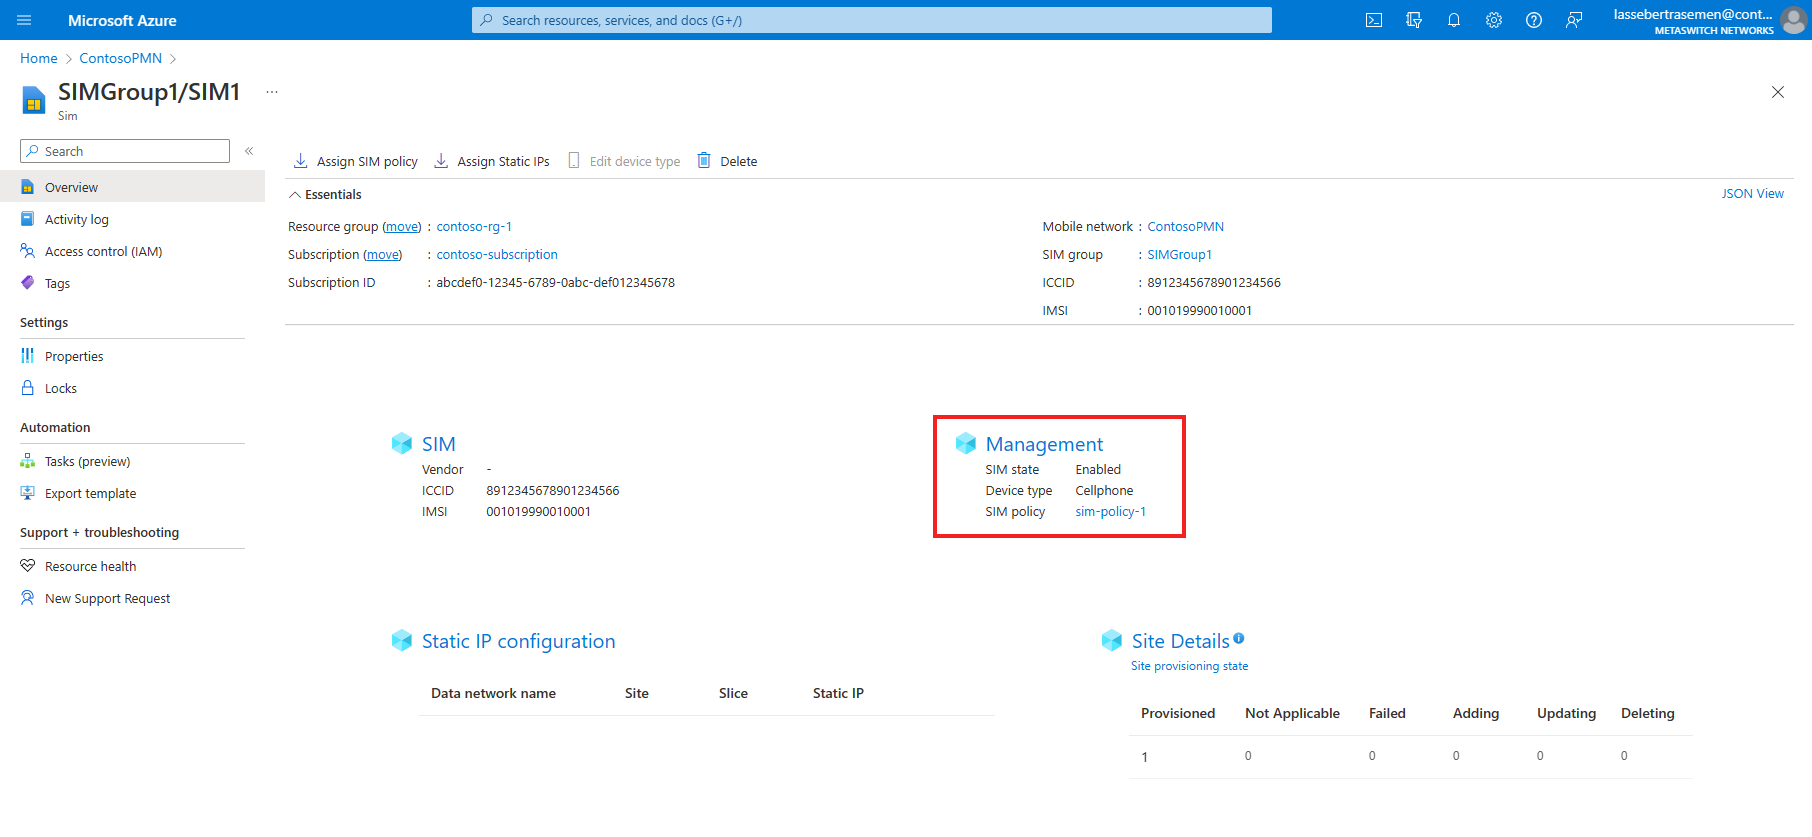
Once the deployment is complete, select Go to Resource.
Check the SIM policy field in the Management section to confirm sim-policy-1 has been successfully assigned.
In the SIM group field under Essentials, select SIMGroup1 to return to the SIM group.
Select the checkbox next to SIM2.
In the Command bar, select Assign SIM policy.
Under Assign SIM policy on the right, set the SIM policy field to sim-policy-2.
Select the Assign SIM policy button.
Once the deployment is complete, select Go to Resource.
Check the SIM policy field in the Management section to confirm sim-policy-2 has been successfully assigned.


You have now provisioned two SIMs and assigned each of them a different SIM policy. Each of these SIM policies provides access to a different set of services.
Clean up resources
You can now delete each of the resources we've created during this tutorial.
- Search for and select the Mobile Network resource representing your private mobile network.
- In the Resource menu, select SIM groups.
- Select the checkbox next to SIMGroup1, and then select Delete from the Command bar.
- Select Delete to confirm your choice.
- Once the SIM group has been deleted, select SIM policies from the Resource menu.
- Select the checkboxes next to sim-policy-1 and sim-policy-2, and then select Delete from the Command bar.
- Select Delete to confirm your choice.
- Once the SIM policies have been deleted, select Services from the Resource menu.
- Select the checkboxes next to service_unrestricted_udp_and_icmp, service_blocking_udp_from_specific_sources, and service_traffic_limits, and then select Delete from the command bar.
- Select Delete to confirm your choice.
Next steps
Feedback
Coming soon: Throughout 2024 we will be phasing out GitHub Issues as the feedback mechanism for content and replacing it with a new feedback system. For more information see: https://aka.ms/ContentUserFeedback.
Submit and view feedback for