Back-end implementation guide (preview)
This Microsoft Fabric developer sample repository serves as a starting point for building applications that require integration with various services, including Lakehouse. This guide helps you set up the environment and configure the necessary components to get started. This article outlines the key components and their roles in the architecture.
Frontend
The frontend is where you manage the user experience (UX) and behavior. It communicates with the Fabric frontend portal via an iFrame, facilitating seamless interaction with the user.
Backend
The backend stores both data and metadata. It utilizes CRUD operations to create Workload (WL) items along with metadata, and executes jobs to populate data in storage. The communication between the frontend and backend is established through public APIs.
Azure Relay and DevGateway
Azure Relay enables communication between the local development environment and the Fabric backend while operating in development mode. The DevGateway.exe utility handles the workload's side of Azure Relay channel and manages the registration of the workload local instance with Fabric in the context of a specific capacity. The utility ensures that the workload is available in all workspaces assigned to that capacity and handles the deregistration when stopped.
Dev gateway
In local mode, the workload operates on the developer's machine. Workload API calls from Fabric to the workload are channeled through Azure Relay. The workload's side of the Azure Relay channel is managed by the DevGateway command-line utility. Workload Control API calls are made directly from the workload to Fabric, and don't require the Azure Relay channel. The DevGateway utility also manages the registration of the workload's local (development) instance with Fabric within a specific capacity context, making the workload accessible in all workspaces assigned to that capacity. Terminating the DevGateway utility automatically removes the workload instance registration.
Lakehouse integration
The workload development kit architecture integrates seamlessly with Lakehouse, allowing operations such as saving, reading, and fetching data. The interaction is facilitated through Azure Relay and the Fabric SDK, ensuring secure and authenticated communication.
Authentication and security
Microsoft Entra ID is used for secure authentication, ensuring that all interactions within the architecture are authorized and secure.
Th development kit overview provides a glimpse into our architecture. For more information on project configuration, authentication guidelines, and getting started, see the respective sections in Authentication overview.
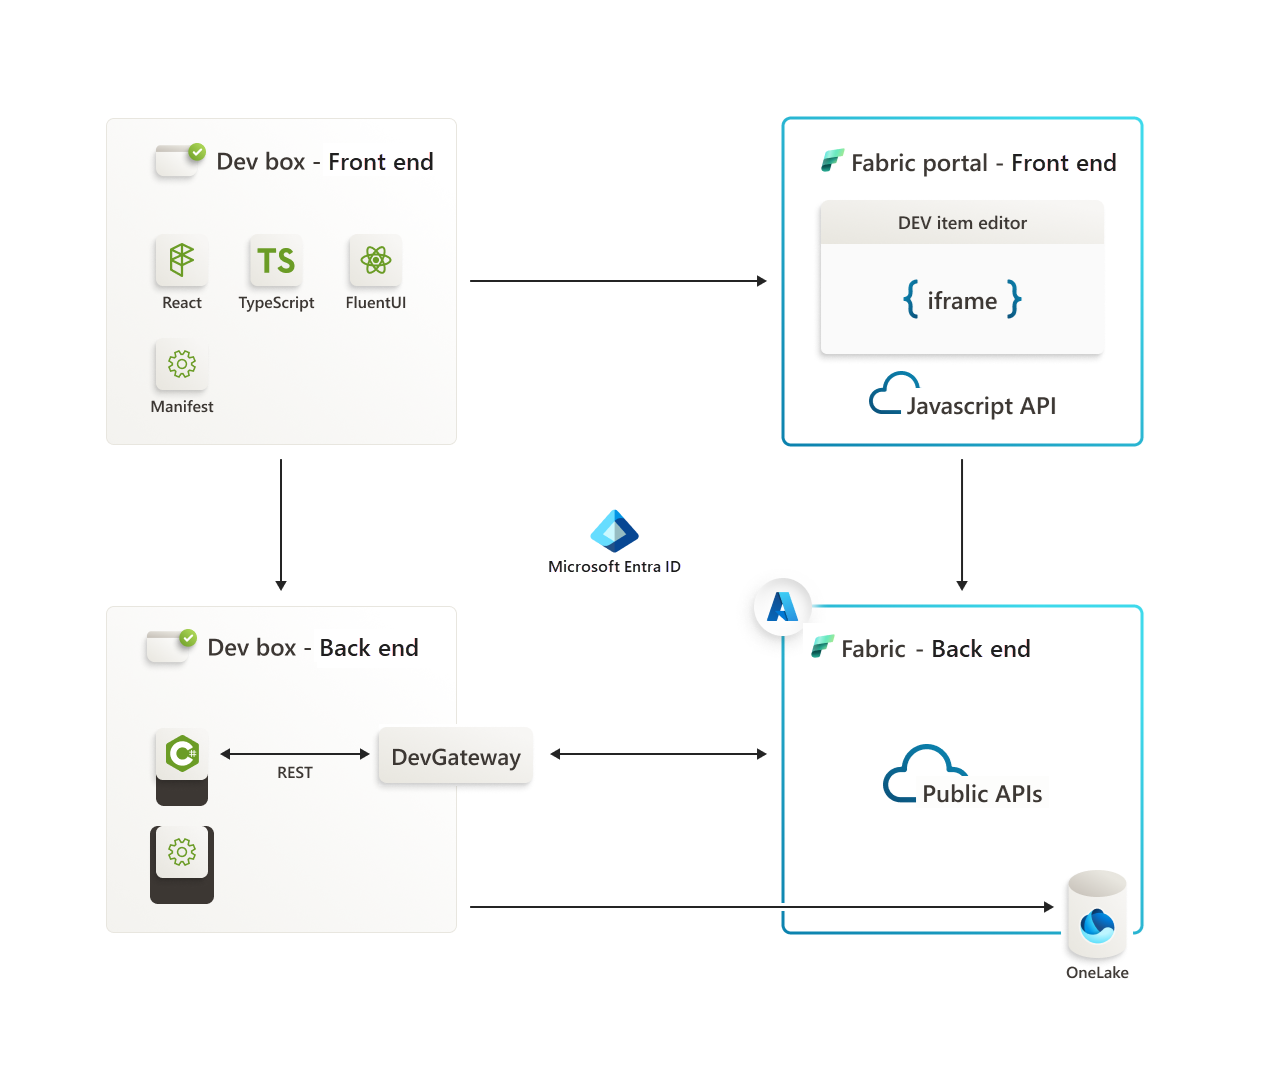
The frontend establishes communication with the Fabric frontend portal via an iFrame. The portal, in turn, interacts with the Fabric backend by making calls to its exposed public APIs.
For interactions between the backend development box and the Fabric backend, the Azure Relay serves as a conduit. Additionally, the backend development box seamlessly integrates with Lakehouse. The communication is facilitated by using Azure Relay and the Fabric Software Development Kit (SDK) installed on the backend development box.
The authentication for all communication within these components is ensured through Microsoft Entra. Entra provides a secure and authenticated environment for the interactions between the frontend, backend, Azure Relay, Fabric SDK, and Lakehouse.
Prerequisites
- .NET 7.0 SDK
- Visual Studio 2022
Ensure that the NuGet Package Manager is integrated into your Visual Studio installation. This tool is required for streamlined management of external libraries and packages essential for our project.
NuGet package management
<NuspecFile>Packages\manifest\ManifestPackageDebug.nuspec</NuspecFile>and<NuspecFile>Packages\manifest\ManifestPackageRelease.nuspec</NuspecFile>: These properties specify the path to the NuSpec files used for creating the NuGet package for Debug and Release modes. The NuSpec file contains metadata about the package, such as its ID, version, dependencies, and other relevant information.<GeneratePackageOnBuild>true</GeneratePackageOnBuild>: When set to true, this property instructs the build process to automatically generate a NuGet package during each build. This property is useful to ensure that the package is always up-to-date with the latest changes in the project.<IsPackable>true</IsPackable>: When set to true, this property indicates that the project is packable, meaning it can be packaged into a NuGet package. It's an essential property for projects intended to produce NuGet packages during the build process.
The generated NuGet package for Debug mode is located in the src\bin\Debug directory after the build process.
Dependencies
The backend boilerplate depends on the following Azure SDK packages:
- Azure.Core
- Azure.Identity
- Azure.Storage.Files.DataLake
The Microsoft Identity package
To configure the NuGet Package Manager, specify the path in the 'Package Sources' section before the build process.
<Project Sdk="Microsoft.NET.Sdk.Web">

  <PropertyGroup>
    <TargetFramework>net7.0</TargetFramework>
    <AutoGenerateBindingRedirects>true</AutoGenerateBindingRedirects>
    <BuildDependsOn>PreBuild</BuildDependsOn>
    <GeneratePackageOnBuild>true</GeneratePackageOnBuild>
    <IsPackable>true</IsPackable>
  </PropertyGroup>

  <PropertyGroup Condition="'$(Configuration)' == 'Release'">
    <NuspecFile>Packages\manifest\ManifestPackageRelease.nuspec</NuspecFile>
  </PropertyGroup>

  <PropertyGroup Condition="'$(Configuration)' == 'Debug'">
    <NuspecFile>Packages\manifest\ManifestPackageDebug.nuspec</NuspecFile>
  </PropertyGroup>

  <ItemGroup>
    <PackageReference Include="Azure.Core" Version="1.38.0" />
    <PackageReference Include="Azure.Identity" Version="1.11.0" />
    <PackageReference Include="Azure.Storage.Files.DataLake" Version="12.14.0" />
    <PackageReference Include="Microsoft.AspNet.WebApi.Client" Version="5.2.9" />
    <PackageReference Include="Microsoft.AspNetCore.Mvc.NewtonsoftJson" Version="7.0.5" />
    <PackageReference Include="Microsoft.Extensions.Logging.Debug" Version="7.0.0" />
    <PackageReference Include="Microsoft.Identity.Client" Version="4.60.3" />
    <PackageReference Include="Microsoft.IdentityModel.Protocols" Version="6.30.1" />
    <PackageReference Include="Microsoft.IdentityModel.Protocols.OpenIdConnect" Version="6.30.1" />
    <PackageReference Include="Microsoft.IdentityModel.Tokens" Version="6.30.1" />
    <PackageReference Include="Swashbuckle.AspNetCore" Version="6.5.0" />
  </ItemGroup>

  <ItemGroup>
    <Folder Include="Properties\ServiceDependencies\" />
  </ItemGroup>

  <Target Name="PreBuild" BeforeTargets="PreBuildEvent">
    <Exec Command="powershell.exe -ExecutionPolicy Bypass -File ValidationScripts\RemoveErrorFile.ps1 -outputDirectory ValidationScripts\" />
    <Exec Command="powershell.exe -ExecutionPolicy Bypass -File ValidationScripts\ManifestValidator.ps1 -inputDirectory .\Packages\manifest\ -inputXml WorkloadManifest.xml -inputXsd WorkloadDefinition.xsd -outputDirectory ValidationScripts\" />
    <Exec Command="powershell.exe -ExecutionPolicy Bypass -File ValidationScripts\ItemManifestValidator.ps1 -inputDirectory .\Packages\manifest\ -inputXsd ItemDefinition.xsd -outputDirectory ValidationScripts\" />
    <Exec Command="powershell.exe -ExecutionPolicy Bypass -File ValidationScripts\ValidateNoDefaults.ps1 -outputDirectory ValidationScripts\" />
    <Error Condition="Exists('ValidationScripts\ValidationErrors.txt')" Text="Validation errors with either manifests or default values" File="ValidationScripts\ValidationErrors.txt" />
  </Target>

</Project>
Getting Started
To set up the boilerplate sample project on your local machine, follow these steps:
Clone the Boilerplate:
git clone https://github.com/microsoft/Microsoft-Fabric-workload-development-sample.gitOpen the solution in Visual Studio 2022.
Set up an app registration by following instructions on the Authentication guide. Ensure that both your Frontend and Backend projects have the necessary setup described in the guide. Microsoft Entra is employed for secure authentication, ensuring that all interactions within the architecture are authorized and secure.
Update the One Lake DFS Base URL: Depending on your Fabric environment, you can update the
OneLakeDFSBaseURLwithin the src\Constants folder. The default isonelake.dfs.fabric.microsoft.combut this can be updated to reflect the environment you are on. More information on the DFS paths can be found in the One Lake documentationSetup Workload Configuration
- Copy workload-dev-mode.json from src/Config to
C:\ - In the workload-dev-mode.json file, update the following fields to match your configuration:
- CapacityGuid: Your Capacity ID. This can be found within the Fabric Portal under the Capacity Settings of the Admin portal.
- ManifestPackageFilePath: The location of the manifest package. When you build the solution, it saves the manifest package within src\bin\Debug. More details on the manifest package can be found in later steps.
- WorkloadEndpointURL: Workload Endpoint URL.
- In the Packages/manifest/WorkloadManifest.xml file, update the following fields to match your configuration:
- <AppId>: Client ID (Application ID) of the workload Entra application.
- <RedirectUri>: Redirect URIs. This can be found in your app registration that you created under 'Authentication' section.
- <ResourceId>: Audience for the incoming Entra tokens. This information can be found in your app registration that you created under 'Expose an API' section.
- In the src/appsettings.json file, update the following fields to match your configuration:
- PublisherTenantId: The ID of the workload publisher tenant.
- ClientId: Client ID (Application ID) of the workload Entra application.
- ClientSecret: The secret for the workload Entra application.
- Audience: Audience for the incoming Entra tokens. This information can be found in your app registration that you created under 'Expose an API' section. This is also referred to as the Application ID URI.
- Copy workload-dev-mode.json from src/Config to
Generate a manifest package. To generate a manifest package file, build Fabric_Extension_BE_Boilerplate. This runs a three step process to generate the manifest package file:
- Trigger
ManifestValidator.ps1onWorkloadManifest.xmlin *Packages\manifest* and triggerItemManifestValidator.ps1on all items XMLs (e.g.,Item1.xml) in *Packages\manifest*. If the validation fails, an error file is generated. You can view the validation scripts in *ValidationScripts*. - If an error file exists, the build fails with
Validation errors with either manifests or default values. Double select on the error in VS studio to see the error file. - After successful validation, pack the
WorkloadManifest.xmlandItem1.xmlfiles into ManifestPackage.1.0.0.nupkg. The resulting package is in src\bin\Debug.
Copy the ManifestPackage.1.0.0.nupkg file to the path defined in the workload-dev-mode.json configuration file.
- Trigger
Program.cs is the entry point and startup script for your application. In this file, you can configure various services, initialize the application, and start the web host.
Build to ensure your project can access the required dependencies for compilation and execution.
Download the DevGateway from Microsoft's Download Center
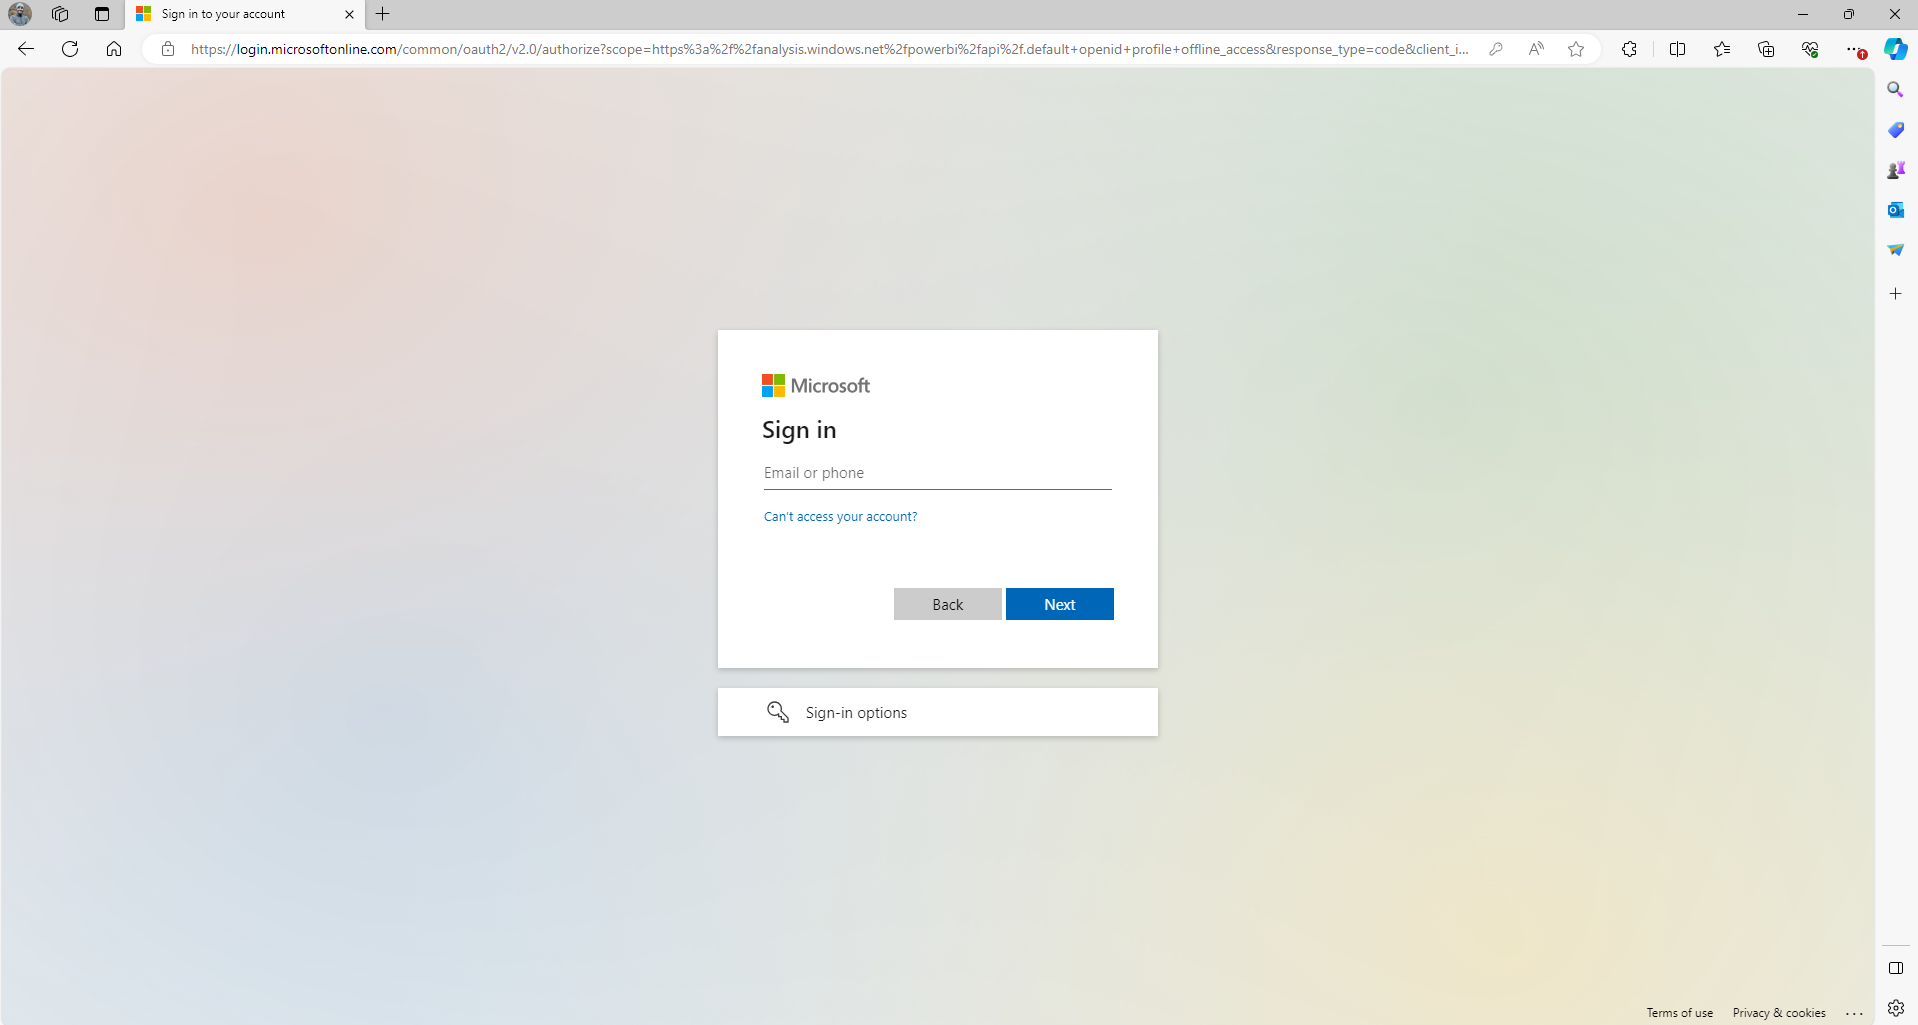
Run the Microsoft.Fabric.Workload.DevGateway.exe application located in the DevGateway folder. Sign in with a user that has capacity admin privileges to the capacity you defined in workload-dev-mode.json (CapacityGuid). Upon the initialization of the workload, an authentication prompt appears.
After authentication, external workloads establish communication with the Fabric backend through Azure Relay. This process involves relay registration and communication management, facilitated by a designated Proxy node. Furthermore, the package containing the workload manifest is uploaded and published.
At this stage, Fabric has knowledge of the workload, encompassing its allocated capacity.
Monitoring for potential errors can be seen in the console.
If you don't get any errors, then the connection is established, registration is successfully executed, and the workload manifest was systematically uploaded.

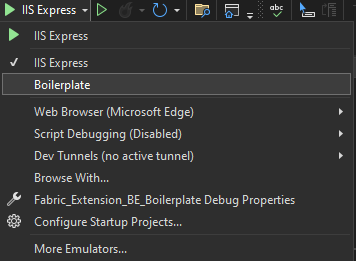
Change your startup project in Visual Studio to the Boilerplate project and select Run.
Working with the Boilerplate
Code generation
We use the workload Boilerplate C# ASP.NET Core sample to explain how to build a workload with REST APIs. Starts with generating server stubs and contract classes based on the Workload API Swagger specification. You can generate them using any of several Swagger code generation tools. Our Boilerplate sample uses NSwag. The sample contains GenerateServerStub.cmd command line script, which wraps NSwag code generator. The script takes a single parameter, which is a full path to NSwag installation directory. It also expects to find the Swagger definition file (swagger.json) and configuration file (nswag.json) next to it.
Executing this script produces a C# file WorkloadAPI_Generated.cs. The contents of this file can be logically divided into three parts, as follows.
ASP.NET Core stub controllers
ItemLifecycleController and JobsController classes are thin implementations of ASP.NET Core controllers for two subsets of Workload API: item lifecycle management and jobs. These classes plug into ASP.NET Core HTTP pipeline, and serve as the entry points for API methods, defined in the Swagger specification. These classes forward the calls to the "real" implementation, provided by the workload.
This is an example of the CreateItem method:
/// <summary>
/// Called by Microsoft Fabric for creating a new item.
/// </summary>
/// <remarks>
/// Upon item creation Fabric performs some basic validations, creates the item with 'provisioning' state and calls this API to notify the workload. The workload is expected to perform required validations, store the item metadata, allocate required resources, and update the Fabric item metadata cache with item relations and ETag. To learn more see [Microsoft Fabric item update flow](https://updateflow).
/// <br/>
/// <br/>This API should accept [SubjectAndApp authentication](https://subjectandappauthentication).
/// <br/>
/// <br/>##Permissions
/// <br/>Permissions are checked by Microsoft Fabric.
/// </remarks>
/// <param name="workspaceId">The workspace ID.</param>
/// <param name="itemType">The item type.</param>
/// <param name="itemId">The item ID.</param>
/// <param name="createItemRequest">The item creation request.</param>
/// <returns>Successfully created.</returns>
[Microsoft.AspNetCore.Mvc.HttpPost, Microsoft.AspNetCore.Mvc.Route("workspaces/{workspaceId}/items/{itemType}/{itemId}")]
public System.Threading.Tasks.Task CreateItem(System.Guid workspaceId, string itemType, System.Guid itemId, [Microsoft.AspNetCore.Mvc.FromBody] CreateItemRequest createItemRequest)
{

	return _implementation.CreateItemAsync(workspaceId, itemType, itemId, createItemRequest);
}
Interfaces for workload implementation
IItemLifecycleController and IJobsController are interfaces for the previously mentioned "real" implementations. They define the same methods, which the controllers implement.
Definition of contract classes
C# contract classes used by the APIs.
Implementation
The next step after generating code is implementing the IItemLifecycleController and IJobsController interfaces. In the Boilerplate sample, ItemLifecycleControllerImpl and JobsControllerImpl implement these interfaces.
For example, this code is the implementation of CreateItem API:
/// <inheritdoc/>
public async Task CreateItemAsync(Guid workspaceId, string itemType, Guid itemId, CreateItemRequest createItemRequest)
{
	var authorizationContext = await _authenticationService.AuthenticateControlPlaneCall(_httpContextAccessor.HttpContext);
	var item = _itemFactory.CreateItem(itemType, authorizationContext);
	await item.Create(workspaceId, itemId, createItemRequest);
}
Handling item payload
Several API methods accept various types of "payload" as part of the request body, or return them as part of the response. For example, CreateItemRequest has creationPayload property.
"CreateItemRequest": {
	"description": "Create item request content.",
	"type": "object",
	"additionalProperties": false,
	"required": [ "displayName" ],
	"properties": {
	"displayName": {
		"description": "The item display name.",
		"type": "string",
		"readOnly": false
	},
	"description": {
		"description": "The item description.",
		"type": "string",
		"readOnly": false
	},
	"creationPayload": {
		"description": "Creation payload specific to the workload and item type, passed by the item editor or as Fabric Automation API parameter.",
		"$ref": "#/definitions/CreateItemPayload",
		"readOnly": false
	}
	}
}
The types for these "payload" properties are defined in the Swagger specification. There's a dedicated type for every kind of payload. These types don't define any specific properties and allow any property to be included. For example, this is CreateItemPayload type:
"CreateItemPayload": {
	"description": "Creation payload specific to the workload and item type.",
	"type": "object",
	"additionalProperties": true
}
The generated C# contract classes are defined as partial and have a dictionary with properties.
/// <summary>
/// Creation payload specific to the workload and item type.
/// </summary>
[System.CodeDom.Compiler.GeneratedCode("NJsonSchema", "13.20.0.0 (NJsonSchema v10.9.0.0 (Newtonsoft.Json v13.0.0.0))")]
public partial class CreateItemPayload
{
	private System.Collections.Generic.IDictionary<string, object> _additionalProperties;

	[Newtonsoft.Json.JsonExtensionData]
	public System.Collections.Generic.IDictionary<string, object> AdditionalProperties
	{
		get { return _additionalProperties ?? (_additionalProperties = new System.Collections.Generic.Dictionary<string, object>()); }
		set { _additionalProperties = value; }
	}
}
The code can use this dictionary for reading and returning properties. However, a better approach is to define specific properties with corresponding types and names. This can be easily achieved because of the 'partial' declaration on the generated classes.
For example, CreateItemPayload.cs file contains a complementary definition for CreateItemPayload class, which adds Item1Metadata property.
namespace Fabric_Extension_BE_Boilerplate.Contracts.FabricAPI.Workload
{
    /// <summary>
    /// Extend the generated class by adding item-type-specific fields.
    /// In this sample every type will have a dedicated property. Alternatively, polymorphic serialization could be used.
    /// </summary>
    public partial class CreateItemPayload
    {
        [Newtonsoft.Json.JsonProperty("item1Metadata", Required = Newtonsoft.Json.Required.Default, NullValueHandling = Newtonsoft.Json.NullValueHandling.Ignore)]
        public Item1Metadata Item1Metadata { get; init; }
    }
}
However, if the workload supports multiple item types, CreateItemPayload class needs to be able to handle different types of creation payload, one per item type. There are two ways to do this. The simpler way, used by the Boilerplate sample, is to define multiple optional properties, each representing the creation payload for a different item type. Every request then has just one of these properties sets, according to the item type being created. Alternatively, you could implement polymorphic serialization, but it isn't demonstrated in the sample because it doesn't provide any significant benefits.
For example, for supporting two item types this class definition would need to be extended as follows:
namespace Fabric_Extension_BE_Boilerplate.Contracts.FabricAPI.Workload
{
    public partial class CreateItemPayload
    {
        [Newtonsoft.Json.JsonProperty("item1Metadata", Required = Newtonsoft.Json.Required.Default, NullValueHandling = Newtonsoft.Json.NullValueHandling.Ignore)]
        public Item1Metadata Item1Metadata { get; init; }

        [Newtonsoft.Json.JsonProperty("item2Metadata", Required = Newtonsoft.Json.Required.Default, NullValueHandling = Newtonsoft.Json.NullValueHandling.Ignore)]
        public Item2Metadata Item2Metadata { get; init; }
    }
}
Note
The "payload" sent to the workload is generated by the client. It could be the item editor iFrame or Fabric Automation REST API. The client is responsible for sending the correct payload and matching the item type. The workload is responsible for verification. Fabric treats this payload as an opaque object and only transfers it from the client to the workload. Similarly, for a payload returned by the workload to the client, it is workload's and client's responsibility to handle the payload correctly.
For example, this code shows how the Boilerplate sample Item1 implementation handles that:
protected override void SetDefinition(CreateItemPayload payload)
{
	if (payload == null)
	{
		Logger.LogInformation("No payload is provided for {0}, objectId={1}", ItemType, ItemObjectId);
		_metadata = Item1Metadata.Default.Clone();
		return;
	}

	if (payload.Item1Metadata == null)
	{
		throw new InvalidItemPayloadException(ItemType, ItemObjectId);
	}

	if (payload.Item1Metadata.Lakehouse == null)
	{
		throw new InvalidItemPayloadException(ItemType, ItemObjectId)
			.WithDetail(ErrorCodes.ItemPayload.MissingLakehouseReference, "Missing Lakehouse reference");
	}

	_metadata = payload.Item1Metadata.Clone();
}
Troubleshooting and Debugging
Known Issues and Solutions
Missing Client Secret
Error:
Microsoft.Identity.Client.MsalServiceException: A configuration issue is preventing authentication. Check the error message from the server for details. You can modify the configuration in the application registration portal. See https://aka.ms/msal-net-invalid-client for details.
Original exception: AADSTS7000215: Invalid client secret provided. Ensure the secret being sent in the request is the client secret value, not the client secret ID, for a secret added to app 'app_guid'.
Resolution: Make sure you have the correct client secret in appsettings.json.
Error during artifact creation due to missing admin consent
Error:
Microsoft.Identity.Client.MsalUiRequiredException: AADSTS65001: The user or administrator didn't consent to use the application with ID.... Send an interactive authorization request for this user and resource.
Resolution: In the item editor, navigate to the bottom and select Navigate to Authentication Page. Under Scopes write .default and select Get Access token. Approve consent in the popped-up dialog.
Item creation fails due to capacity selection
Error: PriorityPlacement: There are no available core services for priority placement only 'name','guid','workload-name'.
Resolution: You might be using a user that only has access to Trial capacity. Make sure you're using a capacity that you have access to.
File creation failure with 404 (NotFound) error
Error:
Creating a new file failed for filePath: 'workspace-id'/'lakehouse-id'/Files/data.json. Error: Response status code doesn't indicate success: 404 (NotFound).
Resolution: Make sure you're working with the OneLake DFS URL that fits your environment. For example, if you work with PPE environment, change EnvironmentConstants.OneLakeDFSBaseUrl in Constants.cs to the appropriate URL.
Debugging
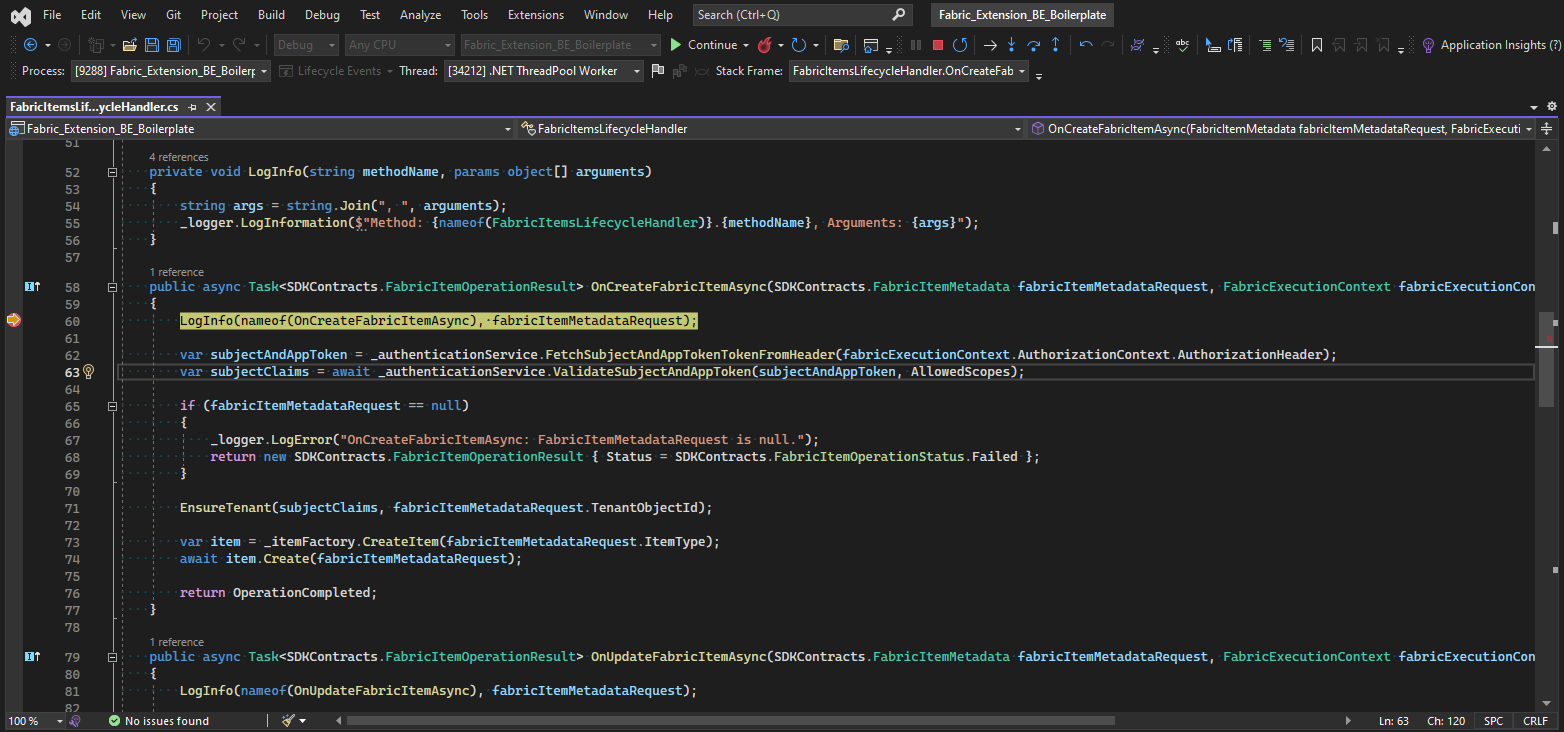
When troubleshooting various operations, you can set breakpoints in the code to analyze and debug the behavior. Follow these steps for effective debugging:
- Open the code in your development environment.
- Navigate to the relevant operation handler function (for example, OnCreateFabricItemAsync for CRUD operations or an endpoint in a controller for Execute operations).
- Place breakpoints at specific lines where you want to inspect the code.
- Run the application in debug mode.
- Trigger the operation from the frontend (FE) that you want to debug.
The debugger pause execution at the specified breakpoints, enabling you to examine variables, step through code, and identify issues.
Workspace
If you are a connecting a backend to the Sample Workload, be aware that your item must belong to a workspace that has is associated to a capacity. By default, the "My Workspace" workspace is not associated to a capacity. Otherwise, you might get this error:
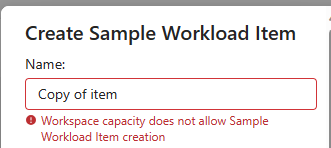
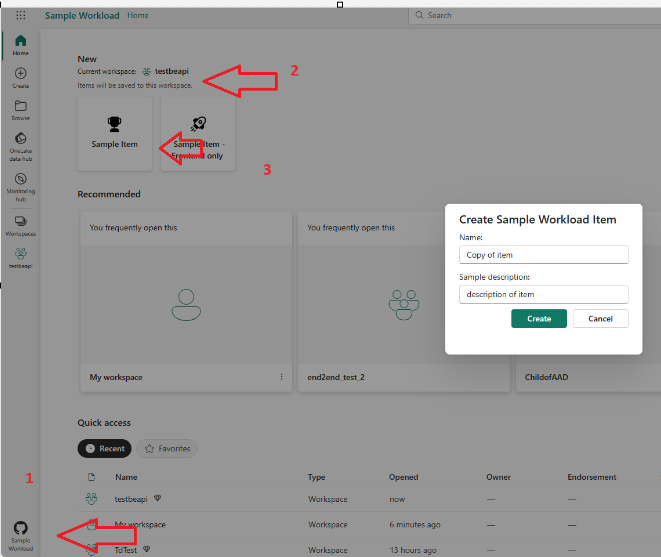
Switch to a named workspace and leave the default My workspace:

From the correct workspace, load the sample workload and proceed with the tests:
Contribute
We welcome contributions to this project. If you find any issues or want to add new features, follow these steps:
- Fork the repository.
- Create a new branch for your feature or bug fix.
- Make your changes and commit them.
- Push your changes to your forked repository.
- Create a pull request with a clear description of your changes.
Related content
Feedback
Coming soon: Throughout 2024 we will be phasing out GitHub Issues as the feedback mechanism for content and replacing it with a new feedback system. For more information see: https://aka.ms/ContentUserFeedback.
Submit and view feedback for