Note
Access to this page requires authorization. You can try signing in or changing directories.
Access to this page requires authorization. You can try changing directories.
You can enable users of your agent to upload files and images. Your agent can analyze these files and use them to provide responses.
When to allow file input
Allow users to upload files to elicit agent responses in the following scenarios:
- Questions that require information from your configured knowledge sources.
- Questions that can be answered from an image or uploaded supported file types, such as text, CSV, or PDF files.
When you allow users to upload files and your agent to generate responses based on those files, follow best practices for prompt engineering.
To get the most out of this feature, review the following tips:
Upload images that are clear and high-quality. Agents might struggle to interpret grainy, poorly lit, or pixelated images.
Only upload supported file types:
- DOCX
- CSV
- TXT
- JPG
- PNG
- WebP
- nonanimated GIF files
Only upload files that meet these size restrictions:
- Individual file size: 15 MB
- Text character limit:
- Without code interpreter: 30,000 characters per file and total when there's a multiple file upload
- With code interpreter: There's no character limit
If a file triggers content moderation filtering, restart the conversation. The agent uses the current conversation history to generate answers and continues to return content moderation filtering errors if objectionable content is part of the conversation history.
Note
If you're having problems generating high-quality responses from files, turn on the Allow ungrounded responses setting in the Knowledge section of your agent's Generative AI settings. This setting is required if there are no relevant knowledge sources configured. For more information, see Allow ungrounded responses.
If you publish your agent to a SharePoint channel, users can't upload files.
If your agent resides in a customer managed key enabled environment, adding files as input is allowed, but the agent doesn't process the files.
Support for XLSX and PPTX file types is currently only available in experimental mode. If you want to use these file types, reach out to Microsoft support or your Microsoft representative.
Channels that support file input
Users can attach files to their messages only on certain channels. By default, the system supports file input from users on:
- Microsoft Teams
- Custom website and Demo website (Direct Line and web chat)
- Omnichannel for Customer Service
- Microsoft 365 Copilot
- The Test your agent panel in Copilot Studio
The system doesn't support file input on voice and telephony channels or on SharePoint. On a channel where the system doesn't support file input, the system ignores an attached file and doesn't send its content to the agent.
How the agent reads uploaded documents
For Word documents (.docx), the agent reads text from the standard paragraphs and tables in the document body. The agent might not read text that appears only in other structures, including:
- Text boxes, shapes, and WordArt
- SmartArt and other diagrams
- Headers and footers
- Content inside embedded or linked objects, such as an embedded spreadsheet
If a document keeps most of its information in these structures, the agent might respond as though the document contains little or no text. Examples of these types of information sources include one-page flyers, diagrams, org charts, or marketing layouts.
Tip
For best results, put the information you want the agent to use in standard paragraphs or table text. If the agent doesn't seem to recognize the contents of a Word file, check whether the important text is in a text box, shape, SmartArt, or header or footer, and move it into the document's body.
When a file exceeds the character limit
Without the code interpreter, the agent reads up to 30,000 characters of text per file, and up to 30,000 characters in total across multiple files. If an uploaded file's extracted text exceeds this limit, the agent discards the file's content. The agent might respond as though the file couldn't be processed or as though no file was uploaded. To work with larger files, do one of the following options:
- Turn on the code interpreter, which removes the character limit for supported structured data scenarios.
- Split the document into smaller files, or remove content the agent doesn't need, before uploading.
This character limit applies to the text that the agent extracts from Office documents, such as Word, PowerPoint, and Excel files. PDF files are processed as the file itself rather than as extracted text, so this character limit doesn't apply to them.
Uploading multiple files in one conversation
Each file a user uploads adds to the amount of content the agent's generative AI model processes in a single conversation. Large files, especially spreadsheets, can add a significant amount. If a user uploads several large files in the same conversation, the combined content can exceed what the model can process at once, and the agent might stop responding or return an error.
To avoid this issue:
- Start a new conversation after uploading and working through a few large files.
- Split large files into smaller ones, and upload only the parts the agent needs.
- Keep in mind that files uploaded earlier in the conversation continue to count, even after the agent answers questions about them.
Note
If the agent regularly processes several large files in one conversation, add a Clear variable values node to the agent's topic and select the option to clear the conversation history for the current session. For example, after each file is processed. This step releases the accumulated file content so that later uploads don't exceed the model's limit.
Encrypted and protected files
Files with encryption, such as sensitivity labels or password protection, aren't supported. When a user uploads a password-protected or encrypted Office file, the agent tells the user that the file is encrypted or password-protected and can't be read. For some rights-managed or label-encrypted files, the agent returns a generic error instead.
To use the content, remove the protection or label before uploading (only if your organization's data governance policies allow it) or use a Microsoft 365 experience such as Microsoft 365 Copilot Chat, which supports sensitivity-labeled files.
Turn on file uploads
Makers can allow users of their agent to upload files during chat interactions with their agent.
Go to the Settings page for your agent, and select Generative AI.
Navigate to the File processing capabilities section.
Turn on File uploads.
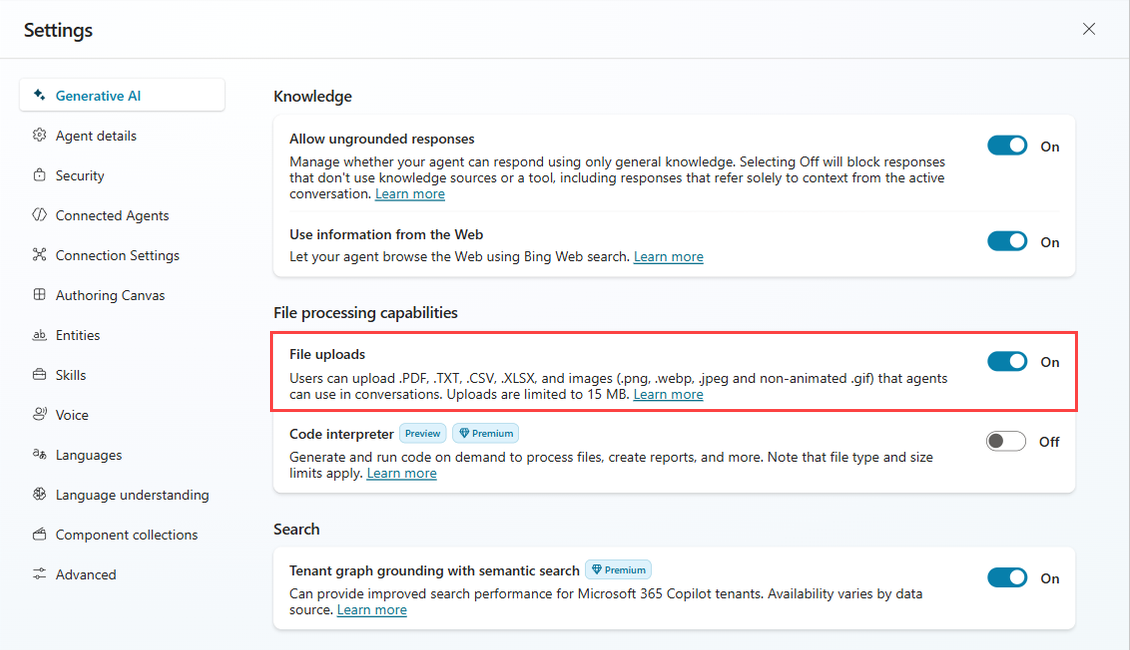
(Optional) Select your preferred level of strictness for content moderation.
Select Save.
Test your agent's file analysis
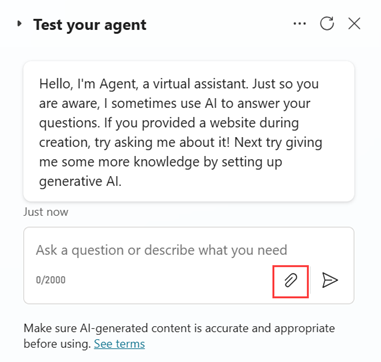
After you turn on File uploads, you can test your agent's capability by uploading files and images and verifying the agent's responses. To upload a file, select the paper clip icon in the Test your agent chat box. Thoroughly test your agent's accuracy by using various files and images with various queries to validate the agent's responses before you publish.
Responsible AI
Microsoft is committed to strong responsible AI practices. Review the responsible AI guidelines for Copilot Studio before using any AI features. Like all generative answers, content is checked twice: first during user input and again before the agent generates an output response. If the system finds harmful, offensive, or malicious content at either the input or output stage, the agent doesn't respond.