Note
Access to this page requires authorization. You can try signing in or changing directories.
Access to this page requires authorization. You can try changing directories.
[This article is prerelease documentation and is subject to change.]
A prompt column is an AI-powered data type in Microsoft Dataverse that enables you to define natural language prompts tied to other columns in your table. The AI model processes these prompts to generate relevant responses based on specified input columns. The result is immediately stored in the prompt column, ready to be used in apps, workflows, or reports.
The key function is that the prompt column contains generative AI results stored in the table persistently. This is how customer data is enriched using generative AI and brings value to their data.
Important
- This is a preview feature.
- Preview features aren’t meant for production use and might have restricted functionality. These features are subject to supplemental terms of use, and are available before an official release so that customers can get early access and provide feedback.
Example use cases:
- Customer support: Automate responses to frequently asked questions by using AI prompts to generate accurate and timely replies based on customer inquiries stored in Dataverse.
- Content creation: Use prompts to assist in writing articles, reports, or marketing materials by generating text that aligns with the input provided.
- Data analysis: Use AI prompts to analyze complex datasets and generate insights, sentiments, extract, and classify contents or summaries that help in making informed decisions.
- Workflow automation: Integrate AI prompts into business workflows to automatically do tasks such as scheduling, reporting, and data entry.
Prerequisites
- Prompt columns use the same licensing model as AI builder prompts. More information: Prompts overview
- Copilot and AI Prompts features turned On in the Features area for the environment settings. More information: Manage feature settings
Create a prompt column
- Go to Power Apps. Select Tables on the left navigation pane.
- Create a new table or open an existing table. More information: Create a table
- On the Tables page, select New > Column.
- On the column properties page, enter a Display name and Description for your column.
- Under the Data type dropdown list, select Prompt.
- Clear the Allow form fill assistance checkbox.
- Select +Add new prompt. You can create up to five prompt columns per table.
- On the prompt column page, create a prompt. More information: How to write an AI prompt for a prompt column
- Select Save on the prompt page.
- Select Save on the column properties page to save your column.
How to write an AI prompt for a prompt column
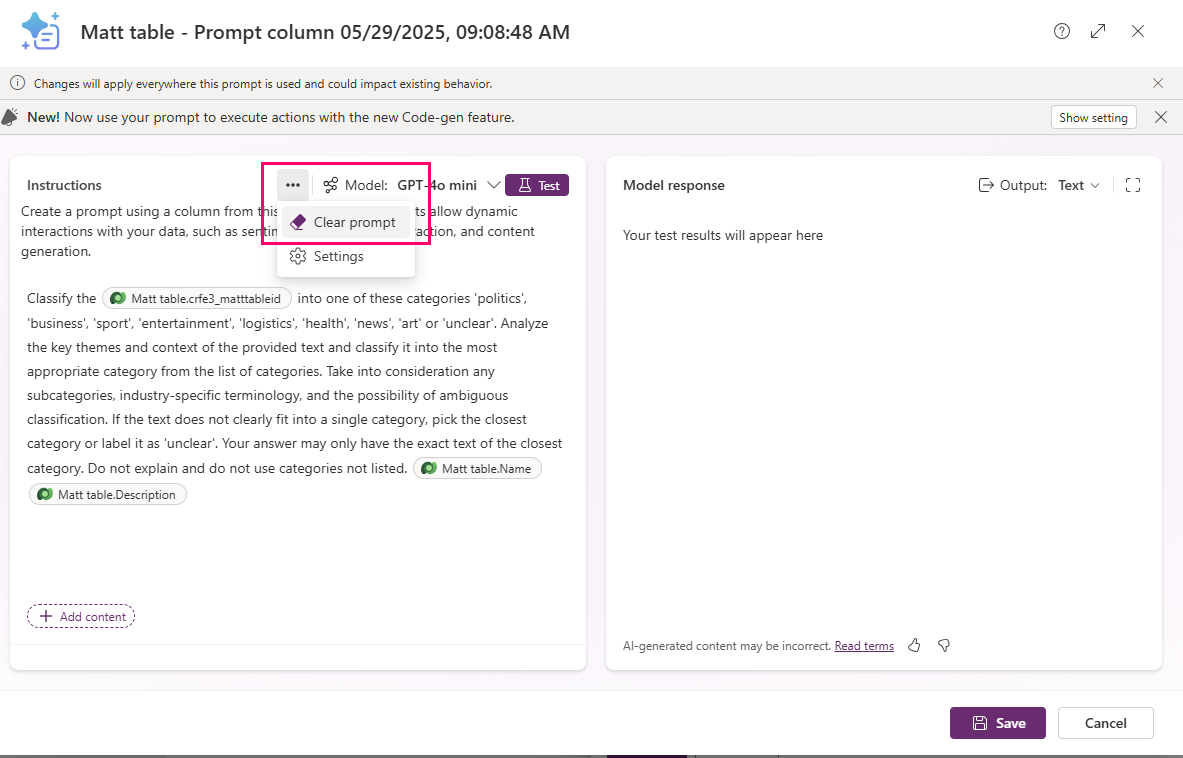
Crafting effective AI prompts is crucial for getting accurate and relevant responses from the AI model. You can use the prefilled prompt or write your own custom prompt.
To clear the prefilled prompt, highlight and delete it, or select the three dots to the left of Model, then select Clear prompt.
Write effective prompts
Here are some best practices for writing prompts:
- Write clear instructions. Ensure that your prompts are clear and specific. Avoid ambiguity by being precise about what you want the AI to do. For example, instead of writing Tell me about the weather, write Provide a summary of today's weather in Paris.
- Use structured language. Structured language helps the AI model understand the context and intent of the prompt better. For example, Generate a list of top 10 marketing strategies for 2025 is more effective than Top marketing strategies.
- Include contextual information. Provide necessary context within the prompt to help the AI model generate more accurate responses. For example, Based on the sales data from Q1, suggest ways to improve our marketing campaign. Add an input column in each prompt.
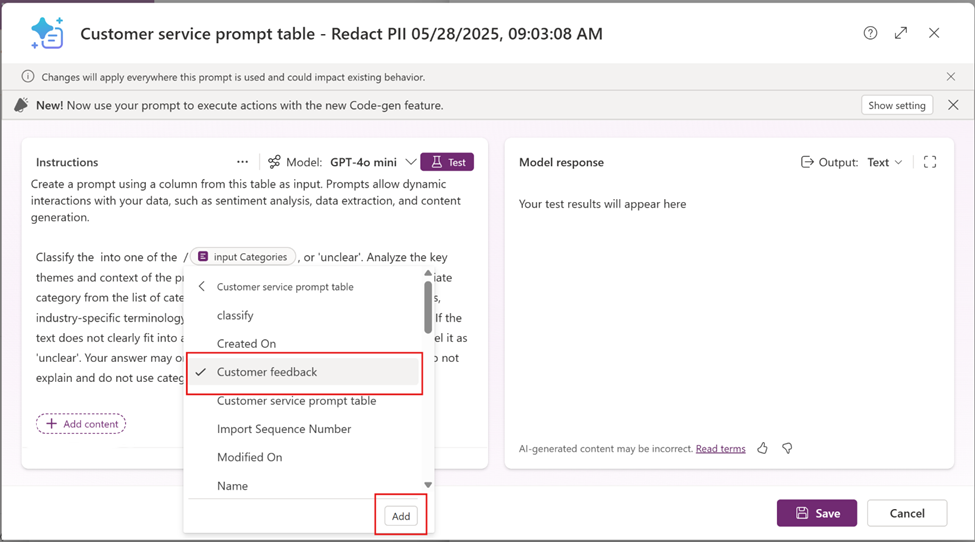
Add input columns
Replace default input text by selecting it and then select Delete.
Select +Add content, and then select the table.
The column dropdown list appears. Select the input column from the list of columns from your table, and then select Add. In this example, the Customer feedback column is selected.
- You can use more than one input column in each prompt.
- Input columns can’t be formula columns, file columns, image data type, or another prompt column. If you select these data types, their input value is ignored.
Select Save.
Test and refine prompts
Test your AI prompt. Create a test record with appropriate values in all your input columns for testing. For example, create a Name column in the table and enter some value that is used to identify the test record, such as testing prompts.
- Create or select a prompt column.
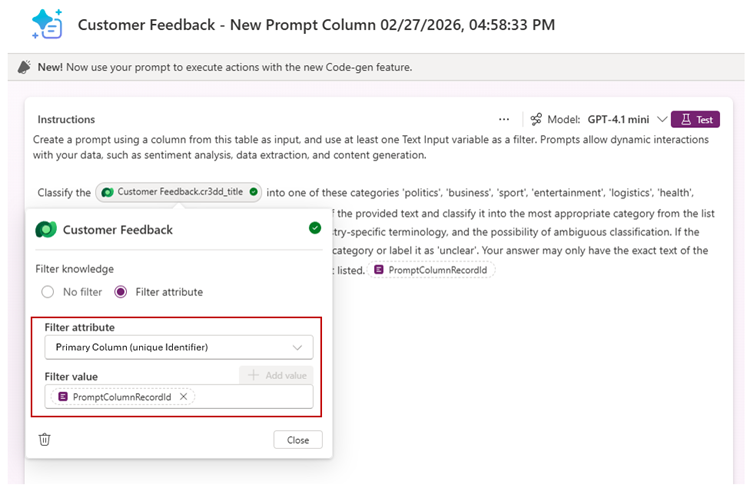
- While editing the prompt in a prompt column, select the input column to open the Filter knowledge pop-up screen.
- Select the Filter attribute option.
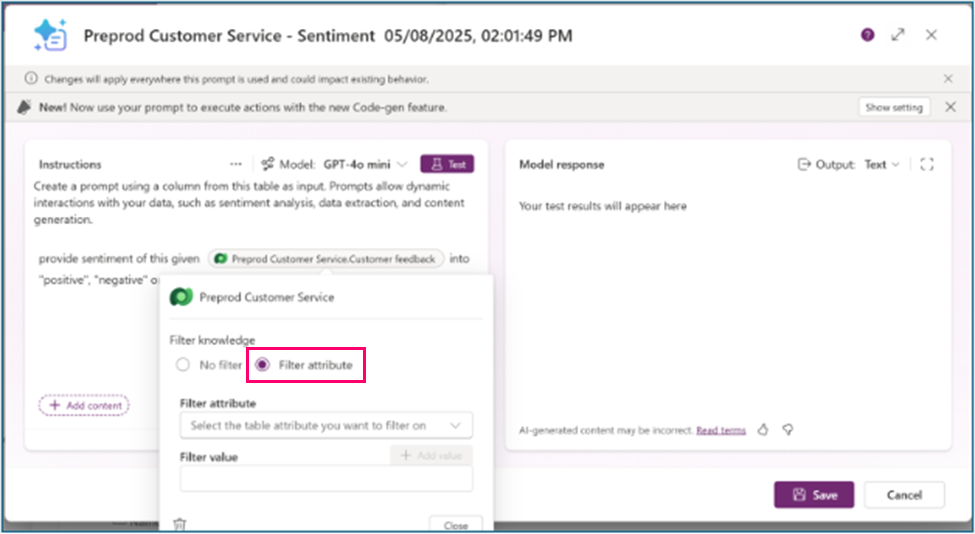
- Select the Filter attribute dropdown list and select a filter, such as Name.
- Enter the value of your testing record Name, such as testing prompt.
- Select Close.
- Select Test and review the Model response.
- Select the Knowledge used tab to confirm that the input came from your test record.
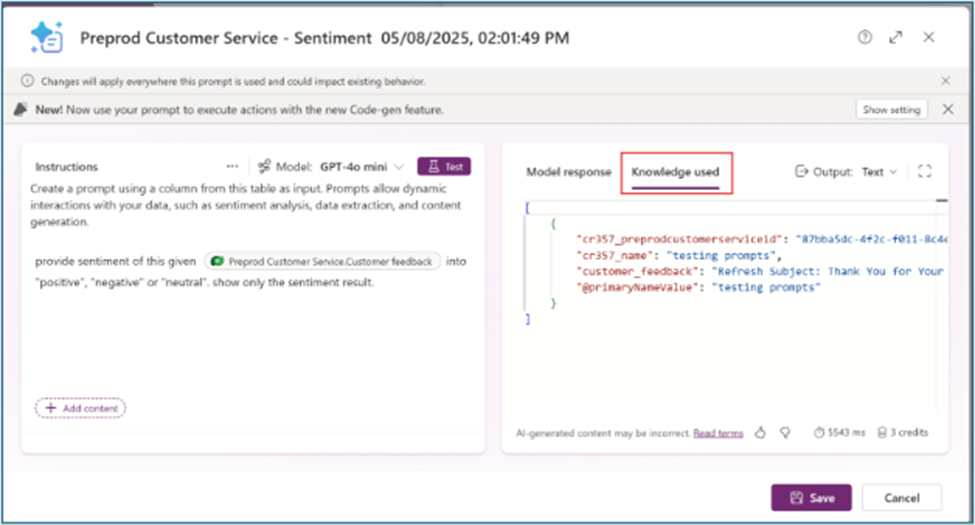
- Modify your prompt until you get the desired results.
- Return to the Filter knowledge pop-up and select No filter when your prompt changes are done.
- Select Save to update your prompt column.

View prompt column results
Create a model-driven app to view and validate your prompt column results.
- Go to Power Apps, and then open an app for editing or create a new app. More information: Create a model-driven app
- In the app designer, select Edit form to edit the table form for the table that has the prompt columns.
- The form designer opens. Select all the input and prompt columns you want to add to the form.
- Select Save and publish.
- Go to the Tables area in Power Apps and select Views.
- Observe the values in the records including new records that contain prompt column values.
Prompt column feature enhancements
Note
This capability is in process of rolling out, and might not be available in your region yet.
Prompt columns leverage asynchronous computation so that AI-driven processing is decoupled from real-time transactions. This preserves system responsiveness, protects business critical workflows, and enables organizations to adopt AI capabilities at scale without compromising operational reliability.
How to know when prompt values in prompt columns are asynchronous
When a prompt column is added to a table, a banner message appears at the top of the page indicating that the value is generated asynchronously.

Note
If your environment isn't updated to the latest version, the banner message might not be visible. Prompt columns created in earlier versions will continue to operate without change until the upgrade occurs. As part of the upgrade process, existing prompt definitions are updated to support asynchronous execution.
Text input variable
A default text input variable is automatically added to the prompt definition. This variable is used as a filter on the primary column of the data source and is required to save the prompt definition.
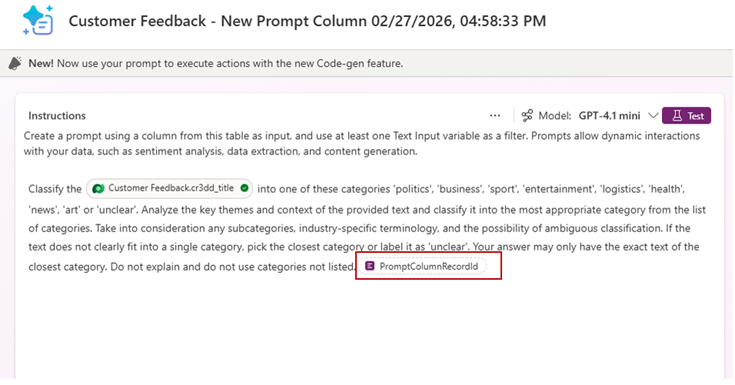
This variable is used as a filter on the primary column of the data source and is required to save the prompt definition.
The platform requires a single text input variable. This variable is automatically added and applied as a filter on the primary column of the data source. Users can edit the prompt definition or add additional columns, provided the required text input variable remains included in the prompt definition. When the column is saved, the platform validates this requirement and displays an error if the text input variable is missing or not applied as a filter on the primary column.
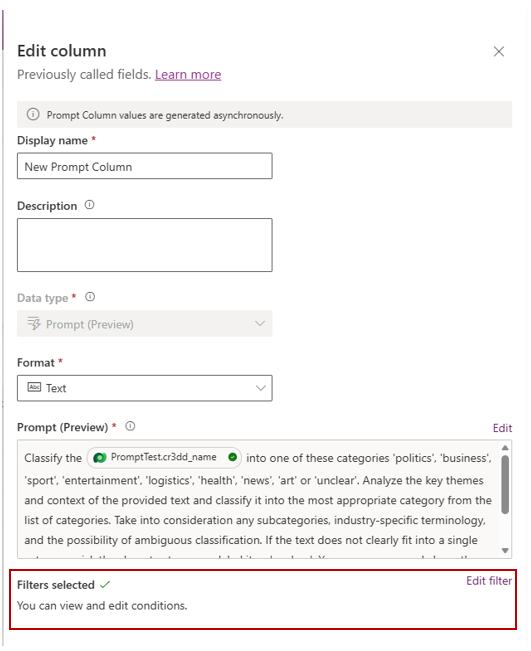
Prompt column with filter condition
Filter conditions ensure prompts run only when they add value.
With filter based execution, prompts run only when specified conditions are satisfied. During record creation or update, the prompt column evaluates the filter first and then executes the prompt for eligible records. This approach reduces unnecessary executions and helps optimize Copilot credit consumption.
Add filters to a prompt column
Go to Power Apps, and select Solutions on the left navigation pane.
Open the solution that has the table you want, select Tables, open table that has prompt column you want to edit or create a new one, and then select Columns.
- If creating a new column, select New > Column. On the right properties page, enter a Display name and Description for your column, for Data type, select Prompt.
- If editing an existing prompt, go to step 5 to apply a filter.
Clear the Allow form fill assistance checkbox.
Select +Add new prompt. You can create up to five prompt columns per table. If editing an existing column, select Edit next to the Prompt box.
Open a table variable, such as
PromptTest.cr3dd_namein this example, and then select Apply filter.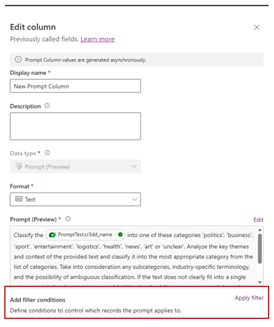
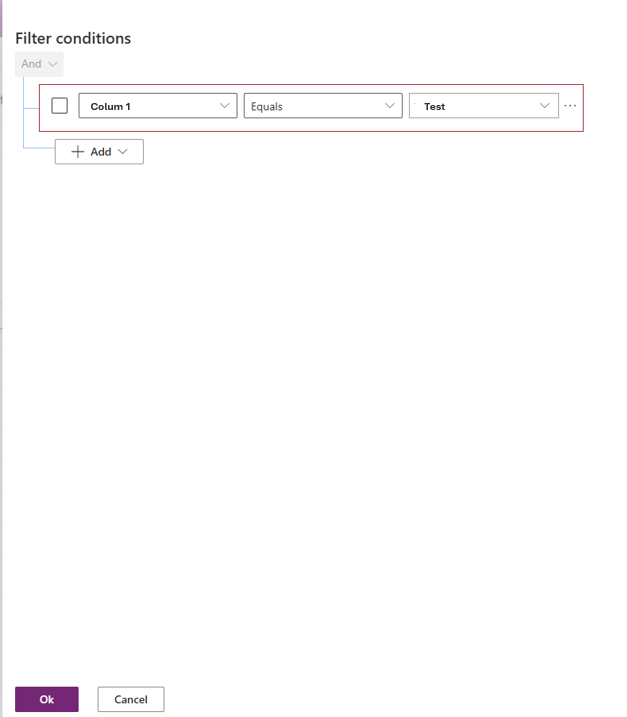
On the Filter conditions pane, select Add filter, and then select OK.
On the Edit column pane, notice Filters selected is applied. Select Save.

View the prompt column status
When a prompt column is created, the table automatically includes two corresponding columns, Status and Details, for that prompt column.
- Go to Power Apps, and then select Tables on the left navigation pane.
- Open the table that has the prompt column where you want to view the status.
- On the Tables page, in the list of columns and data select the +n more header to add additional columns.
- In the select Show existing column list search for the prompt column name.
- Search and select the columns named:
(columnName) _PromptColumnStatus(columnName)_PromptColumnDetails
- Select Save.
- Select Edit to the right of the list to open the columns list with records in a separate view.
When prompt execution starts, these columns are populated to record the execution status and any failure details.
This example demonstrates a prompt column named testSummary and its corresponding Status and Details columns.

Prompt column status codes:
| Status | Name | Description |
|---|---|---|
| 0 | NotStarted | Record created. AI analysis hasn't started yet. |
| 1 | InProgress | The prompt AI analysis is currently in-progress. Details column shows start Date and Time. |
| 2 | Completed | Prompt execution completed successfully. Details column shows last successful Date and Time. |
| 3 | Failed | The prompt AI generation failed. Detail column shows error details in the last execution. |
Disable AI generation for a prompt column
- Go to Power Apps. Select Tables on the left navigation pane.
- Open the table, select Columns, and then open the column that is of data type Prompt where you want to disable AI generation.
- On the Edit column pane, clear the Allow prompt column execution checkbox, and then select Save.
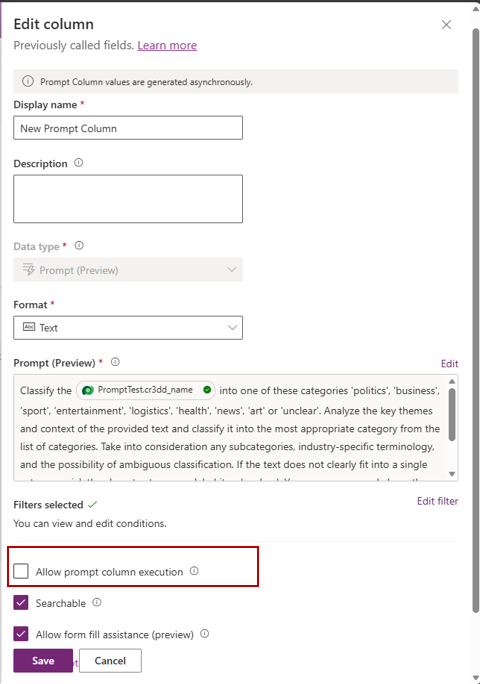
By default, the Allow prompt column execution setting is enabled. When disabled, AI analysis isn't performed for the prompt column.
Note
For prompts to be executed, both tenant level and column level settings need to be enabled.
When Prompt column fails to generate AI Analysis
When AI analysis failed to generate, users see an AI field generation failed message.
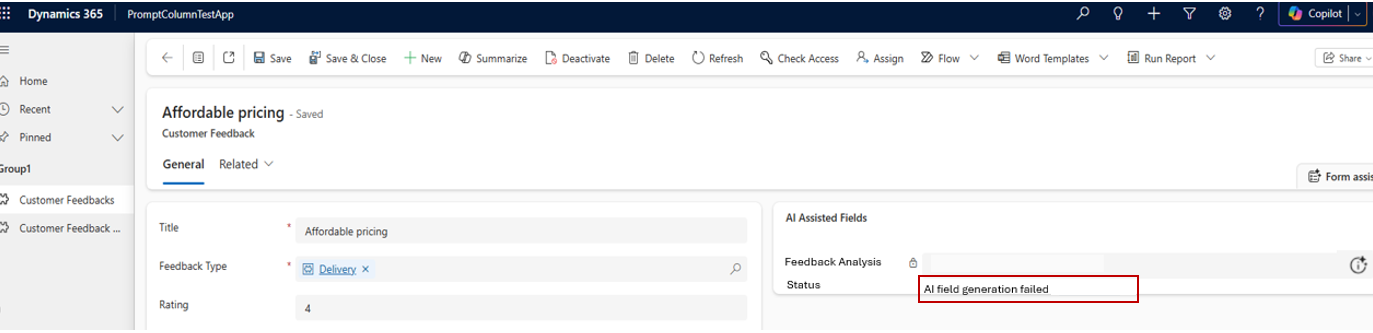
Prompt column execution failures can occur due to various conditions. The scenarios listed below represent common causes but don't cover all possible cases.
- The user doesn't have sufficient permissions on one or more input columns referenced in the prompt column definition.
- Lack of entitlements and credits in Copilot.
Check Details and Status columns in the table. More information: View the prompt column status
FAQs
Are backfills supported?
Prompt columns generate AI results when a new record is created, or when one or more columns specified in the prompt column definition are updated.
Existing records aren't processed by default. However, updating a column defined in the prompt column definition triggers AI analysis.
Are prompt columns audited?
Prompt columns aren't audited.
Can I perform on-demand AI analysis without updating a record?
Prompt columns are triggered automatically on record updates; however, on‑demand execution is not currently supported. As a result, updating the prompt definition does not recalculate existing prompt values until a subsequent update occurs on one or more columns defined in the prompt.
Why didn't the prompt column execute?
Common scenarios where the prompt does not execute, no error is surfaced, and execution is skipped
- AI Prompt feature is disabled. More information: Prerequisites
- Prompt column execution is disabled. More information: Disable AI generation for a prompt column
- Filters conditions aren't met. More information: Add filters to a prompt column
Check Details and Status columns in the table for more information.
Do I need to disable ‘Block unmanaged customizations’ to create or edit prompt columns?
To create or edit Prompt Columns, the‘Block unmanaged customizations’ environment setting must be disabled. If this setting is enabled, users might encounter the following error when attempting to create or modify a prompt column:
"This clustered environment doesn't allow unmanaged customizations on 'msdyn_AIConfiguration' component. This was a choice made by your admin, and certain actions won't be available or will be view only." For more information about this environment setting, go to Block unmanaged customizations
Related articles
For information about how the AI is used with this feature, go to FAQ for prompts and text generation capabilities