Note
Access to this page requires authorization. You can try signing in or changing directories.
Access to this page requires authorization. You can try changing directories.
This tutorial provides a step-by-step guide on how to automate mover tasks with Lifecycle workflows using the Microsoft Entra admin center. The use case for this tutorial is an existing user being added to a new department.
This Mover scenario runs a scheduled workflow and accomplishes the following tasks:
- Sends email to notify manager of user move
- Add users to groups
Prerequisites
Using this feature requires Microsoft Entra ID Governance or Microsoft Entra Suite licenses. To find the right license for your requirements, see Microsoft Entra ID Governance licensing fundamentals.
Before you begin
To complete this tutorial, you must satisfy the prerequisites listed in this section before starting the tutorial as they won't be included in the actual tutorial. Two accounts are required, one account for the user becoming a full-time employee(job profile change), and another account that acts as it's manager. The user account must have the following attributes set:
- An existing user you want to run the workflow on with a manager attribute set, and the manager account should have a mailbox to receive an email.
- A security group named Sales within your tenant.
Detailed breakdown of the relevant attributes:
| Attribute | Description | Set on |
|---|---|---|
| Used to notify manager of the new employees temporary access pass | Both | |
| manager | This attribute that is used by the lifecycle workflow | Employee |
| department | Used to provide the scope for the workflow | Employee |
The mover scenario can be broken down into the following steps:
- Prerequisite: Create two user accounts, one to represent an employee and one to represent a manager
- Prerequisite: Create a group to add the user to
- Prerequisite: Edit the attributes required for this scenario in the admin center
- Prerequisite: Edit the attributes for this scenario using Microsoft Graph Explorer
- Create the workflow
- Trigger the workflow
- Verify the workflow was successfully executed
Create a workflow using the mover template
Use the following steps to create a mover workflow for a user making a job change that is triggered by an attribute change.
Sign in to the Microsoft Entra admin center as at least a Lifecycle Workflows Administrator.
Browse to ID Governance > Lifecycle workflows > Create workflow.
From the templates, select Employee job profile change.

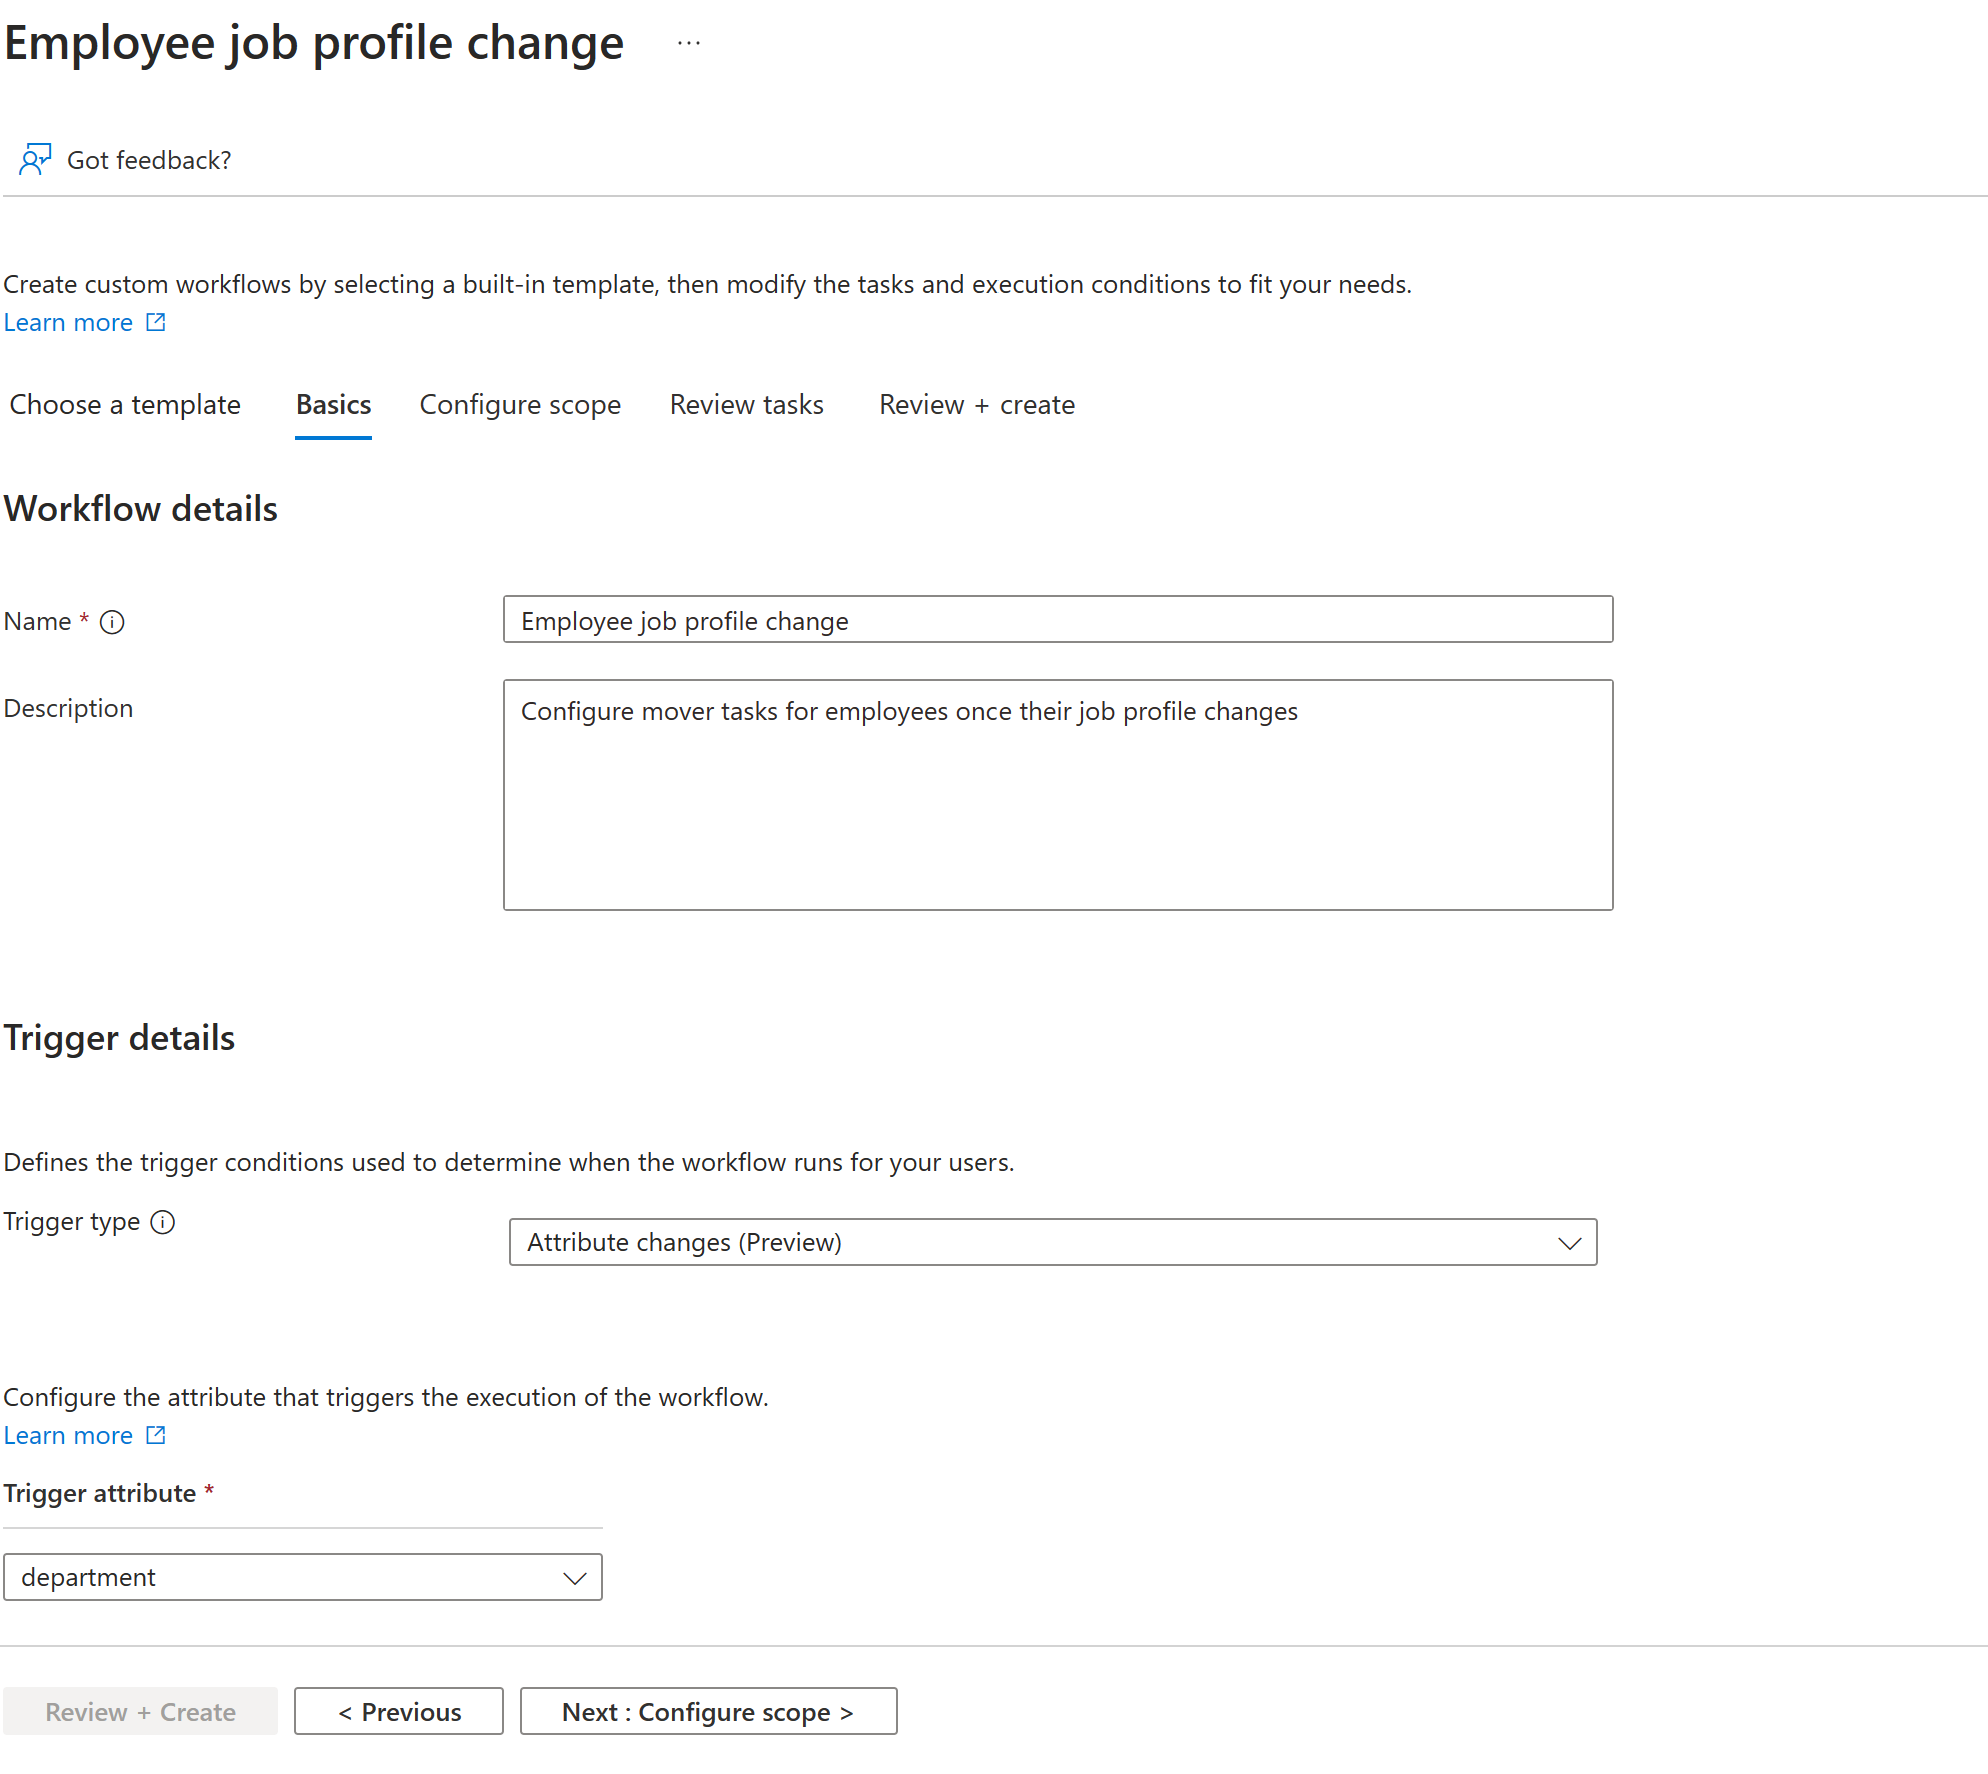
Next, you configure the basic information about the workflow. This information includes a name and description. You're also able to choose the Trigger type of the workflow, which in this case is the Attribute changes trigger. For Trigger attribute you're able to define what attribute being changed will trigger the workflow, which in this case is department. After the trigger is set, select Configure scope.
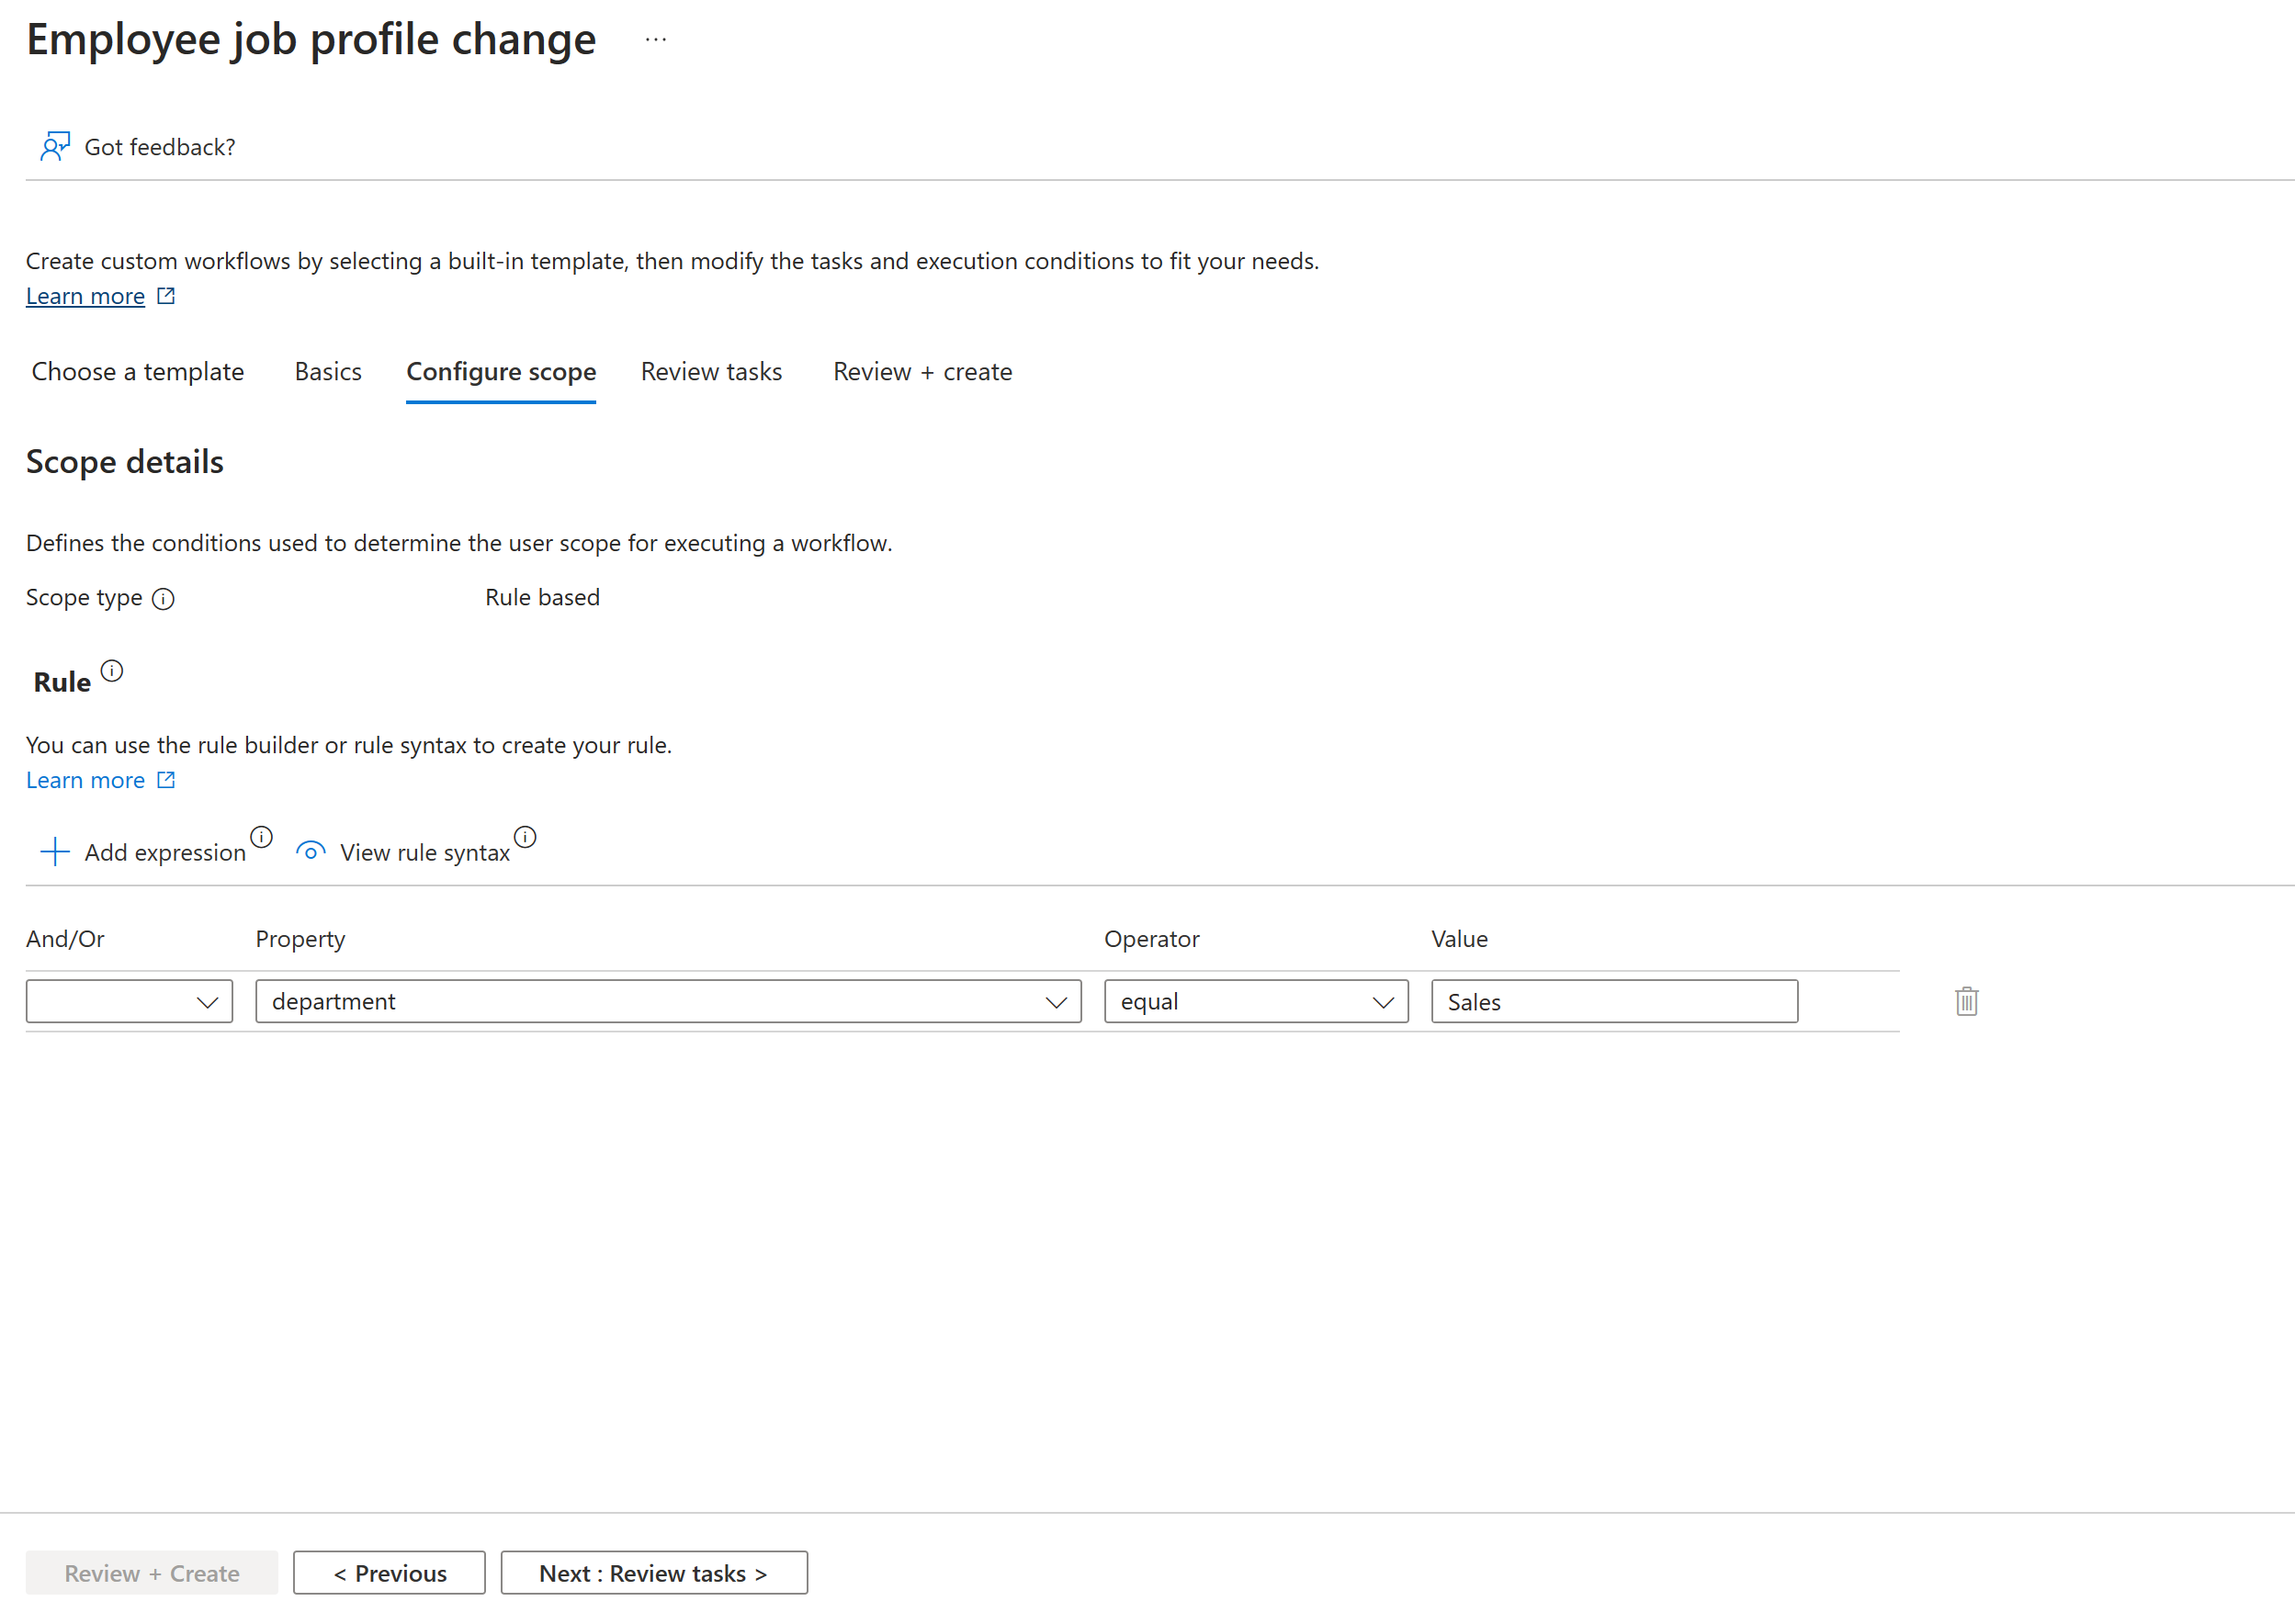
On the next screen you configure the scope. The scope determines which users this workflow runs against. In this case, it is on all users added to the Sales department. On the configure scope screen, under Rule add the following settings, and then select Review tasks. For a full list of supported user properties, see Supported user properties and query parameters.
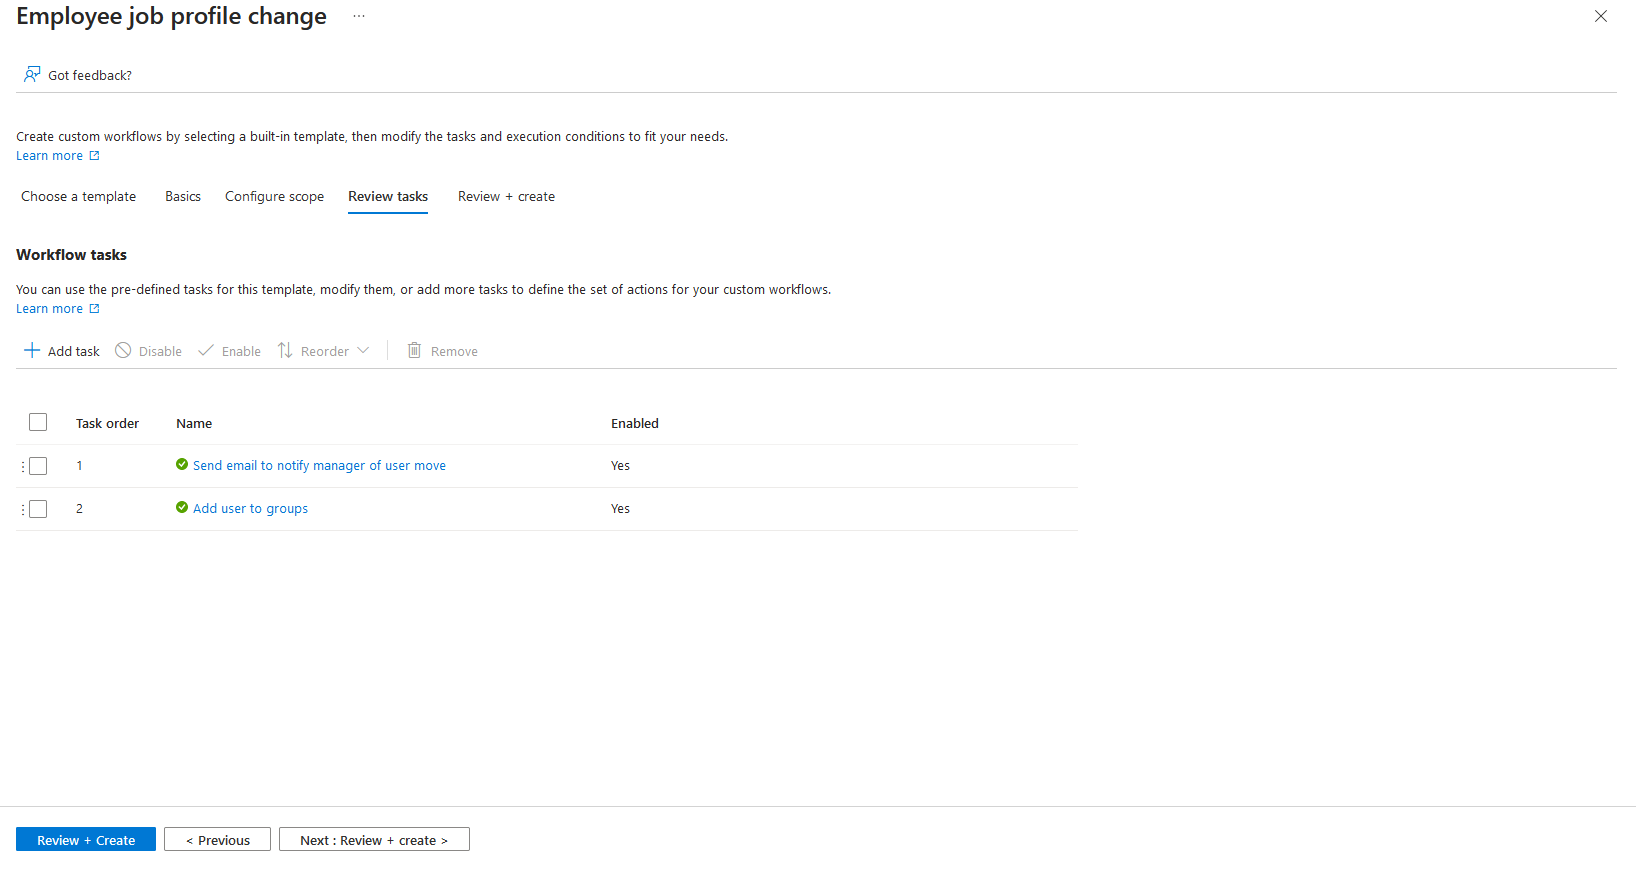
On the Review tasks screen, you're able to add, edit, or remove tasks. From the default tasks, remove Remove user from selected groups, Remove user from Selected Teams, and Request user access package assignment from the list and add Add user to groups from the add task screen. Edit the Add user to groups task so that the Sales group is selected. Once complete, select Review + create.
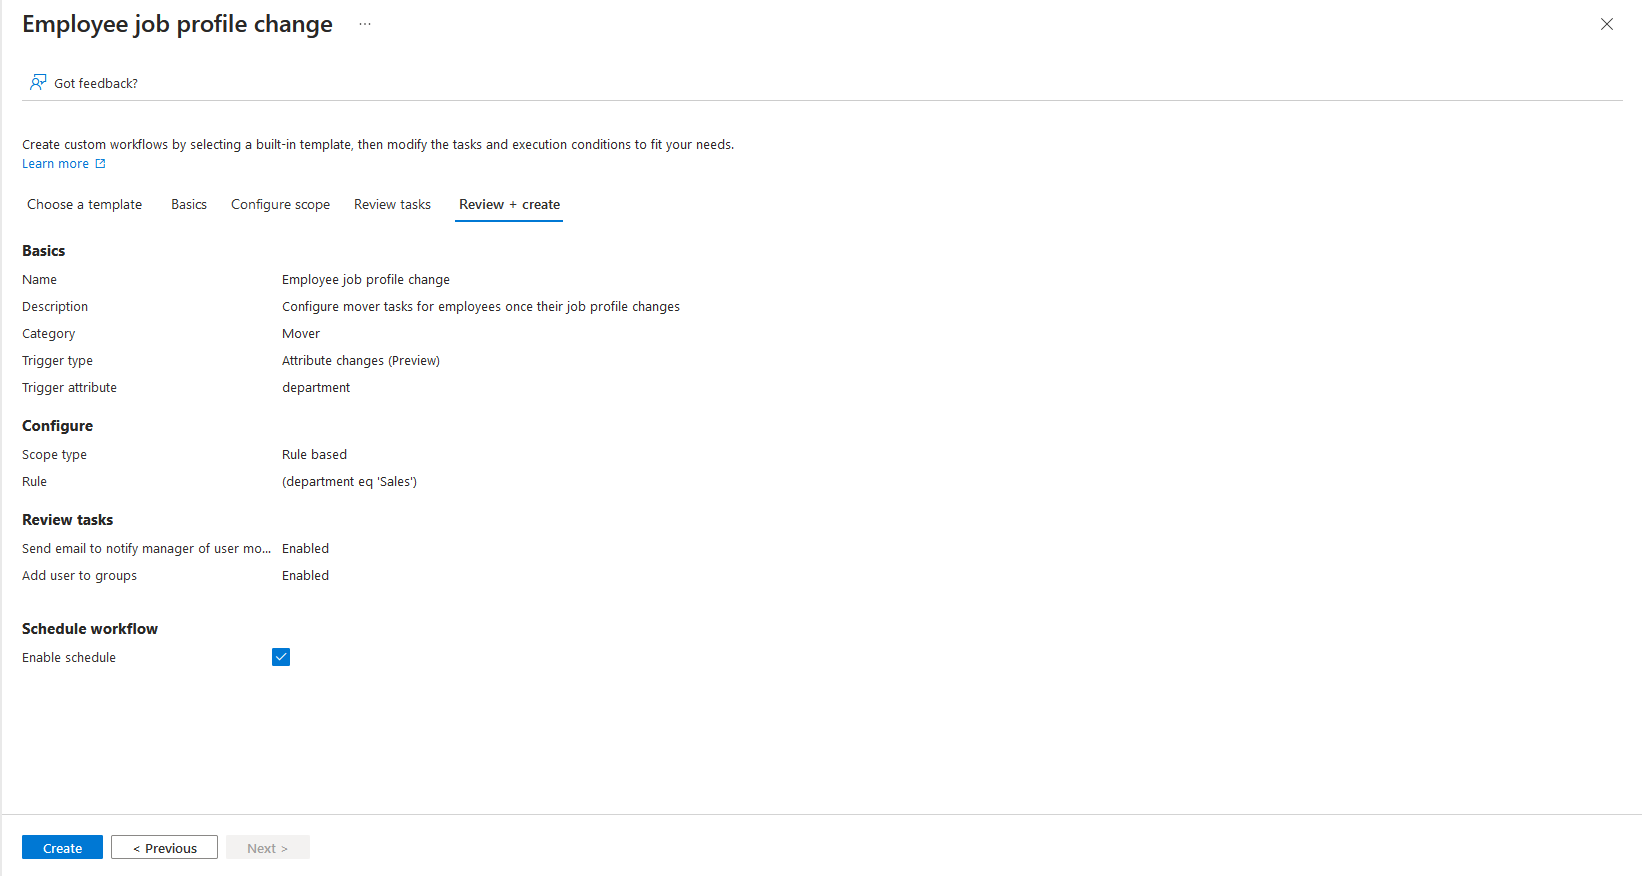
On the review screen, verify the information is correct, and choose to enable the schedule of the workflow. After reviewing, select Create.
Run the workflow
Now that the workflow is created, go to the user you want to run the workflow for, and add them to the Sales department. Within 30 minutes, the user appears in the scope of execution conditions for the workflow. Lifecycle workflows check every 3 hours for users in the associated execution condition, and execute the configured tasks for those users.
Check workflow status and tasks
After setting the attribute for the user, you can check the status of the workflow, who meets its scope, and its tasks. As a reminder, there are three different data pivots: users runs, and tasks that are currently available. You can learn more in the how-to guide Check the status of a workflow. In the course of this tutorial, we look at the status using the user focused reports.
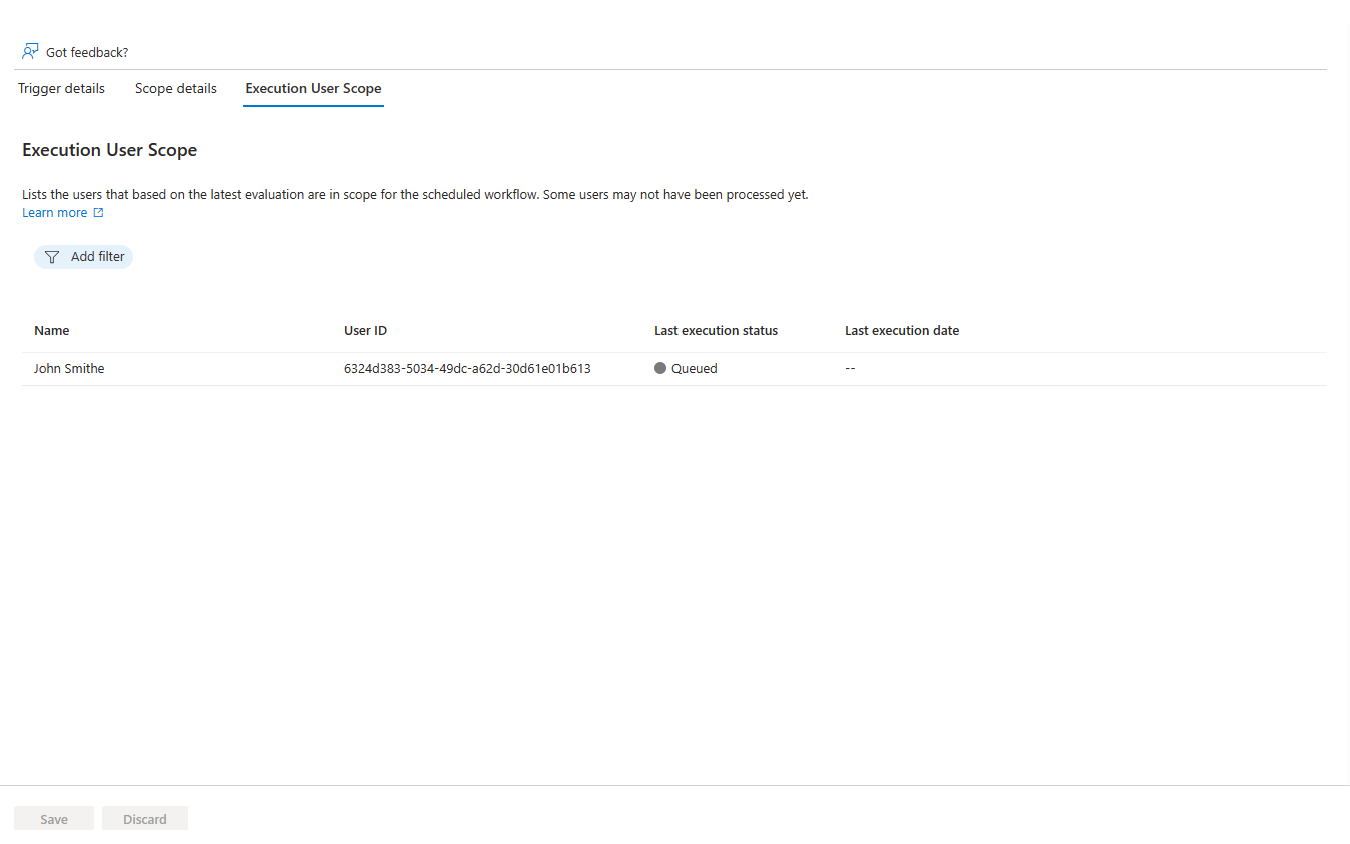
On the workflow you created, select Execution conditions and navigate to the Execution User Scope section.
On the Execution User Scope page you're presented with users who currently meet the execution user scope to have the workflow ran on them at it's next execution time.
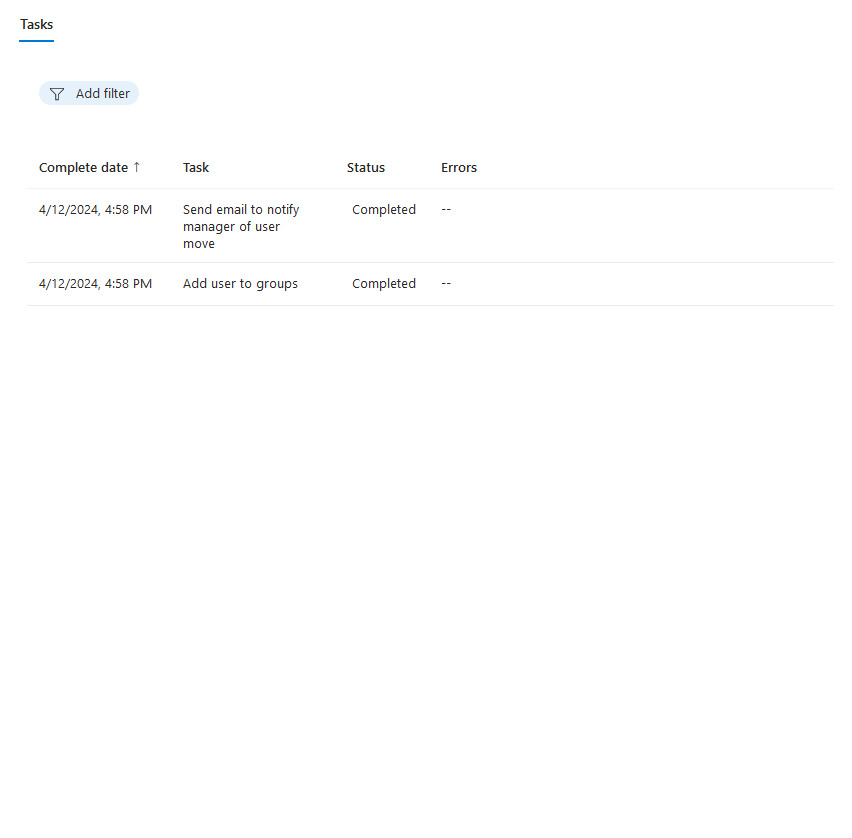
After the workflow runs for the user, select the Workflow history tab to view the user summary and associated workflow tasks and statuses.
On the Workflow history tab you're presented with the workflow history page.
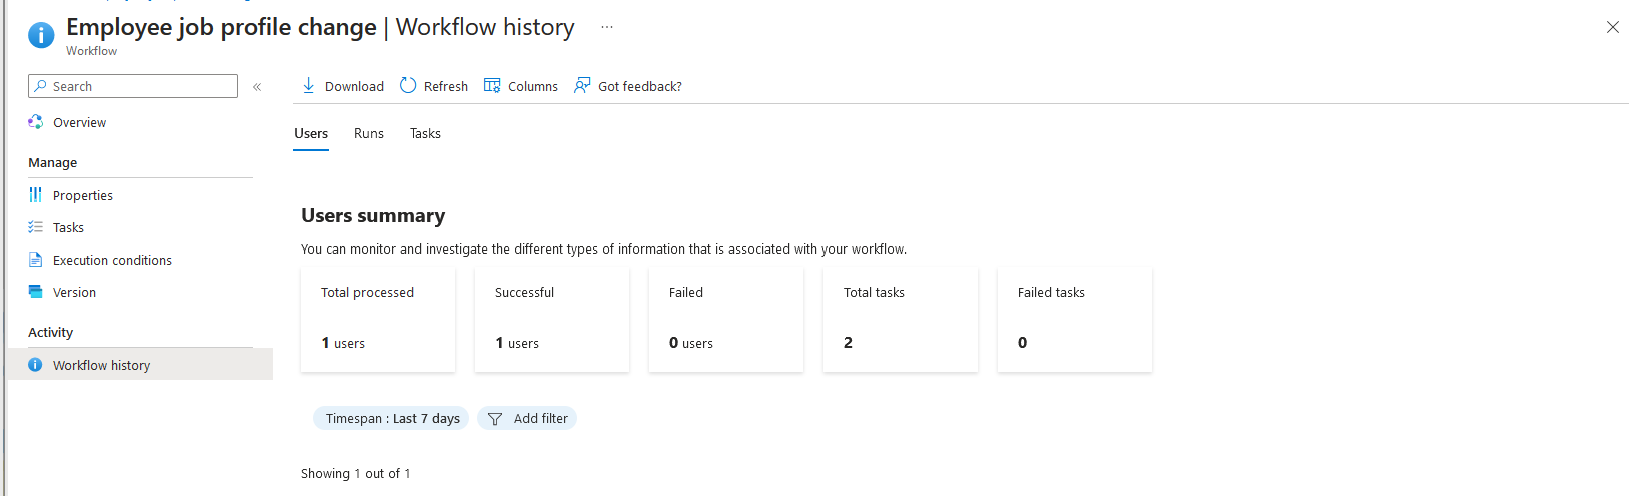
On this page, you're able to see a general summary, based on users, of total processed, successfully processed, failed to process, successful tasks, and failed tasks.
From the list of users processed you can also select a user, see which tasks ran for them, and if they ran successfully. If the task failed, you can see the reason.