Create a Windows Azure Network using PowerShell – 31 Days of Servers in the Cloud (Part 19 of 31)
 Back in Part 10 of our “31 Days of Servers in the Cloud” series, my good friend Bob Hunt wrote up an excellent step-by-step for creating a virtual network in Windows Azure.
His article and guide was so good, in fact, that I am going to attempt to do the very same task – to create and configure a network in Windows Azure; but instead of using the Windows Azure portal, we’re going to do it entirely using PowerShell and some special Windows Azure Management Cmdlets.
“Are you out of your mind?”
Perhaps. The goal, as it was in Bob’s article, is that in the end we have a network configured and ready to securely connect to (and extend our) existing on-premises network. From Bob’s introduction:
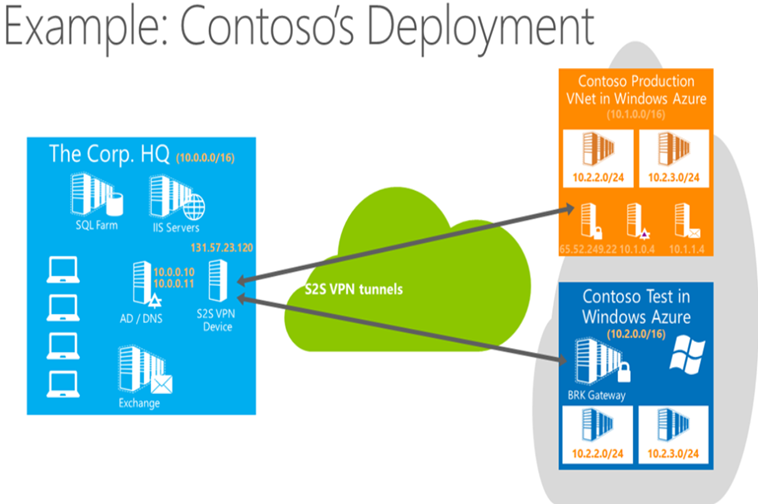
Before we get started, it’s important to set the stage of what we’re trying to accomplish. The Windows Azure Virtual Network you are about to create establishes a Site to Site (S2S) VPN between your company’s network and the Windows Azure Cloud Service using the steps outlined below, and requires that you have an already installed VPN device on your premise. The list of currently supported VPN devices is located here . Windows Azure currently supports up to 5 S2S VPN tunnels, allowing you to have multiple Virtual Networks hosted in Windows Azure, such as a Test Network and a Production Network.

Set up PowerShell
To make this happen, of course, we’re going to have to have done a couple of things in advance:
- Get a Windows Azure account (start with the free 90-day trial),
- Get the Windows Azure PowerShell tools, and
- Follow some simple instructions to set up the secured connection for Windows Azure management.
Once you have this done, open up your Windows Azure PowerShell window, and open up notepad.
“Huh? Notepad?”
Yes.
The .netcfg File
For configuring networking in Windows Azure using PowerShell, there are only two Set-AzureVNet commands:
There are Get-AzureVNet… commands that retrieve information (and objects), but for actually creating and configuring the networking, you’re going to be using an XML formatted document that has (by default) a .netcfg extension, and then using Set-AzureVNetConfig to upload that file. And then we use New-AzureVNetGateway and Set-AzureVNetGateway to configure and connect the gateway.
Again, in Bob’s article, we created a network. So as a starting point for creating the network using PowerShell, I’m going to use Get-AzureVNetConfig to retrieve his configuration into a .netcfg file.
Get-AzureVNetConfig -ExportToFile C:\Users\kevrem\Desktop\MyAzureNetworks.netcfg
And the resulting file looks something like this:
-----
<?xml version="1.0" encoding="utf-8"?>
<NetworkConfiguration xmlns:xsd="https://www.w3.org/2001/XMLSchema" xmlns:xsi="https://www.w3.org/2001/XMLSchema-instance" xmlns="https://schemas.microsoft.com/ServiceHosting/2011/07/NetworkConfiguration">
<VirtualNetworkConfiguration>
<Dns>
<DnsServers>
<DnsServer name="YourDNS" IPAddress="10.1.0.4" />
</DnsServers>
</Dns>
<LocalNetworkSites>
<LocalNetworkSite name="YourCorpHQ">
<AddressSpace>
<AddressPrefix>10.0.0.0/24</AddressPrefix>
</AddressSpace>
<VPNGatewayAddress>XXX.XXX.XXX.XXX</VPNGatewayAddress>
</LocalNetworkSite>
</LocalNetworkSites>
<VirtualNetworkSites>
<VirtualNetworkSite name="YourVirtualNetwork" AffinityGroup="KevRemWestUS">
<AddressSpace>
<AddressPrefix>10.4.0.0/16</AddressPrefix>
</AddressSpace>
<Subnets>
<Subnet name="FrontEndSubnet">
<AddressPrefix>10.4.2.0/24</AddressPrefix>
</Subnet>
<Subnet name="BackEndSubnet">
<AddressPrefix>10.4.3.0/24</AddressPrefix>
</Subnet>
<Subnet name="ADDNSSubnet">
<AddressPrefix>10.4.4.0/24</AddressPrefix>
</Subnet>
<Subnet name="GatewaySubnet">
<AddressPrefix>10.4.1.0/24</AddressPrefix>
</Subnet>
</Subnets>
<DnsServersRef>
<DnsServerRef name="YourDNS" />
</DnsServersRef>
<Gateway>
<ConnectionsToLocalNetwork>
<LocalNetworkSiteRef name="YourCorpHQ" />
</ConnectionsToLocalNetwork>
</Gateway>
</VirtualNetworkSite>
</VirtualNetworkSites>
</VirtualNetworkConfiguration>
</NetworkConfiguration>
-----
Go ahead and copy/paste the above text into Notepad, and save it as a file named MyAzureNetworks.netcfg.
Now please note the highlighted portions. Those are unique for your account. You’ll need to put your own public VPN gateway address, and use your own pre-created affinity group.
Also note the bold text. These are the items that you customize. Put your own names and desired addresses in there, such as your DNS Server name and address. Remove or add <Subnet> </Subnet> sections, or <Subnets>.
But once you have that information, you should be able to use this file with the Set-AzureVNetConfig PowerShell cmdlet to create the same network and subnets. If you’ve saved the file (let’s say to the root of your C:\ drive), and you have the Windows Azure PowerShell window open and connected..
“How do I know it’s connected?”
Try this PowerShell command:
This should return some details on your connected subscription.
Anyway, once that’s verified, and as a first test of creating a network using PowerShell, run this:
Set-AzureVNetConfig -ConfigurationPath C:\MyAzureNetworks.netcfg
This should return successful.
Now open up the Windows Azure Portal, login, and click on the Networks tab. Do you see something like this?:
“Yes, I do!”
Good job! Click on the Local Networks, DNS Servers, and Affinity Groups tabs. You should see the values assigned and items created that match what you configured.
Back in Virtual Networks… Clicking on the network name and opening up the network details should look something like this:
Do you see the problem? We haven’t yet created and enabled the gateway. We can do that with PowerShell, too.
Create the Gateway
To do this, we’ll use the New-AzureVNetGateway command, and specify the name we used for our Azure NetworkThe command for our example looks like this:
New-AzureVNetGateway –VNetName “YourVirtualNetwork”
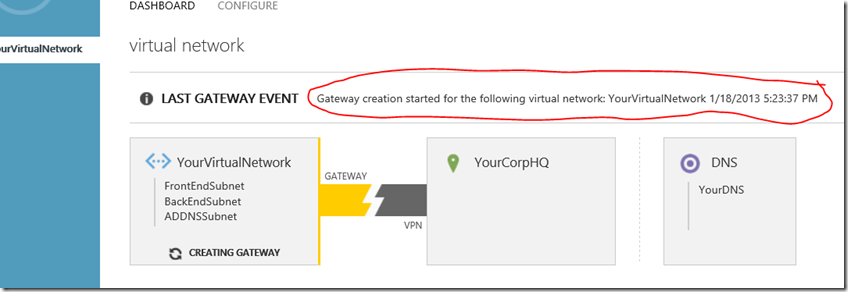
Once you run that, if you refresh the Windows Azure Portal screen, you’ll see this:
The creation of the gateway may take as long as 15 minutes. You can also check the status of this creation by using the Get-AzureVNetGateway cmdlet.
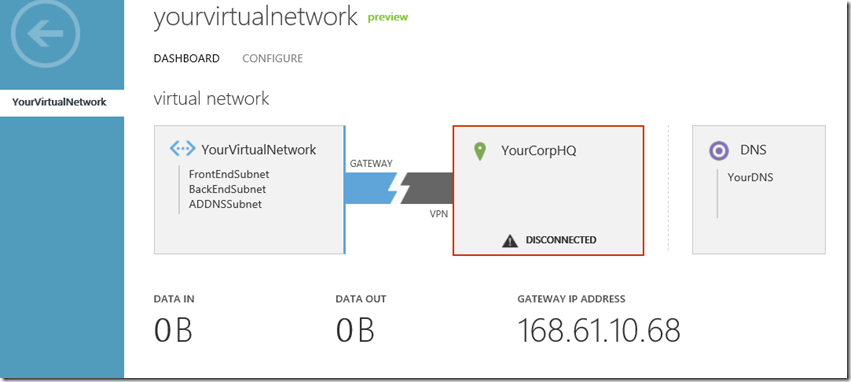
In fact, you can see from my result in PowerShell that my gateway creation has completed, and my gateway address assigned. Now the Windows Azure Portal looks like this:
But we still have one more thing to accomplish. We haven’t yet connected our Azure network to our corporate network.
Connect the Gateway
This is also very simple: Set-AzureVNetGateway is the cmdlet we’ll use.
Set-AzureVNetGateway -Connect –LocalNetworkSiteName “YourCorpHQ” –VNetName “YourVirtualNetwork”
Which shows up on the Windows Azure Portal like this:
Of course, it’s not going to succeed in connecting until we actually have something to connect to on the corporate side. As you’ll recall, there are specific VPN endpoint devices that are supported on the corporate side, and to configure them you can use the Windows Azure Portal to download the Configuration as well as the Shared Key.
“But.. can you do that with PowerShell, too?”
Absolutely. Well, two out of three, anyway…
Get the Gateway IP Address and Shared Key
There are three things you’ll need to configure the VPN device on your corporate side:
- The Gateway IP Address
- The Shared Key, and
- A Device Configuration Script
You can use the Get-AzureVNetGateway cmdlet to find the Gateway IP Address:
Get-AzureVNetGateway -VNetName YourVirtualNetwork
To get the shared key, use the Get-AzureVNetGatewayKey cmdlet:
Get-AzureVNetGatewayKey -LocalNetworkSiteName YourCorpHQ -VNetName YourVirtualNetwork
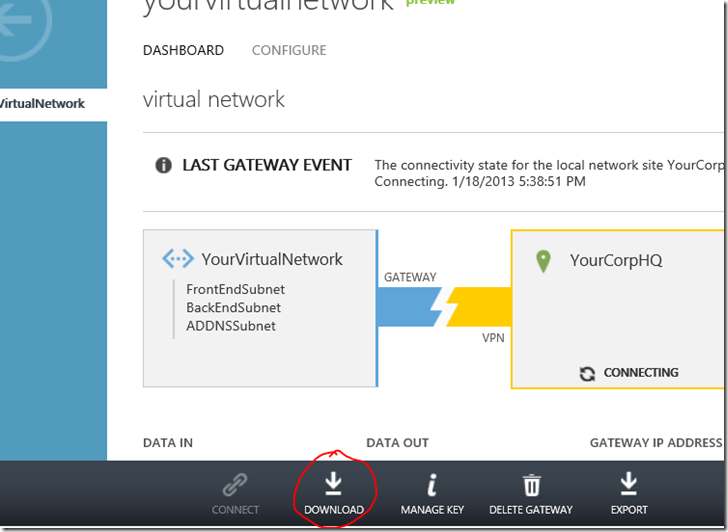
For the getting a script that will automatically configure your device, you’re still want to use the Windows Azure Portal. Down at the bottom of the page while looking at your network dashboard, you see the “Download” button:
Click that, and then walk through the wizard to select your device type and version information.
The result will be a script that can be used by your VPN / Network administrator to configure the device. You can get the VPN configuration script from the Management Portal or from the About VPN Devices for Virtual Network section of the MSDN library. For more information, see Establish a Site-to-Site VPN Connection and your VPN device documentation.
The remainder of this article is “borrowed” directly from the end of Bob Hunt’s excellent article:
The procedure assumes the following:
- The VPN device has been configured at your company.
To configure the VPN device:
Modify the VPN configuration script. You will configure the following:
a. Security policies
b. Incoming tunnel
c. Outgoing tunnel
Run the modified VPN configuration script to configure your VPN device.
Test your connection by running one of the following commands:
Cisco ASA
Cisco ISR/ASR
Juniper SSG/ISG
Juniper SRX/J
Check main mode SAs
show crypto isakmp sa
show crypto isakmp sa
get ike cookie
show security ike security-association Check quick mode SAs
show crypto ipsec sa
show crypto ipsec sa
get sa
show security ipsec security-association
Once the Virtual Network tests out, you’re ready to go. Enjoy!
Thanks, Bob. I think we will!
---
Comments
- Anonymous
June 27, 2014
I got a new laptop from MS, a thin and light model, great machine my thinking was can I function as a


