SQL Server Disk Allocation Size
SQL Server is a major component of any SharePoint installation simply because it stores all the configuration, content and really anything SharePoint needs to interact with users. Given this, sufficient thought should be given to:
- Disk Partition Alignment so the SQL Server I/O subsystem can perform at it's best.
- SQL Server Storage and Capacity Planning for SharePoint so that the SQL Server databases are placed on the correct drives etc for best performance.
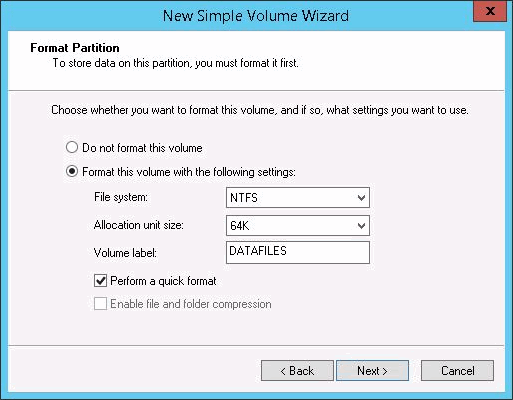
When focusing on the Disk Partitions, it's important to format them properly to maximize the I/O of the server. When you initially format the disks to use NTFS, the default allocation size is 4K bytes. DO NOT use this allocation size. Change it to use 64K for the best performance.
If the disks have already been formatted here are a couple easy ways to check what the allocation size is:
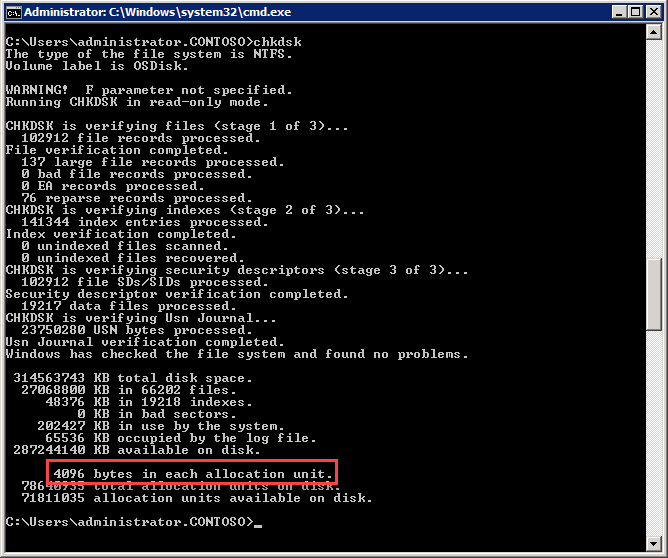
- From a command prompt run "chkdsk" (Check Disk). Locate the "bytes in each allocation unit" number and this is the allocation size for the disk specified.
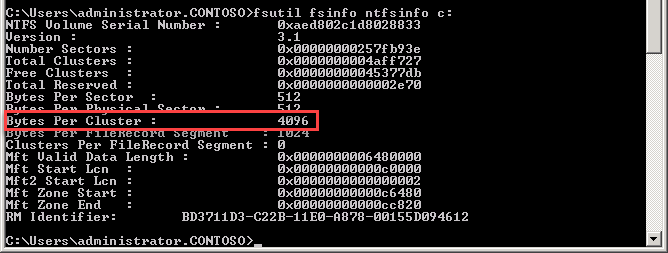
2. Again from the command prompt you can run "fsutil fsinfo ntfsinfo <drive>:". Locate the "Bytes Per Cluster" value and that is the allocation size.
If you find that they disk allocation is not at the recommended 64K allocation size, you do need to re-format the disk using the 64K allocation size. This obviously means that any data on that disk will be lost...or will it! Simply stop all the SQL Server Services, move the data to a temporary storage location, re-format the disk and then move the data back to the drive. Once you start the SQL Server Services then SQL Server will recognize the drives and all is well.
Comments
- Anonymous
March 08, 2018
Good article.


