Azure AD Application Roles: Essentials
The Basics
One can do a simple guess work here and understand that the roles required in the application maybe called as application roles, and this is right! When we speak of roles, roles are always associated with users and when we say users, then these are the people using the software or the application. Roles could be anything which are specific to the application e.g. Administrator, User, Approver, Reviewer etc.
Let us take a moment and go back in the time when ASP.NET forms development was at its peak. People who have worked with it might remember that we used to have something called as ASP.NET membership provider database which used to store the user's credentials and that's how we used to implement the forms based authentication right? Now extend that database and we used to have multiple roles of the application users provisioned in the same database or we had an option of creating and storing user roles in separate database table where roles and users were mapped with their Id keys.
The concept remains the same, however with the evolution of distributed and disconnected systems identity and user roles have become the core of the entire ecosystem. In the world of Microsoft Azure, the Azure Active Directory has become the one of the most mature identity management solution and has lots to offer apart from identity management of users e.g. domain services but that's something for later. For this article let's keep ourselves focused on understanding application roles.
Let's take out the old buddy i.e. ASP.NET membership provider out of the picture for now and focus on the web application which uses Azure Active directory for user authentication. So essentially, we are speaking of the user credentials store and now try asking yourself a question - hey like we used to have various roles to application users in classic forms authentication, so can I have the same here in this user credentials store too (Azure AD)? The answer is yes and Azure AD caters to this requirement by providing you the application roles.
One of the crucial point to note here in Azure AD application roles is that, we are not only restricted to assign these roles to application users from AD but we can also assign these roles to Azure AD groups however for AD group assignments, it needs to have Azure AD premium.
What about Multi-tenancy?
Well, almost nothing needs to be changed when we decide to open our App for multiple Azure AD tenants. (Multi-tenant application is the just another fancy name for the simple concept of letting users from multiple Azure Active directories to log-in to the application.)
Simple fact is, as the name suggests these roles are associated with the Azure AD app so in multi-tenant scenario, all the roles which are created and enabled inside the home tenant (the root tenant where Azure AD app is provisioned) are available for the users from different Azure AD tenants and hence customer tenant administrators would easily be able to assign their tenant users or groups to the application roles.
Let's try and visualize it for simplicity

Well, so far we have tried explaining things to the simplest and if you are still following this article then let us go and see how application role behaves in real world scenarios.
To understand it, let us go ahead and see how can we create these application roles inside Azure AD application. For beginners, this probably would start from the point of locating application settings in Azure AD.
This article assumes that you know the procedure to create the Azure AD application inside your Azure AD tenant so we will not go through the detail procedure to do it but in case you are not aware of it then before proceeding, it is highly recommended that you look at this comprehensive documentation of doing it step by step - Azure AD application registration
Seeing it all in Action
Consider that we have already created an Azure AD application. Let's navigate to it using new Azure portal, once there click on Manifest option as shown in image below
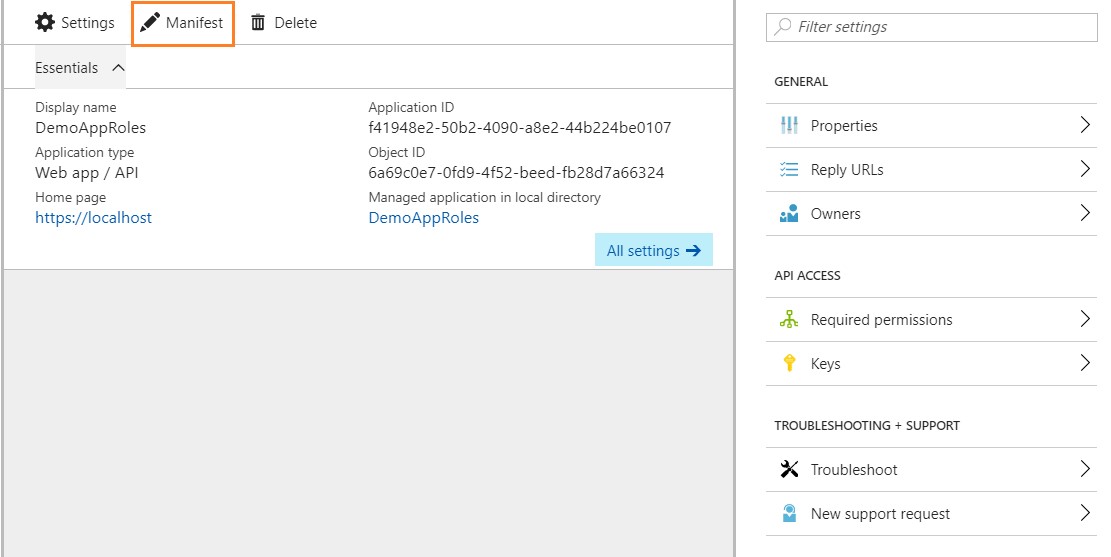
This essentially opens an editor where you will be shown a Json file, this file is called as Manifest of your application and contains almost all the settings which you see on the UI to configure your AD application e.g. reply urls or app permissions.
For creating application roles, we are interested in a node which you will find right below app Id node and it is empty array by default.
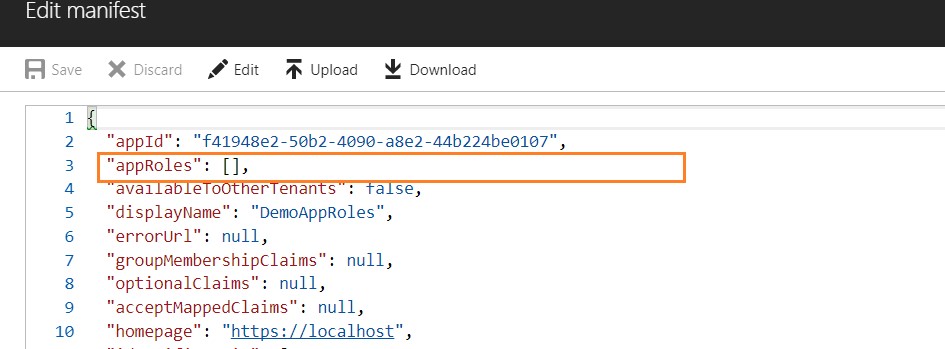
Let's initialize this empty array with values and these values will be our different application roles. The application role object consists of number of properties e.g. Role Id, name, description, display name etc.
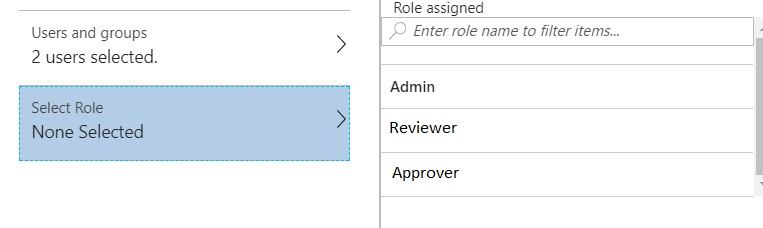
Assume that our application needs to have three different user roles i.e. Admin, Reviewer and Approver. So, we are going to create three appRole nodes and add it to app Roles array which his currently empty.
After edit, manifest should look like this
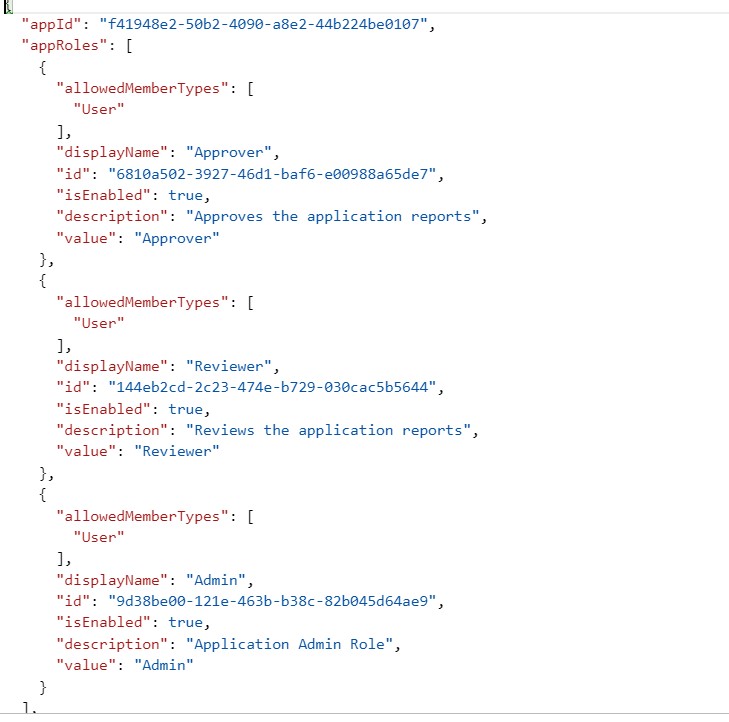
Few important points to note about these properties,
- allowedMemberTypes could be User or Application.
- Value field appears in the role claim returned by the identity provider.
Now that we have created the app roles for our application, let's learn about how we can assign these roles to users.
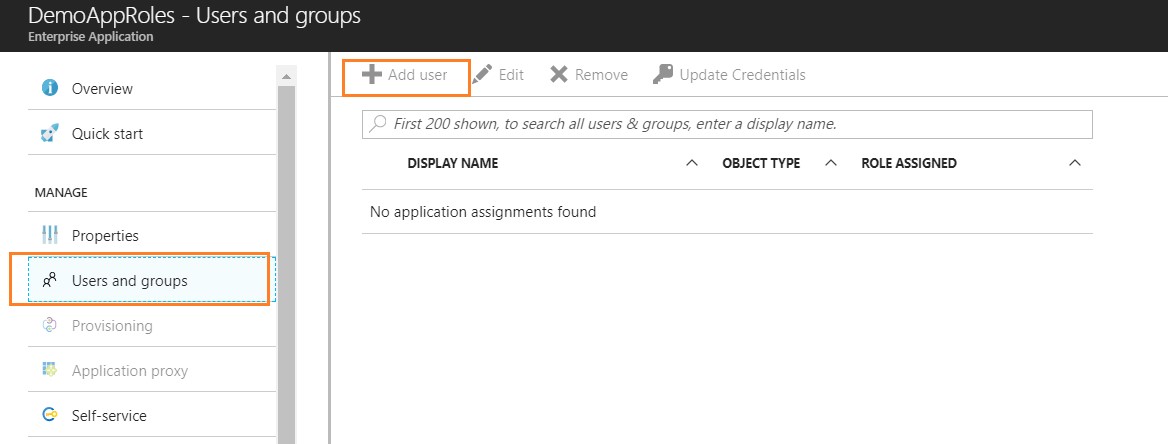
Let's go back to Azure portal and navigate to the enterprise applications section. Select manage applications and list of all applications registered with Azure AD will be shown. Search for our application and select it.
Once the application is selected, click on Users and groups and select Add User (Since we do not have Azure AD premium subscription, we would have to search and select the user while adding it, but as mentioned above, the tenant administrators would have the additional flexibility to add Azure AD groups and associate roles to groups)
Select the user and proceed with role selection
And that's it, you have successfully set up the application roles and ready to use them in your application.
Integration with web applications
Now the next and important part, i.e. how do I consume these application roles inside my application?
Let's take a look at it using example - suppose we are developing a web application say using ASP.NET MVC which needs to have above roles integrated in it. Since the application is going to leverage Azure AD as it's identity provider using OAuth, so OWIN comes to the rescue and can make things quite easy for developers.
If you are not familiar with OWIN then it is highly recommended to go through this article before moving ahead, however in a nutshell, OWIN is a component which sits in front of your web application and takes care of all the authentication / redirection magic. The best part to it is, the component is highly configurable so that it can cater as a solution for multiple use cases.
Let's take a look at the piece which tell Azure AD that hey look, give me application role details in claims for the user who is logging in. This is just a one liner configuration which we will be doing in ConfigureAuth method in Startup.Auth class file. Note that, value field mentioned while creating the application roles will be returned in the claims.
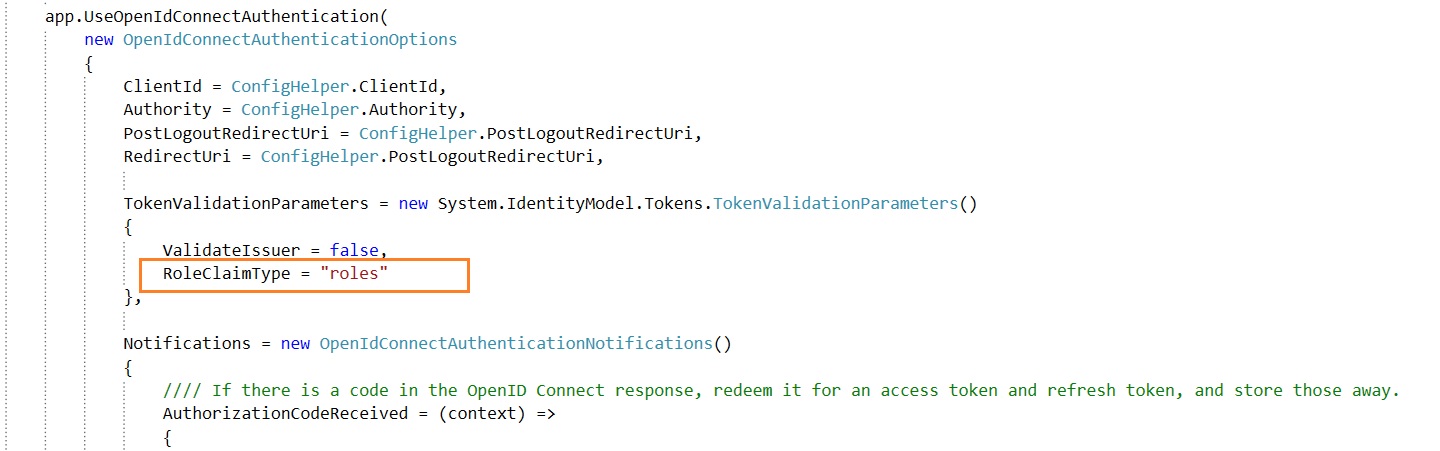
Once it is configured, it is almost all done. We now will be able to get all the role names assigned to the user as a claim.
There could be multiple ways using which now you will be able to consume the roles in your application, however in ASP.NET MVC the typical ways to do it using the Authorize attribute which can be applied to classes or action method and User class. Let's take a quick look how it is done
[Authorize(Roles = "Admin")]
public class  AdminController : Controller
{
      public ActionResult Index()
      {
          return View();
      }
}
In the example above, the Admin controller and all the action methods inside it would be accessible to the users who are in the Admin role. Roles parameter can accept the comma separated string of role names.
Another option is to make use of User class as below, say in a scenario where we want to render the content conditionally on the page
@if (User.IsInRole("Admin"))
{
     @Html.ActionLink("Administrator", "Index",  "Admin")
}
Conclusion
That's a wrap folks! The Azure AD application roles are truly powerful and opens up numerous opportunities for us to leverage them in our applications and can really come handy when it comes to the user and their role management.
References
Those who found this article interesting, feel free to read further details on links below
Roles using Azure AD App Roles
Understanding the Azure Active Directory application manifest
Roles based access control in cloud applications using Azure AD