Configure Customer Managed Keys for data encryption in Azure AI Health Bot
Azure AI Health Bot automatically encrypts all your data at rest, helping to meet your organizational security and compliance goals.
By default, Azure AI Health Bot uses Microsoft-managed encryption keys. For other control over encryption keys, you can supplement default encryption with an other encryption layer using your own keys, which is called customer-managed keys (CMK).
Note
Your Azure AI Health Bot resource must have been created after November 11, 2021 to use Customer Managed Keys.
Enable Customer Managed Keys
Follow the following steps to enable CMK:
1 - Create an Identity for Azure AI Health Bot
Sign in to Azure portal and create a new Azure AI Health Bot, or open an existing Azure AI Health Bot resource (provided it was created after November 11, 2021).
Navigate to the Identity blade, and enable a System-assigned identity. Once the system assigned managed identity is enabled, the Azure AI Health Bot resource is registered with Microsoft Entra ID.
2 - Enable soft-delete and purge protection in Key Vault
As a first step, make sure soft-delete and purge protection are enabled on the key vault. Due to the nature of encryption with customer-managed keys, no one can retrieve your data if your Azure Key vault key is deleted.
To prevent data loss caused by accidental Key Vault key deletions, soft-delete and purge protection must be enabled on the key vault. Soft-delete is enabled by default, so you'll only encounter issues if you purposely disabled it. Purge protection isn't enabled by default, but it's required for customer-managed key encryption in Azure AI Health Bot.
Sign in to Azure portal and open your key vault overview page.
On the Overview page under Essentials, enable Soft-delete and Purge protection.
3 - Create a new key in Key Vault
Skip key generation if you already have a key in Azure Key Vault that you want to use, but collect the Key Name. You'll need this information when enabling CMK.
To learn how to add a key with the Azure portal, see Quickstart: Set and retrieve a key from Azure Key Vault using the Azure portal.
Four - Enable CMK in Azure AI Health Bot
Next, configure your Azure AI Health Bot to use customer-managed keys with Azure Key Vault, and specify the key to use.
Navigate to the Encryption blade in your Azure AI Health Bot resource. By default, key management is set to Microsoft Managed Keys, as shown in the following image.
Select the Customer Managed Keys option.
Choose the Select from Key Vault option.
Select a key vault and key.
Select the key vault containing the key you want to use.
Select the key from the key vault.
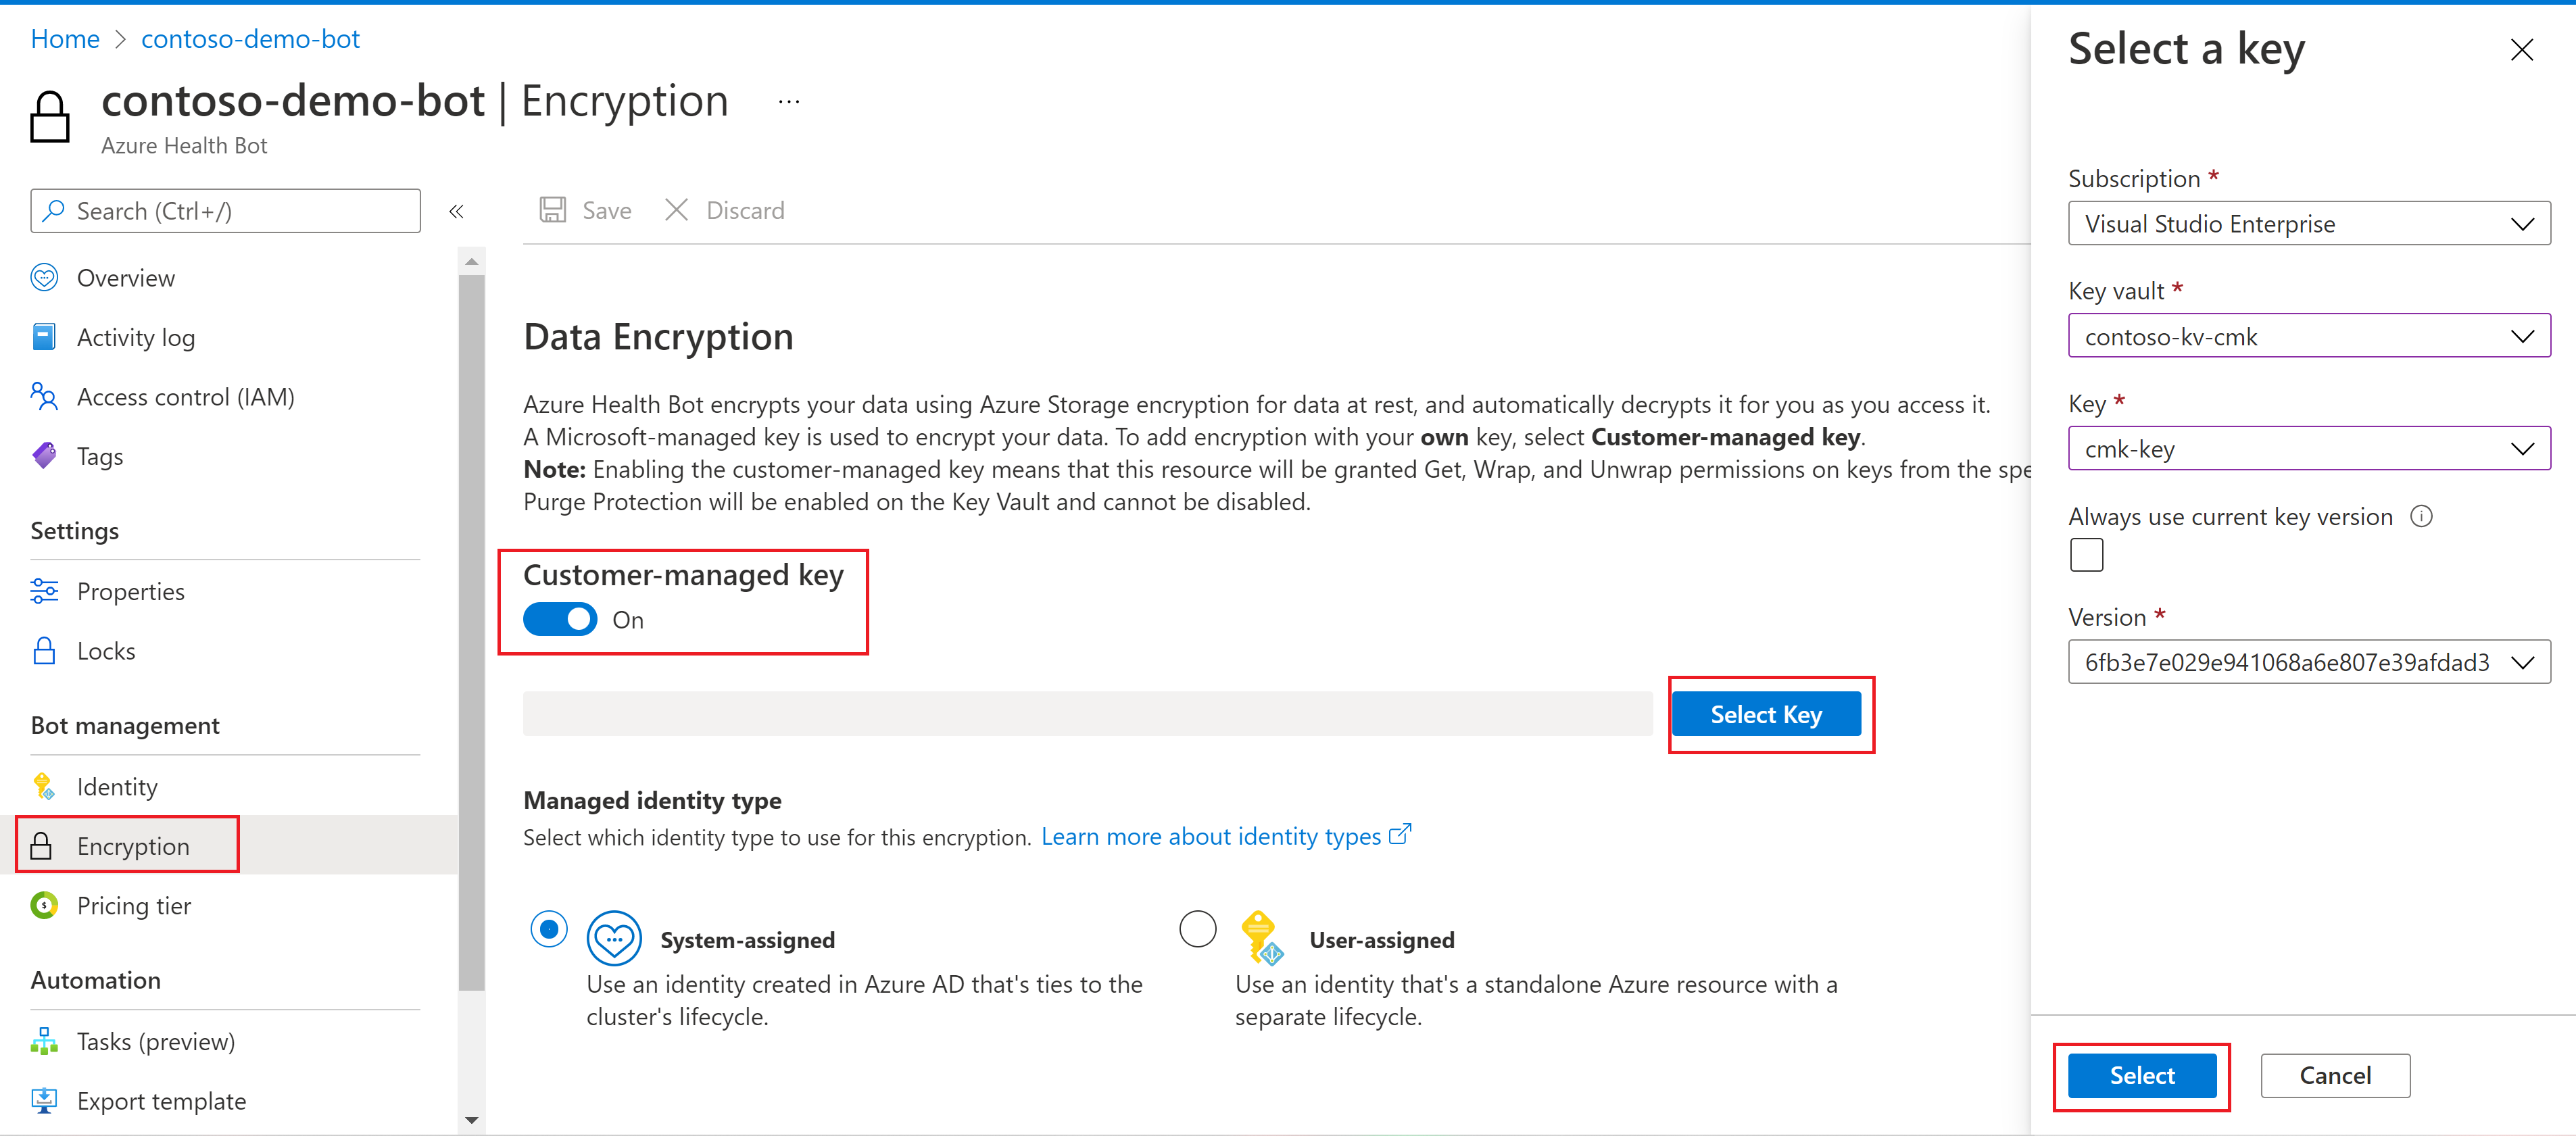
Save your changes.
Caution
Once CMK has been enabled, deleting the Azure AI Health Bot resource will automatically revoke access to Key Vault and customer data will become inaccessible, as it could no longer be decrypted. This action cannot be undone. If you need to create a backup of your Azure AI Health Bot, or export any data, make sure to do so before deleting your Azure AI Health Bot resource.
Next steps
If you're unfamiliar with Azure security architecture, review the Azure Security documentation, and Data encryption-at-rest.