Develop a web extension
TFS 2017
Use extensions to enhance Azure DevOps with new web experiences, dashboard widgets, build tasks, and more. You can develop extensions using standard technologies like HTML, JavaScript, and CSS. They're packaged and published to the Visual Studio Marketplace, and can then be installed into an organization.
Tip
Check out our newest documentation on extension development using the Azure DevOps Extension SDK.
This tutorial guides you through creating your first web extension, which includes the following tasks.
- Install the required tools
- Read a local directory for your extension
- Create an extension manifest file and hub contribution
- Package and publish your extension to the Marketplace
- Test your extension in an organization
Prerequisites
You must have the following permission and installations.
- You're an organization Owner. If you don't have an organization, you can create an organization for free.
- Install Node.js.
- Install the extension packaging tool (TFX) by running
npm install -g tfx-clifrom a command prompt.
Create a directory and manifest
An extension is composed of a set of files that includes a required manifest file. You package it into a .vsix file and publish to the Visual Studio Marketplace.
Create a directory to hold the files needed for your extension:
mkdir my-first-extensionFrom this directory, initialize a new NPM package manifest:
npm init -yThis file describes the libraries required by your extension.
Install the Microsoft VSS Web Extension SDK package and save it to your NPM package manifest:
npm install vss-web-extension-sdk --saveThis SDK includes a JavaScript library that provides APIs required for communicating with the page your extension is embedded in.
Create an extension manifest file named
vss-extension.jsonat the root of your extension directory with the following content:{ "manifestVersion": 1, "id": "my-first-extension", "publisher": "", "version": "1.0.0", "name": "My First Extension", "description": "A sample Visual Studio Services extension", "public": false, "categories": ["Azure Repos"], "targets": [ { "id": "Microsoft.VisualStudio.Services" } ], "contributions": [ { "id": "my-hub", "type": "ms.vss-web.hub", "targets": [ "ms.vss-code-web.code-hub-group" ], "properties": { "name": "My Hub", "uri": "my-hub.html" } } ], "files": [ { "path": "my-hub.html", "addressable": true }, { "path": "node_modules/vss-web-extension-sdk/lib", "addressable": true, "packagePath": "lib" } ] }Note
The
publicproperty controls whether the extension is visible to everyone on the Visual Studio Marketplace. Keep your extensions private during development.Create a file named
my-hub.htmlat the root of your extension directory with the following content, which is for the view (also known as a hub) contributed into the web experience.<!DOCTYPE html> <html xmlns="http://www.w3.org/1999/xhtml"> <head> <script src="lib/VSS.SDK.min.js"></script> <style> body { background-color: rgb(0, 67, 117); color: white; margin: 10px; font-family: "Segoe UI VSS (Regular)","-apple-system",BlinkMacSystemFont,"Segoe UI",sans-serif; } </style> <script type="text/javascript"> VSS.init(); VSS.ready(function() { document.getElementById("name").innerText = VSS.getWebContext().user.name; }); </script> </head> <body> <h1>Hello, <span id="name"></span></h1> </body> </html>Your extension directory should look like the following example.
|-- my-hub.html
|-- node_modules
    |-- @types
    |-- vss-web-extension-sdk
|-- package.json
|-- vss-extension.json
You're now ready to package, publish, and test your extension.
Package and publish your extension
Create a publisher
All extensions, including extensions from Microsoft, are under a publisher. Anyone can create a publisher and publish extensions under it. You can also give other people access to your publisher if a team is developing the extension.
Sign in to the Visual Studio Marketplace management portal.
If you don't already have a publisher, you'll be prompted to create one.
In the Create Publisher form, enter your name in the publisher name field. The ID field should get set automatically based on your name:
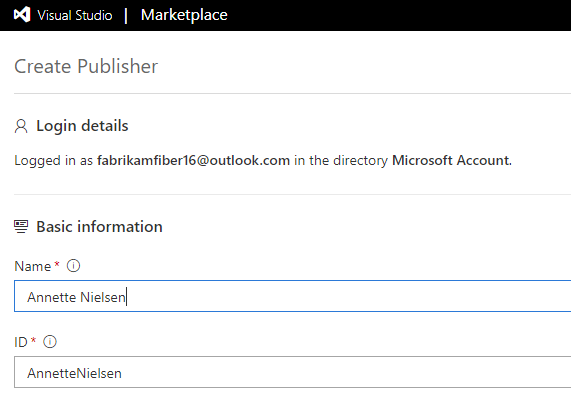
Note
Make note of the ID. You need to set it in the manifest file of your extension.
You're now ready to package your extension and publish (upload) it to the Marketplace. Keep this browser window open as you'll return here after you package your extension.
Package your extension
Open your extension manifest file (
vss-extension.json) and set the value of thepublisherfield to the ID of your publisher. For example:{ ... "id": "my-first-extension", "publisher": "AnnetteNielsen", ... }VSS Web Extensions SDK requires TFX. If you haven't already installed it, open a command prompt and run the following command.
npm install -g tfx-cliFrom a command prompt, run the TFX tool's packaging command from your extension directory.
npx tfx-cli extension createWhen it's completed, you see a message indicating your extension has been successfully packaged:
=== Completed operation: create extension ===
- VSIX: C:\my-first-extension\AnnetteNielsen.my-first-extension-1.0.0.vsix
- Extension ID: my-first-extension
- Extension Version: 1.0.0
- Publisher: AnnetteNielsen
Upload your extension
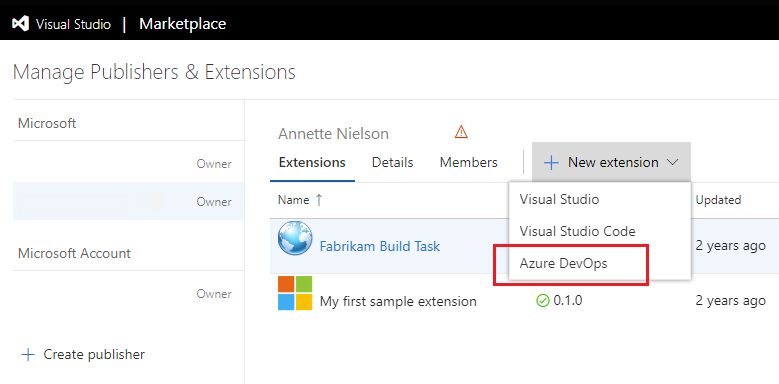
From the management portal, select your publisher from the drop-down at the top of the page.
Select New extension, and then select Azure DevOps.
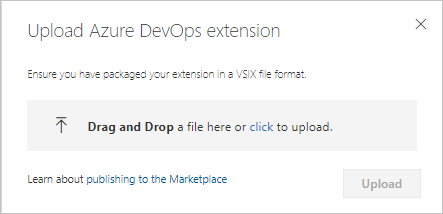
Drag and drop your file or select it to find your VSIX file, which you created in the previous packaging step, and then choose Upload.
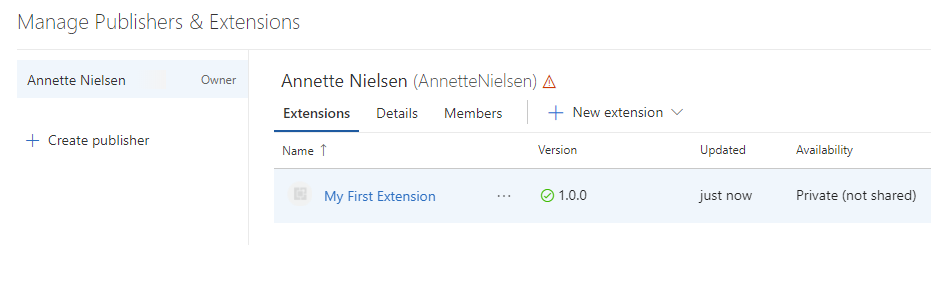
After a few seconds, your extension appears in the list of published extensions. Don't worry, the extension is only visible to you.
Install your extension
To test an extension, it must be installed to an organization in Azure DevOps. Installing requires being the owner of the organization (or having the necessary permissions). Because your extension is private, it must first be shared with the organization you want to install it to.
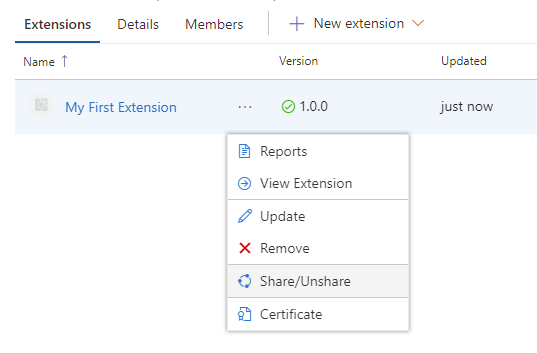
From the management portal, select your extension from the list, right-click, and choose Share/Unshare or Publish/Unpublish, depending on the extension; Share = Publish and Unshare = Unpublish.
Select Organization, and then enter the name of your organization. Select Enter.
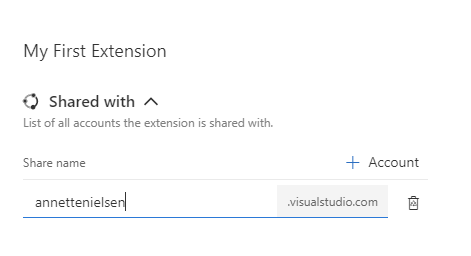
Close the panel.
Your extension can now be installed into this organization.
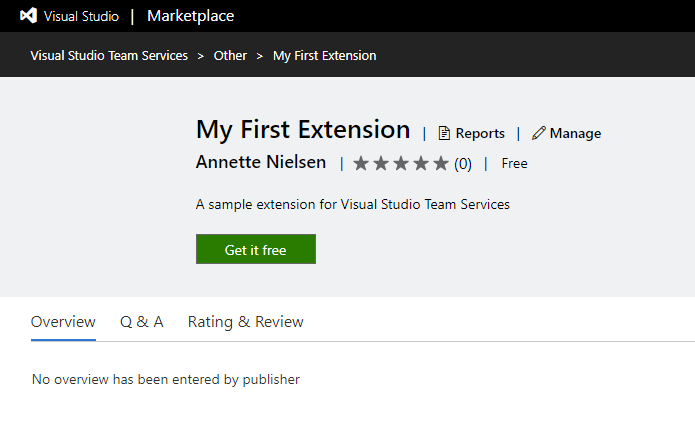
In the Marketplace, select your extension to open its overview page.
Note
Because your extension is private, only you and any member of the organization it is shared with can see this page.
Select Get it free to start the installation process. Select the organization you shared the extension with from the dropdown menu.
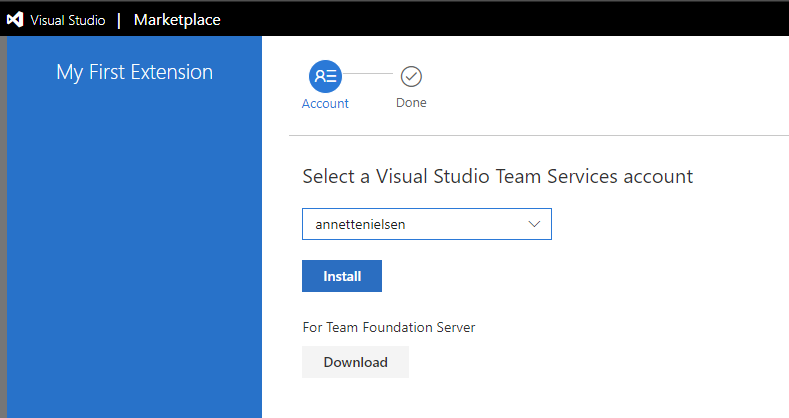
Select Install.
Congratulations! Your extension is now installed into an organization and is ready to be tested.
Try your extension
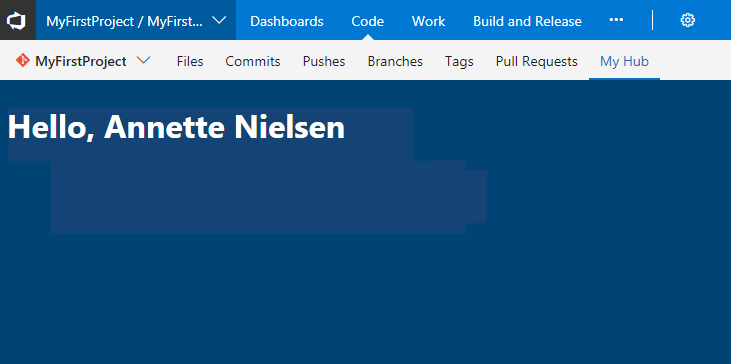
Your extension contributed a view named "My Hub" to the project-level Code area. Let's navigate to it.
Select Proceed to organization at the end of the installation wizard to navigate to the home page of the organization the extension was installed to (
https://dev.azure.com/{organization}).Select any of the projects listed to navigate into it:
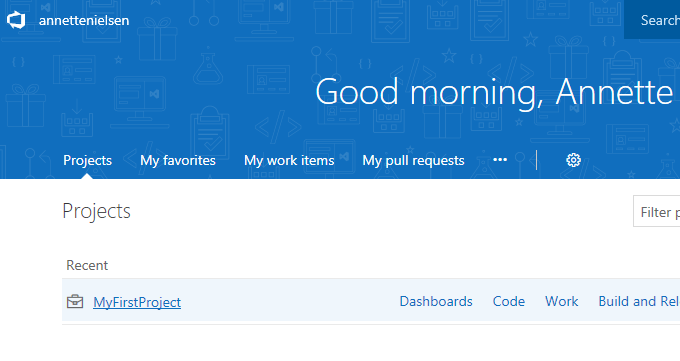
If there aren't any projects in your organization, you're prompted to create one.
Navigate to the Code area and then to the hub contributed by your extension (My Hub):
Debugging your extension
To debug the extension using Visual Studio or Browser Developer Tools and speed up the development without redeploying extension each time you change source code, you need change manifest adding baseUri property:
{
    ...
    "baseUri": "https://localhost:44300",
    ...
}
Changing the manifest loads the extension from your local web server instance. For example, IISExpress in Visual Studio. After you change the manifest, deploy and install this debugging extension only once.
Note
Run your local web server in SSL mode, because Azure DevOps demands that the web page is served from a secure source otherwise you obtain an error in browser console during the extension IFRAME loading.