Inicio rápido: Creación de un asistente de voz personalizado
En este inicio rápido, usará Speech SDK para crear una aplicación de asistente de voz personalizada que se conecta a un bot que ya ha creado y configurado. Si necesita crear un bot, consulte el tutorial relacionado, donde obtendrá una guía más completa.
Tras cumplir algunos requisitos previos, para conectar el asistente de voz personalizado hay que realizar pocos pasos:
- Cree un objeto
BotFrameworkConfiga partir de la clave y la región de suscripción. - Cree un objeto
DialogServiceConnectorcon el objetoBotFrameworkConfiganterior. - Mediante el objeto
DialogServiceConnector, inicie el proceso de escucha de una única expresión. - Inspeccione el objeto
ActivityReceivedEventArgsdevuelto.
Nota:
El SDK de Voz para C++, JavaScript, Objective-C, Python y Swift admite asistentes para voz personalizados, pero aún no hemos incluido una guía aquí.
Puede ver o descargar todos los ejemplos de C# del SDK de Voz en GitHub.
Requisitos previos
Antes de comenzar, compruebe lo siguiente:
- Crear un recurso de voz.
- Ha configurado el entorno de desarrollo y ha creado un proyecto vacío
- Ha creado un bot conectado al canal Direct Line Speech
- Asegúrese de que tiene acceso a un micrófono para capturar el audio.
Nota
Consulte la lista de regiones admitidas para los asistentes de voz y asegúrese de que sus recursos se implementan en una de esas regiones.
Abra el proyecto en Visual Studio.
El primer paso es asegurarse de que tiene el proyecto abierto en Visual Studio.
Inicio con código reutilizable
Vamos a agregar código que funcione como el esqueleto del proyecto.
En el Explorador de soluciones, abra
MainPage.xaml.En la vista XAML del diseñador, reemplace todo el contenido por el siguiente fragmento de código, que define una interfaz de usuario rudimentaria:
<Page
    x:Class="helloworld.MainPage"
    xmlns="http://schemas.microsoft.com/winfx/2006/xaml/presentation"
    xmlns:x="http://schemas.microsoft.com/winfx/2006/xaml"
    xmlns:local="using:helloworld"
    xmlns:d="http://schemas.microsoft.com/expression/blend/2008"
    xmlns:mc="http://schemas.openxmlformats.org/markup-compatibility/2006"
    mc:Ignorable="d"
    Background="{ThemeResource ApplicationPageBackgroundThemeBrush}">

    <Grid>
        <StackPanel Orientation="Vertical" HorizontalAlignment="Center"
                    Margin="20,50,0,0" VerticalAlignment="Center" Width="800">
            <Button x:Name="EnableMicrophoneButton" Content="Enable Microphone"
                    Margin="0,0,10,0" Click="EnableMicrophone_ButtonClicked"
                    Height="35"/>
            <Button x:Name="ListenButton" Content="Talk to your bot"
                    Margin="0,10,10,0" Click="ListenButton_ButtonClicked"
                    Height="35"/>
            <StackPanel x:Name="StatusPanel" Orientation="Vertical"
                        RelativePanel.AlignBottomWithPanel="True"
                        RelativePanel.AlignRightWithPanel="True"
                        RelativePanel.AlignLeftWithPanel="True">
                <TextBlock x:Name="StatusLabel" Margin="0,10,10,0"
                           TextWrapping="Wrap" Text="Status:" FontSize="20"/>
                <Border x:Name="StatusBorder" Margin="0,0,0,0">
                    <ScrollViewer VerticalScrollMode="Auto"
                                  VerticalScrollBarVisibility="Auto" MaxHeight="200">
                        <!-- Use LiveSetting to enable screen readers to announce
                             the status update. -->
                        <TextBlock
                            x:Name="StatusBlock" FontWeight="Bold"
                            AutomationProperties.LiveSetting="Assertive"
                            MaxWidth="{Binding ElementName=Splitter, Path=ActualWidth}"
                            Margin="10,10,10,20" TextWrapping="Wrap"  />
                    </ScrollViewer>
                </Border>
            </StackPanel>
        </StackPanel>
        <MediaElement x:Name="mediaElement"/>
    </Grid>
</Page>
La vista Diseño se actualiza para mostrar la interfaz de usuario de la aplicación.
- En Explorador de soluciones, abra el archivo de código fuente subyacente
MainPage.xaml.cs. (Se agrupa enMainPage.xaml). Reemplace el contenido de este archivo por el siguiente, que incluye:
Instrucciones
usingpara los espacios de nombresSpeechySpeech.Dialog.Una implementación sencilla para garantizar el acceso del micrófono, conectado a un controlador de botón
Asistentes básicos de la interfaz de usuario para presentar los errores y mensajes en la aplicación
Un punto de aterrizaje para la ruta de acceso del código de inicialización que se rellenará más tarde
Una asistente para la reproducción de texto a voz (sin compatibilidad con streaming)
Un controlador de botón vacía para empezar a escuchar que se rellenará más tarde
using Microsoft.CognitiveServices.Speech;
using Microsoft.CognitiveServices.Speech.Audio;
using Microsoft.CognitiveServices.Speech.Dialog;
using System;
using System.Diagnostics;
using System.IO;
using System.Text;
using Windows.Foundation;
using Windows.Storage.Streams;
using Windows.UI.Xaml;
using Windows.UI.Xaml.Controls;
using Windows.UI.Xaml.Media;

namespace helloworld
{
    public sealed partial class MainPage : Page
    {
        private DialogServiceConnector connector;

        private enum NotifyType
        {
            StatusMessage,
            ErrorMessage
        };

        public MainPage()
        {
            this.InitializeComponent();
        }

        private async void EnableMicrophone_ButtonClicked(
            object sender, RoutedEventArgs e)
        {
            bool isMicAvailable = true;
            try
            {
                var mediaCapture = new Windows.Media.Capture.MediaCapture();
                var settings =
                    new Windows.Media.Capture.MediaCaptureInitializationSettings();
                settings.StreamingCaptureMode =
                    Windows.Media.Capture.StreamingCaptureMode.Audio;
                await mediaCapture.InitializeAsync(settings);
            }
            catch (Exception)
            {
                isMicAvailable = false;
            }
            if (!isMicAvailable)
            {
                await Windows.System.Launcher.LaunchUriAsync(
                    new Uri("ms-settings:privacy-microphone"));
            }
            else
            {
                NotifyUser("Microphone was enabled", NotifyType.StatusMessage);
            }
        }

        private void NotifyUser(
            string strMessage, NotifyType type = NotifyType.StatusMessage)
        {
            // If called from the UI thread, then update immediately.
            // Otherwise, schedule a task on the UI thread to perform the update.
            if (Dispatcher.HasThreadAccess)
            {
                UpdateStatus(strMessage, type);
            }
            else
            {
                var task = Dispatcher.RunAsync(
                    Windows.UI.Core.CoreDispatcherPriority.Normal,
                    () => UpdateStatus(strMessage, type));
            }
        }

        private void UpdateStatus(string strMessage, NotifyType type)
        {
            switch (type)
            {
                case NotifyType.StatusMessage:
                    StatusBorder.Background = new SolidColorBrush(
                        Windows.UI.Colors.Green);
                    break;
                case NotifyType.ErrorMessage:
                    StatusBorder.Background = new SolidColorBrush(
                        Windows.UI.Colors.Red);
                    break;
            }
            StatusBlock.Text += string.IsNullOrEmpty(StatusBlock.Text)
                ? strMessage : "\n" + strMessage;

            if (!string.IsNullOrEmpty(StatusBlock.Text))
            {
                StatusBorder.Visibility = Visibility.Visible;
                StatusPanel.Visibility = Visibility.Visible;
            }
            else
            {
                StatusBorder.Visibility = Visibility.Collapsed;
                StatusPanel.Visibility = Visibility.Collapsed;
            }
            // Raise an event if necessary to enable a screen reader
            // to announce the status update.
            var peer = Windows.UI.Xaml.Automation.Peers.FrameworkElementAutomationPeer.FromElement(StatusBlock);
            if (peer != null)
            {
                peer.RaiseAutomationEvent(
                    Windows.UI.Xaml.Automation.Peers.AutomationEvents.LiveRegionChanged);
            }
        }

        // Waits for and accumulates all audio associated with a given
        // PullAudioOutputStream and then plays it to the MediaElement. Long spoken
        // audio will create extra latency and a streaming playback solution
        // (that plays audio while it continues to be received) should be used --
        // see the samples for examples of this.
        private void SynchronouslyPlayActivityAudio(
            PullAudioOutputStream activityAudio)
        {
            var playbackStreamWithHeader = new MemoryStream();
            playbackStreamWithHeader.Write(Encoding.ASCII.GetBytes("RIFF"), 0, 4); // ChunkID
            playbackStreamWithHeader.Write(BitConverter.GetBytes(UInt32.MaxValue), 0, 4); // ChunkSize: max
            playbackStreamWithHeader.Write(Encoding.ASCII.GetBytes("WAVE"), 0, 4); // Format
            playbackStreamWithHeader.Write(Encoding.ASCII.GetBytes("fmt "), 0, 4); // Subchunk1ID
            playbackStreamWithHeader.Write(BitConverter.GetBytes(16), 0, 4); // Subchunk1Size: PCM
            playbackStreamWithHeader.Write(BitConverter.GetBytes(1), 0, 2); // AudioFormat: PCM
            playbackStreamWithHeader.Write(BitConverter.GetBytes(1), 0, 2); // NumChannels: mono
            playbackStreamWithHeader.Write(BitConverter.GetBytes(16000), 0, 4); // SampleRate: 16kHz
            playbackStreamWithHeader.Write(BitConverter.GetBytes(32000), 0, 4); // ByteRate
            playbackStreamWithHeader.Write(BitConverter.GetBytes(2), 0, 2); // BlockAlign
            playbackStreamWithHeader.Write(BitConverter.GetBytes(16), 0, 2); // BitsPerSample: 16-bit
            playbackStreamWithHeader.Write(Encoding.ASCII.GetBytes("data"), 0, 4); // Subchunk2ID
            playbackStreamWithHeader.Write(BitConverter.GetBytes(UInt32.MaxValue), 0, 4); // Subchunk2Size

            byte[] pullBuffer = new byte[2056];

            uint lastRead = 0;
            do
            {
                lastRead = activityAudio.Read(pullBuffer);
                playbackStreamWithHeader.Write(pullBuffer, 0, (int)lastRead);
            }
            while (lastRead == pullBuffer.Length);

            var task = Dispatcher.RunAsync(
                Windows.UI.Core.CoreDispatcherPriority.Normal, () =>
            {
                mediaElement.SetSource(
                    playbackStreamWithHeader.AsRandomAccessStream(), "audio/wav");
                mediaElement.Play();
            });
        }

        private void InitializeDialogServiceConnector()
        {
            // New code will go here
        }

        private async void ListenButton_ButtonClicked(
            object sender, RoutedEventArgs e)
        {
            // New code will go here
        }
    }
}
Agregue el siguiente fragmento de código al cuerpo del método de
InitializeDialogServiceConnector. Este código crea elDialogServiceConnectorcon la información de la suscripción.// Create a BotFrameworkConfig by providing a Speech service subscription key // the botConfig.Language property is optional (default en-US) const string speechSubscriptionKey = "YourSpeechSubscriptionKey"; // Your subscription key const string region = "YourServiceRegion"; // Your subscription service region. var botConfig = BotFrameworkConfig.FromSubscription(speechSubscriptionKey, region); botConfig.Language = "en-US"; connector = new DialogServiceConnector(botConfig);Nota
Consulte la lista de regiones admitidas para los asistentes de voz y asegúrese de que sus recursos se implementan en una de esas regiones.
Nota
Para obtener información sobre la configuración de un bot, consulte la documentación de Bot Framework para el canal Direct Line Speech.
Reemplace las cadenas
YourSpeechSubscriptionKeyyYourServiceRegionpor sus valores para la suscripción de voz y la región.Anexe el siguiente fragmento de código al final del cuerpo del método de
InitializeDialogServiceConnector. Este código configura los controladores de los eventos en los que se basaDialogServiceConnectorcomunicar sus actividades de bot, los resultados del reconocimiento de voz y otra información.// ActivityReceived is the main way your bot will communicate with the client // and uses bot framework activities connector.ActivityReceived += (sender, activityReceivedEventArgs) => { NotifyUser( $"Activity received, hasAudio={activityReceivedEventArgs.HasAudio} activity={activityReceivedEventArgs.Activity}"); if (activityReceivedEventArgs.HasAudio) { SynchronouslyPlayActivityAudio(activityReceivedEventArgs.Audio); } }; // Canceled will be signaled when a turn is aborted or experiences an error condition connector.Canceled += (sender, canceledEventArgs) => { NotifyUser($"Canceled, reason={canceledEventArgs.Reason}"); if (canceledEventArgs.Reason == CancellationReason.Error) { NotifyUser( $"Error: code={canceledEventArgs.ErrorCode}, details={canceledEventArgs.ErrorDetails}"); } }; // Recognizing (not 'Recognized') will provide the intermediate recognized text // while an audio stream is being processed connector.Recognizing += (sender, recognitionEventArgs) => { NotifyUser($"Recognizing! in-progress text={recognitionEventArgs.Result.Text}"); }; // Recognized (not 'Recognizing') will provide the final recognized text // once audio capture is completed connector.Recognized += (sender, recognitionEventArgs) => { NotifyUser($"Final speech to text result: '{recognitionEventArgs.Result.Text}'"); }; // SessionStarted will notify when audio begins flowing to the service for a turn connector.SessionStarted += (sender, sessionEventArgs) => { NotifyUser($"Now Listening! Session started, id={sessionEventArgs.SessionId}"); }; // SessionStopped will notify when a turn is complete and // it's safe to begin listening again connector.SessionStopped += (sender, sessionEventArgs) => { NotifyUser($"Listening complete. Session ended, id={sessionEventArgs.SessionId}"); };Agregue el siguiente fragmento de código al cuerpo del método
ListenButton_ButtonClickedde la claseMainPage. Este código configuraDialogServiceConnectorpara escuchar, ya que ya ha establecido la configuración y ha registrado los controladores de eventos.if (connector == null) { InitializeDialogServiceConnector(); // Optional step to speed up first interaction: if not called, // connection happens automatically on first use var connectTask = connector.ConnectAsync(); } try { // Start sending audio to your speech-enabled bot var listenTask = connector.ListenOnceAsync(); // You can also send activities to your bot as JSON strings -- // Microsoft.Bot.Schema can simplify this string speakActivity = @"{""type"":""message"",""text"":""Greeting Message"", ""speak"":""Hello there!""}"; await connector.SendActivityAsync(speakActivity); } catch (Exception ex) { NotifyUser($"Exception: {ex.ToString()}", NotifyType.ErrorMessage); }
Compilación y ejecución de la aplicación
Ya está listo para compilar la aplicación y probar el asistente de voz personalizado mediante el servicio de voz.
En la barra de menús, elija Compilar>Compilar solución para compilar la aplicación. El código se debería compilar sin errores ahora.
Elija Depurar>Iniciar depuración o presione F5 para iniciar la aplicación. Aparece la ventana HelloWorld.
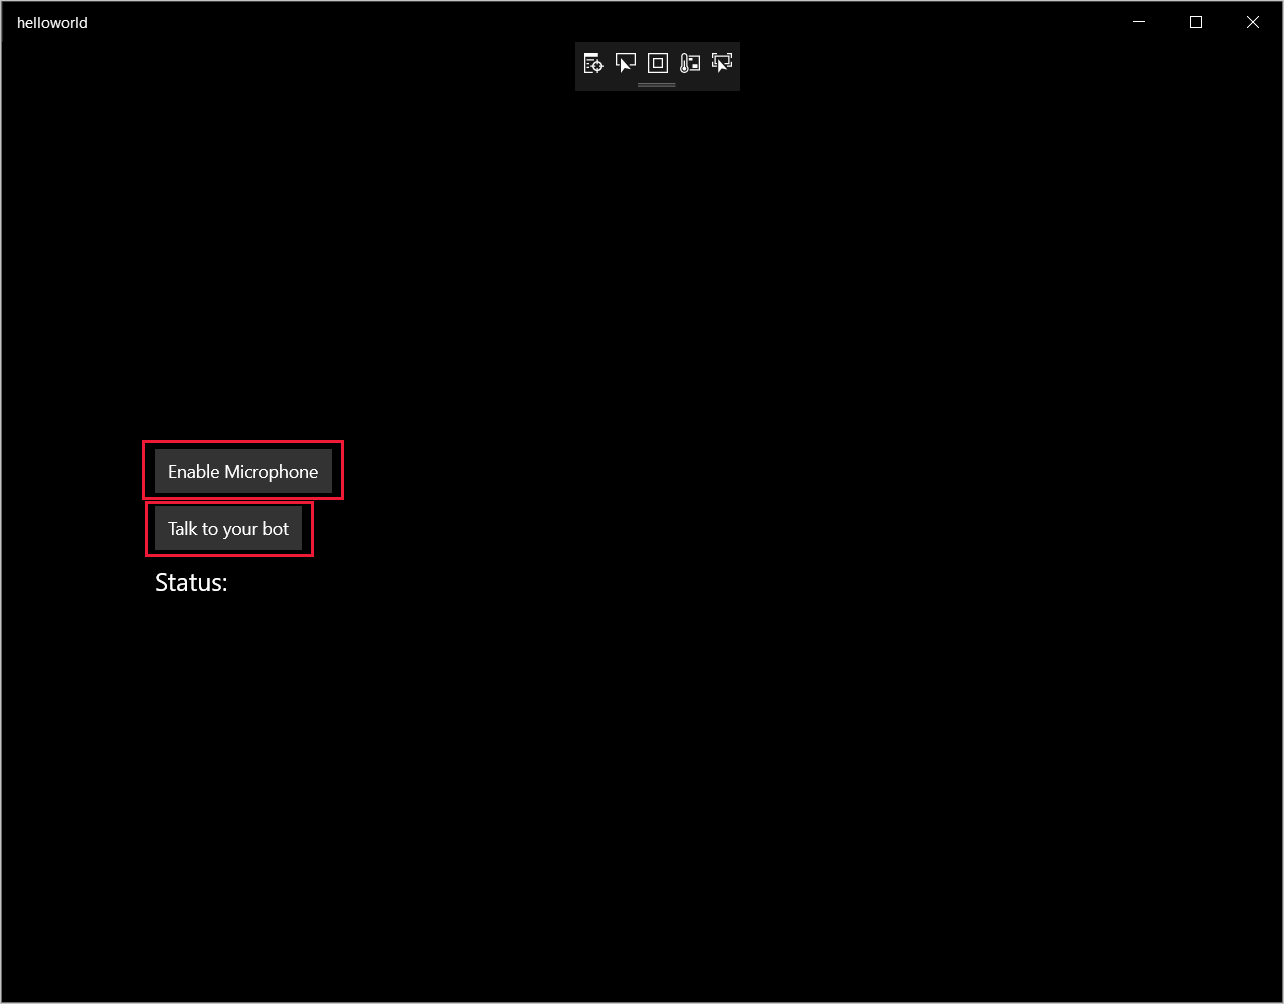
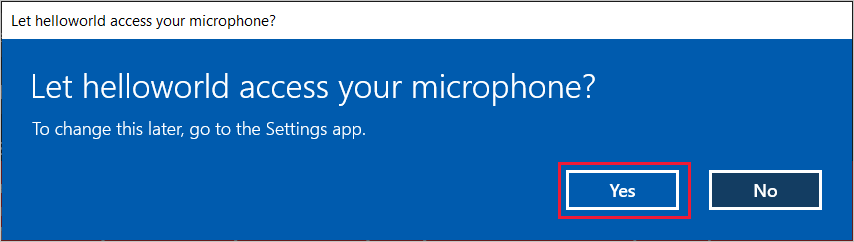
Seleccione Habilitar micrófono y, cuando aparezca la solicitud de permiso de acceso, seleccione Sí.
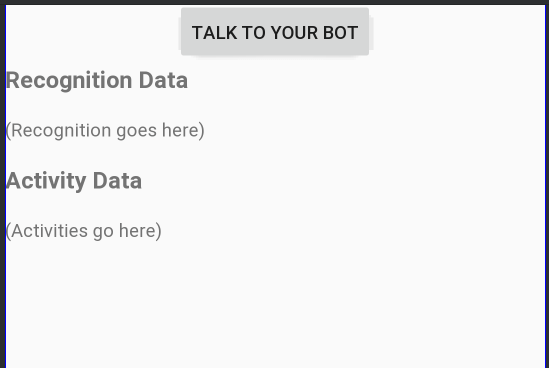
Seleccione Talk to your bot (Hablar con el bot) y diga una expresión o frase en inglés en el micrófono del dispositivo. Lo que diga se transmitirá al canal Direct Line Speech y se transcribirá en texto, que aparece en la misma ventana.
Pasos siguientes
Puede ver o descargar todos los ejemplos de Java del SDK de Voz en GitHub.
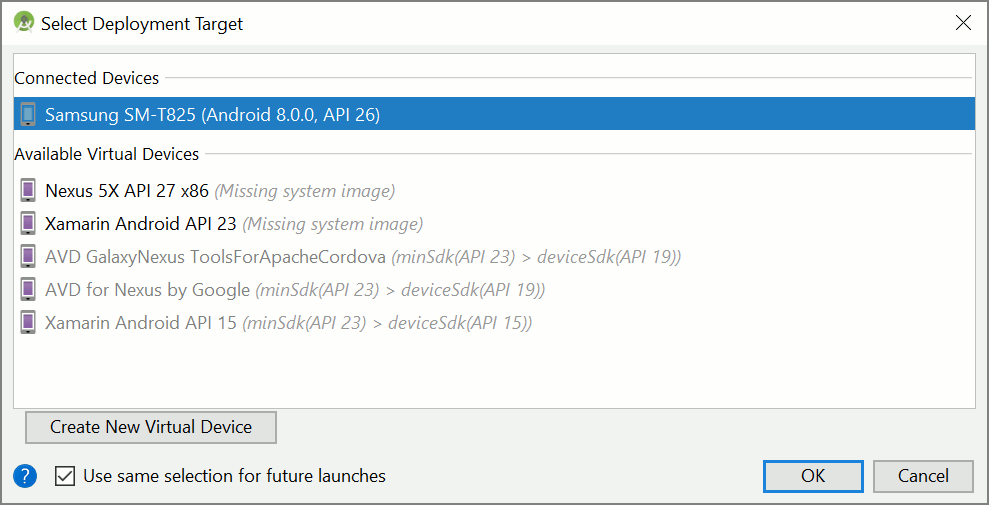
Selección del entorno de destino
Requisitos previos
Antes de comenzar, compruebe lo siguiente:
- Crear un recurso de voz.
- Ha configurado el entorno de desarrollo y ha creado un proyecto vacío
- Ha creado un bot conectado al canal Direct Line Speech
- Asegúrese de que tiene acceso a un micrófono para capturar el audio.
Nota
Consulte la lista de regiones admitidas para los asistentes de voz y asegúrese de que sus recursos se implementan en una de esas regiones.
Creación y configuración de un proyecto
Cree un proyecto de Eclipse e instalación del SDK de Voz.
Además, para habilitar el registro, actualice el archivo pom.xml para incluir la dependencia siguiente:
 <dependency>
     <groupId>org.slf4j</groupId>
     <artifactId>slf4j-simple</artifactId>
     <version>1.7.5</version>
 </dependency>
Incorporación de código de ejemplo
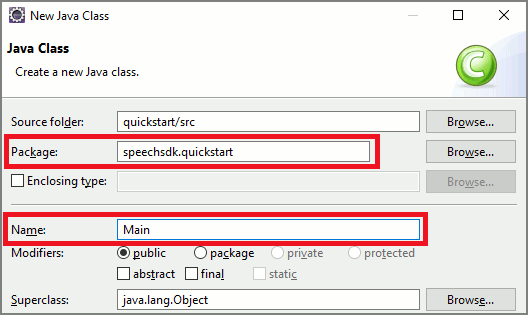
Para agregar una nueva clase vacía al proyecto de Java, seleccione File (Archivo)>New (Nuevo)>Class (Clase) .
En la ventana New Java Class (Nueva clase de Java) escriba speechsdk.quickstart en el campo Package (Paquete) y Main en el campo Name (Nombre).
Abra la clase recién creada
Mainy reemplace el contenido del archivoMain.javapor el código de inicio siguiente:package speechsdk.quickstart; import com.microsoft.cognitiveservices.speech.audio.AudioConfig; import com.microsoft.cognitiveservices.speech.audio.PullAudioOutputStream; import com.microsoft.cognitiveservices.speech.dialog.BotFrameworkConfig; import com.microsoft.cognitiveservices.speech.dialog.DialogServiceConnector; import org.slf4j.Logger; import org.slf4j.LoggerFactory; import javax.sound.sampled.AudioFormat; import javax.sound.sampled.AudioSystem; import javax.sound.sampled.DataLine; import javax.sound.sampled.SourceDataLine; import java.io.InputStream; public class Main { final Logger log = LoggerFactory.getLogger(Main.class); public static void main(String[] args) { // New code will go here } private void playAudioStream(PullAudioOutputStream audio) { ActivityAudioStream stream = new ActivityAudioStream(audio); final ActivityAudioStream.ActivityAudioFormat audioFormat = stream.getActivityAudioFormat(); final AudioFormat format = new AudioFormat( AudioFormat.Encoding.PCM_SIGNED, audioFormat.getSamplesPerSecond(), audioFormat.getBitsPerSample(), audioFormat.getChannels(), audioFormat.getFrameSize(), audioFormat.getSamplesPerSecond(), false); try { int bufferSize = format.getFrameSize(); final byte[] data = new byte[bufferSize]; SourceDataLine.Info info = new DataLine.Info(SourceDataLine.class, format); SourceDataLine line = (SourceDataLine) AudioSystem.getLine(info); line.open(format); if (line != null) { line.start(); int nBytesRead = 0; while (nBytesRead != -1) { nBytesRead = stream.read(data); if (nBytesRead != -1) { line.write(data, 0, nBytesRead); } } line.drain(); line.stop(); line.close(); } stream.close(); } catch (Exception e) { e.printStackTrace(); } } }En el método
main, primero configurará elDialogServiceConfigy lo utilizará para crear una instancia deDialogServiceConnector. Esta instancia se conecta al canal de Direct Line Speech para interactuar con el bot. También se utiliza una instancia deAudioConfigpara especificar el origen de la entrada de audio. En este ejemplo, se usa el micrófono predeterminado conAudioConfig.fromDefaultMicrophoneInput().- Reemplace la cadena
YourSubscriptionKeypor la clave de recurso de Voz, que se puede obtener en Azure Portal. - Reemplace la cadena
YourServiceRegionpor la región asociada a su recurso de Voz.
Nota
Consulte la lista de regiones admitidas para los asistentes de voz y asegúrese de que sus recursos se implementan en una de esas regiones.
final String subscriptionKey = "YourSubscriptionKey"; // Your subscription key final String region = "YourServiceRegion"; // Your speech subscription service region final BotFrameworkConfig botConfig = BotFrameworkConfig.fromSubscription(subscriptionKey, region); // Configure audio input from a microphone. final AudioConfig audioConfig = AudioConfig.fromDefaultMicrophoneInput(); // Create a DialogServiceConnector instance. final DialogServiceConnector connector = new DialogServiceConnector(botConfig, audioConfig);- Reemplace la cadena
El conector
DialogServiceConnectorse basa en varios eventos para comunicar sus actividades de bot, los resultados del reconocimiento de voz y otra información. Agregue estos clientes de escucha de eventos a continuación.// Recognizing will provide the intermediate recognized text while an audio stream is being processed. connector.recognizing.addEventListener((o, speechRecognitionResultEventArgs) -> { log.info("Recognizing speech event text: {}", speechRecognitionResultEventArgs.getResult().getText()); }); // Recognized will provide the final recognized text once audio capture is completed. connector.recognized.addEventListener((o, speechRecognitionResultEventArgs) -> { log.info("Recognized speech event reason text: {}", speechRecognitionResultEventArgs.getResult().getText()); }); // SessionStarted will notify when audio begins flowing to the service for a turn. connector.sessionStarted.addEventListener((o, sessionEventArgs) -> { log.info("Session Started event id: {} ", sessionEventArgs.getSessionId()); }); // SessionStopped will notify when a turn is complete and it's safe to begin listening again. connector.sessionStopped.addEventListener((o, sessionEventArgs) -> { log.info("Session stopped event id: {}", sessionEventArgs.getSessionId()); }); // Canceled will be signaled when a turn is aborted or experiences an error condition. connector.canceled.addEventListener((o, canceledEventArgs) -> { log.info("Canceled event details: {}", canceledEventArgs.getErrorDetails()); connector.disconnectAsync(); }); // ActivityReceived is the main way your bot will communicate with the client and uses Bot Framework activities. connector.activityReceived.addEventListener((o, activityEventArgs) -> { final String act = activityEventArgs.getActivity().serialize(); log.info("Received activity {} audio", activityEventArgs.hasAudio() ? "with" : "without"); if (activityEventArgs.hasAudio()) { playAudioStream(activityEventArgs.getAudio()); } });Conecte el
DialogServiceConnectora Direct Line Speech mediante la llamada al métodoconnectAsync(). Para probar el bot, puede invocar el métodolistenOnceAsyncpara enviar una entrada de audio desde el micrófono. Además, también puede utilizar el métodosendActivityAsyncpara enviar una actividad personalizada como una cadena serializada. Estas actividades personalizadas pueden proporcionar datos adicionales que el bot utilizará en la conversación.connector.connectAsync(); // Start listening. System.out.println("Say something ..."); connector.listenOnceAsync(); // connector.sendActivityAsync(...)Guarde los cambios en el archivo
Main.Para admitir la reproducción de respuestas, puede agregar una clase adicional que se transforma el objeto PullAudioOutputStream devuelto desde la API de getAudio() a un elemento InputStream de Java para facilitar el control. Esta
ActivityAudioStreames una clase especializada que controla la respuesta de audio desde el canal de Direct Line Speech. Proporcionará descriptores de acceso para capturar la información del formato de audio que se requiere para controlar la reproducción. Para ello, seleccione Archivo>Nuevo>Clase.En la ventana New Java Class (Nueva clase Java), escriba speechsdk.quickstart en el campo Package (Paquete) y ActivityAudioStream en el campo Name (Nombre).
Abra la clase
ActivityAudioStreamque se creó recientemente y reemplace el contenido por el código siguiente:package com.speechsdk.quickstart; import com.microsoft.cognitiveservices.speech.audio.PullAudioOutputStream; import java.io.IOException; import java.io.InputStream; public final class ActivityAudioStream extends InputStream { /** * The number of samples played per second (16 kHz). */ public static final long SAMPLE_RATE = 16000; /** * The number of bits in each sample of a sound that has this format (16 bits). */ public static final int BITS_PER_SECOND = 16; /** * The number of audio channels in this format (1 for mono). */ public static final int CHANNELS = 1; /** * The number of bytes in each frame of a sound that has this format (2). */ public static final int FRAME_SIZE = 2; /** * Reads up to a specified maximum number of bytes of data from the audio * stream, putting them into the given byte array. * * @param b the buffer into which the data is read * @param off the offset, from the beginning of array <code>b</code>, at which * the data will be written * @param len the maximum number of bytes to read * @return the total number of bytes read into the buffer, or -1 if there * is no more data because the end of the stream has been reached */ @Override public int read(byte[] b, int off, int len) { byte[] tempBuffer = new byte[len]; int n = (int) this.pullStreamImpl.read(tempBuffer); for (int i = 0; i < n; i++) { if (off + i > b.length) { throw new ArrayIndexOutOfBoundsException(b.length); } b[off + i] = tempBuffer[i]; } if (n == 0) { return -1; } return n; } /** * Reads the next byte of data from the activity audio stream if available. * * @return the next byte of data, or -1 if the end of the stream is reached * @see #read(byte[], int, int) * @see #read(byte[]) * @see #available * <p> */ @Override public int read() { byte[] data = new byte[1]; int temp = read(data); if (temp <= 0) { // we have a weird situation if read(byte[]) returns 0! return -1; } return data[0] & 0xFF; } /** * Reads up to a specified maximum number of bytes of data from the activity audio stream, * putting them into the given byte array. * * @param b the buffer into which the data is read * @return the total number of bytes read into the buffer, or -1 if there * is no more data because the end of the stream has been reached */ @Override public int read(byte[] b) { int n = (int) pullStreamImpl.read(b); if (n == 0) { return -1; } return n; } /** * Skips over and discards a specified number of bytes from this * audio input stream. * * @param n the requested number of bytes to be skipped * @return the actual number of bytes skipped * @throws IOException if an input or output error occurs * @see #read * @see #available */ @Override public long skip(long n) { if (n <= 0) { return 0; } if (n <= Integer.MAX_VALUE) { byte[] tempBuffer = new byte[(int) n]; return read(tempBuffer); } long count = 0; for (long i = n; i > 0; i -= Integer.MAX_VALUE) { int size = (int) Math.min(Integer.MAX_VALUE, i); byte[] tempBuffer = new byte[size]; count += read(tempBuffer); } return count; } /** * Closes this audio input stream and releases any system resources associated * with the stream. */ @Override public void close() { this.pullStreamImpl.close(); } /** * Fetch the audio format for the ActivityAudioStream. The ActivityAudioFormat defines the sample rate, bits per sample, and the # channels. * * @return instance of the ActivityAudioFormat associated with the stream */ public ActivityAudioStream.ActivityAudioFormat getActivityAudioFormat() { return activityAudioFormat; } /** * Returns the maximum number of bytes that can be read (or skipped over) from this * audio input stream without blocking. * * @return the number of bytes that can be read from this audio input stream without blocking. * As this implementation does not buffer, this will be defaulted to 0 */ @Override public int available() { return 0; } public ActivityAudioStream(final PullAudioOutputStream stream) { pullStreamImpl = stream; this.activityAudioFormat = new ActivityAudioStream.ActivityAudioFormat(SAMPLE_RATE, BITS_PER_SECOND, CHANNELS, FRAME_SIZE, AudioEncoding.PCM_SIGNED); } private PullAudioOutputStream pullStreamImpl; private ActivityAudioFormat activityAudioFormat; /** * ActivityAudioFormat is an internal format which contains metadata regarding the type of arrangement of * audio bits in this activity audio stream. */ static class ActivityAudioFormat { private long samplesPerSecond; private int bitsPerSample; private int channels; private int frameSize; private AudioEncoding encoding; public ActivityAudioFormat(long samplesPerSecond, int bitsPerSample, int channels, int frameSize, AudioEncoding encoding) { this.samplesPerSecond = samplesPerSecond; this.bitsPerSample = bitsPerSample; this.channels = channels; this.encoding = encoding; this.frameSize = frameSize; } /** * Fetch the number of samples played per second for the associated audio stream format. * * @return the number of samples played per second */ public long getSamplesPerSecond() { return samplesPerSecond; } /** * Fetch the number of bits in each sample of a sound that has this audio stream format. * * @return the number of bits per sample */ public int getBitsPerSample() { return bitsPerSample; } /** * Fetch the number of audio channels used by this audio stream format. * * @return the number of channels */ public int getChannels() { return channels; } /** * Fetch the default number of bytes in a frame required by this audio stream format. * * @return the number of bytes */ public int getFrameSize() { return frameSize; } /** * Fetch the audio encoding type associated with this audio stream format. * * @return the encoding associated */ public AudioEncoding getEncoding() { return encoding; } } /** * Enum defining the types of audio encoding supported by this stream. */ public enum AudioEncoding { PCM_SIGNED("PCM_SIGNED"); String value; AudioEncoding(String value) { this.value = value; } } }Guarde los cambios en el archivo
ActivityAudioStream.
Compilación y ejecución de la aplicación
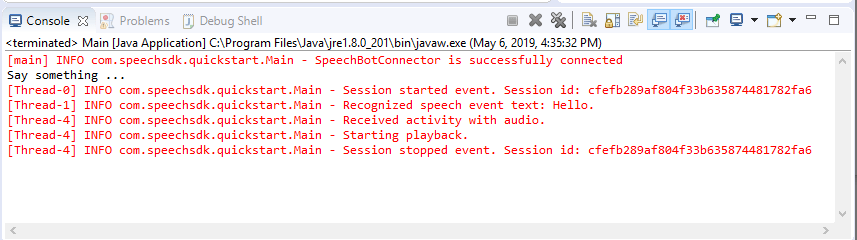
Seleccione F11, o seleccione Run (Ejecutar)>Debug (Depurar) .
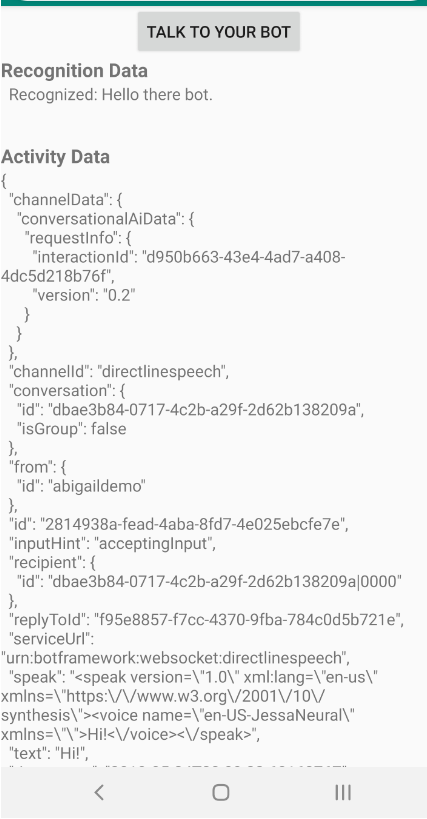
La consola muestra el mensaje "Say something" (Diga algo). En este punto, diga una expresión o frase en inglés que el bot pueda comprender. La voz se transmite al bot a través del canal de Direct Line Speech y, una vez allí, el bot la reconoce y la procesa. La respuesta se devuelve como una actividad. Si el bot devuelve la voz como respuesta, el audio se reproducirá mediante la clase AudioPlayer.
Pasos siguientes
Puede ver o descargar todos los ejemplos de Go del SDK de Voz en GitHub.
Requisitos previos
Antes de comenzar:
- Crear un recurso de voz.
- Configuración del entorno de desarrollo y creación de un proyecto vacío
- Ha creado un bot conectado al canal Direct Line Speech
- Asegúrese de que tiene acceso a un micrófono para capturar el audio.
Nota
Consulte la lista de regiones admitidas para los asistentes de voz y asegúrese de que sus recursos se implementan en una de esas regiones.
Configuración del entorno
Actualice el archivo go.mod con la versión más reciente del SDK agregando esta línea:
require (
    github.com/Microsoft/cognitive-services-speech-sdk-go v1.15.0
)
Inicio con código reutilizable
Reemplace el contenido del archivo de código fuente (por ejemplo, quickstart.go) por el siguiente, que incluye:
- Definición del paquete "main"
- Importación de los módulos necesarios desde el SDK de voz
- Variables para almacenar la información de bots que se sustituirá más adelante en este inicio rápido
- Una implementación sencilla con el micrófono para la entrada de audio
- Controladores de eventos para varios eventos que tienen lugar durante una interacción de voz
package main

import (
    "fmt"
    "time"

    "github.com/Microsoft/cognitive-services-speech-sdk-go/audio"
    "github.com/Microsoft/cognitive-services-speech-sdk-go/dialog"
    "github.com/Microsoft/cognitive-services-speech-sdk-go/speech"
)

func main() {
    subscription :=  "YOUR_SUBSCRIPTION_KEY"
    region := "YOUR_BOT_REGION"

    audioConfig, err := audio.NewAudioConfigFromDefaultMicrophoneInput()
    if err != nil {
        fmt.Println("Got an error: ", err)
        return
    }
    defer audioConfig.Close()
    config, err := dialog.NewBotFrameworkConfigFromSubscription(subscription, region)
    if err != nil {
        fmt.Println("Got an error: ", err)
        return
    }
    defer config.Close()
    connector, err := dialog.NewDialogServiceConnectorFromConfig(config, audioConfig)
    if err != nil {
        fmt.Println("Got an error: ", err)
        return
    }
    defer connector.Close()
    activityReceivedHandler := func(event dialog.ActivityReceivedEventArgs) {
        defer event.Close()
        fmt.Println("Received an activity.")
    }
    connector.ActivityReceived(activityReceivedHandler)
    recognizedHandle := func(event speech.SpeechRecognitionEventArgs) {
        defer event.Close()
        fmt.Println("Recognized ", event.Result.Text)
    }
    connector.Recognized(recognizedHandle)
    recognizingHandler := func(event speech.SpeechRecognitionEventArgs) {
        defer event.Close()
        fmt.Println("Recognizing ", event.Result.Text)
    }
    connector.Recognizing(recognizingHandler)
    connector.ListenOnceAsync()
    <-time.After(10 * time.Second)
}
Reemplace los valores YOUR_SUBSCRIPTION_KEY y YOUR_BOT_REGION por los valores reales del recurso de voz.
Vaya a Azure Portal y abra el recurso Voz.
En Keys and Endpoint (Claves y puntos de conexión), a la izquierda, hay dos claves de suscripción disponibles.
- Use cualquiera de ellas como reemplazo del valor
YOUR_SUBSCRIPTION_KEY
- Use cualquiera de ellas como reemplazo del valor
En Información general, a la izquierda, anote la región y asígnela al identificador de región.
- Use el identificador de región como reemplazo del valor
YOUR_BOT_REGION. Por ejemplo,"westus"para Oeste de EE. UU.
Nota
Consulte la lista de regiones admitidas para los asistentes de voz y asegúrese de que sus recursos se implementan en una de esas regiones.
Nota
Para obtener información sobre la configuración de un bot, consulte la documentación de Bot Framework para el canal Direct Line Speech.
- Use el identificador de región como reemplazo del valor
Explicación del código
Se necesita la clave y la región de la suscripción de Voz para crear un objeto de configuración de voz. El objeto de configuración es necesario para crear una instancia de un objeto del reconocedor de voz.
La instancia del reconocedor ofrece varias formas de reconocer la voz. En este ejemplo, la voz se reconoce continuamente. Esta funcionalidad permite que el servicio de voz sepa que está enviando muchas frases para su reconocimiento y cuándo termina el programa para detener el reconocimiento de voz. A medida que se producen los resultados, el código los escribirá en la consola.
Compilación y ejecución
Ya está listo para compilar el proyecto y probar el asistente de voz personalizado mediante el servicio de voz.
- Compile el proyecto, por ejemplo, "vaya a Compilar" .
- Ejecute el módulo y diga una frase por el micrófono del dispositivo. Lo que diga se transmitirá al canal Direct Line Speech y se transcribirá a texto, que aparece como salida.
Nota
El SDK de Voz se usará de forma predeterminada para reconocer el uso de en-us como idioma; para más información sobre cómo elegir el idioma de origen, vea Procedimiento para reconocer la voz.
Pasos siguientes
Compatibilidad con plataformas y lenguajes adicionales
Si ha hecho clic en esta pestaña, es probable que no vea un inicio rápido en su lenguaje de programación favorito. No se preocupe, tenemos materiales de inicio rápido y ejemplos de código adicionales disponibles en GitHub. Use la tabla para encontrar el ejemplo correcto para su lenguaje de programación y combinación de plataforma y sistema operativo.
| Idioma | Ejemplos de código |
|---|---|
| C# | .NET Framework, .NET Core, UWP, Unity, Xamarin |
| C++ | Windows, Linux, macOS |
| Java | Android, JRE |
| JavaScript | Browser, Node.js |
| Objective-C | iOS, macOS |
| Python | Windows, Linux, macOS |
| Swift | iOS, macOS |