Perform a manual Google Workspace Migration to Microsoft 365 or Office 365 in EAC
The migration process takes several steps and can take from several hours to a couple of days depending on the amount of data you're migrating.
Prerequisites
Before you begin Google Workspace migration:
- Ensure you're signed into Google Workspace as a project creator.
- You have completed the following procedures:
- Create a subdomain for mail routing to Microsoft 365 or Office 365
- Create a subdomain for mail routing to your Google Workspace domain
- Provision users in Microsoft 365 or Office 365
Learn more at Google Workspace Mail Migration Prerequisites.
Start a Google Workspace migration batch with the Exchange admin center
Important
Microsoft's data migration tool is currently unaware of tools enforcing messaging records management (MRM) or archival policies. Because of this, any messages that are deleted or moved to archive by these policies will result in the migration process flagging these items as "missing". The result is perceived data loss rather than actual data loss, which makes it much harder to identify actual data loss during any content verification checks.
Effective from March 2024, to avoid flagging these items as missing, the migration tool will automatically disable MRM (also known as email lifecycle or ELC) for IMAP and Google migrations. The migration tool will also automatically re-enable MRM when the migration is Completed or Deleted. You can use the SkipAutomaticElcUpdate SkipMerging flag to keep ELC enabled during the migration, but doing so will result in the migration tool not searching for missing items to avoid this perceived data loss.
Therefore, before attempting any data migration to mailboxes, Microsoft strongly recommends keeping the automatic ELC disabling feature enabled, or manually disabling all MRM and archival policies.
In the Exchange Admin center, go to Migration and then click Add migration batch.

On the Add migration batch page, configure the following settings:
- Give the migration batch a unique name: Enter a unique name.
- Select the mailbox migration path: Verify that Migration to Exchange Online is selected.
When you're finished, click Next.
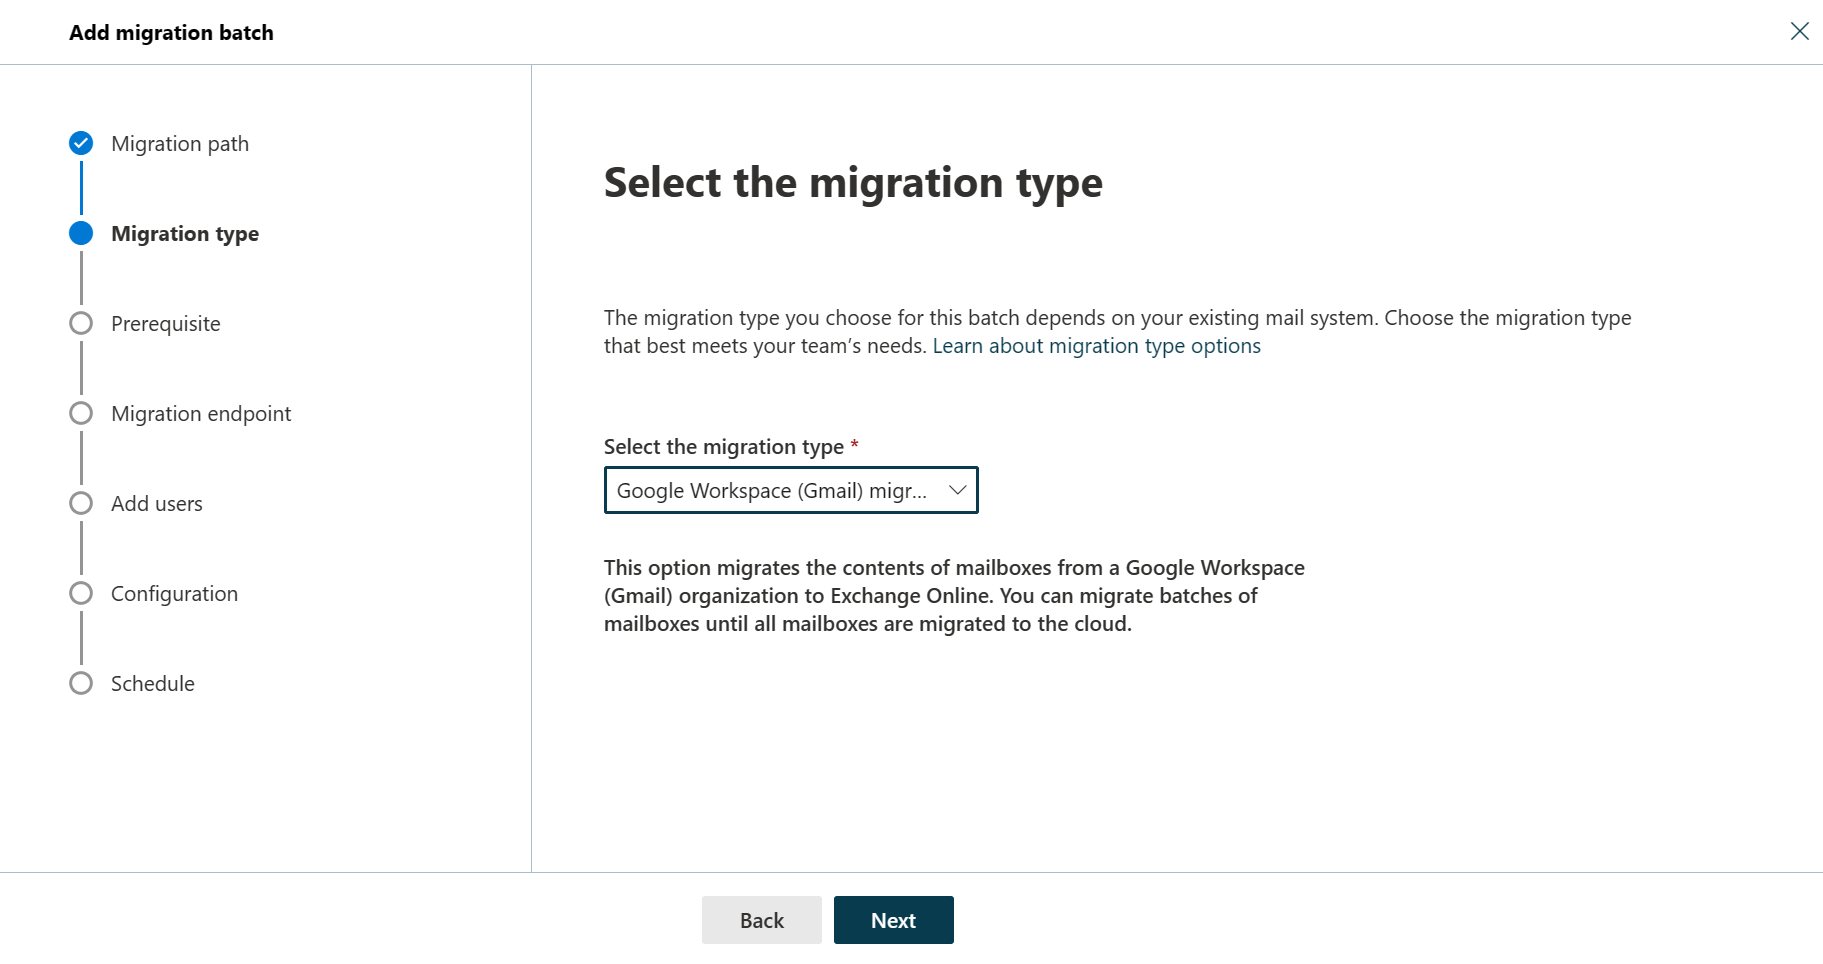
On the Select the migration type page, select Google Workspace (Gmail) migration, and then click Next
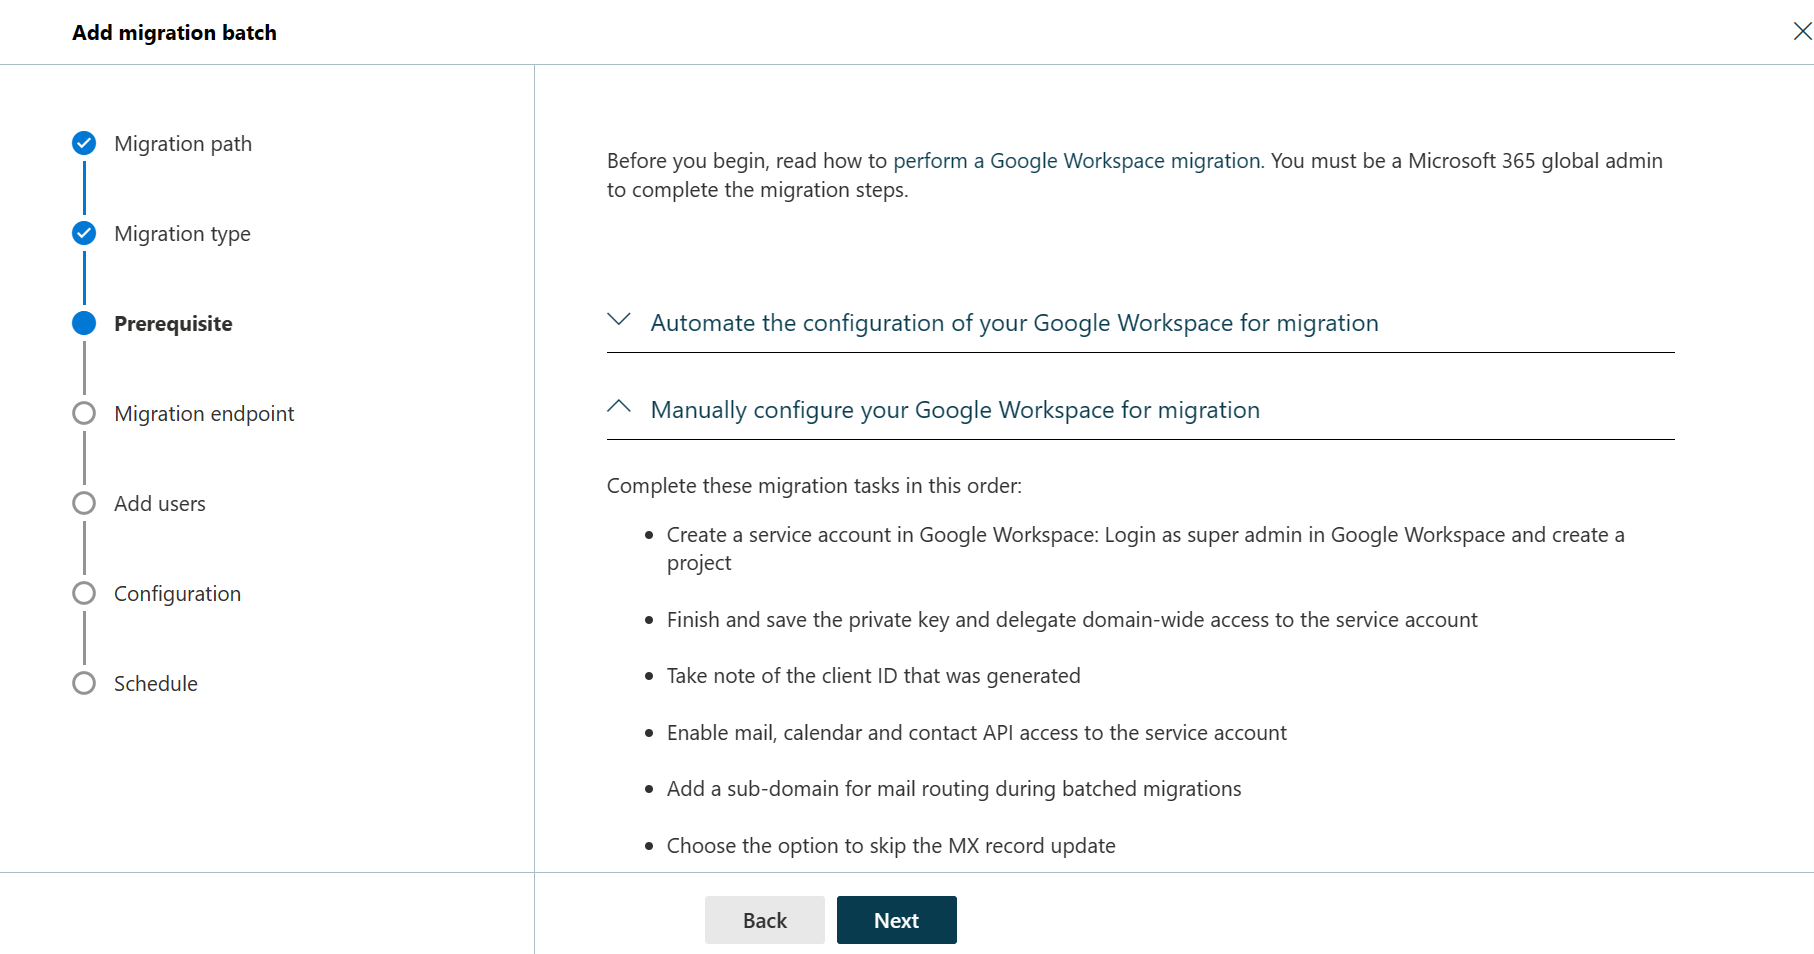
On the Prerequisites for Google Workspace migration page, expand the Manually configure your Google Workspace for migration. As described in the section, configure the following steps:
- Create a Google Service Account
- Enable API Usage in your project
- Grant access to the service account for your Google tenant
When you're finished, click Next.
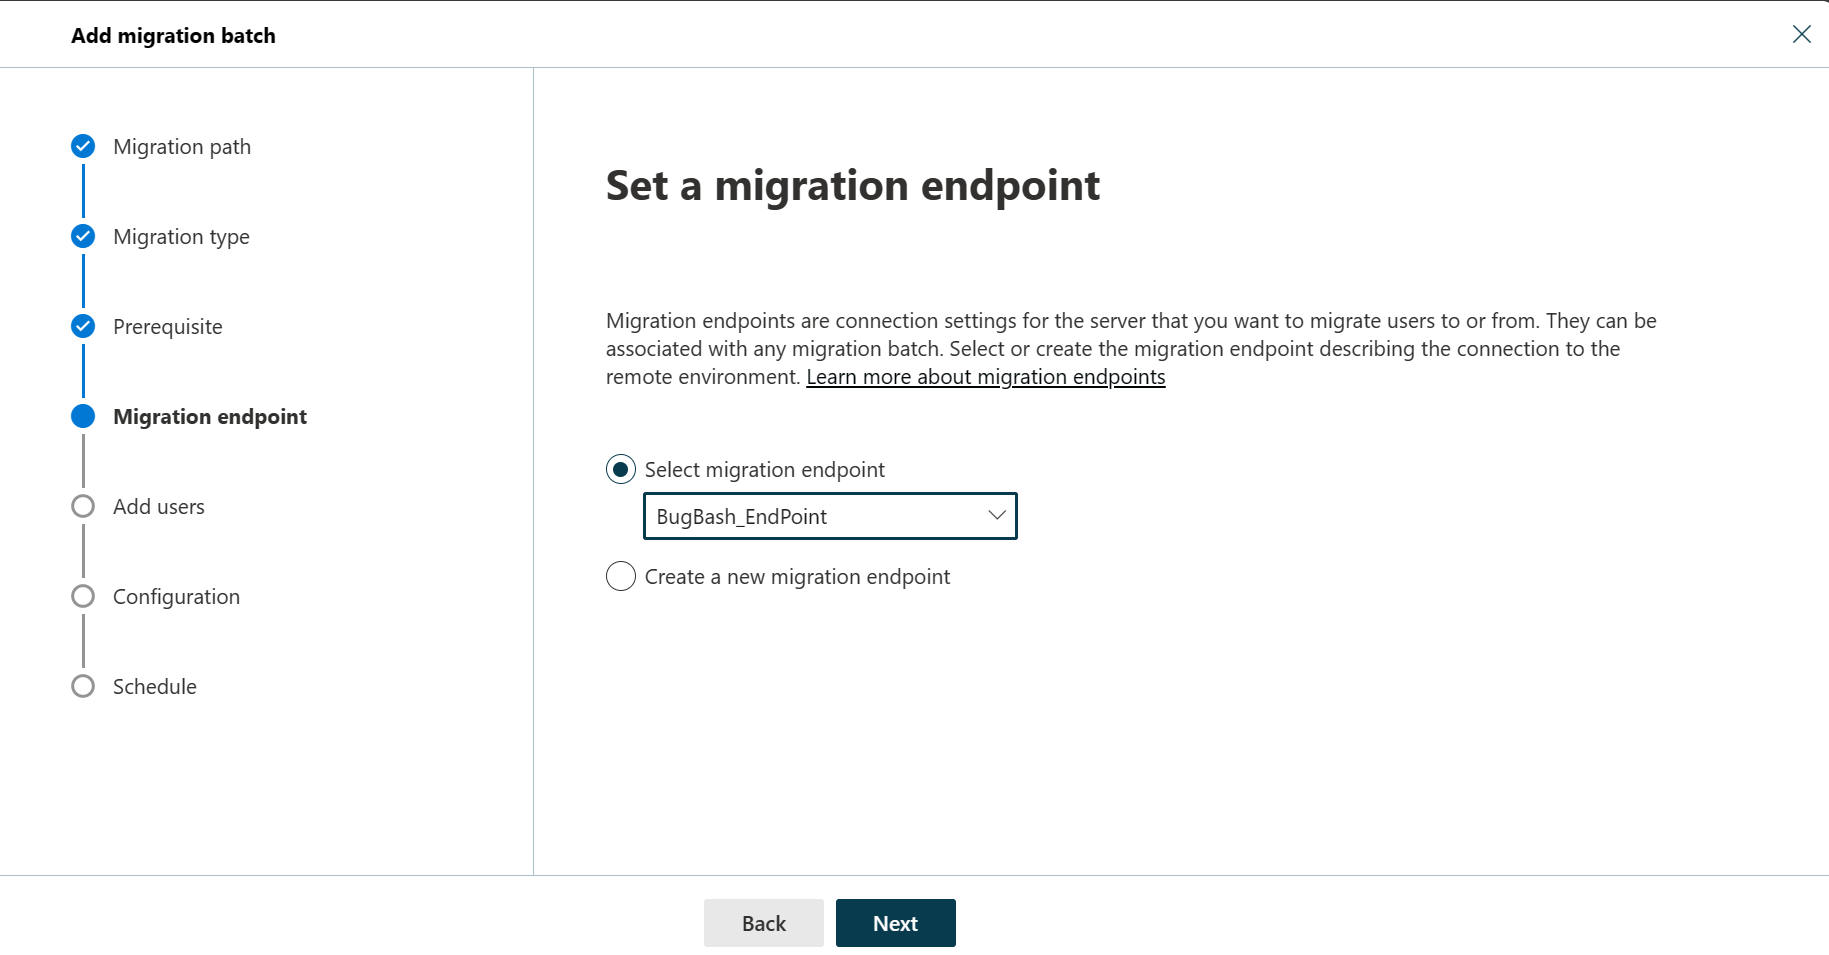
On the Set a migration endpoint page of the wizard, select one of the following options:
- Select the migration endpoint: Select the existing migration endpoint from the drop-down list.
- Create a new migration endpoint: Select this option if you're a first-time user.
Note
To migrate Gmail mailboxes successfully, Microsoft 365 or Office 365 needs to connect and communicate with Gmail. To do this, Microsoft 365 or Office 365 uses a migration endpoint. Migration endpoint is a technical term that describes the settings that are used to create the connection so you can migrate the mailboxes.
If you selected Create a new migration endpoint, do the following steps:
On the General Information page, configure the following settings:
- Migration Endpoint Name: Enter a value.
- Maximum concurrent migrations: Leave the default value 20 or change the value as required.
- Maximum concurrent incremental syncs: Leave the default value 10 or change the value as required.
When you're finished, click Next.
On the Gmail migration configuration page, configure the following settings:
- Email address: Enter the email address that you use to sign in to the Google Workspace.
- JSON key: Click Import JSON. In the dialog that appears, find and select the downloaded JSON file, and then click Open.
Once the endpoint is successfully created, it will be listed under Select migration endpoint drop-down.
Select the endpoint from the drop-down list, and click Next.
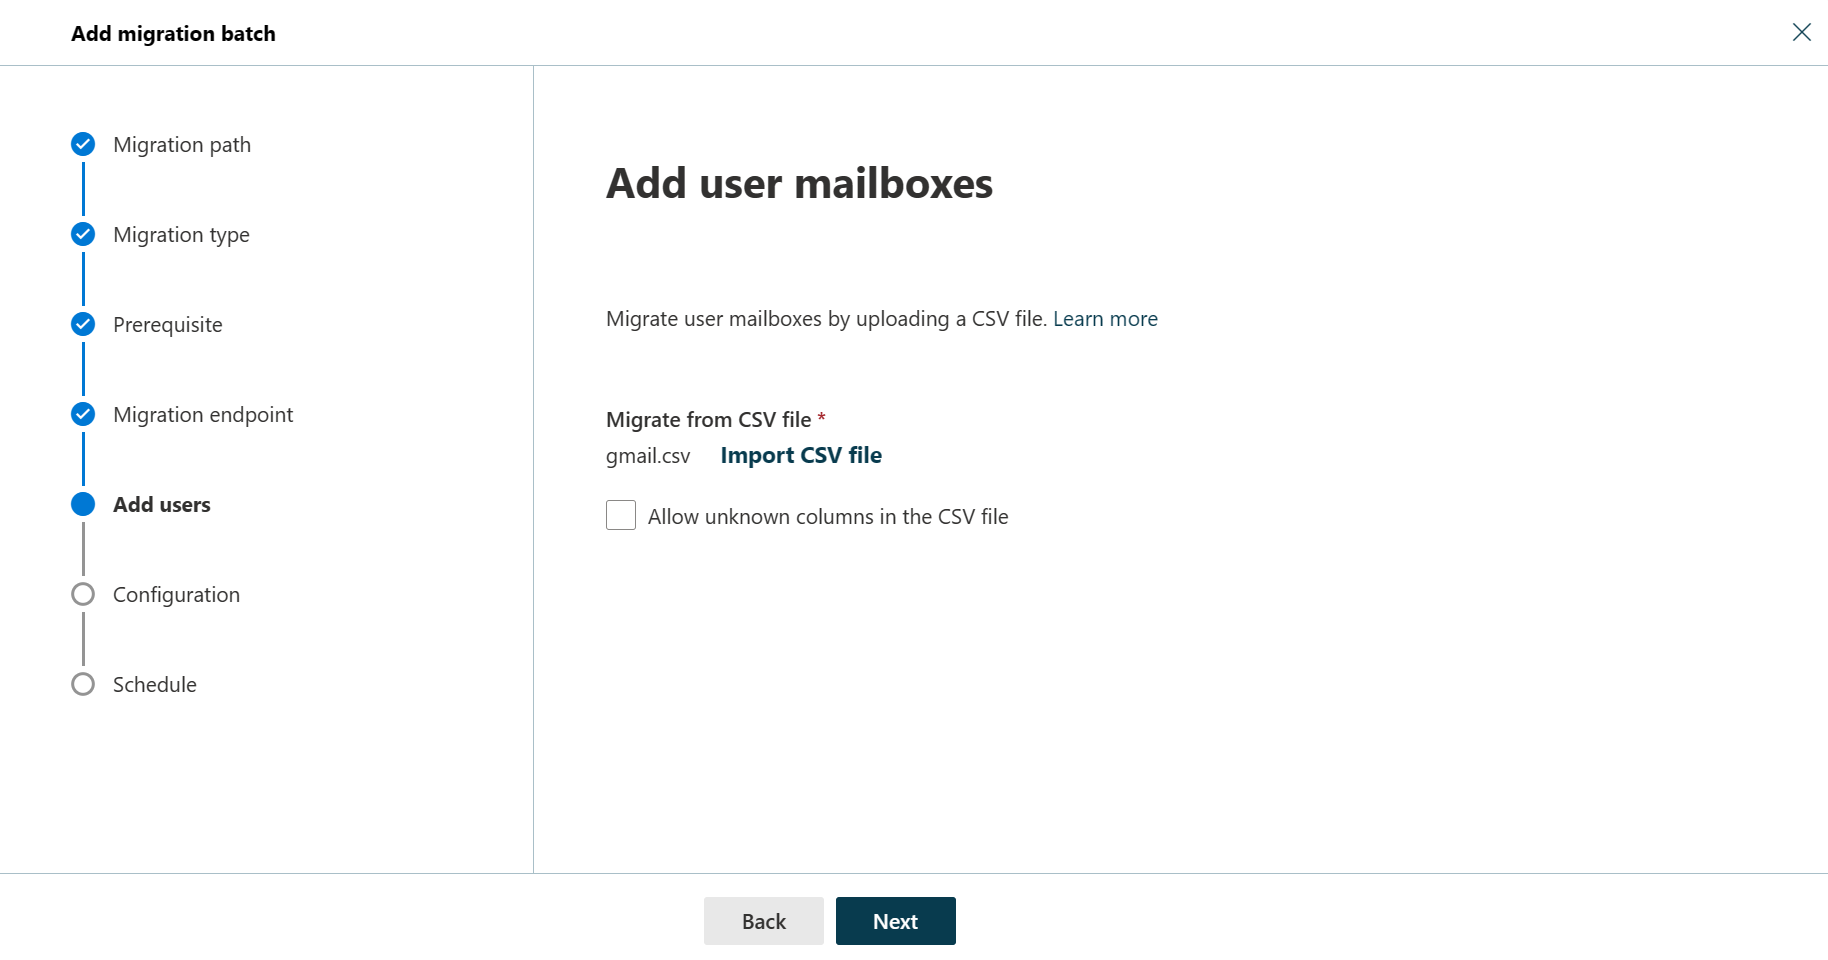
On the Add user mailboxes page, click Import CSV file and navigate to the folder where you have saved the CSV file.
If you haven't already, create a CSV file containing the set of all of the users you want to migrate. You'll need its filename below. The allowed headers are:
- EmailAddress (required): Contains the primary email address for an existing Microsoft 365 or Office 365 mailbox.
- Username (optional). Contains the Gmail primary email address, if it differs from EmailAddress.
EmailAddress
will@fabrikaminc.net
user123@fabrikaminc.net
When you're finished, click Next.
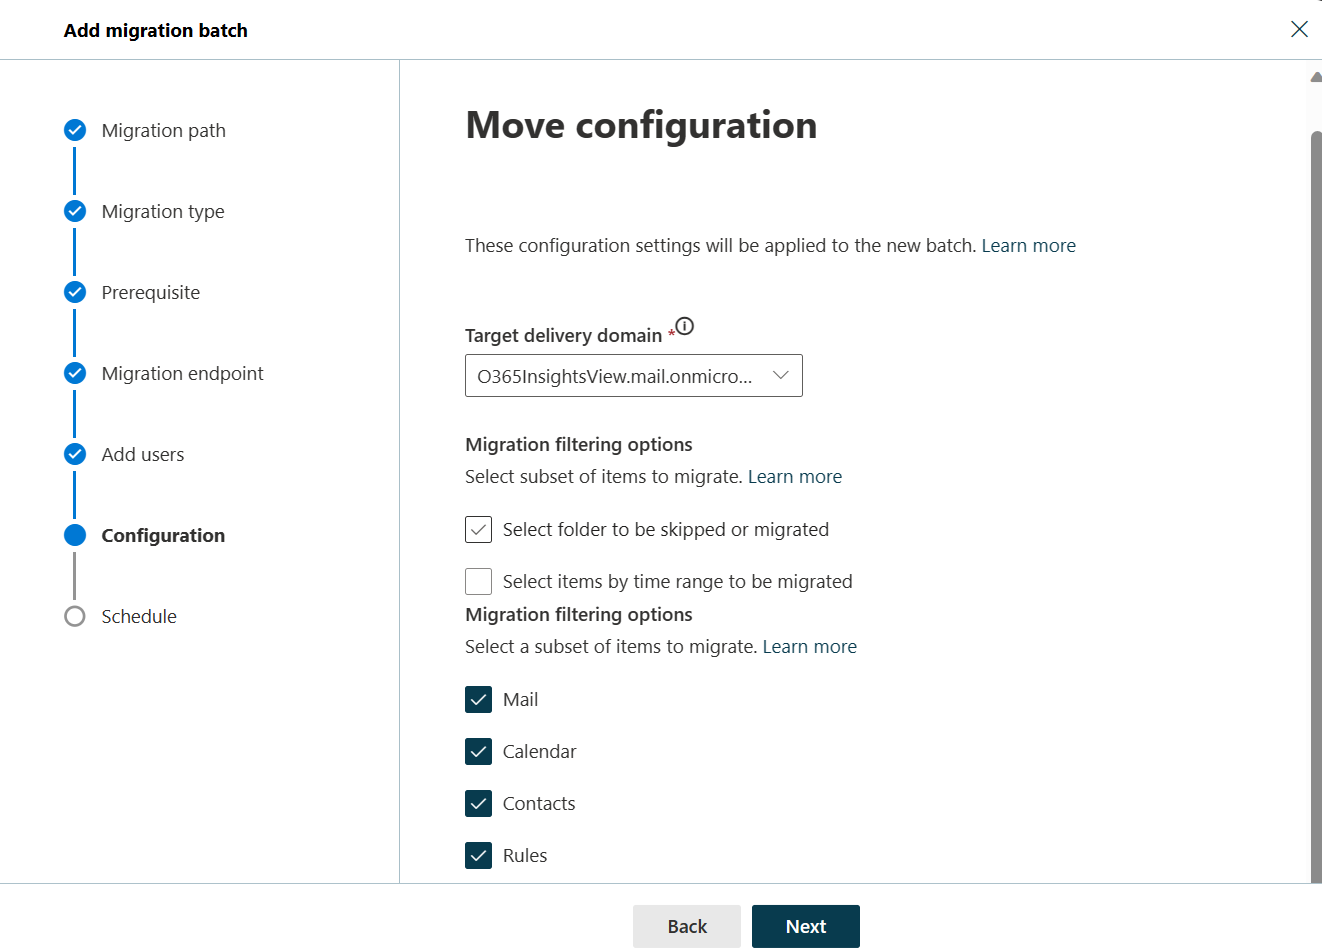
On the Move configuration page, select the Target delivery domain from the drop down, verify other details and click Next.
On the Schedule batch migration page, verify all the details, click Save and click Done.
Once the batch status changes from Syncing to Synced, you need to complete the batch.
To learn more, see the following topics:
- Completion of migration batch: See Completion of migration batch in EAC.
- How the migration happens on the backend: See Overview of the process.