Adding a native boot VHD to Windows 7 – Part 1
I’ve been using the native boot VHD feature of Windows 7 quite a lot lately and I’m really happy with results. Being able to natively boot to a VHD allows you to have different OS images set up for different scenarios. For me this includes:
1. Easily Rebuild-able Win7 Images: I work with a lot of early release code and I’m *really* tired of rebuilding my machines every time a new build comes out or when something goes wrong. With native boot VHDs, I can create a Win7 VHD to run these potentially unstable bits knowing I can “roll back” to an earlier version of the VHD by just copying the VHD off of a back up drive. Native boot also runs much faster than running in a hypervisor since the VHD runs on the metal.
2. Booting to Windows Server 2008 R2 for Hyper-V: I do a lot of development in VHDs, so I need to be able to boot my machine to WSK28 R2 quickly and easily. I have a native boot VHD with WS2K8 R2 installed that I boot to in order to run my VHDs in HyperV. When I need WS2K8 R2, I just reboot my machine and choose that WS2K8 R2 VHD from the boot menu. It’s quick to switch to that image and the performance is great (rather than running the OS from a bootable USB drive, etc.).
The process for setting up a native boot VHD and making in a boot option includes:
1. Creating the VHD.
2. Installing the OS image.
3. Adding the VHD to the Boot Menu.
While there are lots of articles on the native boot VHD feature, here is a simple process to get you started.
Create the VHD
1. Download and install the Windows Automated Installation Kit (AIK) so you have all the tools you need for building your VHD and adding it to the boot menu.
2. Create a folder on your computer to hold the VHDs you’ll build. I created c:\Boot2VHDs.
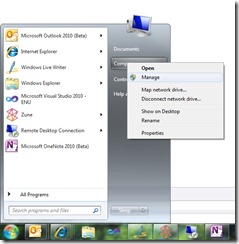
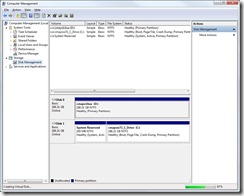
3. Click Start >> Computer >> right-click and select Manage.
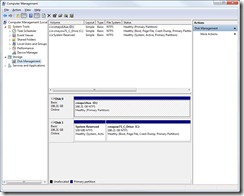
4. In the Computer Management (Local) tree-view on the left hand side, select Storage >> Disk Management.
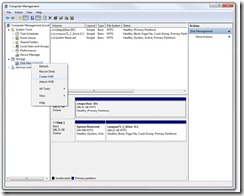
5. Right-click on Disk Management >> Create VHD to create the VHD file that will hold your bootable image.
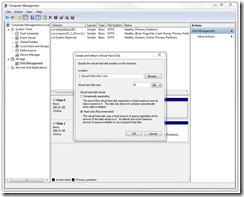
6. In the Create and Attach Virtual Hard Disk dialog, in Location the name and location of the VHD you’d like to create. I called the VHD c:\Boot2VHDs\Win7.vhd.
7. Under Virtual hard disk size enter 50 GB (or whatever size you need to store the OS and any applications on your VHD).
Note: I never keep any files on the VHD so I can easily roll back to a prior version without the risk of losing data.
8. Under Virtual hard disk format, choose Fixed Size (recommended) . Fixed size will give you the best performance at the expense of possibly running out of disk space. The dialog should look like the following.
9. Click OK.
Note: Creating the VHD can take a few minutes based on the size of the VHD and speed of the drive. The status bar at the bottom of the dialog will show you progress.
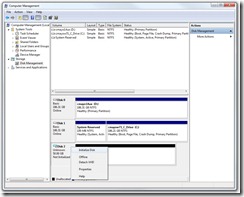
10. Right-click on the newly created disk (Disk 2 below) and select Initialize to make the disk available to Disk Manager.
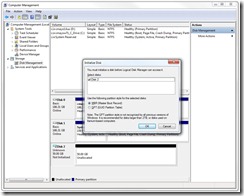
11. In the Initialize Disk dialog, under Select disks select the VHD (Disk 2 in this example) under Use the following partition style for the selected disks: choose the M.B.R (Master Boot Record) option and click OK to initialize the disk to be bootable.
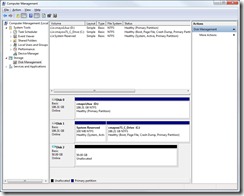
12. Disk Management should now show the 50 GB VHD as Online/Unallocated.
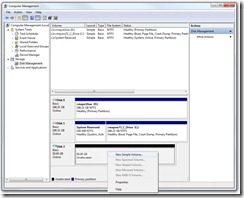
13. Right-click on the Unallocated volume (see below) and select New Simple Volume.
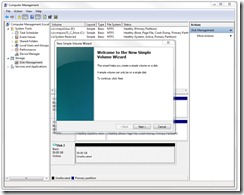
14. In the New Simple Volume Wizard dialog Welcome screen, click Next.
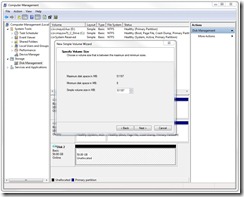
15. In the Specify Volume Size screen, set the Simple volume size in MB to be the size of the VHD you created (51197 MB in this example) and click Next.
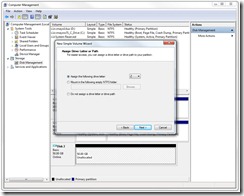
16. In the Assign Drive Letter or Path screen, select the Assign the following drive letter option and select a drive letter (Z: in this example). Click Next.
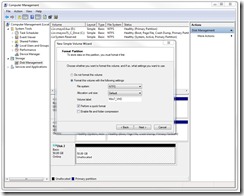
17. In the Format Partition screen, select Format this volume with the following settings, for File system select NTFS, for Allocation unit size select Default and for Volume Label provide descriptive volume label (Win7_VHD for example) and check the Perform a quick format box. Click Next.
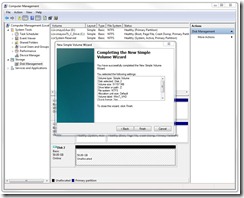
18. In the Completing the New Simple Volume Wizard screen, confirm all your selections and click Finish.
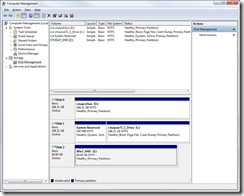
19. The formatting should take a few seconds and then you’ll see your new volume (Win7_VHD as drive Z: in this example).
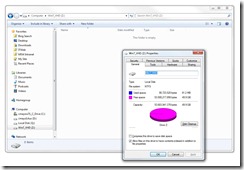
20. Select Start >> Computer and you’ll see your VHD in Windows Explorer listed (he Z: drive using this example).
Now that the VHD has been created, the next step is to apply an OS. The easiest way to apply an image is by using a WIM file, which you’ll see in Part 2.
Thanks,
Chris
Comments
Anonymous
March 05, 2010
so you vhd boot w2k8r2 and run hyper-v within that? Correct me if I'm wrong but I didn't think that was possible.Anonymous
March 06, 2010
just proved myself wrong:) you can boot a w2k8r2 vhd and install the hyper-v role!Anonymous
March 07, 2010
@tonyr - Yes, I've been running my VMs for a few weeks and it's been working great.Anonymous
March 08, 2010
The comment has been removedAnonymous
March 08, 2010
@tonyr - I felt the same way when I first heard about the feature. Get this simple scenario up and running and you'll get addicted to the flexability and easy versioning... I am a big fan, native boot saves me a ton of time. ChrisAnonymous
July 04, 2010
Where is part 2 ?Anonymous
November 29, 2010
Hi cmayo, sorry, this may be a dumb question, but is there special requirements for the base OS install? I usually have a practice of partitioning my drives such that I have about 20-30GB for the OS, 10GB for pagefile/tmp/swap space, then about 30-40GB for apps and whatever is left for Data/VM storage. Does this setup work for this situation? I was initially going to install the free version of vSphere on my new laptop and then run everything inside VMs so I can concurrently run different OSes...but this seems like a good idea as well. Thanks in advance, RRAnonymous
November 30, 2010
@RR - The base OS needs to be either Win7 or WS2K8R2, but I think that's just a requirement of using the Win AIK. I've heard that you can actually use the AIK to configure a boot entry for the OS without a host OS, but I haven't done so. With regard to partitioning your drive, the machine sees the native boot VHD as a partition. I'm not sure that you can use Disk Manager to partition that even further. What I normally do is set up a partition to host my native boot VHDs, another for data, etc. so all my native boot OSes can access my data. Hope it helps.Anonymous
November 30, 2010
Hi Chris, thanks for the prompt response. I'm sitting here at the "Where do you want to install Windows?" screen waiting to decide how I want to partition my system. So as you can guess, my main question was regarding partitioning a brand new HDD for when I install the base Win7/WS2K8R2 before I even get to putting on AIK and then create and mount VHDs etc. What you said about AIK earlier that one can configure a boot entry for the OS without a host OS is very interesting. Do you happen to know off hand on an instructional document as to how to do it? But staying on the original point, maybe I'll have an extra partition in my usual scheme to host the native VHDs in addition to the scheme I described above. But other than that there's no specific requirement of how big my Win7 partition should be right? Thanks again, RRAnonymous
November 30, 2010
@RR - I'll ask around for details on using native boot without a dedicated host. You can put the VHD on any partition that the machine has access to, so feel free to create one dedicated to host the VHDs. The partition just needs to be big enough to hold the VHDs. Make them fixed size for performance and big enough for the apps you'd like to install (like Office 2010 and VS 2010, etc.).Anonymous
November 30, 2010
Awesome. Thanks so much...am struggling at the moment with the install partitioning wizard right now as Win7 uses up a partition by reserving a primary partition and since one can only have 4 primary partitions, I can't so generously create partitions for everything I want, like I'm having to merge my system partition with the OS partition and then if I have one for apps, and one for the VHDs I have no partition for my general data. So i might have to merge the two and have just one data partition. But coming back to your point, do you have experience of installing other OSes on these VHDs like Linux and/or Solaris...I do have a different server running WS2K8R2 with the Hyper-V role and have a Linux VM and a Solaris VM running on them. Thanks again RRAnonymous
December 01, 2010
Hi Chris. I have another question regarding this.... Do you think installing the XP Mode within Win 7 will cause any issues running alongside this AIK and running native VHDs etc? It probably wouldn't matter as I;'m guessing that when I boot into a VHD, I have nothing to do with my base win7 install and it's inaccessible to me right? Whereas the XP Mode applications etc ARE running in a VM from inside of Win 7 and are accessible from there?? Thanks RRAnonymous
April 06, 2011
one question. is it possible to run windows xp mode.vhd in native boot?Anonymous
April 12, 2011
Can you please tell me how to do this for windows server, i'm still unable to create a windows server bootable VHD on a Windows 7 OSAnonymous
April 21, 2011
@ Mohamed - What issues are you having? I do this all the time to have WS2K8 as a boot option on my W7 machine. -Mayo.Anonymous
April 21, 2011
@gabriel - You can change whatever settings you need to in the native boot image. It's actually a full OS installation, it just happens to be running from a VHD rather than directly on the file system. -MayoAnonymous
February 03, 2014
The comment has been removed
