Step by Step Guide of Installing Power View with PowerPivot 2012
Install Win 2008 R2 + SP1
Roles
IIS
Add .Net Framework 3.5 Features
Features
Add Desktop Experience (needs reboot)
Install SQL Server 2012 (default instance)
Note:
Few things which we need to keep in mind during installation – (New Farm)
- Install SP2010 , Apply SP1, Apply Latest CU (guess latest released in Jan 2012)
- Install SQL 2012 – PPIV
- Configure IT
- Install SSRS Integrated with SharePoint (during this install you can select Tabular Instance of SSAS, otherwise your Power View will be limited to only PowerPivot Work Book (As you know there are 2 options in Power View, PPIV URL or Tabular Instance Name)
- Last part is the most confusing part where we need to configure the Application and Content Type
Steps as Follow –>
· Double click on Setup
· Click on Installation (left hand side), then click on New SQL Server stand-alone installation or add features to an existing installation.
· Setup support rules will identify problems if any. If there are problems fix them else press OK button.
· On Product Key choose Evaluation, later you can specify the product key. Press Next button.
· Accept the License Terms then click Next button.
· Setup files will get installed. There will be a report at the end. Press Next button.
· In the Setup Role choose SQL Server Feature Installation then click Next
· Select all features you would like to install then click Next
· Installation Rules should show if any problem is remaining, else click Next button
· Define the Instance name (Default instance)
· Disk Space Requirements will show up. Press Next button.
· Assign appropriate Service Accounts
· In Database Engine Configuration add users to SQL Server Administrators
· In Analysis Services Configuration add users who will have administrative permissions
· In Reporting Services Configuration specify the configuration mode:
· In Distributed Replay Controller add users
· In Distributed Replay Client complete based on below image then click next
· Uncheck Send Windows and SQL Server….. option then click Next button
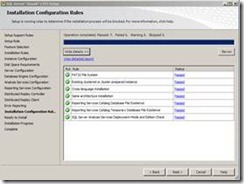
· Installation Configuration Rules will display any error. Click Next button
· Review the Ready to Install information to validate the your selected options.
· Click Install button
· Wait until installation is completed.
· Click Close button
1. Install SharePoint
· Right Click on Splah HTML Application, this will allow you to review Pre-Requirements
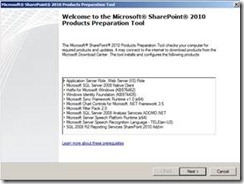
· Click on Install Software prerequisites
· Click Next button
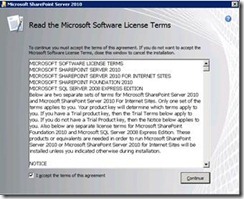
· Accept the License terms by clicking the checkbox then click Next button.
· Installation will start
· Once completed click Finish button.
· Click Install SharePoint Server
· Enter Product Key, once is validated press Continue button
· Accept License Terms and click Continue
· Click Server Farm option
· Select Complete Option then Click Install Now button
· Wait until installation is completed
· Once the installation it is completed. Uncheck the option “Run the SharePoint Products Configuration Wizard now”
2. Install SP SP1 (Very important el se PowerPivot Configuration Tool will fail)
· Double click on officeserver2010sp1-kb2460045-x64-fullfile-en-us application
· Accept the License Terms then click Continue button.
· Once completed press OK button.
3. Run SQL Server setup to install PowerPivot for SharePoint
This step will configure your SharePoint farm and install PowerPivot. It will also customize your farm with recommended settings for a PowerPivot installation.
a. Launch Microsoft SQL Server setup, click the Installation tab, and then click New SQL Server stand-alone installation or add features to an existing installation.
b. On Setup Support Rules page click OK. Once operation is completed click Next.
c. On Installation Type page select Perform a new installation of SQL Server “Denali” CTP3, click Next.
d. Either enters the product key or select free edition when prompted, accept the License Terms and click Next.
e. On Setup Role page select SQL Server PowerPivot for SharePoint, and then leave the Add SQL Server Database Relational Engine Services to this installation checkbox selected. Click Next.
f. On the Feature Selection page you will see all the required features selected, click Next.
g. On the Installation Rules page click Next.
h. On the Instance Configuration page, enter the instance name then click Next.
i. On Disk Space Requirements, click Next button.
j. On the Server Configuration page, enter service accounts for each SQL Server service. The Analysis Services Service Account must be a domain account. Click Next to go to the Database Engine Configuration page.
k. On the Database Engine Configuration page, enter the name of an administrator for SQL Server (you can click Add Current User to ensure that you are a SQL Server admin), then click Next.
l. On the Analysis Services Configuration page, enter the name of an administrator for Analysis Services. At minimum click Add Current User to the administrators, this is required to ensure that PowerPivot is deployed correctly in the farm.
m. Click Next button until you reach Ready to Install page.
n. Click Install button.
o. Once complete click Please launch the PowerPivot Configuration Tool to configure the server.
p. On the Complete page of SQL Server “Denali” CTP3 Setup click Close button.
4. PowerPivot Configuration Tool
This tool (new in CTP3) performs the SharePoint Integration and configuration steps required for PowerPivot.
a. Click Configure or Repair PowerPivot for SharePoint
b. On the PowerPivot Configuration Tool complete all required information
The database server should be the instance you install with SharePoint integration (step 3), you can leave the default port or change it based on your preferences, keep the passphrase handy as you will require it later during the configuration.
c. Click Validate button.
d. If you entered the correct information validation should succeed and display below popup message:
e. Click OK.
f. Now click Run button to begin the configuration of your PowerPivot farm. There will be a warning message click Yes button.
g. You will see an Activity Progress popup window.
h. Once completed you will see following popup message:
i. Click Exit button.
j. Open SharePoint Central Administration to confirm that SharePoint is installed correctly.
5. Run SQL Server setup to install Reporting Services for SharePoint and a BISM instance of Analysis Services.
Although you already ran SQL Server Setup once, you now need to run it again to add Reporting Services and an Analysis Services server in VertiPaq mode. The Analysis Services instance will host the business intelligence semantic models that will serve as data sources for the “Crescent reports” you create.
a. Launch Microsoft SQL Server Setup, click the Installation tab, and then click New SQL Server stand-alone installation or add features to an existing installation.
b. Continue through Setup, selecting the defaults until you get to the Installation Type page. On this page, make sure Perform a new installation of SQL Server “Denali” CTP3 is selected.
c. Enter the product key when prompted and navigate through Setup, selecting the defaults until you reach the Setup Role page.
d. Select SQL Server Feature Installation (the default) and click next.
e. On the Feature Selection page, select Analysis Services, Reporting Services – SharePoint and Reporting Services Add-in for SharePoint Products. Click Next twice.
f. On the Instance Configuration page:
g. Click Next on the Disk Space Requirements page.
h. On the Server Configuration page enter a service account for SQL Server Analysis Services. The following screenshot shows a domain user account, but for an Analysis Services server in VertiPaq mode, you can also use the default virtual account provided by Setup.
i. On the Analysis Services Configuration page, enter the name of an administrator for Analysis Services. To ensure that you are (or the account you are using is) an Analysis Services Administrator, click Add Current User. Click Add if you want to add additional users as administrator. You should add anyone who will perform processing operations on the server. Also select BI Semantic Model as your Analysis Services Deployment mode. Click Next when you are finished .
j. Click Next on Reporting Services Configuration page.
k. Click Next until you are on Ready to install page, click Install button.
l. Close the SQL Setup window.
6. Create a Reporting Services application
a. Click SharePoint Central Administration > Application Management > Manage service applications.
b. Click New > SQL Server Reporting Services Service Application.
c. Specify a name for the service application and an application pool that this service will run under. While you can use an existing application pool such as Web Services Default, consider creating a new application pool to isolate Reporting Services from other web services like Excel Services and Secure Store Service.
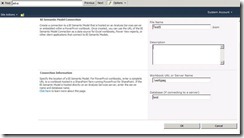
d. On the same page, specify the Database Server to use in provisioning the service application database. SharePoint’s database server is the SQL Server Database Engine instance that was installed as a ‘POWERPIVOT’ named instance. To use this server, enter <ServerName>\POWERPIVOT. Ensure that Windows authentication (default) is selected. Also make sure the check box for the Web Application you wish to enable Crescent on (in this case SharePoint-80) is selected under Web Application Associations. Click OK
e. After click Ok button
f. Your installation is complete and your server is configured and ready to use.
To add different content types
https://technet.microsoft.com/en-us/library/hh230813(SQL.110).aspx
Click Yes and OK
On the same page under content type click
Add Different Content Types
To verify you added the content type, go back to the library and click New Document on the Documents area of the library ribbon. You should see BI Semantic Model Connection File in the New Documents list-
Click on BISM Connection - SSAS tabular Instance -
PowerPivot Workbook.
Workbook URL - https://localhost/PowerPivot Gallery/Book1.xlsx
Comments
Anonymous
June 04, 2012
Thanks, this is greatAnonymous
May 01, 2013
Thanks for this very clear, to the point information.


