Part 4- Monitor Azure with System center Operation Manager (SCOM).
In Part 3 we configured System Center App controller 2012 to manage public cloud on Microsoft Azure. In this Part 4 I will cover how you can monitor hosted services using System Center Operation Manager (SCOM). SCOM can monitor the public and private cloud at the same time using the same console so the administrator can monitor all his system from single pane of glass.
Configure System Center Operation Manager 2012 to monitor hosted service in Azure
1- First download install windows Azure management pack which has the following features:-
Feature Summary
After configuration, the Windows Azure Monitoring Management Pack offers the following functionality:
· Discovers Windows Azure applications.
· Provides status of each role instance.
· Collects and monitors performance information.
· Collects and monitors Windows events.
· Collects and monitors the .NET Framework trace messages from each role instance.
· Grooms performance, event, and the .NET Framework trace data from Windows Azure storage account.
· Changes the number of role instances via a task.
2- Import MP in SCOM
3- As we discussed in previous parts, to be able to communicate with windows Azure you need a certificate and your Subscription ID. However SCOM doesn’t understand Azure out of the box, so to import certificate and password we need to do small work around.
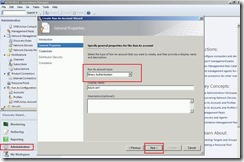
4- Go to administration then right click on Run as configuration and Create a new run as account using Binary authentication and import the certificate we exported in Part 3.
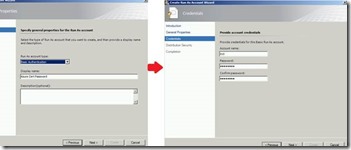
5- Create a new run as account using basic authentication, we will use this account to host certificate password
a. In user name enter any value we only care about password
b. Enter the certificate password you exported in Part3.
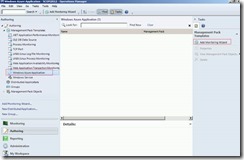
6- Now we successfully import the certificate and authentication in SCOM, select now Authoring view then select the Management Pack templates you should see Windows Azure Application as one of the management packs templates.
7- right-click the Windows Azure Application node and select the “Add Monitoring Wizard.
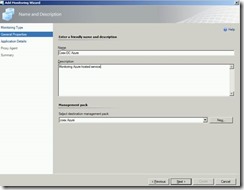
8- On the Name and Description page of the wizard, provide the desired name and description for your new monitoring type and click Next.
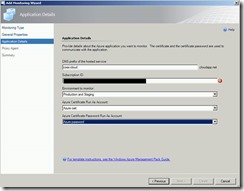
9- On the Application Details page of the wizard, provide the following information:
a) The DNS name of your hosted services in the cloud that you want to monitor
b) Your Subscription ID
c) The Deployment slot of your application, which will either be Staging or Production
d) The Azure certificate run as account, which will be the Azure Binary account you created in step 3
e) The Azure certificate password run as account, which will be the Azure Password account you created in step 4
Once you enter all information, you will select next.
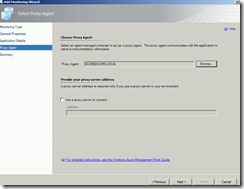
10- The next step will be to select a proxy account.it can be any machine has internet connection. You should just select the Browse button, select the Search button, and then select your server name, as seen below. Select next when it takes you back to the original dialog if you don’t have a proxy server. If so, then enter your proxy server address and then select next then create.
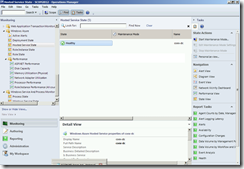
11- Theoretically you finish and after a while if you go to Monitor then Windows Azure you will be able to see the status of the hosted services. However if it keep unmonitored follow the following to solve this known issue .
12- In earlier versions of the Windows Azure SDK, the default Windows Azure Diagnostics string provided by the Visual Studio template in the service configuration file was named DiagnosticsConnectionString. Later Windows Azure SDKs have changed this name to Microsoft.WindowsAzure.Plugins.Diagnostics.ConnectionString. And by default SCOM is looking for old value so we need to change it. To solve this issue either you change the value in Visiual sutdio or in SCOM itself.
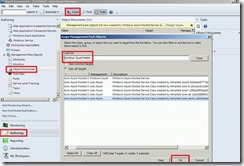
13- To change it from SCOM go to Authoring and select Object Discoveries.
14- Select Scope and search for “windows Azure role instance”
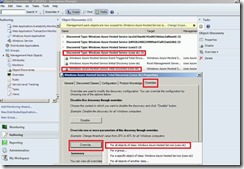
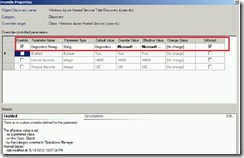
15- Find your desired target whose name should look something like Windows Azure Hosted Service Total Discovery (<your hosted service name>) as seen below. Right-click on the item and select Properties from the popup menu and select override tab then select override.
16- Then change the “DiagnosticsConnectionString” to “Microsoft.WindowsAzure.Plugins.Diagnostics.ConnectionString” then click Ok.
17- It will take a while until you will find SCOM can monitor your Hosted services in Azure healthy.
