'Capture'd the virtual machine. Didn’t intend to generalize it. Now what?
If you are using Azure Resource Manager virtual machines with Managed Disks, you would see a 'Capture' option when you click on the Virtual Machine overview on the Portal
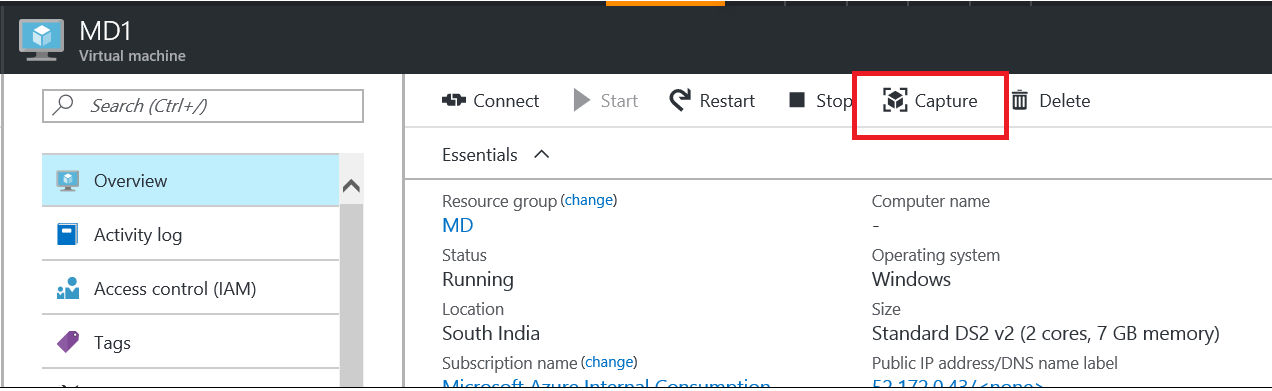
If you click on the button, it clearly mentions its use. You must proceed only if you have run a sysprep or generalized the OS inside the VM.

This option helps us capture a VM Image that can be used to create multiple such VMs that use managed disks. It basically has the same outcome as the article below describes
Capture a managed image of a generalized VM in Azure
</en-us/azure/virtual-machines/virtual-machines-windows-capture-image-resource>
If 'Image' creation is not what you intend to do, this is not the right option to use.
If you intend to just take a copy or backup of the VM, you must use either Snapshot creation for managed disks
Create a copy of a VHD stored as an Azure Managed Disk by using Managed Snapshots
</en-us/azure/virtual-machines/virtual-machines-windows-snapshot-copy-managed-disk>
Or Recovery Services
Back up Azure virtual machines to Recovery Services vaults
</en-us/azure/backup/backup-azure-vms-first-look-arm>
Having established that, we have had a couple of scenarios where customers have proceeded with the 'Capture' option without generalizing the OS.

If you have faced a similar situation, here's how you could recover the machine.
Proceeding with the capture button marks the VM with a 'Generalized' flag since it basically assumes the administrator has run the steps at the OS level. The flag is also carried over to the existing disk, hence recreating the VM using the same disk does not fix the issue.
Instead, we could capture a snapshot of the disk using the steps below
Create a copy of a VHD stored as an Azure Managed Disk by using Managed Snapshots
</en-us/azure/virtual-machines/virtual-machines-windows-snapshot-copy-managed-disk>
Once you have the snapshot, you may delete the VM from the Portal.
Then recreate the machine using the existing NIC resources , but a new managed disk created from the snapshot, using commands like below
Login-AzureRmAccount
$rgName = ‘ResourceGroupName’
$vmName = ‘VMName’
$location = ‘South India’
$storageType = ‘PremiumLRS’
$snapshotName = 'snapshot1'
$snapshotResourceGroupName = 'SnapshotRGName'
$vmsize = 'Standard_DS2_v2'
$nicname = 'nic'
$vm1 = New-AzureRmVMConfig -VMName $vmname -VMSize $vmsize
$snapshot = Get-AzureRmSnapshot -SnapshotName $snapshotName -ResourceGroupName $snapshotResourceGroupName
$diskConfig = New-AzureRmDiskConfig -AccountType ‘PremiumLRS’ -Location $location -CreateOption copy -SourceResourceId $snapshot.Id
$OsDisk = New-AzureRmDisk -DiskName mdnew -Disk $diskConfig -ResourceGroupName $rgName
$vm1 = Set-AzureRmVMOSDisk -VM $vm1 -ManagedDiskId $osDisk.Id -CreateOption Attach -Windows
$nic = Get-AzureRMNetworkInterface -Name $nicname -ResourceGroupName $rgName
$vm1 = Add-AzureRmVMNetworkInterface -VM $vm1 -ID $nic.id
New-AzureRMVM -ResourceGroupName $rgName -Location $location -VM $vm1 -Verbose
Once the VM comes up, it will be running as good as it was originally.