Step 2: Create a new HPC Pack cluster
This article describes how to create a new HPC Pack cluster. You may choose one of the following three availability options for your cluster:
- Single head node cluster: The HPC Pack cluster is created with a single head node node. Note, you will not be able to migrate it to a high availability cluster later by adding a new head node.
- High availability(HA) cluster with built-in HA architecture: The HPC Pack cluster is created as a high availability cluster with the built-in high availability architecture newly introduced in HPC Pack 2019.
- High availability(HA) cluster with Microsoft Service Fabric: The HPC Pack cluster is created as a high availability cluster with Microsoft Service Fabric introduced in HPC Pack 2016.
Before installation
To deploy the head node of your HPC cluster, you must install a supported edition of Windows Server 2019, Windows Server 2016 or Windows Server 2012 R2 on the computer (or computers) that will act as the head node, and join the computer (or computers) to an Active Directory domain. For more information about the system requirements to install HPC Pack on the head node, see System Requirements for Microsoft HPC Pack 2019.
More considerations for the installation
- Before you install the operating system, you should obtain and install the latest BIOS, firmware, and device drivers for your head node computer from the websites of your hardware vendors.
- We strongly recommend that you perform a clean installation of Windows Server before installing HPC Pack. If you want to install HPC Pack on an existing installation of Windows Server, remove all server roles first, and then follow the procedures in this guide. For procedures to remove role services and server roles by using the Server Manager GUI or command-line tools, see Install or Uninstall Roles, Role Services, or Features. HPC Pack cannot be installed on the head node computer if the Deployment Server role service of the Deployment Services role is already installed.
- Windows Server must be installed in one of the following languages that is supported by HPC Pack on the head node: English, Japanese, or Simplified Chinese.
- Ensure that the Windows Firewall service is running on the head node. This is necessary so that HPC-specific firewall rules for an HPC cluster can be applied during and after installation of HPC Pack. By default in Windows Server 2019, Windows Server 2016 and Windows Server 2012 R2, the Windows Firewall service is running.
Option 1: Create a single head node cluster
To start the HPC Pack Installation Wizard on the computer that will act as the head node, run Setup.exe from the HPC Pack installation package in a local folder.
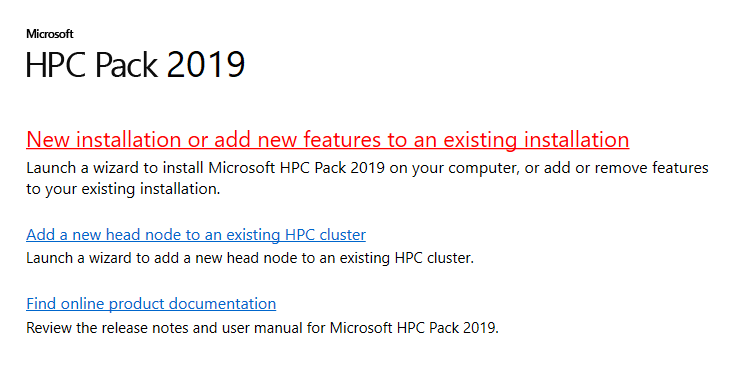
On the HPC Pack 2019 Setup screen, click New installation or add new features to an existing installation.
In the HPC Pack Installation Wizard, on the Getting Started page, read the description and click Next.
On the Microsoft Software User Agreement page, read or print the software license terms in the license agreement, and accept or reject the terms of that agreement. If you accept the terms, click Next.
On the Select Installation Type page, click Create a new HPC cluster by creating a head node, and then click Next.
On the Head Node High Availability page, select Single head node mode or Built-in high availability architecture.
Important
If you choose Single head node mode, you will not be able to add another new head node to the cluster in the future.
On the Installation Rules page, review the results of the pre-installation tests on your environment. If the Status of an item is Failed, review the information provided on the test and make any necessary configuration changes in your environment. If necessary, to run the tests again, click Rerun, or start the installation of HPC Pack again. After all the tests pass, click Next.
On the HPC DB Configuration page, select either the head node or a remote server that is running Microsoft SQL Server as the location for each of the five HPC databases. Depending on your selections, you then configure the following settings for each database:
- The folders for each database and each database log.
- For each database that is configured on a remote server that is running a supported version of Microsoft SQL Server, the SQL Server connection string, and other settings to access the remote database.
Important
If you choose to install one or more HPC databases on a remote server, the database must already be created and configured for remote access before you can configure settings during the installation of HPC Pack. For more information, see Step 1.3, earlier in this guide.
On the Install Location page, specify locations for the following files and data:
- The program files for HPC Pack on the head node.
- Data on the head node, such as log files, HPC runtime data and the operating system images that will be deployed to on-premises nodes.
On the Certificate page, specify the Certificate for the head node you prepared in Step 1: Prepare for your deployment. Click Browse to select a certificate which is already installed in the computer, or click Import to import a PFX format certificate or generate a new self-signed certificate.
Follow the remaining steps in the installation wizard to complete the installation of HPC Pack.
Option 2: Create a high availability cluster with built-in HA architecture
A light-weight high availability architecture is built into HPC Pack 2019. It can enable high availability for your HPC Pack cluster with two head nodes and a witness SQL database. Compared with the Microsoft Service Fabric based HA architecture provided in HPC Pack 2016, this option requires fewer head nodes and uses less CPU/Memory resources on each head node.
To install the first head node
To start the HPC Pack Installation Wizard on the computer that will act as the head node, run Setup.exe from the HPC Pack installation media or from a network location.
On the HPC Pack 2019 Setup screen, click New installation or add new features to an existing installation.
In the HPC Pack Installation Wizard, on the Getting Started page, read the description and click Next.
On the Microsoft Software User Agreement page, read or print the software license terms in the license agreement, and accept or reject the terms of that agreement. If you accept the terms, click Next.
On the Select Installation Type page, click Create a new HPC cluster by creating a head node, and then click Next.
On the Head Node High Availability page, select Built-in high availability architecture , and then click Next.
On the Installation Rules page, review the results of the pre-installation tests on your environment. If the Status of an item is Failed, review the information provided on the test and make any necessary configuration changes in your environment. If necessary, to run the tests again, click Rerun, or start the installation of HPC Pack again. After all the tests pass, click Next.
On the Cluster Name page, specify a unique cluster name for your HPC cluster, and click Next.
On the HA Service Affinity page, specify whether you want to enable Service Affinity to protect the cluster against network partitions, and click Next.
On the HPC DB Configuration page, choose Remote Server for all the HPC databases, and then configure the SQL Server connection string, and other settings to access the remote database on the subsequent Database Settings pages for each HPC database.
Important
The databases must already be created and configured for remote access before you can configure settings during the installation of HPC Pack. For more information, see Step 1.3, earlier in this guide.
On the Install Location page, specify locations for the following files and data:
- The program files for HPC Pack on the head node.
- Data on the head node, such as log files and the operating system images that will be deployed to on-premises nodes.
On the Certificate page, specify the Certificate for the head node you prepared in Step 1: Prepare for your deployment. Click Browse to select a certificate which is already installed in the computer, or click Import to import a PFX format certificate or generate a new self-signed certificate.
On the Net Shares page, specify the network shares used by the HPC Pack cluster. You can select Create all network shares on this computer, or select Specify network shares separately and specify the network shares.
Follow the remaining steps in the installation wizard to complete the installation of HPC Pack.
To install the second head node
Note
You can install the second head node immediately after the first head node is installed to achieve the high availability. Or you can add the second head node to your cluster at any time in the future.
To start the HPC Pack Installation Wizard on the computer that will act as the head node, run Setup.exe from the HPC Pack installation media or from a network location.
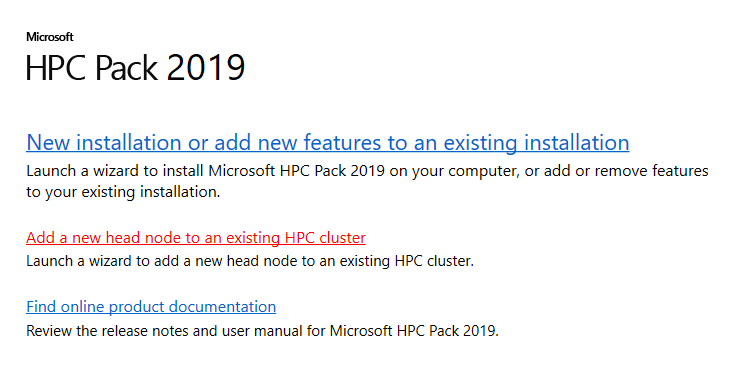
On the HPC Pack 2019 Setup screen, click Add a new head node to an existing HPC cluster.
In the HPC Pack Installation Wizard, on the Getting Started page, read the description and click Next.
On the Microsoft Software User Agreement page, read or print the software license terms in the license agreement, and accept or reject the terms of that agreement. If you accept the terms, click Next.
On the Installation Rules page, review the results of the pre-installation tests on your environment. If the Status of an item is Failed, review the information provided on the test and make any necessary configuration changes in your environment. If necessary, to run the tests again, click Rerun, or start the installation of HPC Pack again. After all the tests pass, click Next.
On the Join Cluster page, specify the cluster connection string of the existing HPC cluster, i.e. the host name of the first head node in this case, and click Next.
On the Install Location page, specify locations for the following files and data:
- The program files for HPC Pack on the head node.
- Data on the head node, such as log files and the operating system images that will be deployed to on-premises nodes.
On the Certificate page, specify the Certificate for the head node you prepared in Step 1: Prepare for your deployment. Click Browse to select a certificate which is already installed in the computer, or click Import to import a PFX format certificate.
Follow the remaining steps in the installation wizard to complete the installation of HPC Pack.
Option 3: Create a high availability cluster with Microsoft Service Fabric
To install prerequisite components for the head node on the first two head node computers
To start the HPC Pack Installation Wizard on the computer that will act as the head node, run Setup.exe from the HPC Pack installation media or from a network location.
On the HPC Pack 2019 Setup screen, click New installation or add new features to an existing installation.
In the HPC Pack Installation Wizard, on the Getting Started page, click Next.
On the Microsoft Software User Agreement page, read or print the software license terms in the license agreement, and accept or reject the terms of that agreement. If you accept the terms, click Next.
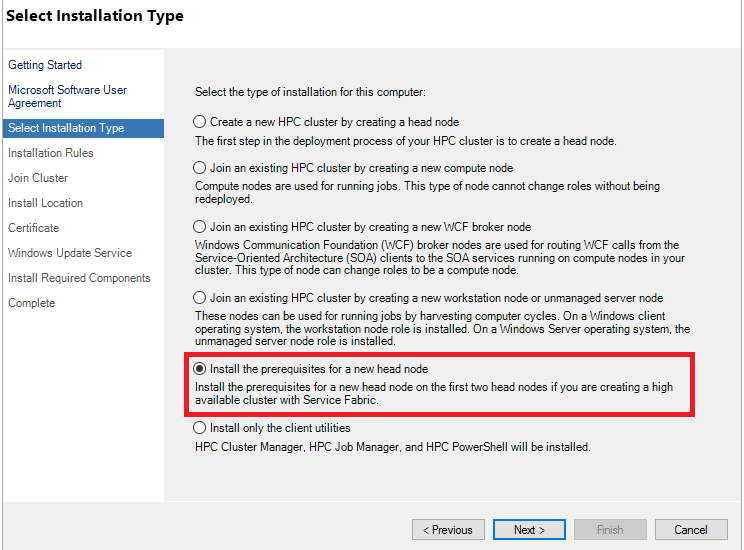
On the HPC Pack Setup screen, click Install the prerequisites for a new head node.
On the Installation Rules page, review the results of the pre-installation tests on your environment. If the Status of an item is Failed, review the information provided on the test and make any necessary configuration changes in your environment. If necessary, to run the tests again, click Rerun, or start the installation of HPC Pack again. After all the tests pass, click Next.
On the Join Cluster page, input the host names of the three head nodes (separated with commas) as connection string, and click Next.
On the Install Location page, specify locations for the following files and data:
- The program files for HPC Pack on the head node.
- Data on the head node, such as log files.
On the Certificate page, specify the Certificate for the head node you prepared in in Step 1: Prepare for your deployment. You can either click Browse to select a certificate which is already installed in the computer, or click Import to import a PFX format certificate. For requirements for the certificate, see Step 1.8.
Follow the remaining steps in the installation wizard to complete the installation.
Note
In case if a head node of the Service Fabric cluster goes down, follow the following steps to replace the bad node:
- Make sure the new head node joins the same Active Directory domain as the old one and has the same name as the old, bad node.
- Make sure the new head node has installed the required certificates.
- Find
ServiceFabric\MicrosoftAzureServiceFabric.cabin the HPC Pack setup, unzip it to obtainMicrosoftAzureServiceFabric\bin\Fabric\Fabric.Code\InstallFabric.ps1, then copy the.ps1and the.cabonto the new head node. - Copy
C:\ProgramData\SF\clusterManifest.xmlfrom an existing head node to the new one. - Install head node prerequisites on the new head node.
- Start Powershell as Administrator on the new head node, then run
.\InstallFabric.ps1 -FabricRuntimePackagePath "MicrosoftAzureServiceFabric.cab". - Restart the new head node.
- Start Powershell as Administrator on the new head node, then run
New-ServiceFabricNodeConfiguration -ClusterManifestPath clusterManifest.xml. - Start
FabricHostSvcservice.
To perform full head node installation on the third head node computer
Important
The HPC Pack 2019 head node cannot be installed from an installation package stored on a network share. You must copy the installation package to a local folder before running Setup.exe.
To start the HPC Pack Installation Wizard on the computer that will act as the head node, run Setup.exe from the HPC Pack installation package in a local folder.
On the HPC Pack 2019 Setup screen, click New installation or add new features to an existing installation.
In the HPC Pack Installation Wizard, on the Getting Started page, click Next.
On the Microsoft Software User Agreement page, read or print the software license terms in the license agreement, and accept or reject the terms of that agreement. If you accept the terms, click Next.
On the Select Installation Type page, click Create a new HPC cluster by creating a head node, and then click Next.
On the Head Node High Availability page, Microsoft Service Fabric cluster.
On the Installation Rules page, review the results of the pre-installation tests on your environment. If the Status of an item is Failed, review the information provided on the test and make any necessary configuration changes in your environment. If necessary, to run the tests again, click Rerun, or start the installation of HPC Pack again. After all the tests pass, click Next.
On the Cluster Name page, specify a unique cluster name for your HPC cluster, and click Next.
On the Service Fabric Cluster page, specify the host names of the three head nodes (separated with commas). Specify a unique cluster name for your HPC cluster, and click Next.
On the HPC DB Configuration page, choose Remote Server for all the HPC databases, and then configure the SQL Server connection string, and other settings to access the remote database on the subsequent Database Settings pages for each HPC database.
Important
The HPC databases must already be created and configured for remote access before you can configure settings during the installation of HPC Pack. For more information, see Step 1.3, earlier in this guide.
On the Install Location page, specify locations for the following files and data:
- The program files for HPC Pack on the head node.
- Data on the head node, such as log files and the operating system images that will be deployed to on-premises nodes.
On the Certificate page, specify the Certificate for the head node you prepared in Step 1: Prepare for your deployment. Click Browse to select a certificate which is already installed in the computer, or click Import to import a PFX format certificate. For a cluster with a single head node, you can click Import and choose to generate a self-signed certificate.
On the Net Shares page, specify the network shares used by the HPC Pack cluster. You can select Create all network shares on this computer, or select Specify network shares separately and specify the network shares.
Follow the remaining steps in the installation wizard to complete the installation of HPC Pack.