Remarque
L’accès à cette page nécessite une autorisation. Vous pouvez essayer de vous connecter ou de modifier des répertoires.
L’accès à cette page nécessite une autorisation. Vous pouvez essayer de modifier des répertoires.
AppWindow et ses API associées simplifient la création d’applications multi-fenêtres en vous permettant d’afficher le contenu de votre application dans les fenêtres secondaires tout en travaillant sur le même thread d’interface utilisateur sur chaque fenêtre.
Remarque
AppWindow est actuellement en préversion. Cela signifie que vous pouvez soumettre des applications qui utilisent AppWindow au Windows Store, mais certains composants de plateforme et d’infrastructure sont connus pour ne pas fonctionner avec AppWindow (voir Limitations).
Ici, nous montrons quelques scénarios pour plusieurs fenêtres avec un exemple d’application appelé HelloAppWindow. L’exemple d’application illustre les fonctionnalités suivantes :
- Détachez un élément de contrôle de la page principale et ouvrez-le dans une nouvelle fenêtre.
- Ouvrez de nouvelles instances d’une page dans les nouvelles fenêtres.
- Dimensionner et positionner par programmation de nouvelles fenêtres dans l’application.
- Associez un ContentDialog à la fenêtre appropriée dans l’application.
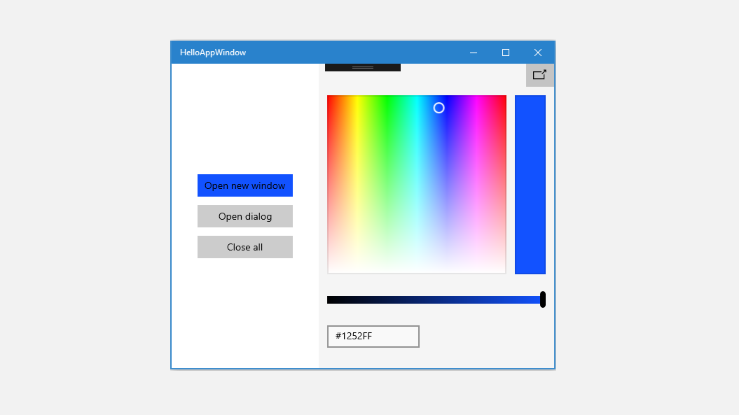
Exemple d’application avec une seule fenêtre
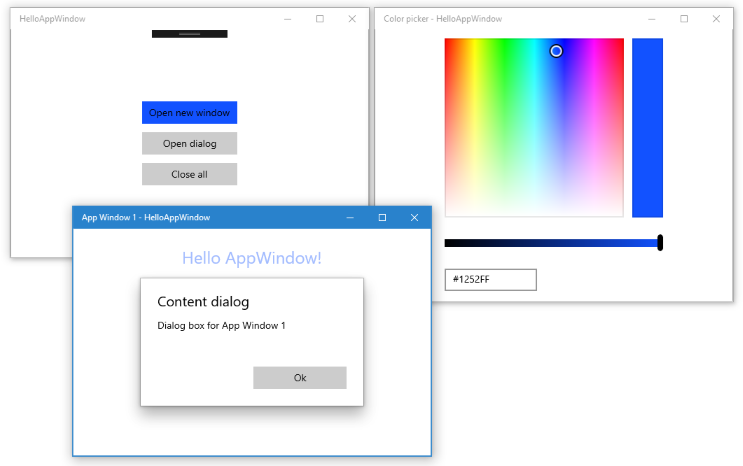
exemple d’application avec sélecteur de couleurs non ancrés et fenêtre secondaire
API importantes : espace de nommage Windows.UI.WindowManagement, classe AppWindow
Présentation de l’API
La classe AppWindow et d’autres API de l’espace de noms WindowManagement sont disponibles à partir de Windows 10, version 1903 (SDK 18362). Si votre application cible des versions antérieures de Windows 10, vous devez utiliser ApplicationView pour créer des fenêtres secondaires. Les API WindowManagement sont toujours en cours de développement et ont limitations comme décrit dans la documentation de référence de l’API.
Voici quelques-unes des API importantes que vous utilisez pour afficher du contenu dans un AppWindow.
Fenêtre d'application
La classe AppWindow peut être utilisée pour afficher une partie d’une application UWP dans une fenêtre secondaire. Il est similaire à un ApplicationViewen concept, mais il diffère en comportement et en durée de vie. Une fonctionnalité principale d’AppWindow est que chaque instance partage le même thread de traitement de l’interface utilisateur (y compris le répartiteur d’événements) à partir duquel ils ont été créés, ce qui simplifie les applications multi-fenêtres.
Vous pouvez uniquement connecter du contenu XAML à votre AppWindow, il n’existe aucune prise en charge du contenu DirectX natif ou Holographique. Toutefois, vous pouvez afficher un code XAML SwapChainPanel qui héberge du contenu DirectX.
Environnement de fenêtrage
L’API WindowingEnvironment vous permet de connaître l’environnement dans lequel votre application est présentée afin de pouvoir adapter votre application en fonction des besoins. Il décrit le type de fenêtre prise en charge par l’environnement ; par exemple, Overlapped si l’application s’exécute sur un PC ou Tiled si l’application s’exécute sur une Xbox. Il fournit également un ensemble d’objets DisplayRegion qui décrivent les zones dans lesquelles une application peut être affichée sur un affichage logique.
Zone d'affichage
L’API DisplayRegion décrit la région dans laquelle une vue peut être affichée à un utilisateur sur un affichage logique ; par exemple, sur un PC de bureau, il s’agit de l’affichage complet moins la zone de la barre des tâches. Il ne s’agit pas nécessairement d’un mappage 1:1 avec la zone d’affichage physique du moniteur de soutien. Il peut y avoir plusieurs régions d’affichage dans le même moniteur, ou un DisplayRegion peut être configuré pour s’étendre sur plusieurs moniteurs si ces moniteurs sont homogènes dans tous les aspects.
Présentateur de Fenêtre d'Application
L’API AppWindowPresenter vous permet de basculer facilement les fenêtres en configurations prédéfinies comme FullScreen ou CompactOverlay. Ces configurations offrent à l’utilisateur une expérience cohérente sur n’importe quel appareil qui prend en charge la configuration.
Contexte d'interface utilisateur
UIContext est un identificateur unique pour une fenêtre ou une vue d’application. Il est créé automatiquement et vous pouvez utiliser la propriété UIElement.UIContext pour récupérer UIContext. Chaque UIElement dans l’arborescence XAML a le même UIContext.
UIContext est important, car les API telles que Window.Current et le GetForCurrentView modèle s’appuient sur une seule arborescence ApplicationView/CoreWindow avec une arborescence XAML unique par thread à utiliser. Ce n’est pas le cas lorsque vous utilisez un AppWindow. Vous utilisez donc UIContext pour identifier une fenêtre particulière à la place.
XamlRoot
La classe XamlRoot contient une arborescence d’éléments XAML, la connecte à l’objet hôte de fenêtre (par exemple, AppWindow ou ApplicationView) et fournit des informations telles que la taille et la visibilité. Vous ne créez pas d’objet XamlRoot directement. Au lieu de cela, un élément XAML est créé lorsque vous attachez un élément XAML à un AppWindow. Vous pouvez ensuite utiliser la propriété UIElement.XamlRoot pour récupérer xamlRoot.
Pour plus d’informations sur UIContext et XamlRoot, consultez : rendre le code portable entre les systèmes hôtes de fenêtre.
Afficher une nouvelle fenêtre
Examinons les étapes permettant d’afficher le contenu dans un nouvel AppWindow.
Pour afficher une nouvelle fenêtre
Appelez la méthode statique AppWindow.TryCreateAsync pour créer une nouvelle AppWindow.
AppWindow appWindow = await AppWindow.TryCreateAsync();Créez le contenu de la fenêtre.
En règle générale, vous créez un Frame XAML, puis naviguez dans le Frame vers une Page XAML où vous avez défini le contenu de votre application. Pour plus d’informations sur les cadres et les pages, consultez la navigation pair à pair entre deux pages.
Frame appWindowContentFrame = new Frame();
appWindowContentFrame.Navigate(typeof(AppWindowMainPage));
Toutefois, vous pouvez afficher n’importe quel contenu XAML dans AppWindow, pas seulement un cadre et une page. Par exemple, vous pouvez afficher un seul contrôle, comme ColorPicker, ou afficher un SwapChainPanel qui héberge du contenu DirectX.
Appelez la méthode ElementCompositionPreview.SetAppWindowContent pour attacher le contenu XAML à AppWindow.
ElementCompositionPreview.SetAppWindowContent(appWindow, appWindowContentFrame);L’appel à cette méthode crée un objet XamlRoot et le définit comme propriété XamlRoot pour l’UIElement spécifié.
Vous ne pouvez appeler cette méthode qu’une seule fois par instance AppWindow. Une fois le contenu défini, d’autres appels à SetAppWindowContent pour cette instance AppWindow échoueront. En outre, si vous tentez de déconnecter le contenu AppWindow en transmettant un objet UIElement Null, l’appel échoue.
Appelez la méthode AppWindow.TryShowAsync pour afficher la nouvelle fenêtre.
await appWindow.TryShowAsync();
Libérer des ressources lorsqu’une fenêtre est fermée
Vous devez toujours gérer l’événement AppWindow.Closed pour libérer des ressources XAML (le contenu AppWindow) et des références à AppWindow.
appWindow.Closed += delegate
{
    appWindowContentFrame.Content = null;
    appWindow = null;
};
Conseil / Astuce
Vous devez conserver la quantité de code dans votre Closed gestionnaire d’événements à la quantité minimale possible pour éviter des problèmes inattendus.
Suivre les instances d’AppWindow
Selon la façon dont vous utilisez plusieurs fenêtres dans votre application, vous pouvez ou ne pas avoir besoin de suivre les instances d’AppWindow que vous créez. L’exemple HelloAppWindow montre quelques manières différentes dont vous pourriez typiquement utiliser un AppWindow. Ici, nous allons voir pourquoi ces fenêtres doivent être suivies et comment procéder.
Suivi simple
La fenêtre du sélecteur de couleurs héberge un seul contrôle XAML et le code permettant d’interagir avec le sélecteur de couleurs réside tous dans le MainPage.xaml.cs fichier. La fenêtre du sélecteur de couleurs autorise uniquement une seule instance et est essentiellement une extension de MainWindow. Pour vous assurer qu’une seule instance est créée, la fenêtre du sélecteur de couleurs est gérée par une variable au niveau de la page. Avant de créer une fenêtre de sélecteur de couleurs, vérifiez si une instance existe et, si elle le fait, ignorez les étapes de création d’une nouvelle fenêtre et appelez simplement TryShowAsync sur la fenêtre existante.
AppWindow colorPickerAppWindow;

// ...

private async void DetachColorPickerButton_Click(object sender, RoutedEventArgs e)
{
    // Create the color picker window.
    if (colorPickerAppWindow == null)
    {
        // ...
        // Create a new window
        colorPickerAppWindow = await AppWindow.TryCreateAsync();
        // ...
    }
    // Show the window.
    await colorPickerAppWindow.TryShowAsync();
}
Suivre une instance AppWindow dans son contenu hébergé
La AppWindowPage fenêtre héberge une page XAML complète, et le code d’interaction avec la page réside dans AppWindowPage.xaml.cs. Il autorise plusieurs instances, chacune d’entre elles fonctionne indépendamment.
La fonctionnalité de la page vous permet de manipuler la fenêtre, de la régler sur FullScreen ou CompactOverlay, et d'écouter les événements AppWindow.Changed pour afficher des informations sur la fenêtre. Pour appeler ces API, AppWindowPage vous avez besoin d’une référence à l’instance AppWindow qui l’héberge.
Si c’est tout ce dont vous avez besoin, vous pouvez créer une propriété dans AppWindowPage l’instance AppWindow et l’affecter lors de sa création.
AppWindowPage.xaml.cs
Dans AppWindowPage, créez une propriété pour contenir la référence AppWindow.
public sealed partial class AppWindowPage : Page
{
    public AppWindow MyAppWindow { get; set; }

    // ...
}
MainPage.xaml.cs
Dans MainPage, obtenez une référence à l’instance de page et affectez l’AppWindow nouvellement créée à la propriété dans AppWindowPage.
private async void ShowNewWindowButton_Click(object sender, RoutedEventArgs e)
{
    // Create a new window.
    AppWindow appWindow = await AppWindow.TryCreateAsync();

    // Create a Frame and navigate to the Page you want to show in the new window.
    Frame appWindowContentFrame = new Frame();
    appWindowContentFrame.Navigate(typeof(AppWindowPage));

    // Get a reference to the page instance and assign the
    // newly created AppWindow to the MyAppWindow property.
    AppWindowPage page = (AppWindowPage)appWindowContentFrame.Content;
    page.MyAppWindow = appWindow;

    // ...
}
Suivi des fenêtres d’application à l’aide de UIContext
Vous pourriez également vouloir accéder aux instances AppWindow depuis d’autres parties de votre application. Par exemple, MainPage vous pouvez avoir un bouton « Fermer tout » qui ferme toutes les instances suivies d’AppWindow.
Dans ce cas, vous devez utiliser l'identifiant unique UIContext pour suivre les instances de fenêtre dans un Dictionnaire .
MainPage.xaml.cs
Dans MainPage, créez le dictionnaire en tant que propriété statique. Ensuite, ajoutez la page au dictionnaire lorsque vous le créez et supprimez-la lorsque la page est fermée. Vous pouvez obtenir UIContext à partir du cadre de contenu (appWindowContentFrame.UIContext) après avoir appelé ElementCompositionPreview.SetAppWindowContent.
public sealed partial class MainPage : Page
{
    // Track open app windows in a Dictionary.
    public static Dictionary<UIContext, AppWindow> AppWindows { get; set; }
        = new Dictionary<UIContext, AppWindow>();

    // ...

    private async void ShowNewWindowButton_Click(object sender, RoutedEventArgs e)
    {
        // Create a new window.
        AppWindow appWindow = await AppWindow.TryCreateAsync();

        // Create a Frame and navigate to the Page you want to show in the new window.
        Frame appWindowContentFrame = new Frame();
        appWindowContentFrame.Navigate(typeof(AppWindowPage));

        // Attach the XAML content to the window.
        ElementCompositionPreview.SetAppWindowContent(appWindow, appWindowContentFrame);

        // Add the new page to the Dictionary using the UIContext as the Key.
        AppWindows.Add(appWindowContentFrame.UIContext, appWindow);
        appWindow.Title = "App Window " + AppWindows.Count.ToString();

        // When the window is closed, be sure to release
        // XAML resources and the reference to the window.
        appWindow.Closed += delegate
        {
            MainPage.AppWindows.Remove(appWindowContentFrame.UIContext);
            appWindowContentFrame.Content = null;
            appWindow = null;
        };

        // Show the window.
        await appWindow.TryShowAsync();
    }

    private async void CloseAllButton_Click(object sender, RoutedEventArgs e)
    {
        while (AppWindows.Count > 0)
        {
            await AppWindows.Values.First().CloseAsync();
        }
    }
    // ...
}
AppWindowPage.xaml.cs
Pour utiliser l’instance AppWindow dans votre code de AppWindowPage, utilisez le UIContext de la page pour la récupérer à partir du dictionnaire statique dans MainPage. Vous devez le faire dans le gestionnaire d’événements Loaded de la page plutôt que dans le constructeur afin que UIContext n’ait pas la valeur Null. Vous pouvez obtenir l'UIContext à partir de la page : this.UIContext.
public sealed partial class AppWindowPage : Page
{
    AppWindow window;

    // ...
    public AppWindowPage()
    {
        this.InitializeComponent();

        Loaded += AppWindowPage_Loaded;
    }

    private void AppWindowPage_Loaded(object sender, RoutedEventArgs e)
    {
        // Get the reference to this AppWindow that was stored when it was created.
        window = MainPage.AppWindows[this.UIContext];

        // Set up event handlers for the window.
        window.Changed += Window_Changed;
    }
    // ...
}
Remarque
L’exemple HelloAppWindow montre les deux façons de suivre la fenêtre dans AppWindowPage, mais vous utiliserez généralement l’un ou l’autre, pas les deux.
Taille et positionnement de la fenêtre de requête
La classe AppWindow a plusieurs méthodes que vous pouvez utiliser pour contrôler la taille et le positionnement de la fenêtre. Comme indiqué par les noms de méthode, le système peut ou non respecter les modifications demandées en fonction des facteurs environnementaux.
Appelez RequestSize pour spécifier une taille de fenêtre souhaitée, comme suit.
colorPickerAppWindow.RequestSize(new Size(300, 428));
Les méthodes permettant de gérer l’emplacement des fenêtres sont nommées RequestMove* : RequestMoveAdjacentToCurrentView, RequestMoveAdjacentToWindow, RequestMoveRelativeToDisplayRegion, RequestMoveToDisplayRegion.
Dans cet exemple, ce code déplace la fenêtre à côté de la vue principale à partir de laquelle la fenêtre est générée.
colorPickerAppWindow.RequestMoveAdjacentToCurrentView();
Pour obtenir des informations sur la taille et le positionnement actuels de la fenêtre, appelez GetPlacement. Cela renvoie un objet
Par exemple, vous pouvez appeler ce code pour déplacer la fenêtre dans le coin supérieur droit de l’affichage. Ce code doit être appelé une fois la fenêtre affichée ; sinon, la taille de la fenêtre retournée par l’appel à GetPlacement est de 0,0 et le décalage est incorrect.
DisplayRegion displayRegion = window.GetPlacement().DisplayRegion;
double displayRegionWidth = displayRegion.WorkAreaSize.Width;
double windowWidth = window.GetPlacement().Size.Width;
int horizontalOffset = (int)(displayRegionWidth - windowWidth);
window.RequestMoveRelativeToDisplayRegion(displayRegion, new Point(horizontalOffset, 0));
Demander une configuration de présentation
La classe AppWindowPresenter vous permet d’afficher un AppWindow à l’aide d’une configuration prédéfinie appropriée pour l’appareil sur lequel il est affiché. Vous pouvez utiliser une valeur AppWindowPresentationConfiguration pour placer la fenêtre en FullScreen mode ou en CompactOverlay mode.
Cet exemple montre comment effectuer les opérations suivantes :
- Utilisez l’événement AppWindow.Changed pour être averti si les présentations de fenêtre disponibles changent.
- Utilisez la propriété appWindow.Presenter
pour obtenir leAppWindowPresenter actuel. - Appelez IsPresentationSupported pour voir si un AppWindowPresentationKind spécifique est pris en charge.
- Appelez GetConfiguration pour vérifier le type de configuration actuellement utilisé.
- Appelez requestPresentation pour modifier la configuration actuelle.
private void Window_Changed(AppWindow sender, AppWindowChangedEventArgs args)
{
    if (args.DidAvailableWindowPresentationsChange)
    {
        EnablePresentationButtons(sender);
    }

    if (args.DidWindowPresentationChange)
    {
        ConfigText.Text = window.Presenter.GetConfiguration().Kind.ToString();
    }

    if (args.DidSizeChange)
    {
        SizeText.Text = window.GetPlacement().Size.ToString();
    }
}

private void EnablePresentationButtons(AppWindow window)
{
    // Check whether the current AppWindowPresenter supports CompactOverlay.
    if (window.Presenter.IsPresentationSupported(AppWindowPresentationKind.CompactOverlay))
    {
        // Show the CompactOverlay button...
        compactOverlayButton.Visibility = Visibility.Visible;
    }
    else
    {
        // Hide the CompactOverlay button...
        compactOverlayButton.Visibility = Visibility.Collapsed;
    }

    // Check whether the current AppWindowPresenter supports FullScreen?
    if (window.Presenter.IsPresentationSupported(AppWindowPresentationKind.FullScreen))
    {
        // Show the FullScreen button...
        fullScreenButton.Visibility = Visibility.Visible;
    }
    else
    {
        // Hide the FullScreen button...
        fullScreenButton.Visibility = Visibility.Collapsed;
    }
}

private void CompactOverlayButton_Click(object sender, RoutedEventArgs e)
{
    if (window.Presenter.GetConfiguration().Kind != AppWindowPresentationKind.CompactOverlay)
    {
        window.Presenter.RequestPresentation(AppWindowPresentationKind.CompactOverlay);
        fullScreenButton.IsChecked = false;
    }
    else
    {
        window.Presenter.RequestPresentation(AppWindowPresentationKind.Default);
    }
}

private void FullScreenButton_Click(object sender, RoutedEventArgs e)
{
    if (window.Presenter.GetConfiguration().Kind != AppWindowPresentationKind.FullScreen)
    {
        window.Presenter.RequestPresentation(AppWindowPresentationKind.FullScreen);
        compactOverlayButton.IsChecked = false;
    }
    else
    {
        window.Presenter.RequestPresentation(AppWindowPresentationKind.Default);
    }
}
Réutiliser des éléments XAML
Un AppWindow vous permet d’avoir plusieurs arborescences XAML avec le même thread d’interface utilisateur. Toutefois, un élément XAML ne peut être ajouté qu’une seule fois à une arborescence XAML. Si vous souhaitez déplacer une partie de votre interface utilisateur d’une fenêtre vers une autre, vous devez gérer son positionnement dans l’arborescence XAML.
Cet exemple montre comment réutiliser un contrôle ColorPicker tout en le déplaçant entre la fenêtre principale et une fenêtre secondaire.
Le sélecteur de couleurs est déclaré dans le code XAML pour MainPage, qui le place dans l’arborescence MainPage XAML.
<StackPanel x:Name="colorPickerContainer" Grid.Column="1" Background="WhiteSmoke">
<Button Click="DetachColorPickerButton_Click" HorizontalAlignment="Right">
<FontIcon FontFamily="Segoe MDL2 Assets" Glyph="" />
</Button>
<ColorPicker x:Name="colorPicker" Margin="12" Width="288"
IsColorChannelTextInputVisible="False"
ColorChanged="ColorPicker_ColorChanged"/>
</StackPanel>
Lorsque le sélecteur de couleurs est détaché pour être placé dans un nouvel AppWindow, vous devez d’abord le supprimer de l’arborescence MainPage XAML en le supprimant de son conteneur parent. Bien qu’il ne soit pas obligatoire, cet exemple masque également le conteneur parent.
colorPickerContainer.Children.Remove(colorPicker);
colorPickerContainer.Visibility = Visibility.Collapsed;
Vous pouvez ensuite l’ajouter à la nouvelle arborescence XAML. Ici, vous créez d’abord une grille qui sera le conteneur parent de ColorPicker et ajoutez le ColorPicker en tant qu’enfant de la grille. (Cela vous permet de supprimer facilement le ColorPicker de cette arborescence XAML ultérieurement.) Vous définissez ensuite la grille comme racine de l’arborescence XAML dans la nouvelle fenêtre.
Grid appWindowRootGrid = new Grid();
appWindowRootGrid.Children.Add(colorPicker);

// Create a new window
colorPickerAppWindow = await AppWindow.TryCreateAsync();

// Attach the XAML content to our window
ElementCompositionPreview.SetAppWindowContent(colorPickerAppWindow, appWindowRootGrid);
Lorsque AppWindow est fermé, vous inversez le processus. Tout d'abord, supprimez le ColorPicker de la Grille, puis ajoutez-le en tant qu'enfant du StackPanel dans MainPage.
// When the window is closed, be sure to release XAML resources
// and the reference to the window.
colorPickerAppWindow.Closed += delegate
{
    appWindowRootGrid.Children.Remove(colorPicker);
    appWindowRootGrid = null;
    colorPickerAppWindow = null;

    colorPickerContainer.Children.Add(colorPicker);
    colorPickerContainer.Visibility = Visibility.Visible;
};
private async void DetachColorPickerButton_Click(object sender, RoutedEventArgs e)
{
    ColorPickerContainer.Visibility = Visibility.Collapsed;

    // Create the color picker window.
    if (colorPickerAppWindow == null)
    {
        ColorPickerContainer.Children.Remove(colorPicker);

        Grid appWindowRootGrid = new Grid();
        appWindowRootGrid.Children.Add(colorPicker);

        // Create a new window
        colorPickerAppWindow = await AppWindow.TryCreateAsync();
        colorPickerAppWindow.RequestMoveAdjacentToCurrentView();
        colorPickerAppWindow.RequestSize(new Size(300, 428));
        colorPickerAppWindow.Title = "Color picker";

        // Attach the XAML content to our window
        ElementCompositionPreview.SetAppWindowContent(colorPickerAppWindow, appWindowRootGrid);

        // When the window is closed, be sure to release XAML resources
        // and the reference to the window.
        colorPickerAppWindow.Closed += delegate
        {
            appWindowRootGrid.Children.Remove(colorPicker);
            appWindowRootGrid = null;
            colorPickerAppWindow = null;

            ColorPickerContainer.Children.Add(colorPicker);
            ColorPickerContainer.Visibility = Visibility.Visible;
        };
    }
    // Show the window.
    await colorPickerAppWindow.TryShowAsync();
}
Afficher une boîte de dialogue
Par défaut, le contenu de boîtes de dialogue s’affiche de manière modale, en fonction de la racine ApplicationView. Lorsque vous utilisez un
Pour ce faire, définissez la propriété XamlRoot de ContentDialog sur le même XamlRoot qu’un élément déjà dans l'AppWindow. Ici, ce code se trouve dans le gestionnaire d’événements Click
if (ApiInformation.IsApiContractPresent("Windows.Foundation.UniversalApiContract", 8))
{
    simpleDialog.XamlRoot = ((Button)sender).XamlRoot;
}
Si vous avez ouvert un ou plusieurs AppWindows en plus de la fenêtre principale (ApplicationView), chaque fenêtre peut tenter d’ouvrir une boîte de dialogue, car la boîte de dialogue modale bloque uniquement la fenêtre dans laquelle elle est enracinée. Toutefois, il ne peut y avoir qu’un seul ContentDialog ouvert par thread à la fois. La tentative d’ouverture de deux ContentDialogs lève une exception, même si elles tentent de s'ouvrir dans des AppWindows distincts.
Pour gérer cela, vous devez au moins ouvrir la boîte de dialogue dans un try/catch bloc pour intercepter l’exception au cas où un autre dialogue était déjà ouvert.
try
{
    ContentDialogResult result = await simpleDialog.ShowAsync();
}
catch (Exception)
{
    // The dialog didn't open, probably because another dialog is already open.
}
Une autre façon de gérer les dialogues consiste à suivre le dialogue actuellement ouvert et à le fermer avant d’essayer d’ouvrir un nouveau dialogue. Ici, vous créez une propriété statique appelée MainPageCurrentDialog à cet effet.
public sealed partial class MainPage : Page
{
    // Track the last opened dialog so you can close it if another dialog tries to open.
    public static ContentDialog CurrentDialog { get; set; } = null;

   // ...
}
Ensuite, vous vérifiez s’il existe une boîte de dialogue actuellement ouverte et, le cas échéant, appelez la méthode Hide pour la fermer. Enfin, affectez la nouvelle boîte de dialogue à CurrentDialog, puis essayez de l’afficher.
private async void DialogButton_Click(object sender, RoutedEventArgs e)
{
    ContentDialog simpleDialog = new ContentDialog
    {
        Title = "Content dialog",
        Content = "Dialog box for " + window.Title,
        CloseButtonText = "Ok"
    };

    if (MainPage.CurrentDialog != null)
    {
        MainPage.CurrentDialog.Hide();
    }
    MainPage.CurrentDialog = simpleDialog;

    // Use this code to associate the dialog to the appropriate AppWindow by setting
    // the dialog's XamlRoot to the same XamlRoot as an element that is already
    // present in the AppWindow.
    if (ApiInformation.IsApiContractPresent("Windows.Foundation.UniversalApiContract", 8))
    {
        simpleDialog.XamlRoot = ((Button)sender).XamlRoot;
    }

    try
    {
        ContentDialogResult result = await simpleDialog.ShowAsync();
    }
    catch (Exception)
    {
        // The dialog didn't open, probably because another dialog is already open.
    }
}
S’il n’est pas souhaitable d’avoir une boîte de dialogue fermée par programme, ne l’affectez pas en tant que CurrentDialog. Ici, MainPage affiche une boîte de dialogue importante qui ne doit être fermée que lorsque l'utilisateur clique sur Ok. Étant donné qu’il n’est pas affecté en tant que CurrentDialog, aucune tentative n’est faite pour la fermer automatiquement.
public sealed partial class MainPage : Page
{
    // Track the last opened dialog so you can close it if another dialog tries to open.
    public static ContentDialog CurrentDialog { get; set; } = null;

    // ...
    private async void DialogButton_Click(object sender, RoutedEventArgs e)
    {
        ContentDialog importantDialog = new ContentDialog
        {
            Title = "Important dialog",
            Content = "This dialog can only be dismissed by clicking Ok.",
            CloseButtonText = "Ok"
        };

        if (MainPage.CurrentDialog != null)
        {
            MainPage.CurrentDialog.Hide();
        }
        // Do not track this dialog as the MainPage.CurrentDialog.
        // It should only be closed by clicking the Ok button.
        MainPage.CurrentDialog = null;

        try
        {
            ContentDialogResult result = await importantDialog.ShowAsync();
        }
        catch (Exception)
        {
            // The dialog didn't open, probably because another dialog is already open.
        }
    }
    // ...
}
Code complet
MainPage.xaml
<Page
x:Class="HelloAppWindow.MainPage"
xmlns="http://schemas.microsoft.com/winfx/2006/xaml/presentation"
xmlns:x="http://schemas.microsoft.com/winfx/2006/xaml"
xmlns:local="using:HelloAppWindow"
xmlns:d="http://schemas.microsoft.com/expression/blend/2008"
xmlns:mc="http://schemas.openxmlformats.org/markup-compatibility/2006"
mc:Ignorable="d"
Background="{ThemeResource ApplicationPageBackgroundThemeBrush}">
<Grid>
<Grid.ColumnDefinitions>
<ColumnDefinition/>
<ColumnDefinition Width="Auto"/>
</Grid.ColumnDefinitions>
<StackPanel VerticalAlignment="Center" HorizontalAlignment="Center">
<Button x:Name="NewWindowButton" Content="Open new window"
Click="ShowNewWindowButton_Click" Margin="0,12"/>
<Button Content="Open dialog" Click="DialogButton_Click"
HorizontalAlignment="Stretch"/>
<Button Content="Close all" Click="CloseAllButton_Click"
Margin="0,12" HorizontalAlignment="Stretch"/>
</StackPanel>
<StackPanel x:Name="colorPickerContainer" Grid.Column="1" Background="WhiteSmoke">
<Button Click="DetachColorPickerButton_Click" HorizontalAlignment="Right">
<FontIcon FontFamily="Segoe MDL2 Assets" Glyph="" />
</Button>
<ColorPicker x:Name="colorPicker" Margin="12" Width="288"
IsColorChannelTextInputVisible="False"
ColorChanged="ColorPicker_ColorChanged"/>
</StackPanel>
</Grid>
</Page>
MainPage.xaml.cs
using System;
using System.Collections.Generic;
using System.Linq;
using Windows.Foundation;
using Windows.UI;
using Windows.UI.WindowManagement;
using Windows.UI.Xaml;
using Windows.UI.Xaml.Controls;
using Windows.UI.Xaml.Hosting;
using Windows.UI.Xaml.Media;

// The Blank Page item template is documented at https://go.microsoft.com/fwlink/?LinkId=402352&clcid=0x409

namespace HelloAppWindow
{
    /// <summary>
    /// An empty page that can be used on its own or navigated to within a Frame.
    /// </summary>
    public sealed partial class MainPage : Page
    {
        AppWindow colorPickerAppWindow;

        // Track open app windows in a Dictionary.
        public static Dictionary<UIContext, AppWindow> AppWindows { get; set; }
            = new Dictionary<UIContext, AppWindow>();

        // Track the last opened dialog so you can close it if another dialog tries to open.
        public static ContentDialog CurrentDialog { get; set; } = null;

        public MainPage()
        {
            this.InitializeComponent();
        }

        private async void ShowNewWindowButton_Click(object sender, RoutedEventArgs e)
        {
            // Create a new window.
            AppWindow appWindow = await AppWindow.TryCreateAsync();

            // Create a Frame and navigate to the Page you want to show in the new window.
            Frame appWindowContentFrame = new Frame();
            appWindowContentFrame.Navigate(typeof(AppWindowPage));

            // Get a reference to the page instance and assign the
            // newly created AppWindow to the MyAppWindow property.
            AppWindowPage page = (AppWindowPage)appWindowContentFrame.Content;
            page.MyAppWindow = appWindow;
            page.TextColorBrush = new SolidColorBrush(colorPicker.Color);

            // Attach the XAML content to the window.
            ElementCompositionPreview.SetAppWindowContent(appWindow, appWindowContentFrame);

            // Add the new page to the Dictionary using the UIContext as the Key.
            AppWindows.Add(appWindowContentFrame.UIContext, appWindow);
            appWindow.Title = "App Window " + AppWindows.Count.ToString();

            // When the window is closed, be sure to release XAML resources
            // and the reference to the window.
            appWindow.Closed += delegate
            {
                MainPage.AppWindows.Remove(appWindowContentFrame.UIContext);
                appWindowContentFrame.Content = null;
                appWindow = null;
            };

            // Show the window.
            await appWindow.TryShowAsync();
        }

        private async void DialogButton_Click(object sender, RoutedEventArgs e)
        {
            ContentDialog importantDialog = new ContentDialog
            {
                Title = "Important dialog",
                Content = "This dialog can only be dismissed by clicking Ok.",
                CloseButtonText = "Ok"
            };

            if (MainPage.CurrentDialog != null)
            {
                MainPage.CurrentDialog.Hide();
            }
            // Do not track this dialog as the MainPage.CurrentDialog.
            // It should only be closed by clicking the Ok button.
            MainPage.CurrentDialog = null;

            try
            {
                ContentDialogResult result = await importantDialog.ShowAsync();
            }
            catch (Exception)
            {
                // The dialog didn't open, probably because another dialog is already open.
            }
        }

        private async void DetachColorPickerButton_Click(object sender, RoutedEventArgs e)
        {
            // Create the color picker window.
            if (colorPickerAppWindow == null)
            {
                colorPickerContainer.Children.Remove(colorPicker);
                colorPickerContainer.Visibility = Visibility.Collapsed;

                Grid appWindowRootGrid = new Grid();
                appWindowRootGrid.Children.Add(colorPicker);

                // Create a new window
                colorPickerAppWindow = await AppWindow.TryCreateAsync();
                colorPickerAppWindow.RequestMoveAdjacentToCurrentView();
                colorPickerAppWindow.RequestSize(new Size(300, 428));
                colorPickerAppWindow.Title = "Color picker";

                // Attach the XAML content to our window
                ElementCompositionPreview.SetAppWindowContent(colorPickerAppWindow, appWindowRootGrid);

                // Make sure to release the reference to this window,
                // and release XAML resources, when it's closed
                colorPickerAppWindow.Closed += delegate
                {
                    appWindowRootGrid.Children.Remove(colorPicker);
                    appWindowRootGrid = null;
                    colorPickerAppWindow = null;

                    colorPickerContainer.Children.Add(colorPicker);
                    colorPickerContainer.Visibility = Visibility.Visible;
                };
            }
            // Show the window.
            await colorPickerAppWindow.TryShowAsync();
        }

        private void ColorPicker_ColorChanged(ColorPicker sender, ColorChangedEventArgs args)
        {
            NewWindowButton.Background = new SolidColorBrush(args.NewColor);
        }

        private async void CloseAllButton_Click(object sender, RoutedEventArgs e)
        {
            while (AppWindows.Count > 0)
            {
                await AppWindows.Values.First().CloseAsync();
            }
        }
    }
}
AppWindowPage.xaml
<Page
    x:Class="HelloAppWindow.AppWindowPage"
    xmlns="http://schemas.microsoft.com/winfx/2006/xaml/presentation"
    xmlns:x="http://schemas.microsoft.com/winfx/2006/xaml"
    xmlns:local="using:HelloAppWindow"
    xmlns:d="http://schemas.microsoft.com/expression/blend/2008"
    xmlns:mc="http://schemas.openxmlformats.org/markup-compatibility/2006"
    mc:Ignorable="d"
    Background="{ThemeResource ApplicationPageBackgroundThemeBrush}">

    <Grid>
        <TextBlock x:Name="TitleTextBlock" Text="Hello AppWindow!" FontSize="24" HorizontalAlignment="Center" Margin="24"/>

        <StackPanel VerticalAlignment="Center" HorizontalAlignment="Center">
            <Button Content="Open dialog" Click="DialogButton_Click"
                    Width="200" Margin="0,4"/>
            <Button Content="Move window" Click="MoveWindowButton_Click"
                    Width="200" Margin="0,4"/>
            <ToggleButton Content="Compact Overlay" x:Name="compactOverlayButton" Click="CompactOverlayButton_Click"
                          Width="200" Margin="0,4"/>
            <ToggleButton Content="Full Screen" x:Name="fullScreenButton" Click="FullScreenButton_Click"
                          Width="200" Margin="0,4"/>
            <Grid>
                <TextBlock Text="Size:"/>
                <TextBlock x:Name="SizeText" HorizontalAlignment="Right"/>
            </Grid>
            <Grid>
                <TextBlock Text="Presentation:"/>
                <TextBlock x:Name="ConfigText" HorizontalAlignment="Right"/>
            </Grid>
        </StackPanel>
    </Grid>
</Page>
AppWindowPage.xaml.cs
using System;
using Windows.Foundation;
using Windows.Foundation.Metadata;
using Windows.UI;
using Windows.UI.WindowManagement;
using Windows.UI.Xaml;
using Windows.UI.Xaml.Controls;
using Windows.UI.Xaml.Media;

// The Blank Page item template is documented at https://go.microsoft.com/fwlink/?LinkId=234238

namespace HelloAppWindow
{
    /// <summary>
    /// An empty page that can be used on its own or navigated to within a Frame.
    /// </summary>
    public sealed partial class AppWindowPage : Page
    {
        AppWindow window;

        public AppWindow MyAppWindow { get; set; }

        public SolidColorBrush TextColorBrush { get; set; } = new SolidColorBrush(Colors.Black);

        public AppWindowPage()
        {
            this.InitializeComponent();

            Loaded += AppWindowPage_Loaded;
        }

        private void AppWindowPage_Loaded(object sender, RoutedEventArgs e)
        {
            // Get the reference to this AppWindow that was stored when it was created.
            window = MainPage.AppWindows[this.UIContext];

            // Set up event handlers for the window.
            window.Changed += Window_Changed;

            TitleTextBlock.Foreground = TextColorBrush;
        }

        private async void DialogButton_Click(object sender, RoutedEventArgs e)
        {
            ContentDialog simpleDialog = new ContentDialog
            {
                Title = "Content dialog",
                Content = "Dialog box for " + window.Title,
                CloseButtonText = "Ok"
            };

            if (MainPage.CurrentDialog != null)
            {
                MainPage.CurrentDialog.Hide();
            }
            MainPage.CurrentDialog = simpleDialog;

            // Use this code to associate the dialog to the appropriate AppWindow by setting
            // the dialog's XamlRoot to the same XamlRoot as an element that is already
            // present in the AppWindow.
            if (ApiInformation.IsApiContractPresent("Windows.Foundation.UniversalApiContract", 8))
            {
                simpleDialog.XamlRoot = ((Button)sender).XamlRoot;
            }

            try
            {
                ContentDialogResult result = await simpleDialog.ShowAsync();
            }
            catch (Exception)
            {
                // The dialog didn't open, probably because another dialog is already open.
            }
        }

        private void Window_Changed(AppWindow sender, AppWindowChangedEventArgs args)
        {
            if (args.DidAvailableWindowPresentationsChange)
            {
                EnablePresentationButtons(sender);
            }

            if (args.DidWindowPresentationChange)
            {
                ConfigText.Text = window.Presenter.GetConfiguration().Kind.ToString();
            }

            if (args.DidSizeChange)
            {
                SizeText.Text = window.GetPlacement().Size.ToString();
            }
        }

        private void EnablePresentationButtons(AppWindow window)
        {
            // Check whether the current AppWindowPresenter supports CompactOverlay.
            if (window.Presenter.IsPresentationSupported(AppWindowPresentationKind.CompactOverlay))
            {
                // Show the CompactOverlay button...
                compactOverlayButton.Visibility = Visibility.Visible;
            }
            else
            {
                // Hide the CompactOverlay button...
                compactOverlayButton.Visibility = Visibility.Collapsed;
            }

            // Check whether the current AppWindowPresenter supports FullScreen?
            if (window.Presenter.IsPresentationSupported(AppWindowPresentationKind.FullScreen))
            {
                // Show the FullScreen button...
                fullScreenButton.Visibility = Visibility.Visible;
            }
            else
            {
                // Hide the FullScreen button...
                fullScreenButton.Visibility = Visibility.Collapsed;
            }
        }

        private void CompactOverlayButton_Click(object sender, RoutedEventArgs e)
        {
            if (window.Presenter.GetConfiguration().Kind != AppWindowPresentationKind.CompactOverlay)
            {
                window.Presenter.RequestPresentation(AppWindowPresentationKind.CompactOverlay);
                fullScreenButton.IsChecked = false;
            }
            else
            {
                window.Presenter.RequestPresentation(AppWindowPresentationKind.Default);
            }
        }

        private void FullScreenButton_Click(object sender, RoutedEventArgs e)
        {
            if (window.Presenter.GetConfiguration().Kind != AppWindowPresentationKind.FullScreen)
            {
                window.Presenter.RequestPresentation(AppWindowPresentationKind.FullScreen);
                compactOverlayButton.IsChecked = false;
            }
            else
            {
                window.Presenter.RequestPresentation(AppWindowPresentationKind.Default);
            }
        }

        private void MoveWindowButton_Click(object sender, RoutedEventArgs e)
        {
            DisplayRegion displayRegion = window.GetPlacement().DisplayRegion;
            double displayRegionWidth = displayRegion.WorkAreaSize.Width;
            double windowWidth = window.GetPlacement().Size.Width;
            int horizontalOffset = (int)(displayRegionWidth - windowWidth);
            window.RequestMoveRelativeToDisplayRegion(displayRegion, new Point(horizontalOffset, 0));
        }
    }
}